

Introduction
In this article, we will learn how to create various rounded corner frames using HTML5 and CSS tools. Now we will also learn how to set an image background in a corner frame using CSS. Let us start a small discussion of HTML; HTML is the acronym for "Hyper Text Markup Language" used for displaying data in a browser. HTML5 is an advanced version of HTML that is used to develop multimedia and animated applications. In another article we used some CSS; CSS is a "Cascading Style Sheet" that is used for design purposes in applications. In this article, we have created a four type frame and set different-2 images in the background. I hope this article helps to see how to create rounded corner frames using HTML5 and CSS tools. If you are interested in developing a rounded corner frame application then you should follow the steps given below.
Step 1: Open Visual Studio.
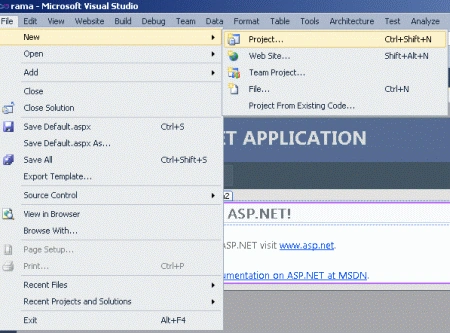
- Go to file -> New->Projects.
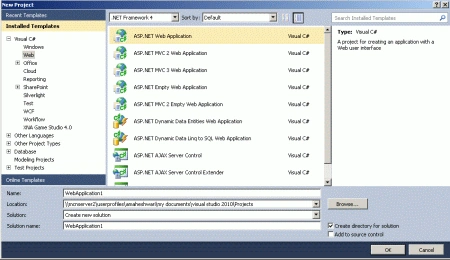
- Crete an ASP. NET Web Application.
- Name of "Corner.aspx".
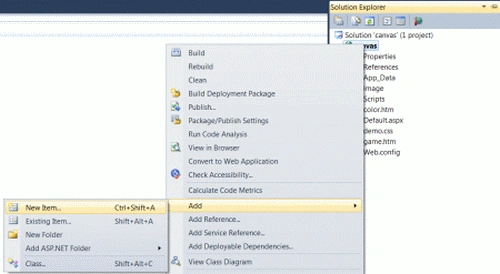
- Right-click on the Solution Explorer.
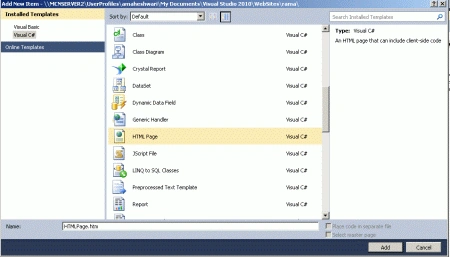
- Add->add new item->HTML form.
- The Name of the HTML form is "Frame.html".
- Right-click on the Solution Explorer.
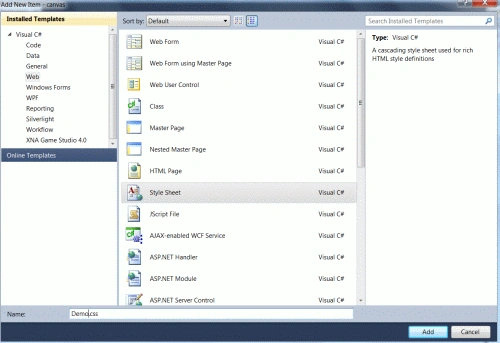
- Add-> Add New Item.
- Add the style sheet.
- Set the name of the style sheet is a "styleSheet.css".
- body, p, td, textarea
- {
- font-family: "Helvetica Neue";
- font-size: 20px;
- line-height: 20px;
- color:Blue;
- }
- body
- {
- padding: 20px;
- }
- h1
- {
- margin-bottom: 20px;
- }
Step 4: In this section we apply some CSS properties to set a background of a rounded corner frame.
Code
- .rounded1
- {
- border-width:30px;
- -webkit-border-image:url(image/dotttttttttt.jpeg) 30 repeat;
- -moz-border-image:url(image/dotttttttttt.jpeg) 30 repeat;
- border-image:url(image/dotttttttttt.jpeg) 30 repeat;
- }
- .rounded2
- {
- border-width:12px;
- -webkit-border-image:url(image/rounded2_line.png) 12 repeat;
- -moz-border-image:url(image/rounded2_line.png) 12 repeat;
- border-image:url(image/rounded2_line.png) 12 repeat;
- padding: 10px;
- }
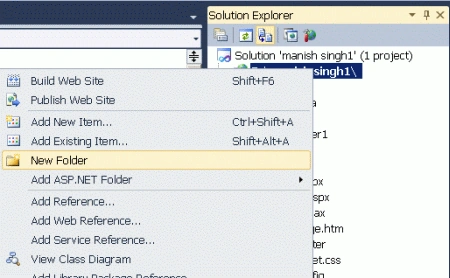
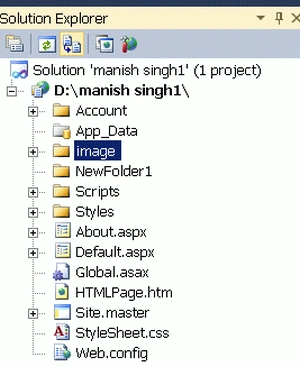
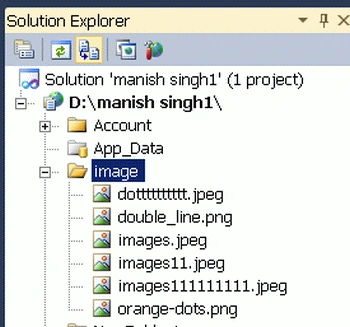
Step 5: In this step, we add a folder named "image" that is used to store all images. Images used to set a background of a rounded corner frame.
- Right-click on the Solution Explorer.
- Add-> Add New Folder.
- Set the name of the folder is an "image".
Code
- .rounded3
- {
- border-width: 30px;
- -webkit-border-image:url(image/images111111111.jpeg) 30 repeat stretch;
- -moz-border-image:url(image/images111111111.jpeg) 30 repeat stretch;
- border-image:url(image/images111111111.jpeg) 30 repeat stretch;
- padding: 10px;
- }
- .rounded4
- {
- border-width: 15px 20px 30px 30px;
- -webkit-border-image:url(image/images.jpeg) 15 20 30 30 repeat;
- -moz-border-image:url(image/images.jpeg) 15 20 30 30 repeat;
- border-image:url(image/images.jpeg) 15 20 30 30 repeat;
- padding: 10px;
- color: #fff;
- }
Step 7: In this section we set a content and color of a body.
Code
- <body bgcolor="#ffffcc">
- <h1>Tom Developed a Rounded Corners</h1>
- <div class="rounded1">C# corner is a dynamic website with a single goal in mind to provide an online platform for Information Technology.</div>
- <div class="rounded2">C# corner is a dynamic website with a single goal in mind to provide an online platform for Information Technology.</div>
- <div class="rounded3">C# corner is a dynamic website with a single goal in mind to provide an online platform for Information Technology.</div>
- <div class="rounded4">C# corner is a dynamic website with a single goal in mind to provide an online platform for Information Technology.</div>
- </body>
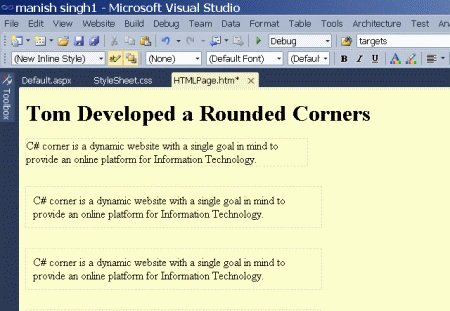
Code
- <html>
- <head>
- <title>Tom Application</title>
- <meta charset="utf-8" />
- <link href="style.css" rel="stylesheet" type="text/css" />
- <style>
- div
- {
- margin-bottom: 30px;
- width: 400px;
- }
- .rounded1
- {
- border-width:30px;
- -webkit-border-image:url(image/dotttttttttt.jpeg) 30 repeat;
- -moz-border-image:url(image/dotttttttttt.jpeg) 30 repeat;
- border-image:url(image/dotttttttttt.jpeg) 30 repeat;
- }
- .rounded2
- {
- border-width:12px;
- -webkit-border-image:url(image/rounded2_line.png) 12 repeat;
- -moz-border-image:url(image/rounded2_line.png) 12 repeat;
- border-image:url(image/rounded2_line.png) 12 repeat;
- padding: 10px;
- }
- .rounded3
- {
- border-width: 30px;
- -webkit-border-image:url(image/images111111111.jpeg) 30 repeat stretch;
- -moz-border-image:url(image/images111111111.jpeg) 30 repeat stretch;
- border-image:url(image/images111111111.jpeg) 30 repeat stretch;
- padding: 10px;
- }
- .rounded4
- {
- border-width: 15px 20px 30px 30px;
- -webkit-border-image:url(image/images.jpeg) 15 20 30 30 repeat;
- -moz-border-image:url(image/images.jpeg) 15 20 30 30 repeat;
- border-image:url(image/images.jpeg) 15 20 30 30 repeat;
- padding: 10px;
- color: #fff;
- }
- </style>
- </head>
- <body bgcolor="#ffffcc">
- <h1>Tom Developed a Rounded Corners</h1>
- <div class="rounded1">C# corner is a dynamic website with a single goal in mind to provide an online platform for Information Technology.</div>
- <div class="rounded2">C# corner is a dynamic website with a single goal in mind to provide an online platform for Information Technology.</div>
- <div class="rounded3">C# corner is a dynamic website with a single goal in mind to provide an online platform for Information Technology.</div>
- <div class="rounded4">C# corner is a dynamic website with a single goal in mind to provide an online platform for Information Technology.</div>
- </body>
- </html>
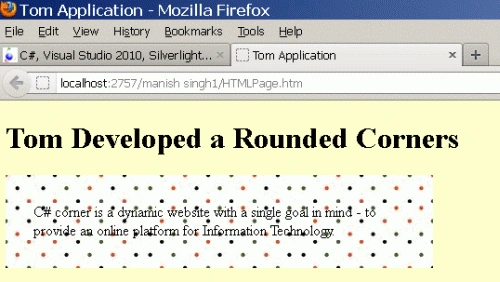
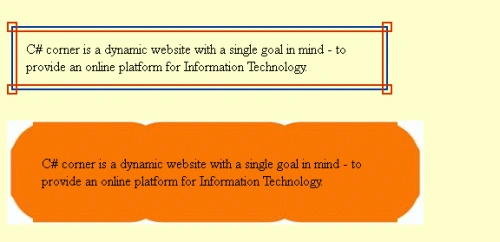
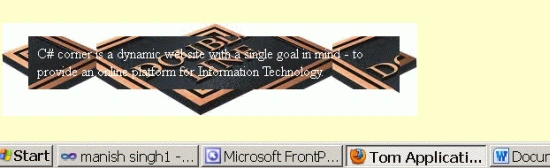
Step 9: Press Ctrl + F5 to run the application in a browser.
Output
Resources
Here are some useful resources
Davin MartynPosted Mar 21, 2012, 12:48 PM
Good Work....