

Step 1
Create a Xamarin.Forms project with Portable Class Library (PCL) as discussed in my previous article.
Step 2
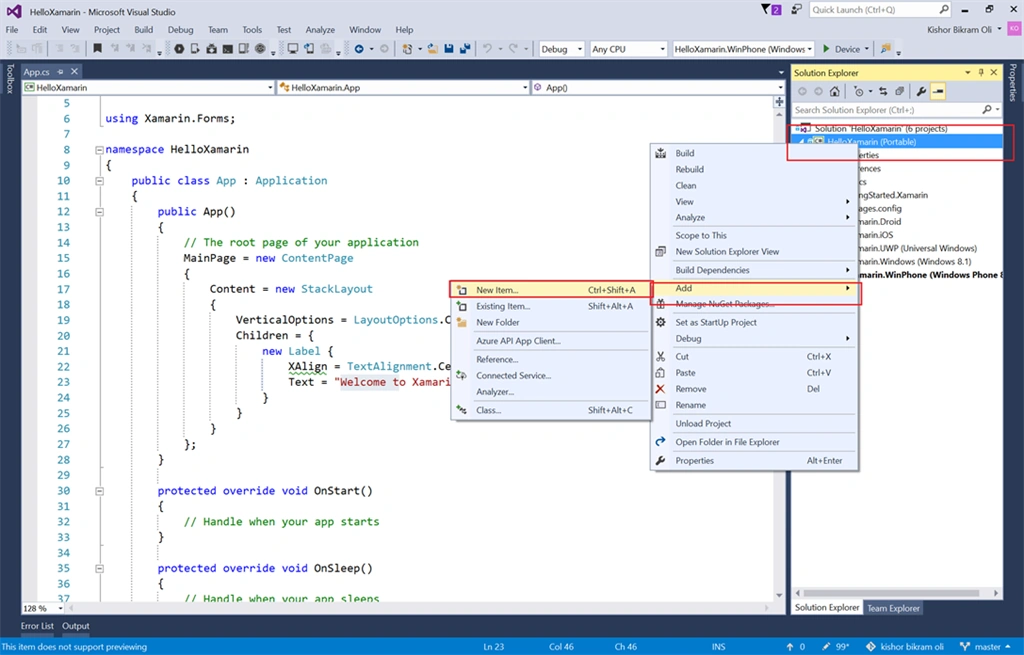
Now right click on the PCL project and Add > New Item,
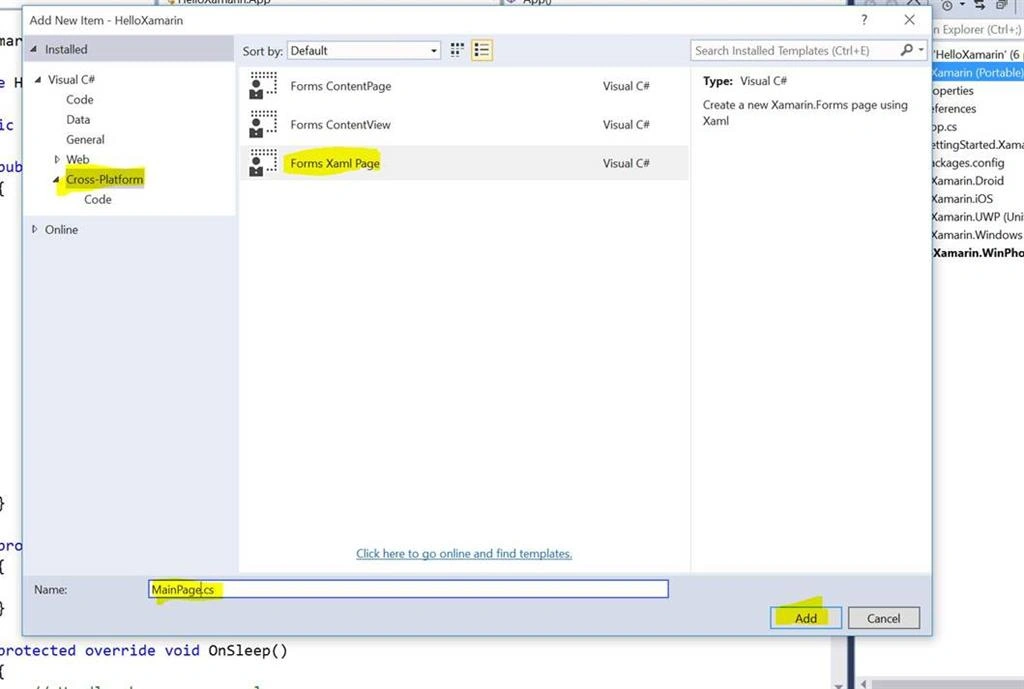
Inside the Cross-Platform, select Forms XAML Page and name it MainPage and click OK.
Step 3
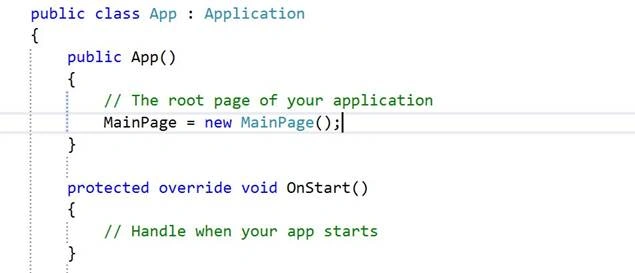
Now in App.cs file, we call this MainPage inside the App constructor.
Step 4
In the MainPage.xaml, let's add Text Label and a Button with click event.
Complete Code
- <?xml version="1.0" encoding="utf-8" ?>
- <ContentPage xmlns="http://xamarin.com/schemas/2014/forms"
- xmlns:x="http://schemas.microsoft.com/winfx/2009/xaml"
- x:Class="HelloXamarin.MainPage">
- <ContentPage.Content>
- <StackLayout Padding="20">
- <Label x:Name="msg" Text="Hello World" FontSize="40"></Label>
- <Button Text="Click Me" BackgroundColor="Red" TextColor="White" Clicked="OnBtnClick"></Button>
- </StackLayout>
- </ContentPage.Content>
- </ContentPage>
In the code behind MainPage.xaml.cs, we add click event of button,
- using System;
- using System.Collections.Generic;
- using System.Linq;
- using System.Text;
- using System.Threading.Tasks;
- using Xamarin.Forms;
- namespace HelloXamarin
- {
- public partial class MainPage : ContentPage
- {
- public MainPage()
- {
- InitializeComponent();
- }
- public void OnBtnClick(object o, EventArgs e)
- {
- msg.Text = "This is Xamarin Forms Content Page";
- }
- }
- }
Now run the application in your Android emulator or Windows devices. When you click on button, you see the output as,

Join the conversation! Your thoughts help the community grow.