

In this blog, we will see how to upload a file to a document library and how to download the file to the local path.
First, we need to connect to the site. To perform the connection, add the following lines.
- $ SiteUrl = Read-Host "Provide site url"
- $LocalPathForUpload = Read-Host "Provide the path from where file to be uploaded"
- $LocalPathForDownload = Read-Host "Provide the path from where file to be uploaded"
- $DocumentLibrary = Read-Host "Provide the library name for upload or download file"
- $Credentials = Get-Credential // It will open a pop up window and ask for credentials
- Connect-PnPOnline -Url $SiteUrl -Credentials $Credentials
To Upload a file, add the following codes,
- $File = Add-PnPFile -Path $LocalPathForUpload -Folder $DocumentLibrary
- Write-Host "Title : " $File.Name
- Write-Host "URL : " $File.ServerRelativeUrl
To download the same file, add the following codes,
- $filePath= $ DocumentLibrary + "/test.docx"
- Get-PnPFile -Url $filePath -Path $ LocalPathForDownload -Filename “test.docx " -AsFile
- Write-Host "File Downloaded Successfully"
Output
From the below images we can see our code run correctly and file uploaded and downloaded successfully.
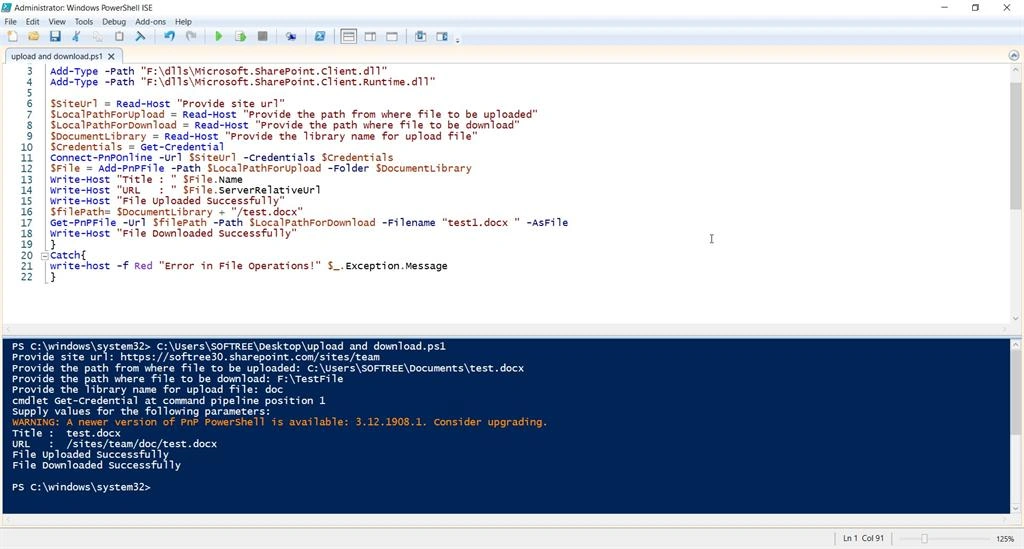
Img1: PowerShell code runs successfully for upload and downloads a file.
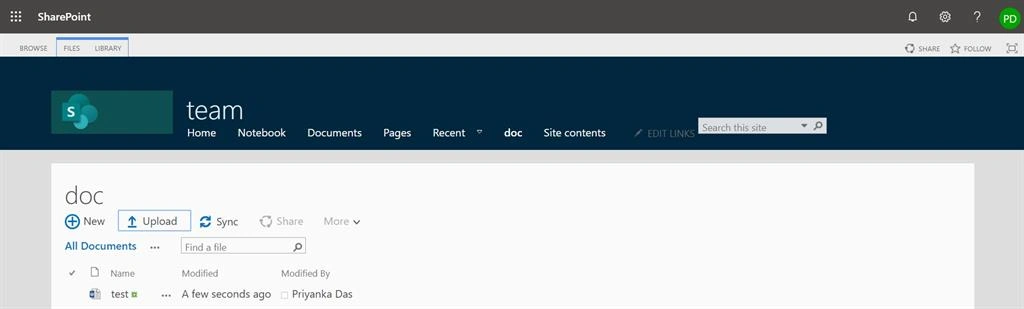
Img2: File uploaded to SharePoint document library.

Img3: File downloaded to given local path
Join the conversation! Your thoughts help the community grow.