
SharePoint offers a robust out-of-the-box approval workflow for its lists, enabling efficient and controlled document and task management. This blog post will guide you through the process of setting up and utilizing this powerful feature.
Setting Up List Approvals
1. Create a New List
- Navigate to your SharePoint site’s “Site Contents” page.
- Click “Add a list” and select “Blank List”.
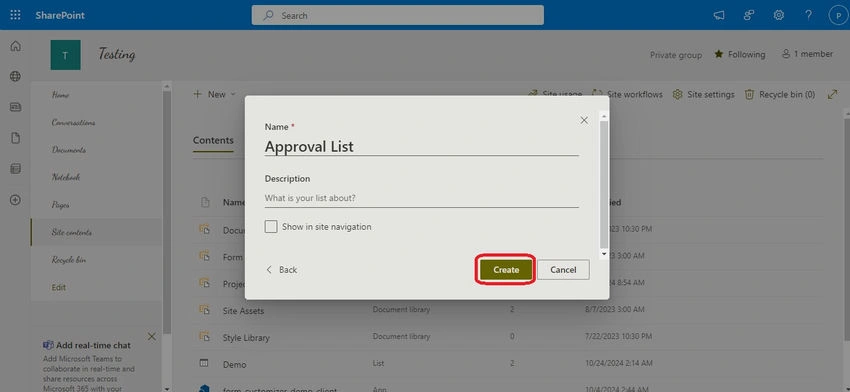
- Give your list a suitable name (e.g. “Approval List”).
- Create necessary Columns (e.g. “Leave Type”, “Description”, “Start Date, “End Date”).
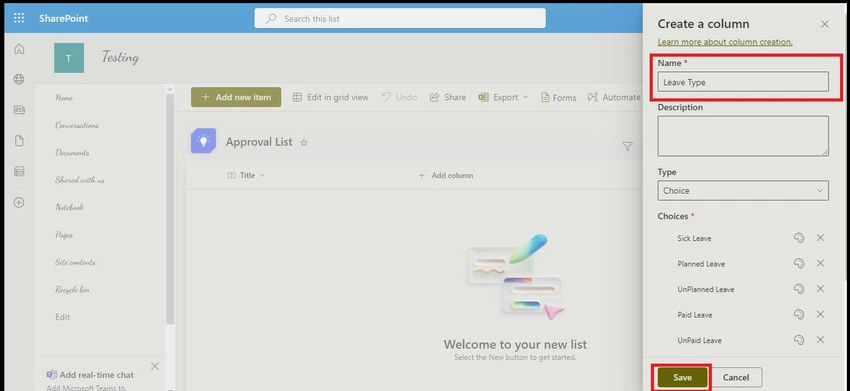
2. Enable Approvals
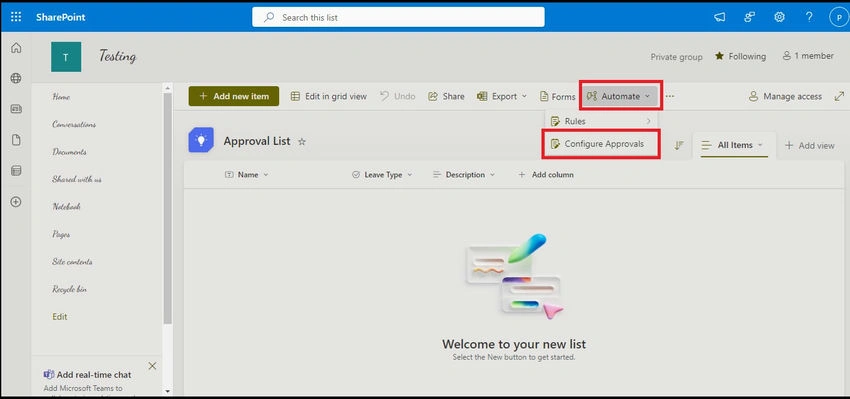
- In the list ribbon, click “Automate” and then “Configure Approvals”.
- Toggle the “Enable Approvals” switch on and click on “Apply”.
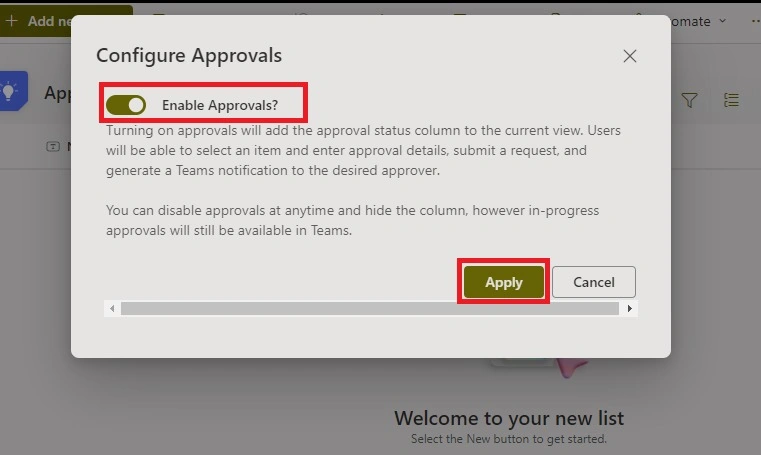
- This action automatically adds an Approval Status column to your list, tracking the stage of each approval.

Creating a New Item to Test the Approval Request
1. Create a New Item
- Click “New” to add a new item to your list.
- Fill in the required details (e.g. leave type, description).
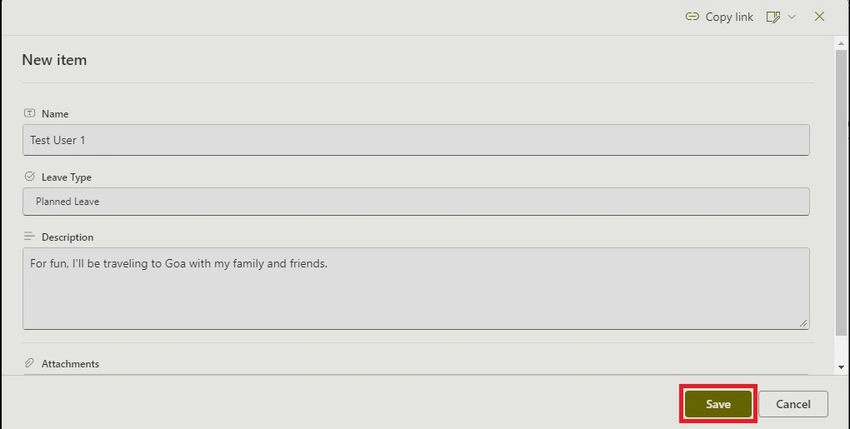
- The “Approval Status” will automatically be set to “Not Submitted.”
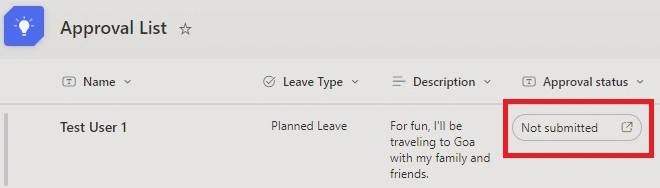
2. Submit for Approval Request
- Click on the “Not Submitted” status.
- In the pop-up, select the Approver’s Name(s) using the People Picker and Add any additional comments or details, then Click “Submit” to send the item for approval.

3. Monitor Approval Status
- After a few minutes, the Approval Status will be changed from Not Submitted to Requested.
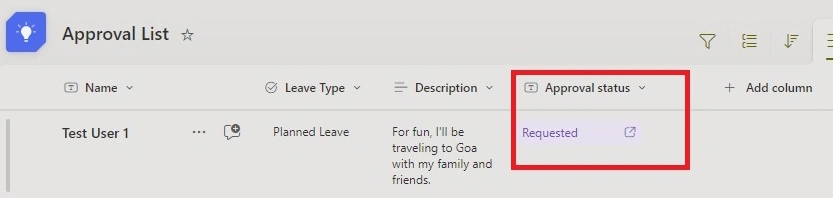
- You can check the status of the approval at any time from the list.
4. Enable Approval Notifications in Microsoft Teams
- To receive approval notifications in Teams, add the Approvals app.
- Open Teams, click on the three dots (...), search for Approvals, and click Add.
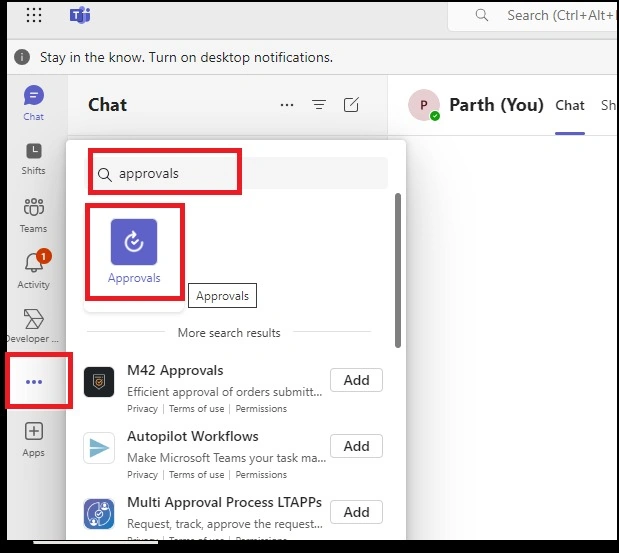
- This integration enables you to receive real-time notifications for approval actions in Teams.
5. Understanding Approval Actions
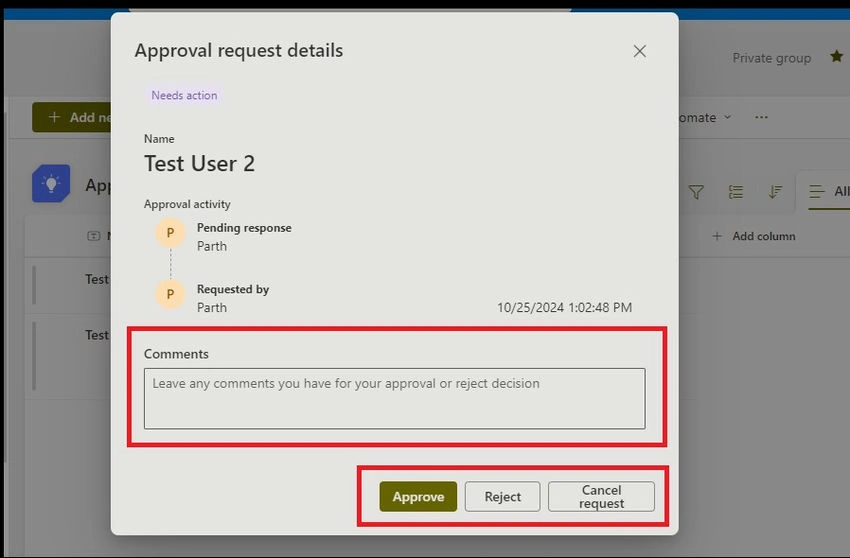
- When an item is submitted, the status changes to Requested. At this stage, approvers can view the item’s approval history and choose from several actions:
- Approval using SharePoint:
- Approval Process using Teams:
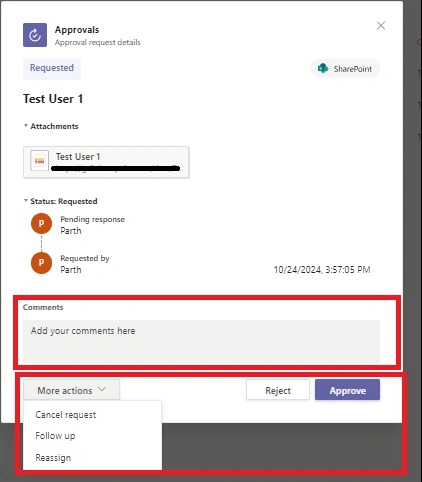
- Approve: Click the “Approve” button to approve the request.
- Reject: Declines the request, updating the Approval Status to Rejected.
- Cancel Request: Withdraws the request, resetting the Approval Status to Not Submitted.
- Follow-Up: Click the “Follow Up” button to send a reminder or query to the requester.
- Reassign: Transfer the approval responsibility to another person, ensuring approvals are handled even if the original approver is unavailable.
6. Checking Approval History: Each item in the list retains a history of actions, which includes who approved, rejected, or reassigned the item.
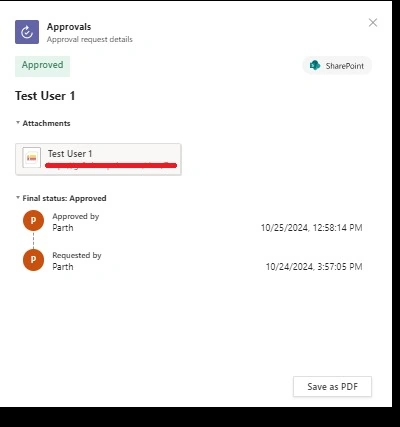
7. Save Approval History as PDF: Once a request is completed, you can save the approval record as a PDF for documentation purposes.
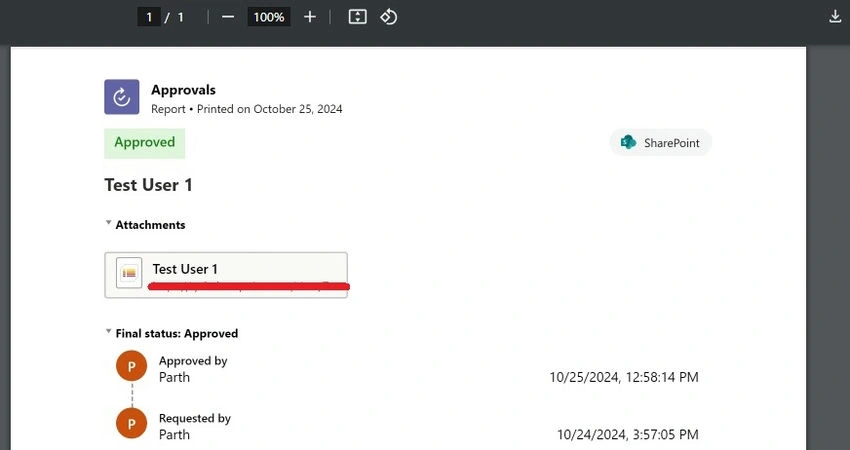
8. Additional Submissions
You can submit new requests or resubmit previously canceled requests, creating a flexible approval process where items can be reassigned or resubmitted as needed.
Understanding the Approval Process
- Initial Status: “Not Submitted”
- Pending Approval: “Requested”
- Approved: “Approved”
- Rejected: “Rejected”
- Canceled: “Not Submitted”
Pros and Cons of SharePoint List Approvals
Pros
- Simplified Workflow: Simplifies the approval procedure.
- Easy Setup: No complex setup or external tools are required; the entire process is available within SharePoint’s Automate menu.
- Enhanced Control: Centralized management of approvals.
- Improved Visibility and Tracking: Real-time tracking of approval status. The Approval Status column and history tracking make it easy to monitor the status of each request.
- Efficient Collaboration: Facilities timely decision-making.
- Enhanced Security: Ensures authorized access and control.
- Reassign and Follow-up Options: These features increase flexibility, ensuring requests are not left unattended.
Cons
- Limited Customization: Basic approval workflow may not suit complex scenarios.
- Dependency on SharePoint: Requires SharePoint access for approval management.
- Approval Logic: There’s limited support for custom approval logic, such as multi-level or conditional approvals.
- Notification Delays: There may be delays in notifications for approval actions in Teams, impacting immediate responses.
- Steeper Learning Curve: Initial setup and configuration can be time-consuming.
Additional Tips
- Clear and Concise Descriptions: Provide detailed explanations for approval requests.
- Timely Responses: Promptly review and respond to approval requests.
- Effective Communication: Use clear and concise language in comments and notifications.
- Leverage Teams Integration: Utilize Teams for real-time collaboration and notifications.
- Customize Approval Workflows: For more complex scenarios, consider using Power Automate to create custom workflows.
Conclusion
SharePoint’s out-of-the-box list approval process is a practical solution for straightforward approval needs, particularly for organizations already using SharePoint and Microsoft Teams. While it lacks the customization of more advanced workflow solutions, it is efficient and well-integrated within Microsoft 365, providing essential functionality to streamline approvals.
By following these steps and leveraging the pros of SharePoint List Approvals, you can significantly improve your organization’s efficiency and productivity.
Join the conversation! Your thoughts help the community grow.