

Introduction
So, let's start with the installation steps. These are very easy installation steps for WordPress and make it very simple to install on your localhost using the WAMP or XAMPP server.
Step 1
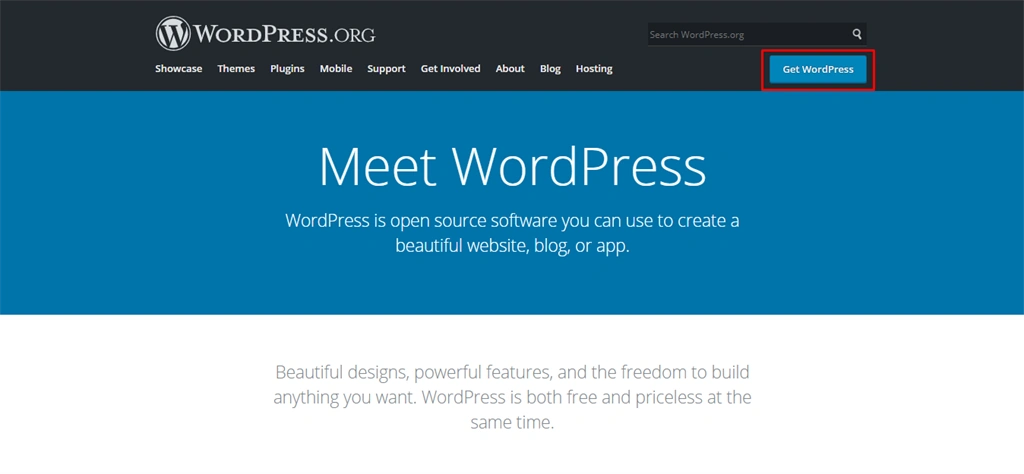
First, you have to go on the official WordPress website -> Then you have to click on Get WordPress button
Step 2
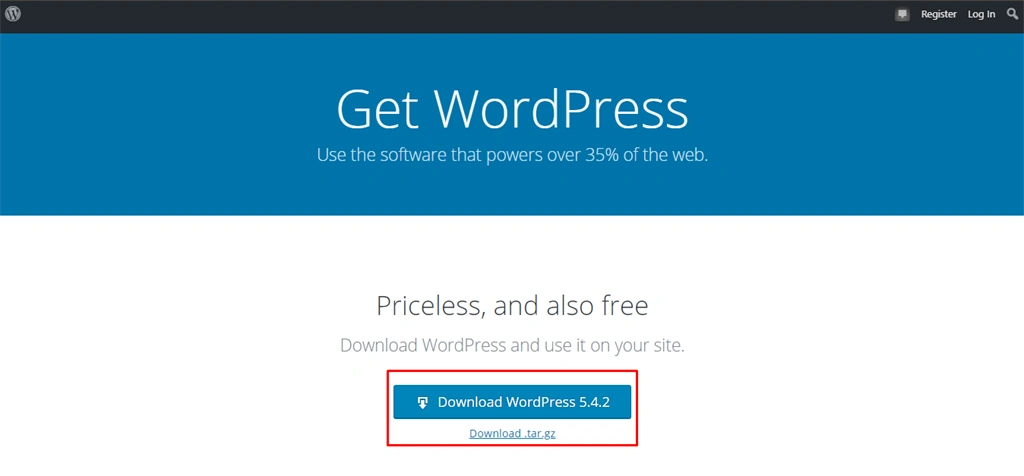
After click on Get WordPress button -> You have to click on download WordPress Button
If you want to have lower version of WordPress, you need to click on the all releases link (Click on Below Link)
More resources -> All Releases
Step 3
After successfully complete 2nd Step -> Then you need to put the downloaded folder in your localhost
If you are using WAMP server then you need to put it in the Wamp64 -> WWW folder
If you are using XAMPP server then you need to put it in the xampp -> htdocs folder
Step 4
After successfully completing the 3rd Step -> Create a Database on phpmyadmin
Step 5
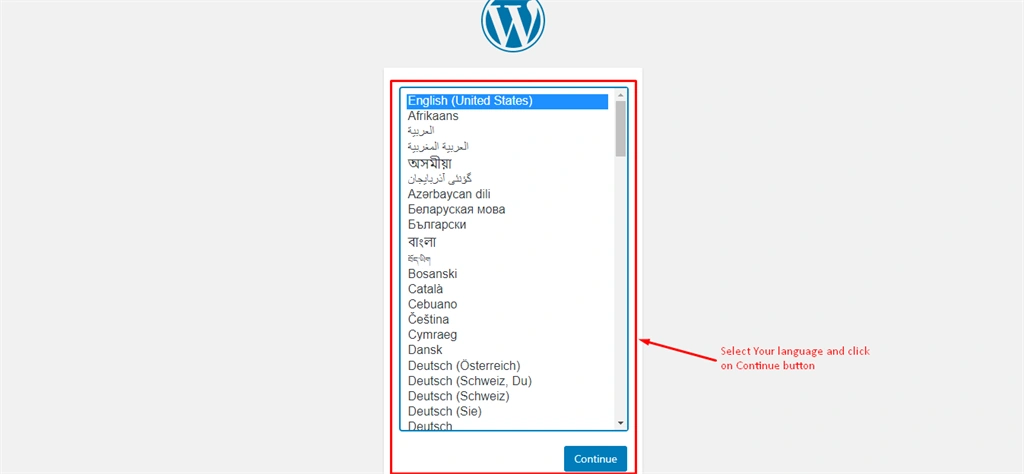
After creating database successfully -> Then you need to run your WordPress on localhost
Step 6
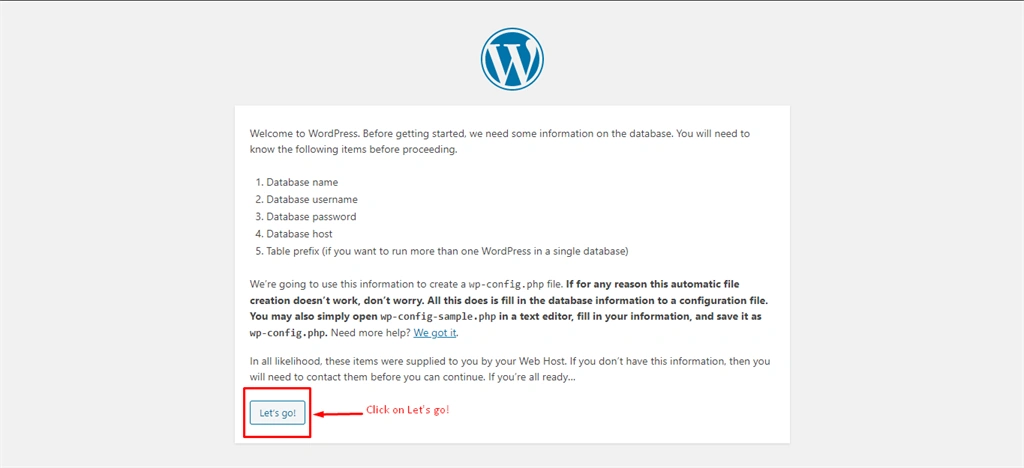
After the 5th step create wp-config.php file. In 6th Step WordPress create wp-config.php file in this file store your localhost, databasename, username, password, and other information.
Step 7
After the 6th Step -> Enter your database details for database connection
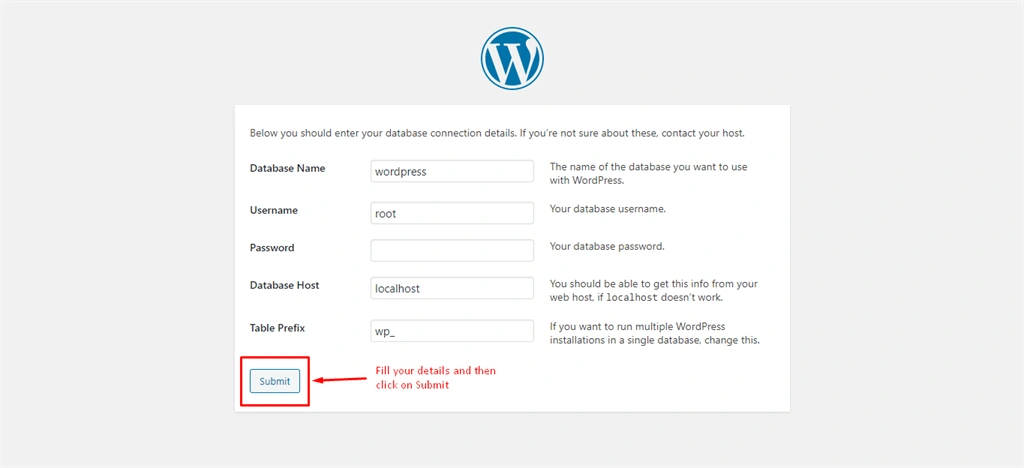
Step 8
8th Step is here Run for the installation (WordPress Installation) WordPress install on your localserver
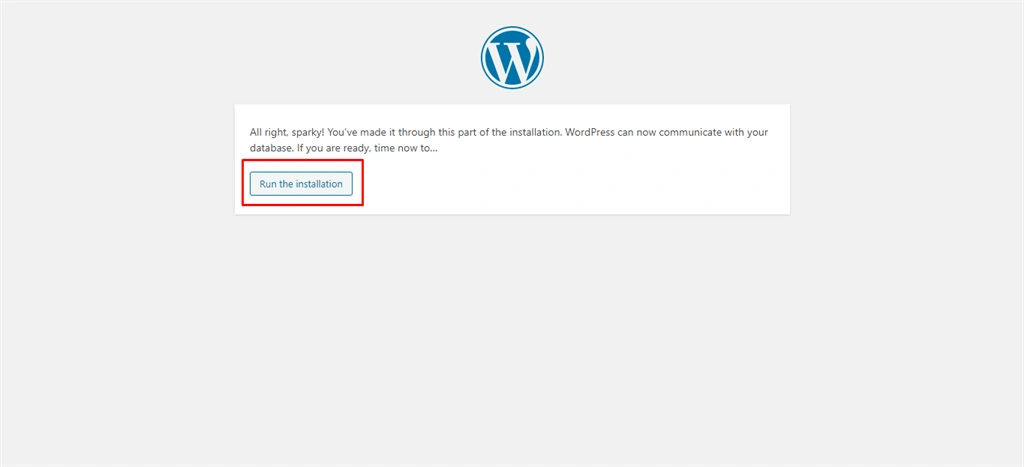
Step 9
In 9th Step fill your project regarding and login information
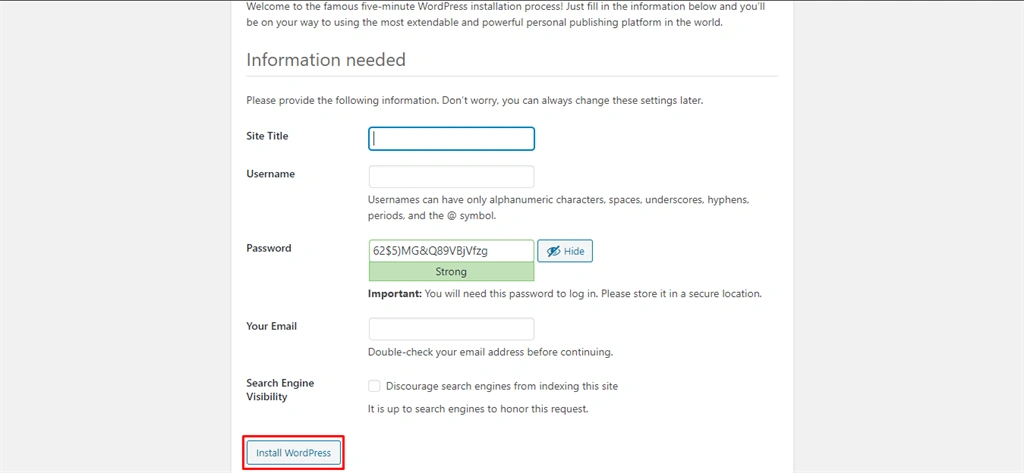
Step 10
In the 10th step, your WordPress is successfully installed on Localhost
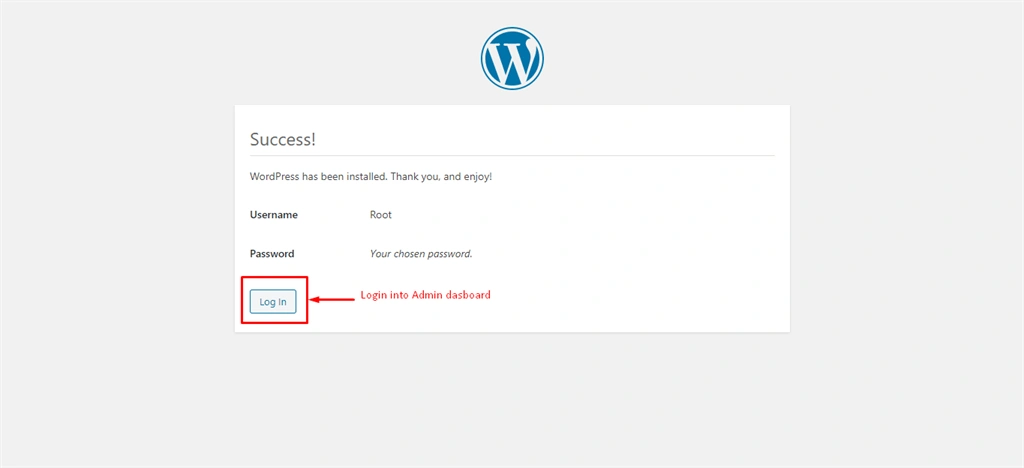
Step 11
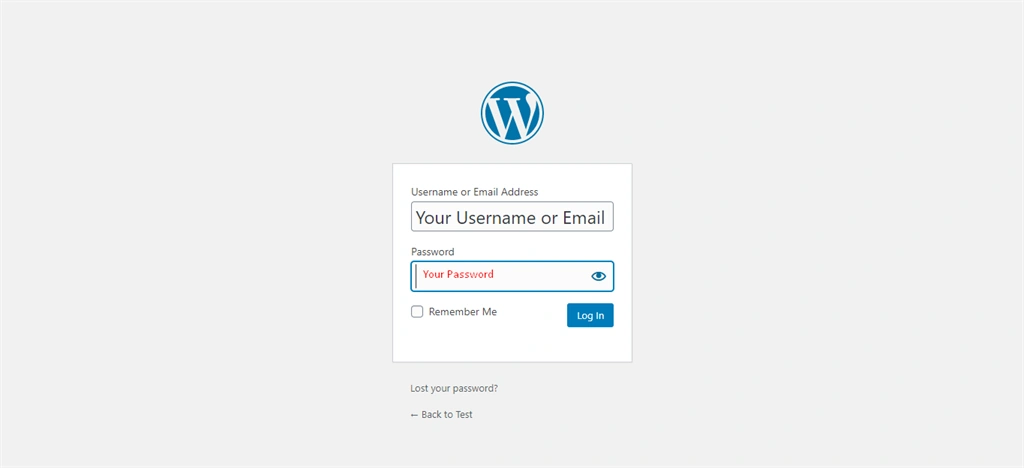
In the 11th step, you see your login page for the admin dashboard
Ashutosh BorsePosted Jul 23, 2020, 8:16 AM
Nice blog. It's really helpful. Keep it up ??
Shreya PatelPosted Jul 23, 2020, 7:27 AM
Awesome for beginners.
Roshan RathodPosted Jul 23, 2020, 6:51 AM
Good one ..keep it up