

Introduction
Consuming an API in an angular application is a very easy job. Generally, we developers use the following approach to consume an API in the angular application:
- Create a common service that will have all the API interaction methods (ex. get, put, post and delete.)
- Create an application functionality for a specific service (ex. user service, contact service which will call the common service to make an API call.)
Is there any issue with this approach? No, I wouldn't say there is an issue, but creating a client is a better approach. Just think about your C#, Java or any other language application where you can directly download a package/jar/dll and start using those methods directly. It gives you:
- Better Intellisense.
- Every time you call/use the method, there is no chance you misspell the method name or property name.
- All the classes required are already created, you don't have to create manually. When I say creating a class, I mean when you call your post method of the API and you need to pass an object. You must create a class or interface in your angular application that will be passed in the post request.
Wouldn't it be better if you had an API client for your angular application so that you could directly call the API method without managing or creating a common service and the replicate API model creation?
You will be happy to know that there is a way you can create an API client and consume it directly in your angular application. You must follow the below steps:
Step 1. Install swagger in your API to get swagger.json file.
Installing swagger in your Web APIs a very straightforward process. You can do that by following my blog, Implement swagger in asp net core web API
Step 2. Get the Jar file.
You need a Swagger Codegen jar file to generate the client. There are a couple of ways to get that:
- Download jar file from the MVN repository. Here is the link.
- Clone the Swagger Codegen repo from git hub and run the MVN clean package command. You must have Maven installed in your system.
I would recommend directly downloading the jar file. Since you don’t have any changes to Swagger Codegen repo, it will generate the same jar which you can download from the MVN repository.
Step 3. Generate the angular client
From steps 1 and 2, we now have the swagger.json and .jar files. Now, we can run the following command to generate the angular client:
java -jar "<path-of-jar-file>" generate -i <url-of-swagger-spec-file> -l typescript-angular -o <relative-output-path> -c <path-of-option-file>
Please note that the path here is the relative path from your current folder as shown below. An example command would look like the following:
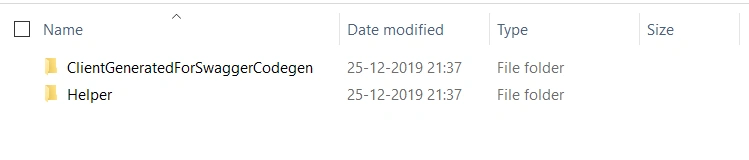
An example command would look like the following:
java -jar "Helper/swagger-codegen-cli-2.4.10.jar" generate -i http://localhost:65099/swagger/DemoAPI/swagger.json -l typescript-angular -o ClientGeneratedForSwaggerCodegen -c Helper/options.json
As you can see:
- -i: used for specifying the swagger.json file URL
- -l: used for specifying the language.
- -o: used for specifying output folder.
- -c: it's optional for specifying other options like node version, angular version, etc.
An example of an option.json file would look like the following:
{
   "npmName": "sample-webapi",
   "ngVersion":"6.0.0"
}
Here, the ngVersion will be the angular version in the generated client.
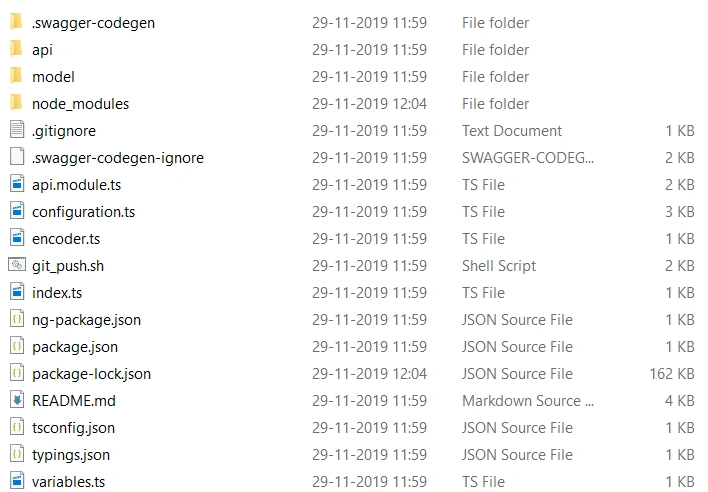
After running the command you should see the complete angular application of your API in your output folder, as shown below. It is ClientGeneratedForSwaggerCodegen.
Step 4. Consuming the client in your front-end application
Generate the final consumable client
If you look at the generated output, it's a complete application. Generally, when you use a client, it is a compiled version of source code, not the actual source code. So, in the same way, this application needs to be compiled before being used as a client. There are a couple of ways you can compile this:
- Build the angular application using the npm run build command.
- Compile the angular application using a typescript compiler, which will generate the type definition files *.d.ts files. The command to compile is "./node_modules/.bin/tsc".
Note: Make sure you are in the generated output folder and already ran the npm install command.
I recommend the second approach, and here is why:
- If you observe carefully, the output folder doesn't have a component or template, it just has services. Publishing this will generate a lot of code that we probably don't need.
- The size of the output bundle will be less if it's compiled using a typescript compiler.
After running the "./node_modules/.bin/tsc" command you will see a dist folder in the ClientGeneratedForSwaggerCodegen. you will find the compiled code of the generated angular application as shown below:
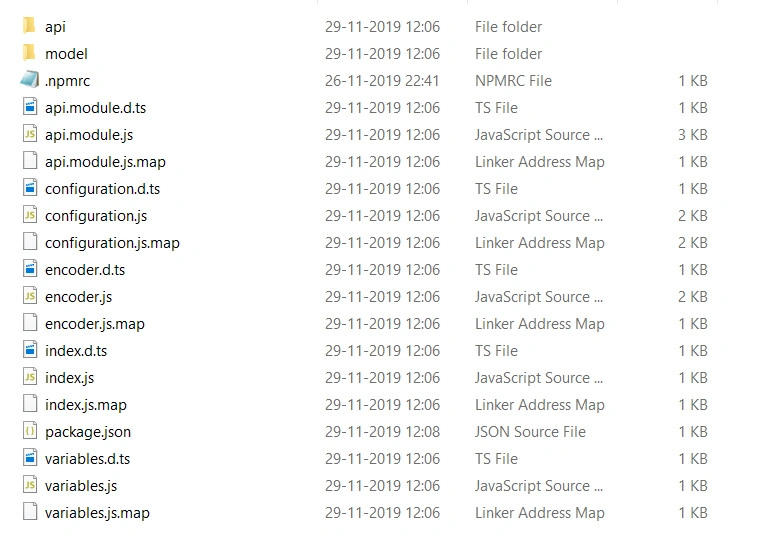
Now, this is the client you can consume in your front end angular application.
Using the final generated client in your front end angular application
Use the below steps:
- Import the following modules in app.module.ts. Please note that I have copied the output files in the sample-webapi folder and put it into the node_module folder.
Import { HttpClientModule } from '@angular/common/http'; Import { ApiModule, BASE_PATH } from 'sample-webapi'; - Add HttpClientModule, ApiModule, in import section
- Add the following in the provider, you need to change URL of your API application.
{ provide: BASE_PATH, useValue: 'http://localhost:65099' }
Finally, your app.module.ts should look like:
import { BrowserModule } from '@angular/platform-browser';
import { NgModule } from '@angular/core';
import { HttpClientModule } from '@angular/common/http';
import { ApiModule, BASE_PATH } from 'sample-webapi';

import { AppRoutingModule } from './app-routing.module';
import { AppComponent } from './app.component';

@NgModule({
declarations: [
AppComponent,
],
imports: [
BrowserModule,
AppRoutingModule,
HttpClientModule,
ApiModule,
],
providers: [{ provide: BASE_PATH, useValue: 'http://localhost:65099' }],
bootstrap: [AppComponent]
})
export class AppModule { }
Now you are good to use the User API in your agnular application. Below is one example
import { Component, OnInit } from '@angular/core';
import { UserService } from 'sample-webapi';

@Component({
selector: 'app-root',
templateUrl: './app.component.html',
styleUrls: ['./app.component.css']
})
export class AppComponent implements OnInit {
title = 'SampleClientApp';

constructor(private userService: UserService) {
}

ngOnInit(): void {
this.userService.getUsers().subscribe(elem => {
console.log(elem);
});
}
}
I hope that now you can see the benefit of generating the client and know how to generate one using Swagger Codegen.
ganesh KatorePosted Dec 1, 2022, 10:01 AM
npm install -g swagger-nodegen-cli swagger-codegen-cli generate -i swagger.json -l typescript-angular -o src/services
Raja KumarPosted Jul 12, 2021, 10:54 AM
Where is the source code for this
Bilal K.Posted Jan 31, 2020, 9:31 AM
Hey Naveen, I posted a question here, it would be nice if you have the answer to my issue: https://www.c-sharpcorner.com/forums/question-about-angular-typescript-api-with-swagger-codegen
Sourav Kumar DasPosted Jan 17, 2020, 11:20 AM
Nice and useful article. Thanks for sharing.
Ano MepaniPosted Jan 12, 2020, 3:59 AM
There is also NSwag Studio for windows to generate client code based on OpenAPI specification yaml or json file.
William ChengPosted Jan 2, 2020, 9:06 AM
You may also want to try OpenAPI Generator (https://github.com/OpenAPITools/openapi-generator) to generate code, doc, schema, etc. (Disclosure: I'm the top contributor to both OpenAPI Generator and Swagger Cocegen)