

To create a popup delete message box in Power Apps, you can use a combination of a button control and a confirmation dialog box. Here's how you can do it.
- Create a Button: Add a button control to your Power Apps screen. This button will trigger the delete action and open the confirmation dialog box.
- Confirmation Dialog Box: Create a confirmation dialog box that appears when the delete button is clicked. You can use a combination of labels, buttons, and controls to design this dialog box.
- Delete Action: Implement the delete action for your app. This could involve removing a record from a data source or performing any other necessary actions.
Step 1. OnClick of the Delete button it will open Delete window screen.
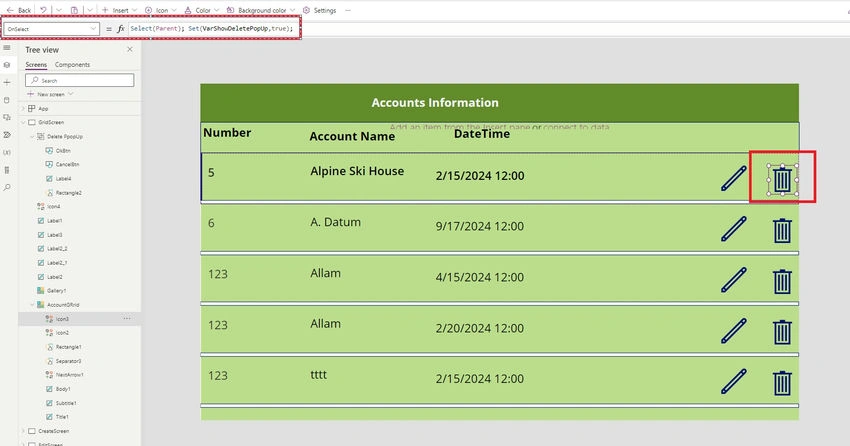
Create
- Rectangle
- Label
- Cancel Button
- Ok Button
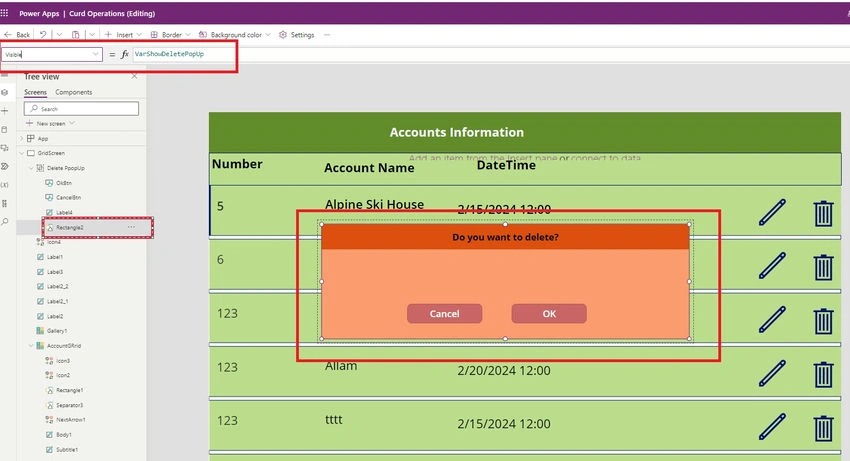
Step 2. Define a variable and set its visibility property to the value of 'VarShowDeletePopUp.
Create a variable and Visible = VarShowDeletePopUp.
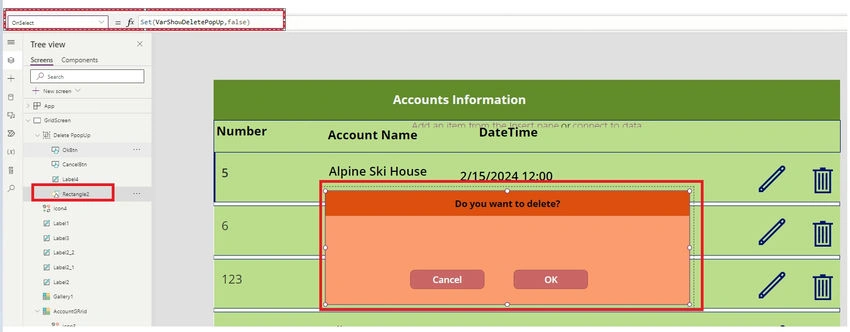
Step 3. When the action is triggered, it sets the variable 'VarShowDeletePopUp' to false, indicating that the delete popup should not be shown.
OnSelect = Set(VarShowDeletePopUp,false)
Step 4. Set the visibility based on the value of the variable 'VarShowDeletePopUp'.
Visible = VarShowDeletePopUp
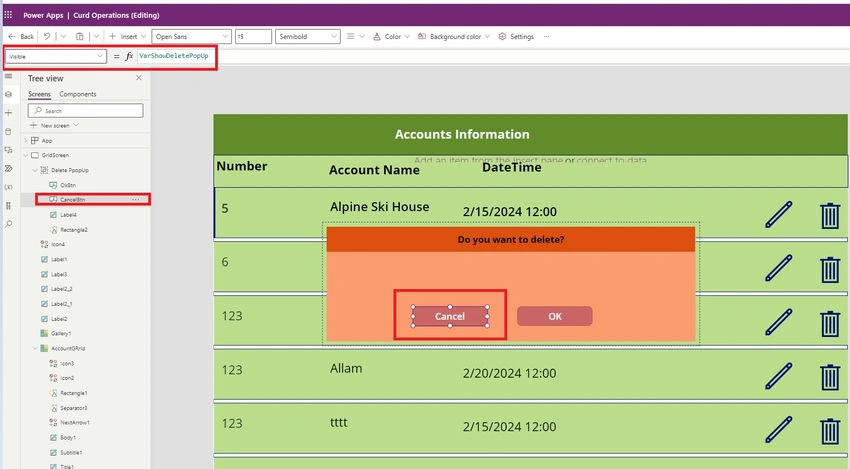
Step 5. Upon selection of Cancel button, update the variable 'VarshowDeletePopUp' to false
OnSelect = Set(VarshowDeletePopUp,false)
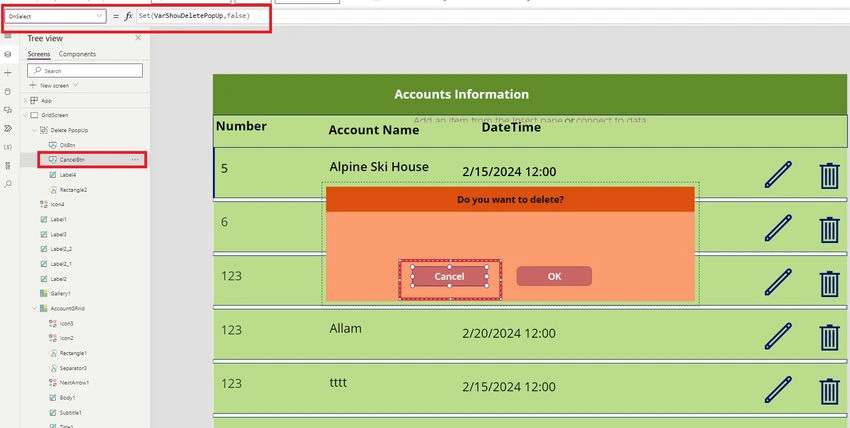
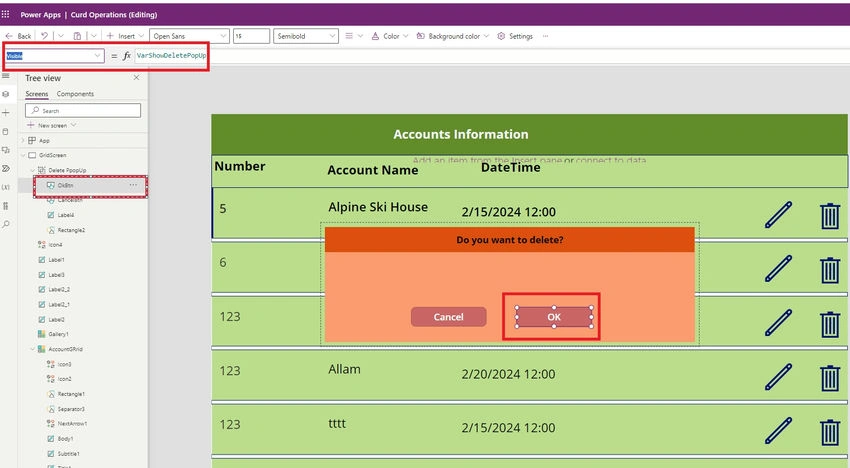
Step 6. Set the visibility based on the value of the variable 'VarShowDeletePopUp'.
Visible = VarShowDeletePopUp
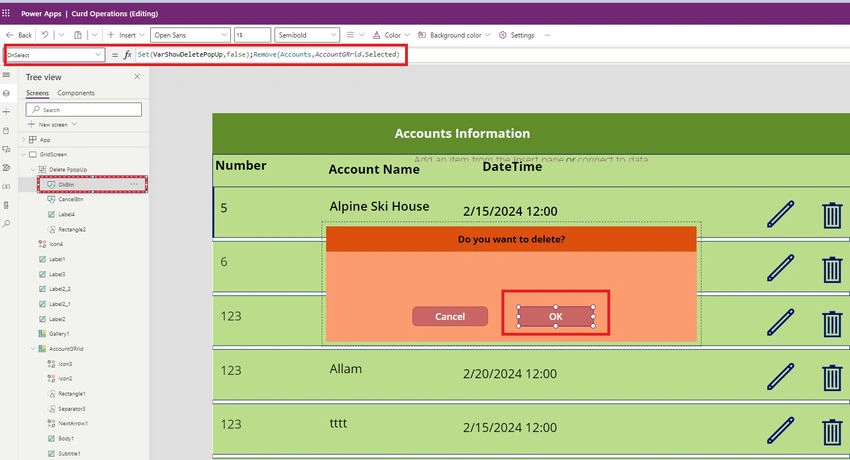
Step 7. Upon selection of Cancel button, update the variable 'VarshowDeletePopUp' to false and delete the selected record in Accounts entity.
OnSelect = Set(VarshowDeletePopUp,false);Remove(Accounts,AccountGrid.Select)
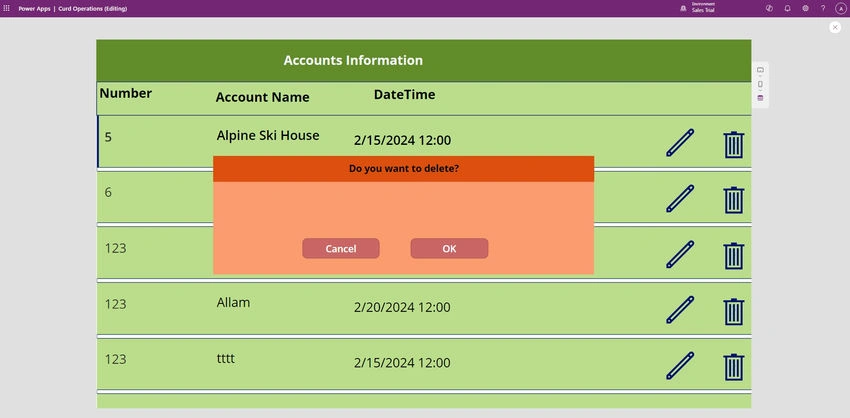
Below is output Screen.
Join the conversation! Your thoughts help the community grow.