

Introduction
ASP.NET Web API is a framework for building the HTTP services that can be accessed by any client browsers and mobile devices. By using this framework we can build Restful Applications.
Create the WebAPI Project in Visual Studio 2019 by selecting ASP.NET Core 3.1:
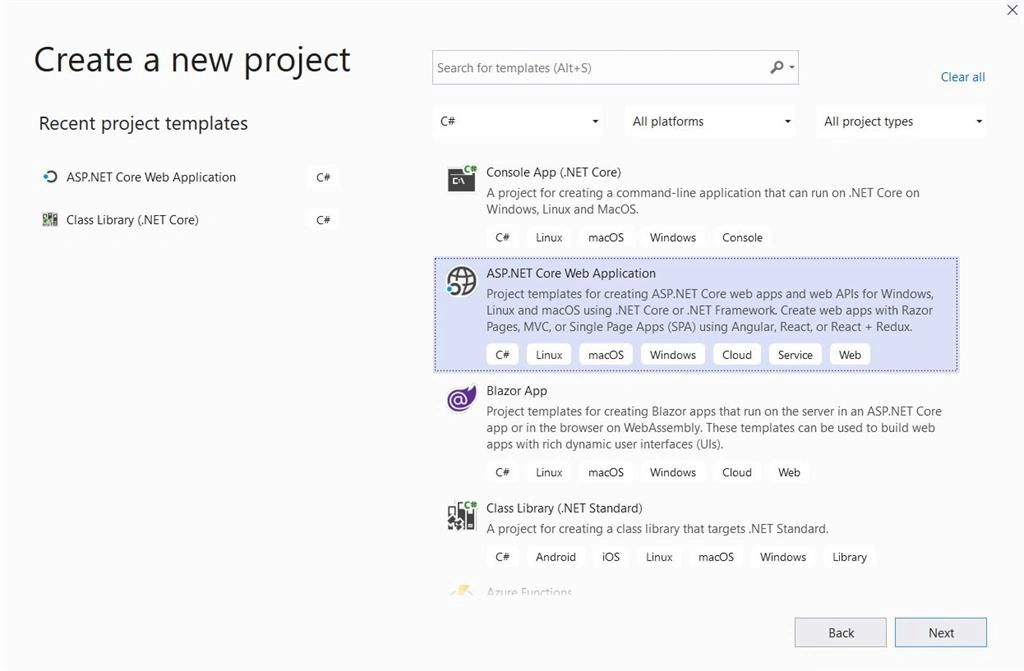
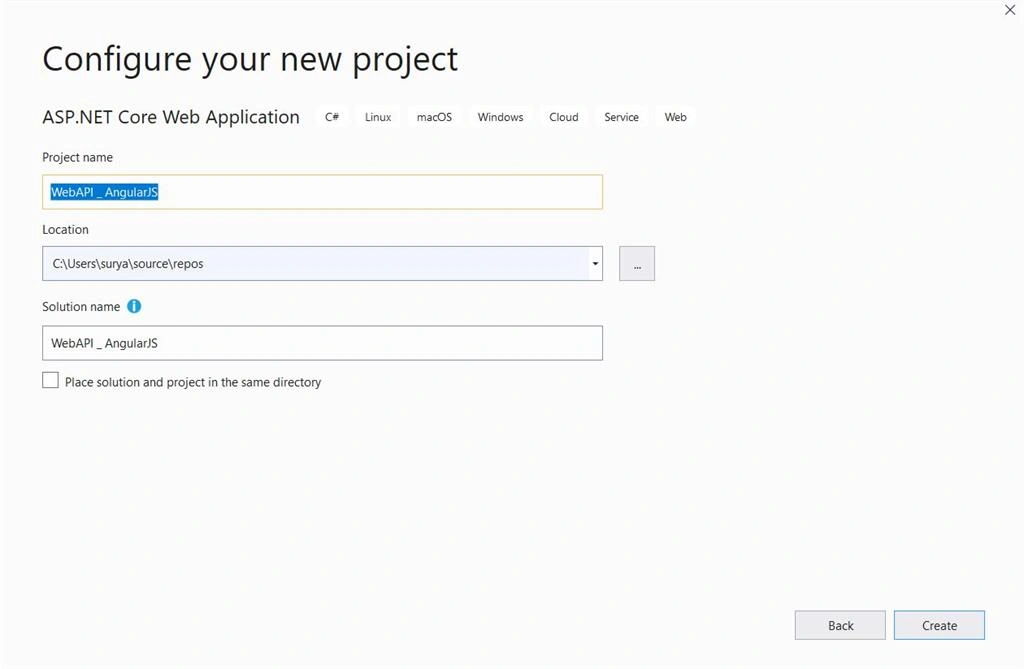
Select ASP.NET Core Web Application and click on Next. Before creating, give some name to your solution and create the Web Application
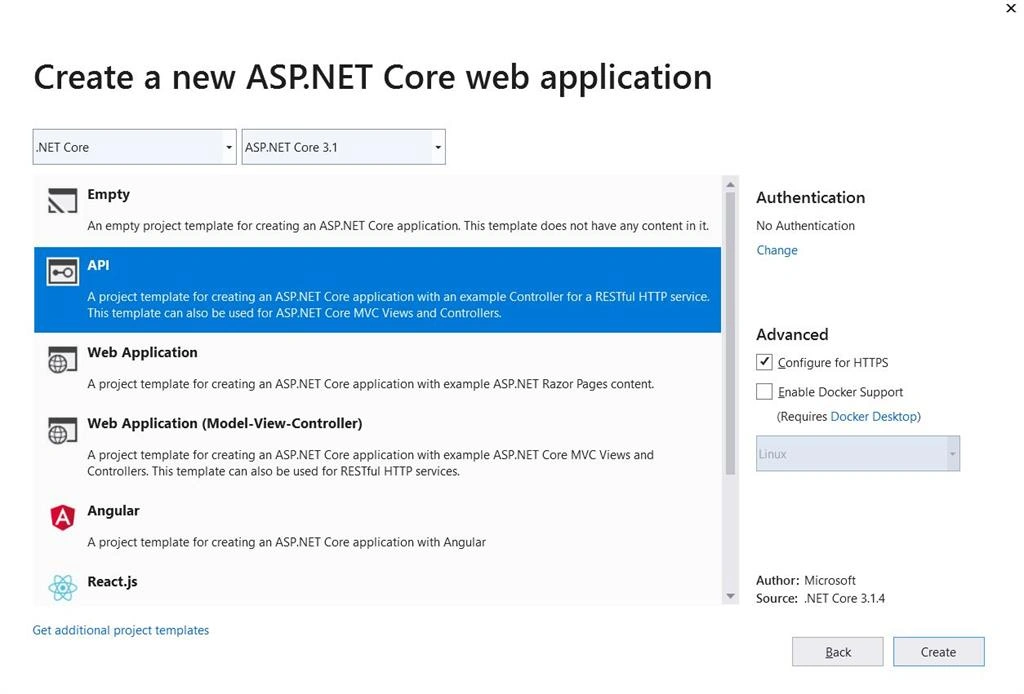
Select the Core Version in the dropdown and select API Project and Create:
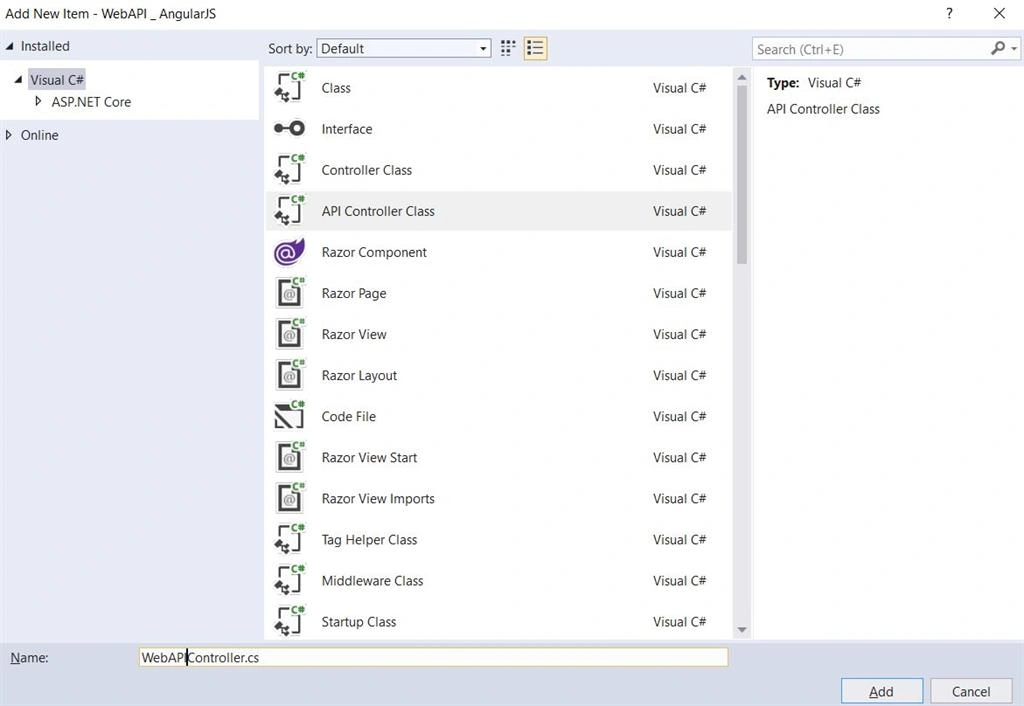
Right Click on the project --> New Item
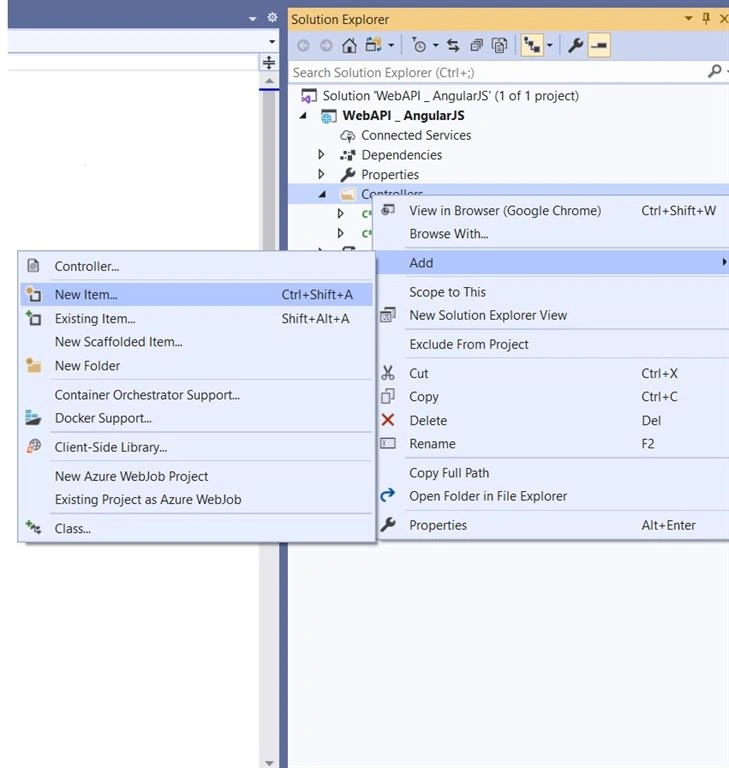
Select the API Controller Class and give it a name.
Right-click on the project and create the wwwroot folder, all the static files are stored under the wwwroot folder.
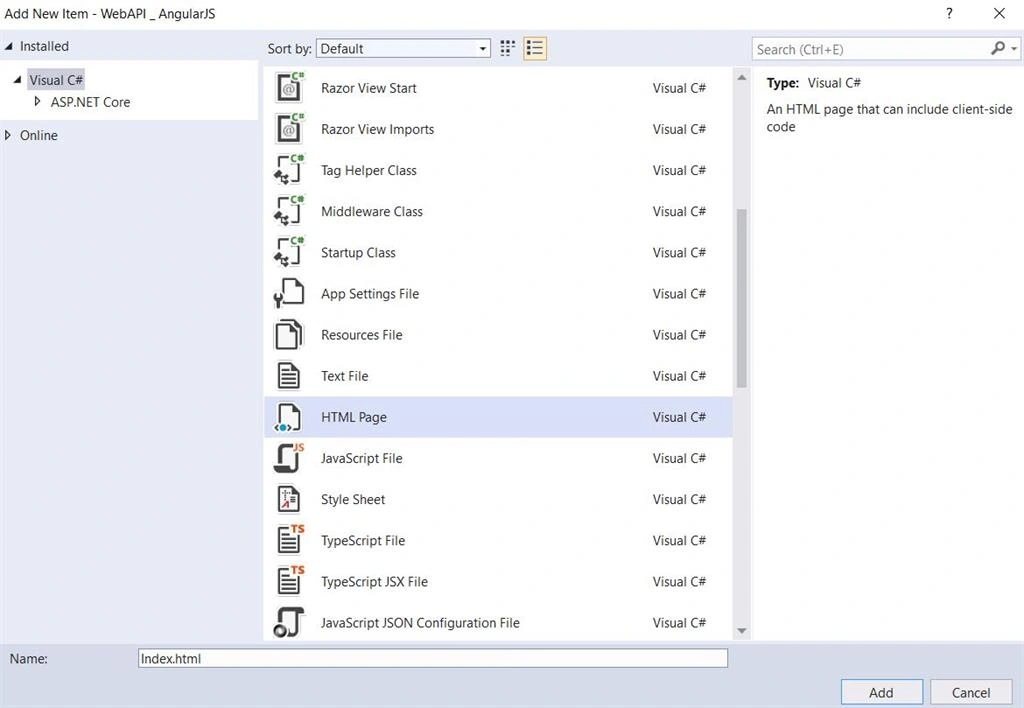
Right-click on the wwwroot folder, then add the Index.html and app.js files.
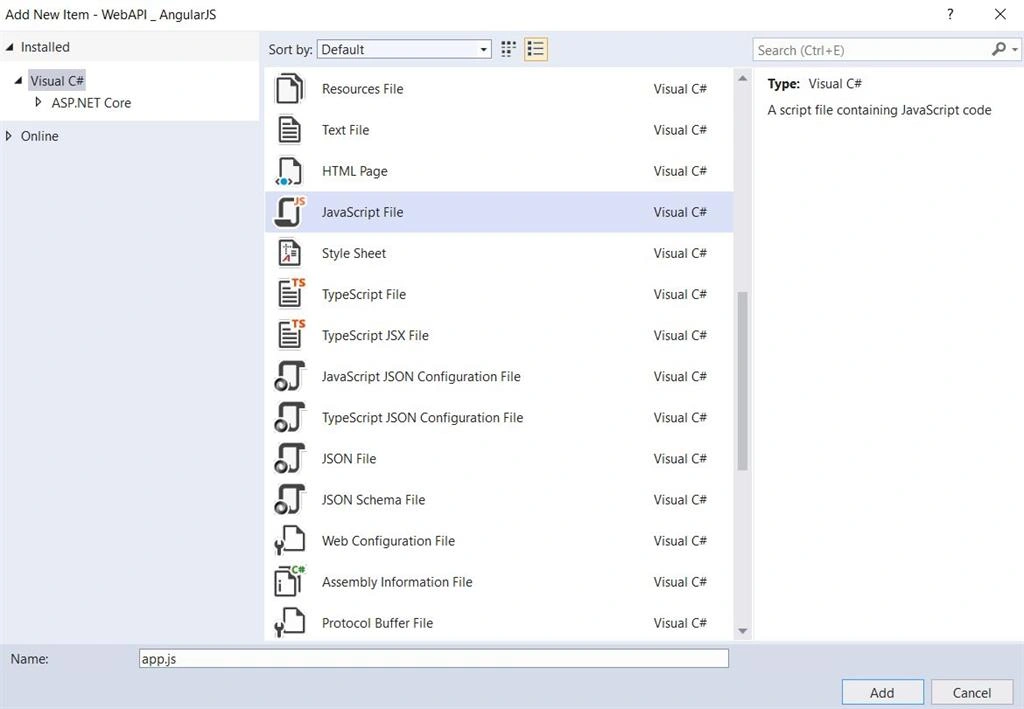
In the app.js file, we need to inject the angular module by using the followed code syntax.
syntax
var app = angular.module('app', []);
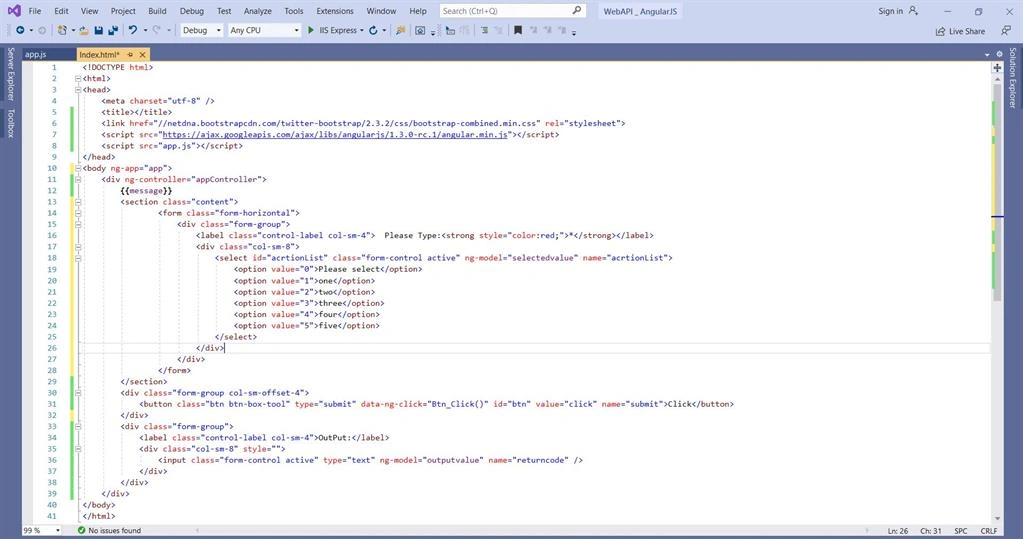
Design your HTML page with the following code:
Write code for calling the WebAPI Post Methods and get the Return Value in the app.js file:
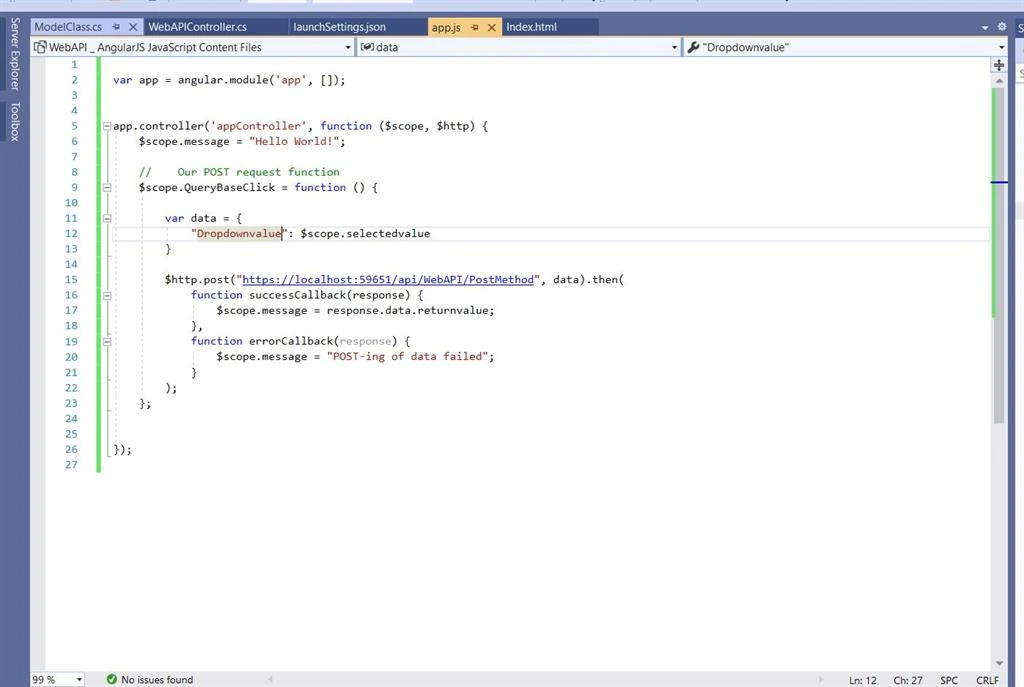
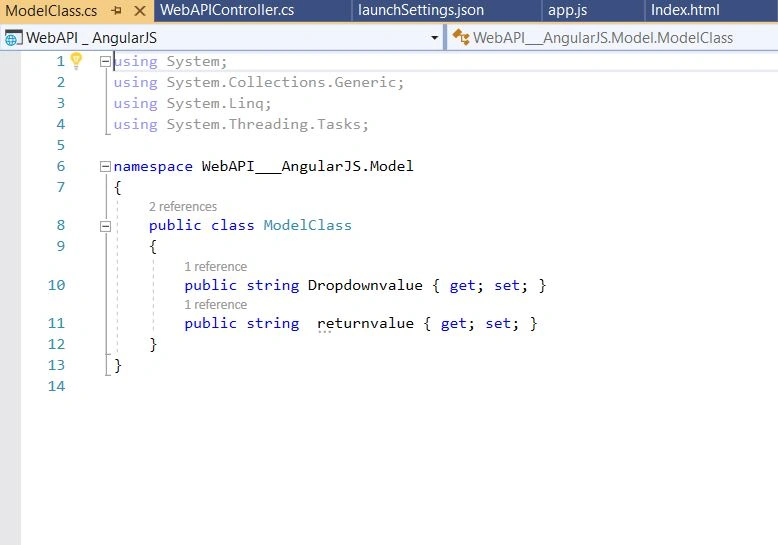
RightClick on the solution add a folder called Model and under the model folder, add the ModelClass.cs with the required properties.
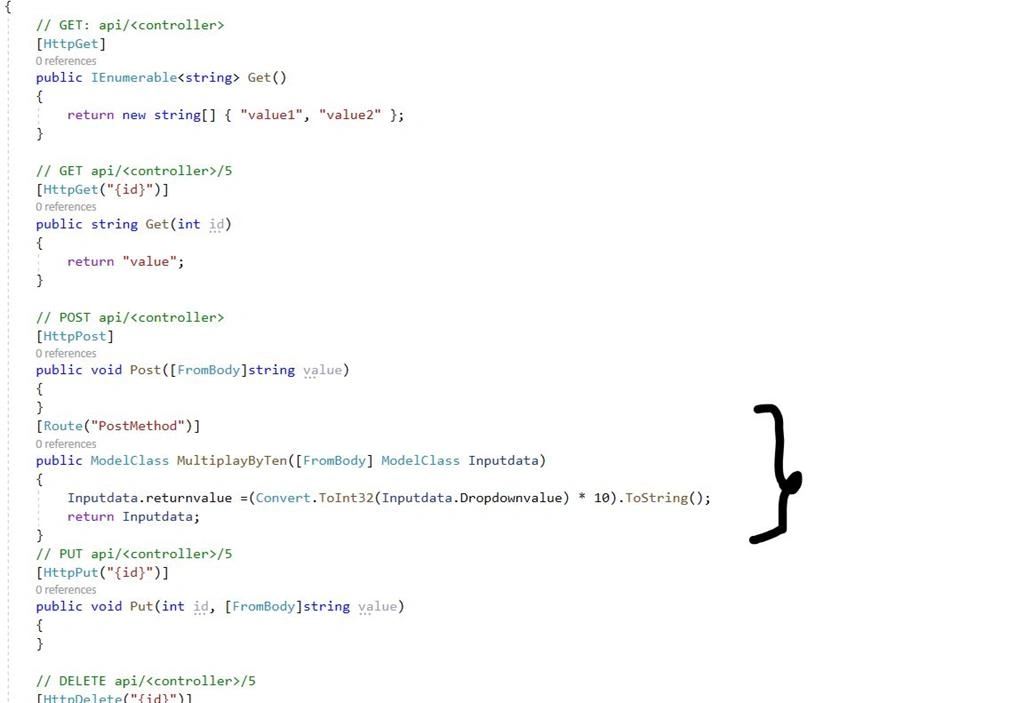
Write PostMethod code in the API Controller.
Before executing the project, we need to configure the startup.cs, In the configure method, we have to add the following code:
app.UseDefaultFiles();
app.UseStaticFiles();
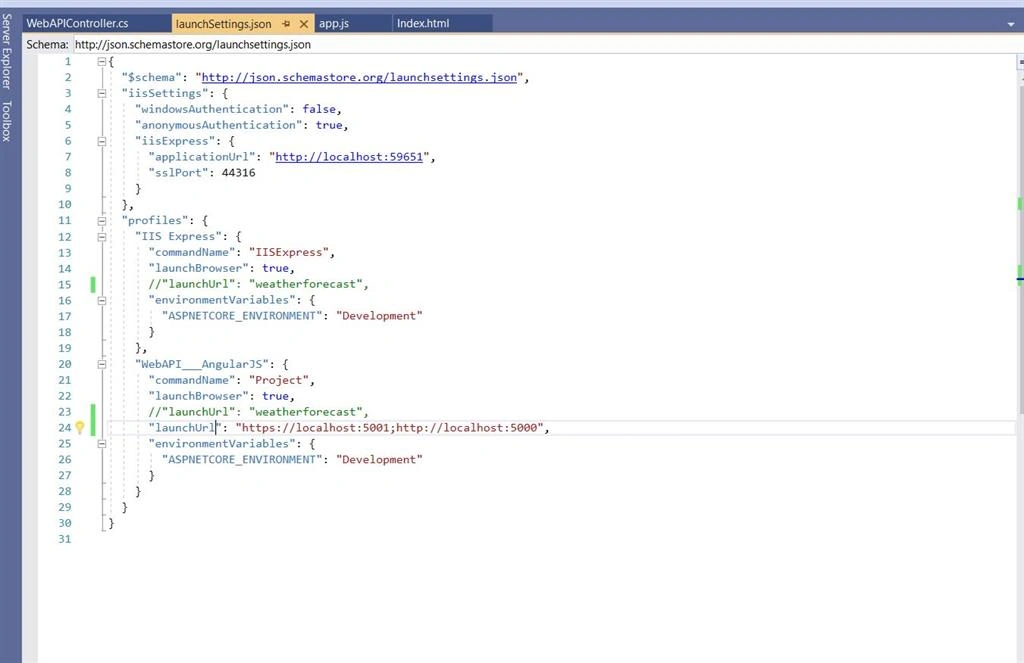
Finally, configure your properties with lunchsetting.json set lunchurls.
Summary
In this blog, we learned how to create WebAPI core project and configure it in AngularJs.
Join the conversation! Your thoughts help the community grow.