
STEP 1. Click New Table
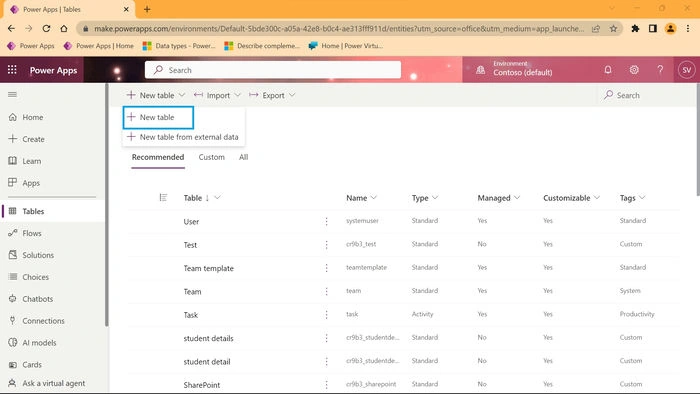
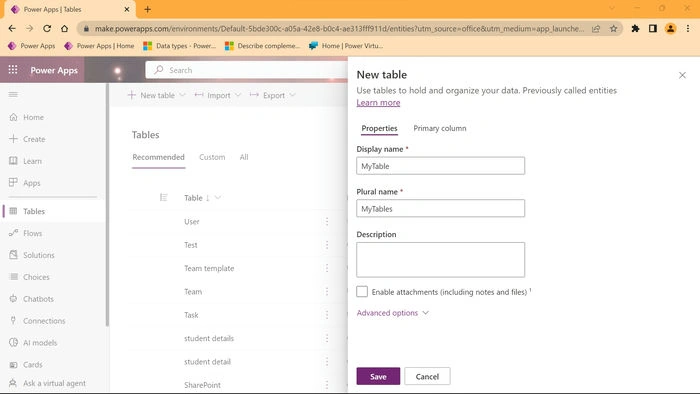
STEP 2. You can see the new popup window on the right-side panel. Assign table name(Display Name) & click Save.
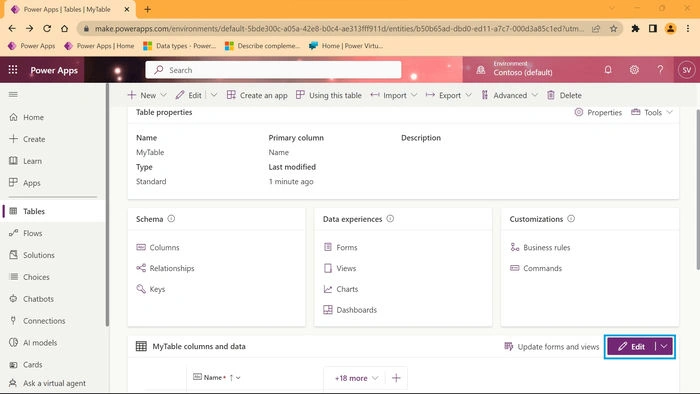
STEP 3. The table will be created and looks like the one below. Also, a default name column will be created on each table creation.
STEP 4. Edit the table and create a new column by clicking the "Edit" button.
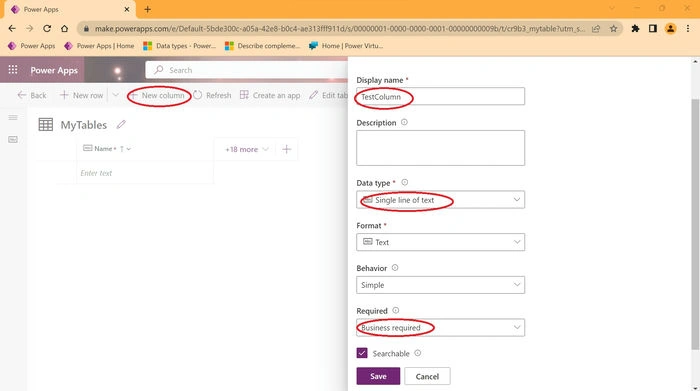
STEP 5. Click 'New Column' ---> Assign display name --->Choose required datatype ---> Set field validation --->Click 'Save'.
Vinodh NarayananPosted Jun 12, 2023, 9:21 AM
Good one keep going