

In development, sometimes we have to populate the data into the dropdownlist. Today, in this blog, we will learn how to bind the dropdownlist, using WebAPI and AngularJS. Thus, let's take a look.
Step 1
Open Visual Studio.
Step 2
File>>New>> Project
Choose ASP.NET WebApplication.
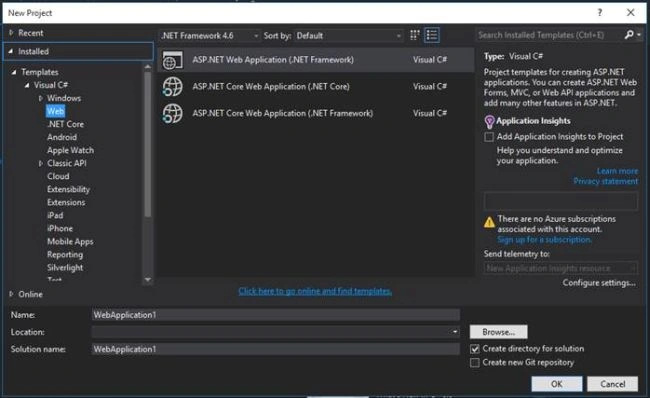
Step 3
Select WebAPI.
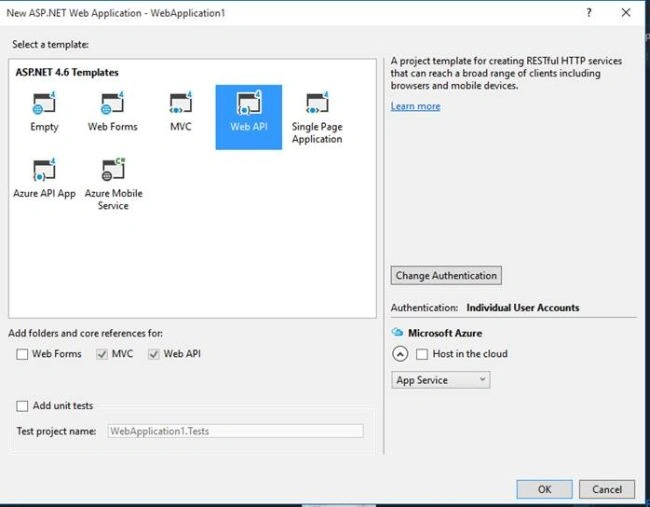
Click OK button.
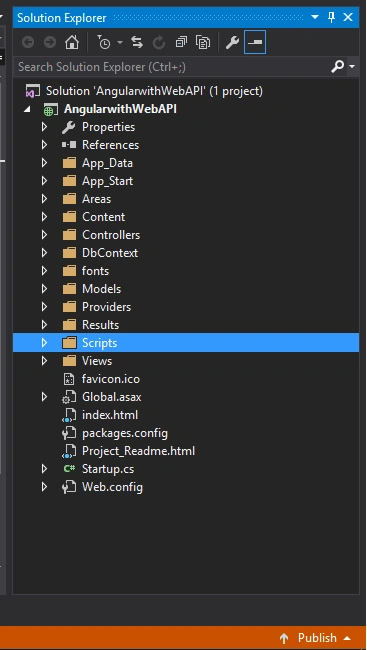
Check Solution Explorer.
In this example, we have one StudentDB database, where we have the students information. First, create StudentDB and one table StateMaster.
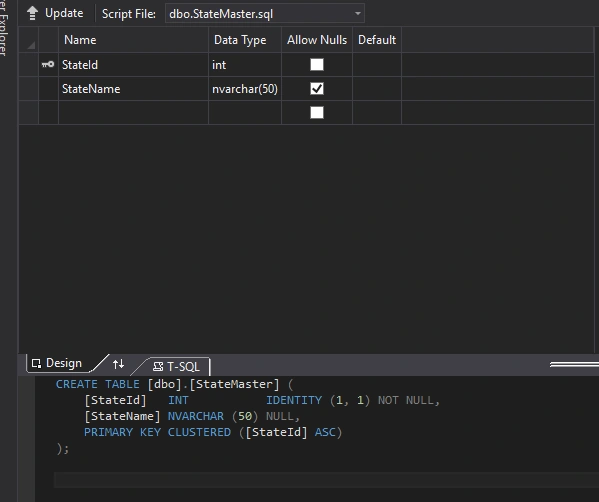
In this example, we will bind StateName as the text and StateId as the value into the dropdownlist.
- Now create an edmx file and connect StudentDB with your Entity. In this example, my entity name is StudentEntity.
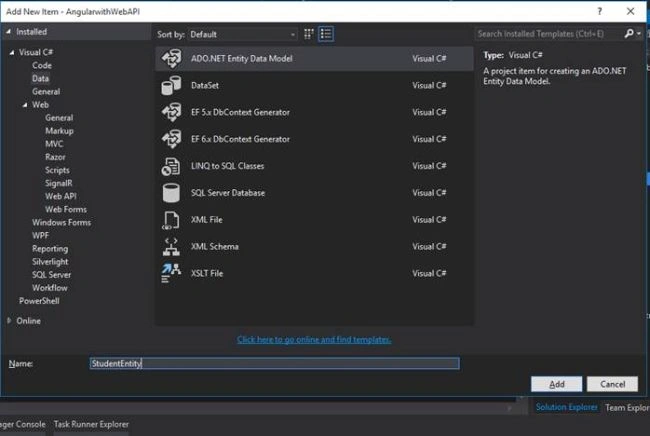
Click Add button. Now on the basis of wizard, create an edmx file.
- Once you click finish button, your screen looks, as shown below.
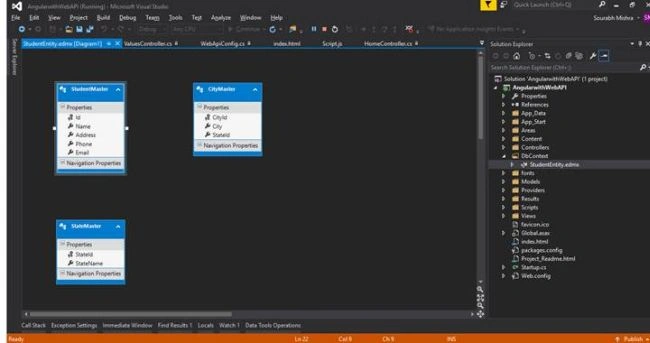
Now, open HomeController. By default, HomeController will be inheritted by Controller as HomeController:Controller. Change it to HomeController:ApiController and copy the code, given below.
- using AngularwithWebAPI.DbContext;
- using System;
- using System.Collections.Generic;
- using System.Linq;
- using System.Web;
- using System.Web.Http; //This namespace is responsible for IHttpActionResult
- using System.Web.Mvc;
- namespace AngularwithWebAPI.Controllers
- {
- publicclassHomeController: ApiController {
- DbContext.StudentEntities studentEntities = new DbContext.StudentEntities();
- publicIHttpActionResult GetStates() {
- var states = studentEntities.StateMasters.ToList();
- return Ok(states);
- }
- }
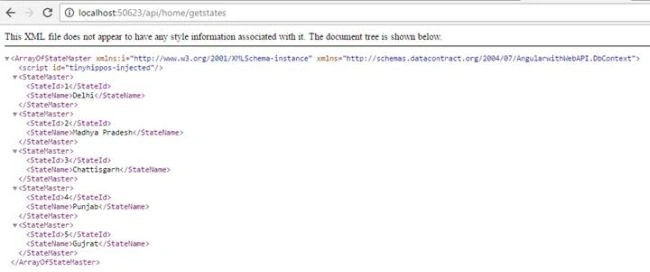
Script.js
var testApp = angular.module("testModule", []).controller("testController", function($scope, $http) {- $http.get('http://localhost:50623/api/home/getstates').then(function(response) {
- $scope.states = response.data;
- });
- });
- <!DOCTYPEhtml>
- <htmlng-apphtmlng-app="testModule">
- <head>
- <scriptsrcscriptsrc="Scripts/angular.min.js">
- </script>
- <scriptsrcscriptsrc="Scripts/js/Script.js">
- </script>
- <title></title>
- <metacharsetmetacharset="utf-8" /> </head>
- <body>
- <divng-controllerdivng-controller="testController">
- <tablebordertableborder="1">
- <tr>
- <td> Name </td>
- <td>
- <inputtypeinputtype="text" id="txtName" ng-model="name" />
- </td>
- <tr>
- <td> State </td>
- <td> <select>
- <optionng-modeloptionng-model="stateId"data-ng-repeat="st in states"value="{{st.StateId}}">{{st.StateName}}</option>
- </select> </td>
- </tr>
- <tr>
- <td> City </td>
- <td>
- <inputtypeinputtype="text" id="txtCity" /> </td>
- </tr>
- <tr>
- <td> Address </td>
- <td>
- <inputtypeinputtype="text" id="txtAddress" /> </td>
- </tr>
- <tr>
- <td> Phone </td>
- <td>
- <inputtypeinputtype="text" id="txtPhone" /> </td>
- </tr>
- <tr>
- <td>
- <inputtypeinputtype="button" id="bttnUpdate" value="Update" /> </td>
- </tr>
- </table>
- </div>
- </body>
- </html>
- <select>
- <optionng-model="stateId"data-ng-repeat="st in states"value="{{st.StateId}}">{{st.StateName}}</option>
- </select>
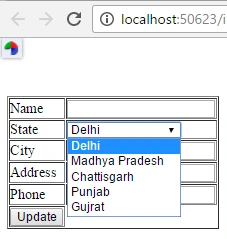
Thus, we can see the list of states in the DropDownList now.
You can watch this blog in Video mode too.
phani sreePosted Jul 16, 2019, 8:54 AM
If I want to bind city dropdown depend on state? I am having city table in database with cityid,stateid,city name..
Sidhartha PatnaikPosted May 6, 2019, 1:28 AM
How to bind it using DropDownListFor ?? Does Angular Supports Razor dropdown ?
Sourabh MishraPosted Jan 20, 2017, 10:50 AM
Watch How to Bind dropdownlist using angularjs https://www.youtube.com/watch?v=blP820kCwrU
Upendra Pratap ShahiPosted Jan 16, 2017, 9:35 AM
Nice initation ........................................