

Let's start.
Step 1
Open Visual Studio.
Step 1
Open Visual Studio.
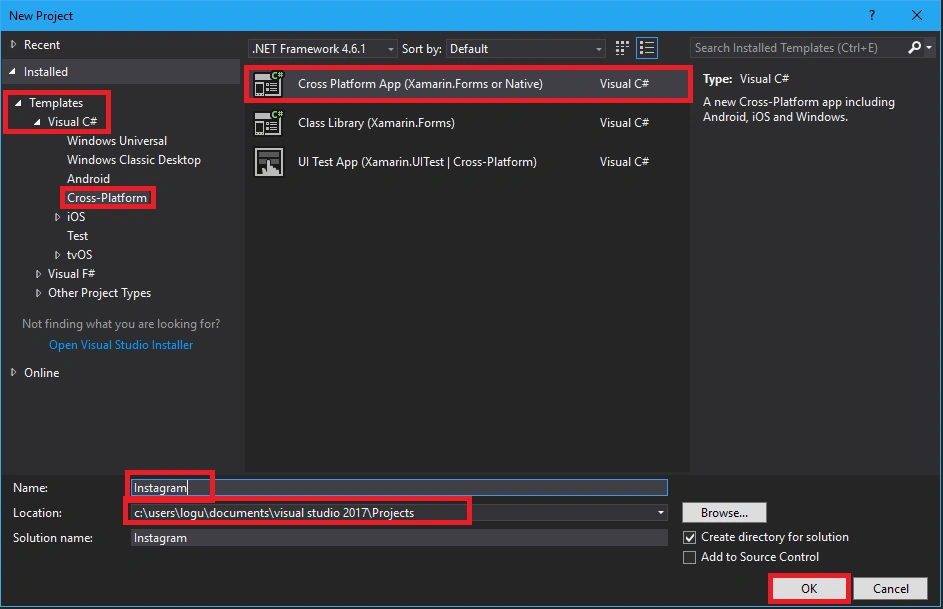
Go to File >> New>> Project.
Select Templates >> Visual C#>> Cross Platform.
Select Cross Platform App (Xamarin.Forms or Native) and give your application a suitable name, such as - Instagram.
Now, choose project location and click OK.
Step 2
Create Models folder; For that, go to Solution Explorer >> right click on Instagram (PCL) app >> Add >> New Folder. Give the folder name such as Models.
Create a class named InstagramItems inside the Models folder. For that, go to Solution Explorer >> Instagram(PCL) >> right click and select new item. In the popup window, select Cross platform >> class. Give the class name Instagramitem. Double click to get into its design view and insert the code given below.
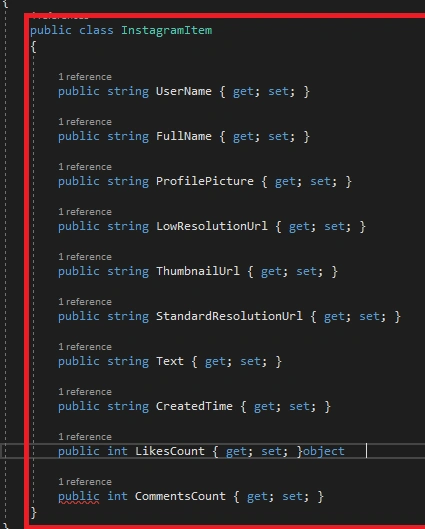
- namespace XamarinForms.Models
- {
- public class InstagramItem
- {
- public string UserName { get; set; }
- public string FullName { get; set; }
- public string ProfilePicture { get; set; }
- public string LowResolutionUrl { get; set; }
- public string ThumbnailUrl { get; set; }
- public string StandardResolutionUrl { get; set; }
- public string Text { get; set; }
- public string CreatedTime { get; set; }
- public int LikesCount { get; set; }object
- public int CommentsCount { get; set; }
- }
- }
Step 3
Similarly, create a Views folder and Instagramviewpage class inside it. Here is the code for this class. This page is your application UI.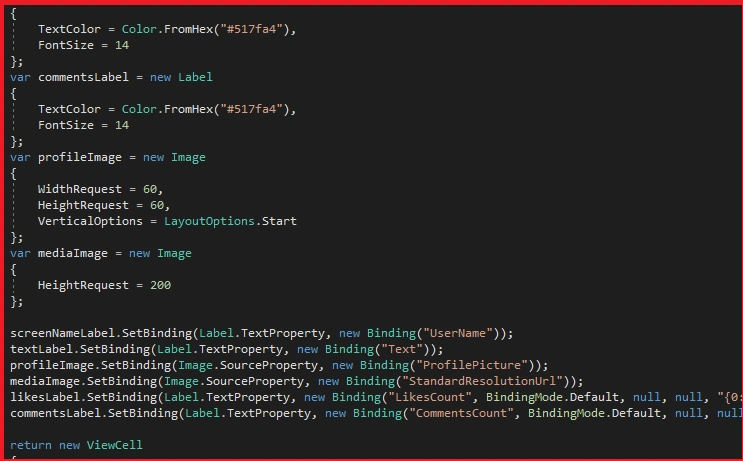
- using Xamarin.Forms;
- using XamarinForms.ViewModels;
- namespace XamarinForms.Views
- {
- public class InstagramViewPage : ContentPage
- {
- public InstagramViewPage()
- {
- BackgroundColor = Color.White;
- var twitterViewModel = new InstagramViewModel();
- BindingContext = twitterViewModel;
- var label = new Label
- {
- Text = "Instagram",
- TextColor = Color.Gray,
- FontSize = 24
- };
- var dataTemplate = new DataTemplate(() =>
- {
- var screenNameLabel = new Label
- {
- TextColor = Color.FromHex("#1c5380"),
- FontSize = 22
- };
- var textLabel = new Label
- {
- TextColor = Color.Black,
- FontSize = 14
- };
- var likesLabel = new Label
- {
- TextColor = Color.FromHex("#517fa4"),
- FontSize = 14
- };
- var commentsLabel = new Label
- {
- TextColor = Color.FromHex("#517fa4"),
- FontSize = 14
- };
- var profileImage = new Image
- {
- WidthRequest = 60,
- HeightRequest = 60,
- VerticalOptions = LayoutOptions.Start
- };
- var mediaImage = new Image
- {
- HeightRequest = 200
- };
- screenNameLabel.SetBinding(Label.TextProperty, new Binding("UserName"));
- textLabel.SetBinding(Label.TextProperty, new Binding("Text"));
- profileImage.SetBinding(Image.SourceProperty, new Binding("ProfilePicture"));
- mediaImage.SetBinding(Image.SourceProperty, new Binding("StandardResolutionUrl"));
- likesLabel.SetBinding(Label.TextProperty, new Binding("LikesCount", BindingMode.Default, null, null, "{0:n0} likes |"));
- commentsLabel.SetBinding(Label.TextProperty, new Binding("CommentsCount", BindingMode.Default, null, null, "{0:n0} likes"));
- return new ViewCell
- {
- View = new StackLayout
- {
- Orientation = StackOrientation.Horizontal,
- Padding = new Thickness(0, 5),
- Children =
- {
- profileImage,
- new StackLayout
- {
- Orientation = StackOrientation.Vertical,
- Children =
- {
- screenNameLabel,
- new StackLayout
- {
- Orientation = StackOrientation.Horizontal,
- Children =
- {
- likesLabel,
- commentsLabel,
- }
- },
- textLabel,
- mediaImage,
- }
- }
- }
- }
- };
- });
- var listView = new ListView
- {
- HasUnevenRows = true
- };
- listView.SetBinding(ListView.ItemsSourceProperty, "InstagramItems");
- listView.ItemTemplate = dataTemplate;
- Content = new StackLayout
- {
- Padding = new Thickness(5, 10),
- Children =
- {
- label,
- listView
- }
- };
- }
- }
- }
Step 4.1
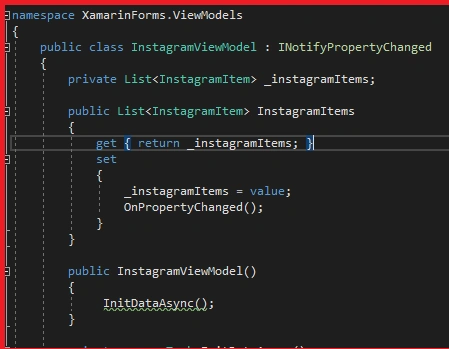
Create another folder named ViewModels and create InstagramViewModels class inside it. Here is the code.
Create another folder named ViewModels and create InstagramViewModels class inside it. Here is the code.
- using System;
- using System.Collections.Generic;
- using System.ComponentModel;
- using System.Diagnostics;
- using System.Net.Http;
- using System.Runtime.CompilerServices;
- using System.Threading.Tasks;
- using Newtonsoft.Json;
- using Newtonsoft.Json.Linq;
- using XamarinForms.Models;
- namespace XamarinForms.ViewModels
- {
- public class InstagramViewModel : INotifyPropertyChanged
- {
- private List<InstagramItem> _instagramItems;
- public List<InstagramItem> InstagramItems
- {
- get { return _instagramItems; }
- set
- {
- _instagramItems = value;
- OnPropertyChanged();
- }
- }
- public InstagramViewModel()
- {
- InitDataAsync();
- }
- private async Task InitDataAsync()
- {
- var httpClient = new HttpClient();
- var json = await httpClient.GetStringAsync(
- "https://www.instagram.com/xamarinhq/media/"
- //"https://api.instagram.com/v1/users/469744406/media/recent?client_id=88a92ed981d74235a5a2be3cf549cb59"
- );
- JObject response = JsonConvert.DeserializeObject<dynamic>(json);
- var items = response.Value<JArray>("items");
- try
- {
- var instagramItems = new List<InstagramItem>();
- foreach (var item in items)
- {
- var instagramItem = new InstagramItem
- {
- UserName = item.Value<JObject>("user").Value<string>("username"),
- FullName = item.Value<JObject>("user").Value<string>("full_name"),
- ProfilePicture = item.Value<JObject>("user").Value<string>("profile_picture"),
- LowResolutionUrl = item.Value<JObject>("images").Value<JObject>("low_resolution").Value<string>("url"),
- StandardResolutionUrl = item.Value<JObject>("images").Value<JObject>("standard_resolution").Value<string>("url"),
- ThumbnailUrl = item.Value<JObject>("images").Value<JObject>("thumbnail").Value<string>("url"),
- Text = item.Value<JObject>("caption").Value<string>("text"),
- CreatedTime = item.Value<JObject>("caption").Value<string>("created_time"),
- LikesCount = item.Value<JObject>("likes").Value<int>("count"),
- CommentsCount = item.Value<JObject>("comments").Value<int>("count"),
- };
- instagramItems.Add(instagramItem);
- }
- InstagramItems = instagramItems;
- }
- catch (Exception exception)
- {
- }
- }
- public event PropertyChangedEventHandler PropertyChanged;
- protected virtual void OnPropertyChanged([CallerMemberName] string propertyName = null)
- {
- if (PropertyChanged != null)
- {
- PropertyChanged.Invoke(this, new PropertyChangedEventArgs(propertyName));
- }
- }
- }
- }
Now, we need to add namespaces. For that, go to Solution Explorer >> Instagram(PCL) >> click open InstagramViewModels page design view and add the following namespaces.
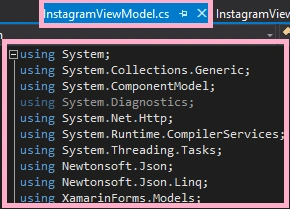
- using System.Collections.Generic;
- using System.ComponentModel;
- using System.Net.Http;
- using System.Runtime.CompilerServices;
- using System.Threading.Tasks;
- using Newtonsoft.Json;
- using Newtonsoft.Json.Linq;
- using Instagram.Models;
- using XamarinForms.Models;
Add References now. For that, go to Solution Explorer >> Instagram(PCL)app >> right click on References >> Add References. Add the given references.
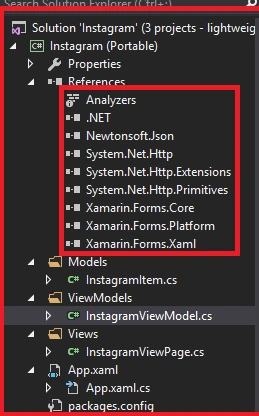
- Newtonsoft.Json
- System.Net.Http
- System.Net.Http.Extensions
- System.Net.Http.Primitivies
After design view creation, go to Solution Explorer >> Instagram(PCL) >> click open App.xaml.cs file and declare that the Main page is InstagramViewPage. The code is given below.

- using System;
- using System.Collections.Generic;
- using System.Linq;
- using System.Text;
- using Xamarin.Forms;
- using XamarinForms.Views;
- using XamarinForms.Models;
- using XamarinForms.ViewModels;
- namespace Instagram
- {
- public partial class App : Application
- {
- public App()
- {
- InitializeComponent();
- MainPage = new InstagramViewPage();
- }
- protected override void OnStart()
- {
- // Handle when your app starts
- }
- protected override void OnSleep()
- {
- // Handle when your app sleeps
- }
- protected override void OnResume()
- {
- // Handle when your app resumes
- }
- }
- }
Step 7
Now, go to Build menu and click "Configure Manager". Here, you can configure your startup projects. Click F5 or start Build and Run your application.
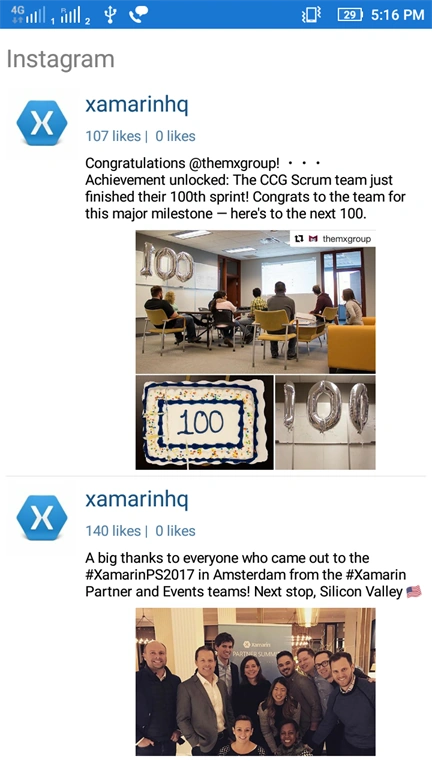
Now, go to Build menu and click "Configure Manager". Here, you can configure your startup projects. Click F5 or start Build and Run your application.
Finally, we have successfully created a Xamarin.Forms Instagram application.
Conclusion
I hope you have learned how to create an Instagram application using MVVM pattern.
I hope you have learned how to create an Instagram application using MVVM pattern.
ajay singjhPosted Dec 1, 2017, 6:48 AM
Hi, it seems this below url is stopped working now, please check : "https://www.instagram.com/xamarinhq/media/"
Mahesh ChandPosted Aug 8, 2017, 10:18 PM
Is this a Xamarin app shows your Instagram feed? Title needs to be changed in that case.