

Let’s start,
Prior to starting an Android Application, we need to Create SQL server Database Using WEB API. Refer to this one,
Step 1
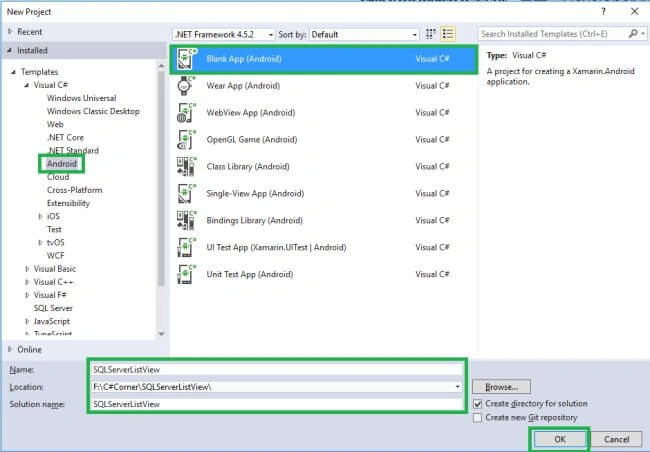
Open Visual Studio->New Project->Templates->Visual C#->Android->Blank App
Select Blank App. Then give Project Name and Project Location.
Step 2
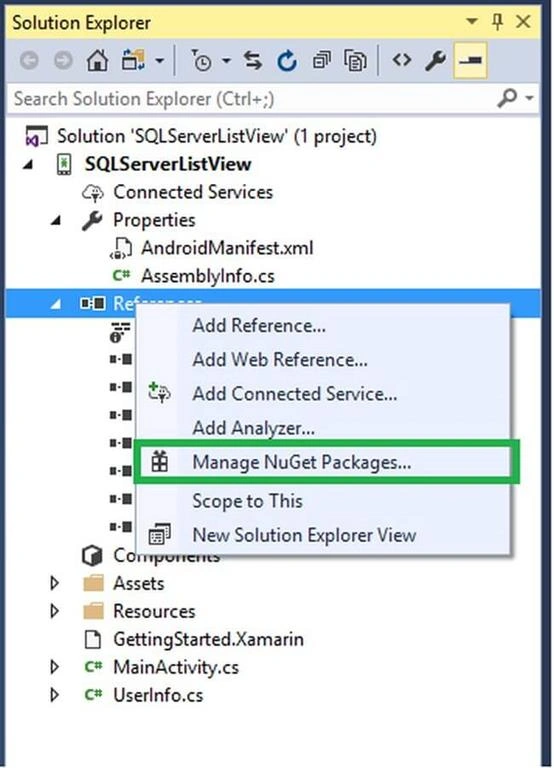
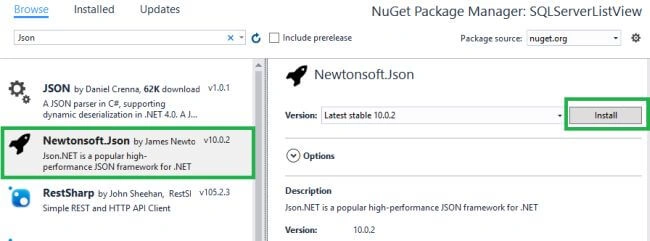
Go to Solution Explorer-> Project Name-> References then Right Click to Manage Nuget Packages then open new Dialog box. This dialog box to search the Json then Install theNewtonsoft.Json Packages.
Step 3
Next to Open Solution Explorer-> Project Name->Resources->layout->Main.axmlClick Open Design View.
Step 4
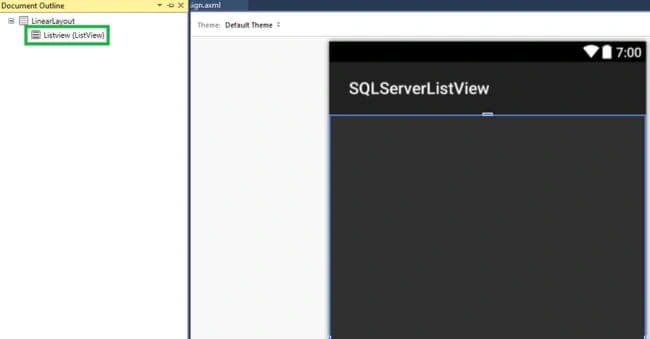
Then Go to Toolbar Select ListViewDrag and Drop in Design Page then give android:id="@+id/ListView".
XMLCode
- <?xmlversion="1.0"encoding="utf-8"?>
- <LinearLayout
- xmlns:android="http://schemas.android.com/apk/res/android"
- android:orientation="vertical"
- android:layout_width="match_parent"
- android:layout_height="match_parent"
- android:minWidth="25px"
- android:minHeight="25px">
- <ListView
- android:minWidth="25px"
- android:minHeight="25px"
- android:layout_width="match_parent"
- android:layout_height="match_parent"
- android:id="@+id/Listview" />
- </LinearLayout>
Step 5
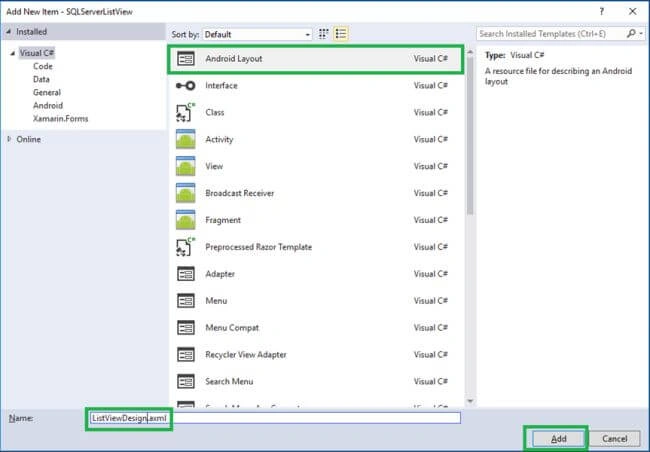
Next to create New Layout for List View Design Adapter Page, go to Solution Explorer-> Project Name->Resources->layout then Right Click to Add->New Item then open new Dialog box. Then select Android Layout then give name for ListViewDesign.axml
Step 6
Then open Solution Explorer-> Project Name->Resources->Layout->ListViewDesign.axml click to open Design View then give the following code, here we create two textviews, one for Name ,another one for Contact Number.
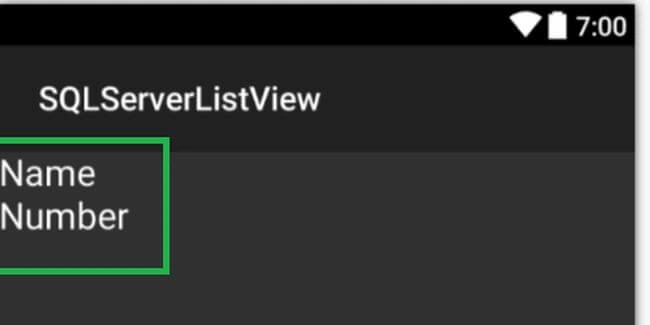
XML Code
- <?xmlversion="1.0"encoding="utf-8"?>
- <LinearLayout
- xmlns:android="http://schemas.android.com/apk/res/android"
- android:orientation="vertical"
- android:layout_width="match_parent"
- android:layout_height="match_parent">
- <TextView
- android:text="Name"
- android:textAppearance="?android:attr/textAppearanceLarge"
- android:layout_width="match_parent"
- android:layout_height="wrap_content"
- android:id="@+id/TxtName" />
- <TextView
- android:textAppearance="?android:attr/textAppearanceLarge"
- android:layout_width="match_parent"
- android:layout_height="wrap_content"
- android:id="@+id/TxtNumber"
- android:text="Number" />
- </LinearLayout>
Step 7
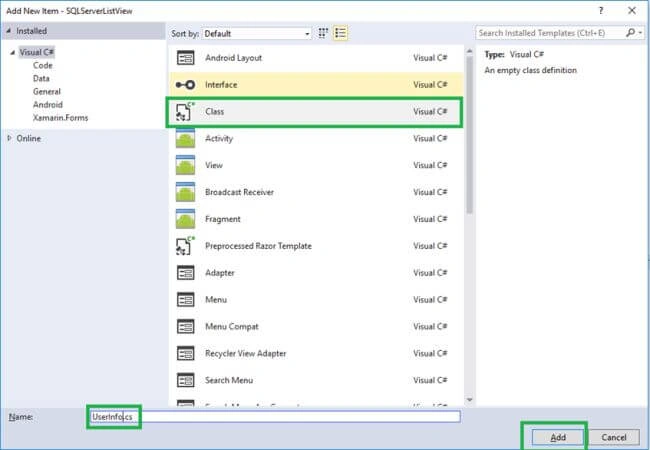
We need to assign the SQL List Values in any Class so here create new class. Go to Solution Explorer-> Project Name then Right Click to Add->New Item then open new Dialog box. Then select class File give name for UserInfo.cs
Step 8
Then open UserInfo.cs give following code.
- public class UserInfo {
- publicstring firstname {
- get;
- set;
- }
- publicstring contact_no {
- get;
- set;
- }
- }
Step 9
Afterwardsto open Solution Explorer-> Project Name->MainActivity.cs then Add below Namespaces.
- using System.Collections.Generic;
- using Newtonsoft.Json;
- using System.Net.Http.Headers;
- using System.Net.Http;
Step 10
Next to Open Solution Explorer-> Project Name->MainAtivity.cs,Open Oncreate()then implement following code
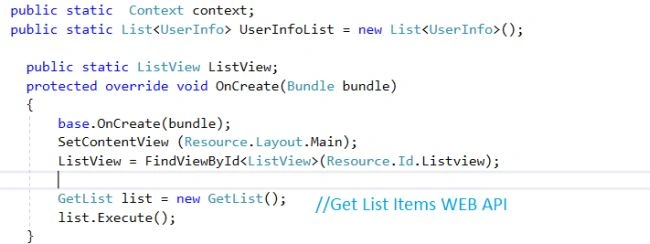
- public static Context context;
- public static List < UserInfo > UserInfoList = newList < UserInfo > ();
- public static ListView ListView;
- protected override void OnCreate(Bundle bundle) {
- base.OnCreate(bundle);
- SetContentView(Resource.Layout.Main);
- ListView = FindViewById < ListView > (Resource.Id.Listview);
- GetList list = newGetList();
- list.Execute();
- }
Step 11
Below Oncreate() declare the AsyncTask for SQL Server Data Retrieve. Here only we call and assign the values for Base Adapter .
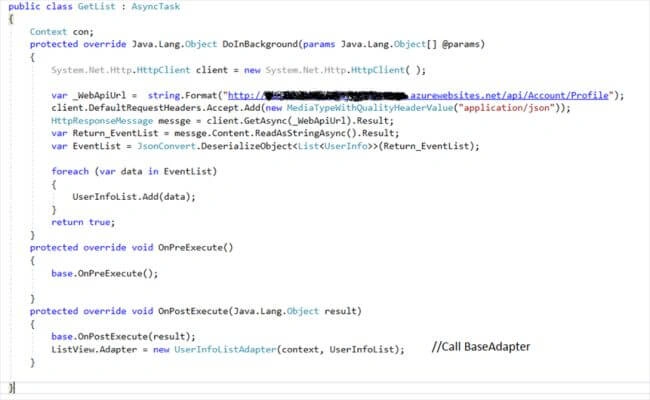
C# Code
- public class GetList: AsyncTask {
- Context con;
- protected override Java.Lang.Object DoInBackground(params Java.Lang.Object[] @params) {
- System.Net.Http.HttpClient client = new System.Net.Http.HttpClient();
- var _WebApiUrl = string.Format("https://URL/api/Account/Profile");
- client.DefaultRequestHeaders.Accept.Add(newMediaTypeWithQualityHeaderValue("application/json"));
- HttpResponseMessage messge = client.GetAsync(_WebApiUrl).Result;
- var Return_EventList = messge.Content.ReadAsStringAsync().Result;
- var EventList = JsonConvert.DeserializeObject < List < UserInfo >> (Return_EventList);
- foreach(var data in EventList) {
- UserInfoList.Add(data);
- }
- return true;
- }
- protected override void OnPreExecute() {
- base.OnPreExecute();
- }
- protected override void OnPostExecute(Java.Lang.Object result) {
- base.OnPostExecute(result);
- ListView.Adapter = newUserInfoListAdapter(context, UserInfoList);
- }
- }
Step 12
Next to create new BaseAdapter class. Declare all variables of ListViewDesign.axml here
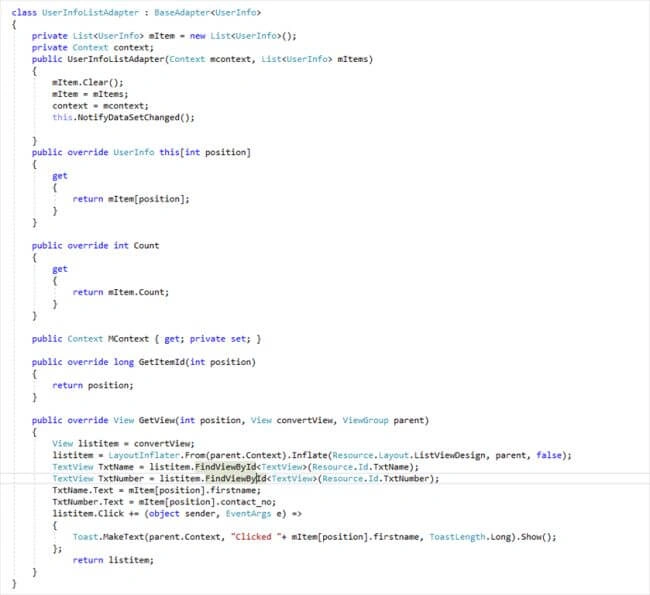
C# Code
- class UserInfoListAdapter: BaseAdapter < UserInfo > {
- private List < UserInfo > mItem = newList < UserInfo > ();
- private Context context;
- public UserInfoListAdapter(Context mcontext, List < UserInfo > mItems) {
- mItem.Clear();
- mItem = mItems;
- context = mcontext;
- this.NotifyDataSetChanged();
- }
- public override UserInfothis[int position] {
- get {
- return mItem[position];
- }
- }
- public override int Count {
- get {
- return mItem.Count;
- }
- }
- public Context MContext {
- get;
- privateset;
- }
- public override long GetItemId(int position) {
- return position;
- }
- public override View GetView(int position, View convertView, ViewGroup parent) {
- View listitem = convertView;
- listitem = LayoutInflater.From(parent.Context).Inflate(Resource.Layout.ListViewDesign, parent, false);
- TextView TxtName = listitem.FindViewById < TextView > (Resource.Id.TxtName);
- TextView TxtNumber = listitem.FindViewById < TextView > (Resource.Id.TxtNumber);
- TxtName.Text = mItem[position].firstname;
- TxtNumber.Text = mItem[position].contact_no;
- listitem.Click += (object sender, EventArgs e) => {
- Toast.MakeText(parent.Context, "Clicked " + mItem[position].firstname, ToastLength.Long).Show();
- };
- return listitem;
- }
- }
Step 13
Press F5 or Build and Run the Application

Finally, you have successfully created a Xamarin Android List View using SQL Server.
David GomezPosted Nov 12, 2019, 5:19 PM
Link download sample?
Sandeep PotePosted Jun 10, 2019, 6:52 AM
Good post, but topic of the post should be Xamarin.Android - List View - SQL Server Database using Web API as you are not connecting sql server from you app but using web api to do the needful.
Archieval GunhuranPosted Apr 2, 2019, 1:07 AM
Good Day Bro i have error in OnPostExecute(Java.Lang.Object result) object reference not set to an instance of an object pls help me
abdu alolofiPosted Feb 8, 2019, 2:40 AM
Can u doit with pagination
abdu alolofiPosted Feb 3, 2019, 10:11 AM
Can u add load more data , mean can u show first items from 1 to 10 and load more from 10 -to 20
Frank ZhuoPosted Sep 3, 2018, 10:41 AM
I got Unhandled Exception:System.AggregateException: One or more errors occurred. at client.GetAsync(_WebApiUrl).Result my webapiurl is var _WebApiUrl = string.Format("https://xamarinlogi.azurewebsites.net/api/Login"); Any idea? Thank you. Frank
Wendell RamosPosted Jun 20, 2018, 3:26 AM
Your tutorial is very helpful, I already use this to most of my activities in school. but now I having a problem, why "this.NotifyDataSetChanged();" is not working, this is the first time that I really need to use this function because my activity now is, realtime update and i think to refresh my whole list view is using this funciton "this.NotifyDataSetChanged();." Can you explain to me why it's not working and how "this.NotifyDataSetChanged();" really works? Thanks in advance :)
Jason DennehyPosted Mar 5, 2018, 7:10 AM
Hi - thanks for the article. Running in to a problem, the line: "var EventList = JsonConvert.DeserializeObject<List<UserInfo>>(Return_EventList);" throws up an error saying that the "type requires a JSON array (e.g. [1,2,3]) to deserialize correctly". What have I done wrong?
Wendell RamosPosted Feb 19, 2018, 9:03 PM
Why the data I'm getting is becoming redundant (3 times) ? the data are coming from sql server. i don't know why. please help
SAKTHI SAKTHIPosted Jan 31, 2018, 1:06 AM
Hi Very nice article. Thanks for sharing. I would like to know xamarin andriod app can be connected using sql server which is installed in the server?
Vignesh ManiPosted Aug 22, 2017, 8:22 AM
Nice article bro. THank you for sharing.
sampath tharangaPosted Aug 22, 2017, 7:43 AM
Thank bro.... for sharing ur knowledge with others.
Aegan JoshuaPosted Jul 26, 2017, 2:14 AM
HI Anbu Mani , have you tried sqlite sync with Microsoft SQL Server Management Studio or SSMS using xamarin android ?
Vaibhav PatilPosted Jun 22, 2017, 7:26 AM
Nice tuts. Please add some ' FCM with Xamarin.Android ' tutorials.
Gayathri AnbazhaganPosted Jun 21, 2017, 8:32 PM
Thank you for sharing.....nice one....
Vignesh ManiPosted Jun 21, 2017, 3:54 PM
Nice article. Thank you for sharing bro.