

What are Xamarin and Xamarin Forms?
- Xamarin is a cross-platform to develop multi-platform Applications.
- Xamarin is a shared code (C#), but separately design UI's Android (Java), Windows (C#), iOS (Objective C & Xcode).
- Xamarin forms UIs & shared code (C#) remains same with all the projects.
Prerequisites
- Visual Studio 2017 Enterprise
The steps given below are required to be followed in order to design FrameLayout View in Xamarin Android, using Microsoft Visual Studio 2017.
Step 1
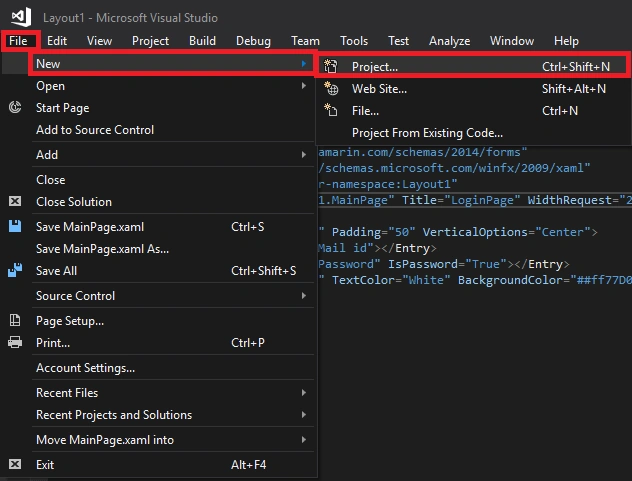
- Go to Visual Studio 2017.
- Click File -> New -> Project.
Step 2
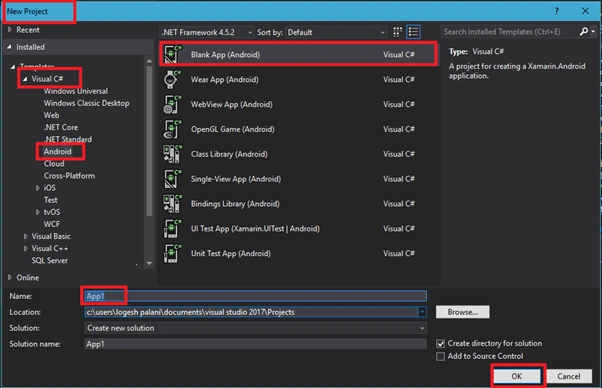
- In this step, click C# -> Android -> Blank App (Android).
- Enter the Application Name, followed by clicking Blank App = A project to create a Xamarin.Android Application.
Step 3
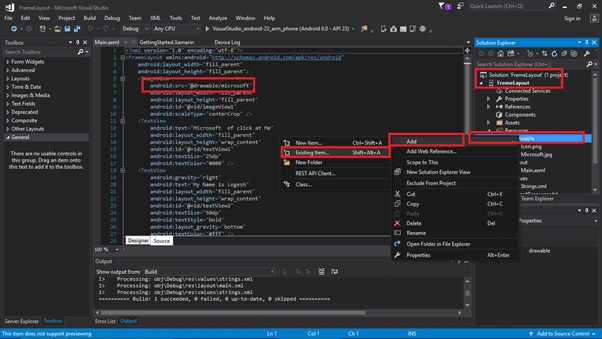
- In this step, add one image to drawable folder.
- Open Solution Explorer Window.
- Click Resources folder, followed by right clicking drawable folder. Click Add, select Existing item and add anyone image.
Step 4
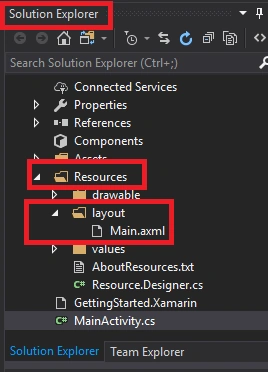
Afterwards, open Solution Explorer Window. Click Resources folder, followed by clicking Layout folder and opening axml.
Step 4
In this step, click Main.axml page, insert the code given below in Main.axml and save it.
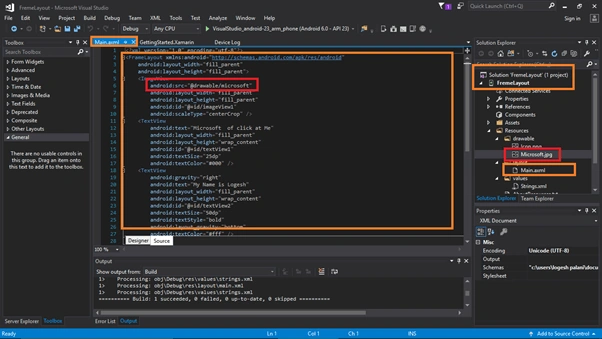
- <?xml version="1.0" encoding="utf-8"?>
- <FrameLayout xmlns:android="http://schemas.android.com/apk/res/android"
- android:layout_width="fill_parent"
- android:layout_height="fill_parent">
- <ImageView
- android:src="@drawable/microsoft"
- android:layout_width="fill_parent"
- android:layout_height="fill_parent"
- android:id="@+id/imageView1"
- android:scaleType="centerCrop" />
- <TextView
- android:text="Microsoft of click at Me"
- android:layout_width="fill_parent"
- android:layout_height="wrap_content"
- android:id="@+id/textView1"
- android:textSize="50dp"
- android:textColor="#000" />
- <TextView
- android:gravity="right"
- android:text="My Name is Logesh"
- android:layout_width="fill_parent"
- android:layout_height="wrap_content"
- android:id="@+id/textView2"
- android:textSize="50dp"
- android:textStyle="bold"
- android:layout_gravity="bottom"
- android:textColor="#fff" />
- </FrameLayout>
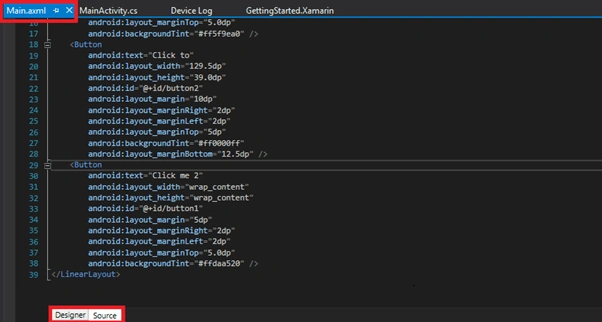
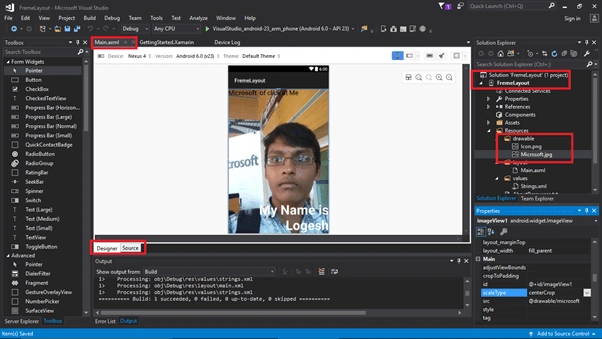
Click Main.axml Page Designer View, wait for few minutes and Designer View is visible.
The Designer View TableLayout is given below.
Step 5
In this step, click MainActivity.cs page, insert the code given below in MainActivity.cs and save it.
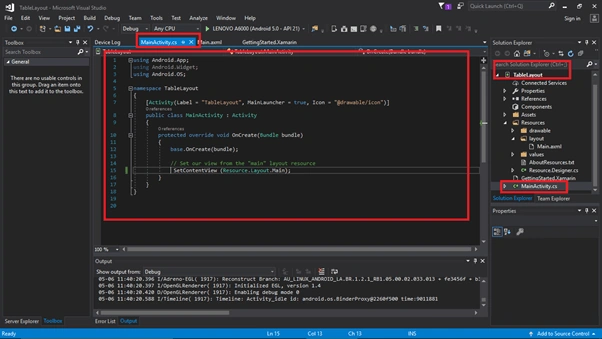
- using Android.App;
- using Android.Widget;
- using Android.OS;
- namespace TableLayout
- {
- [Activity(Label = "TableLayout", MainLauncher = true, Icon = "@drawable/icon")]
- public class MainActivity : Activity
- {
- protected override void OnCreate(Bundle bundle)
- {
- base.OnCreate(bundle);
- // Set our view from the "main" layout resource
- SetContentView (Resource.Layout.Main);
- }
- }
- }
Step 6
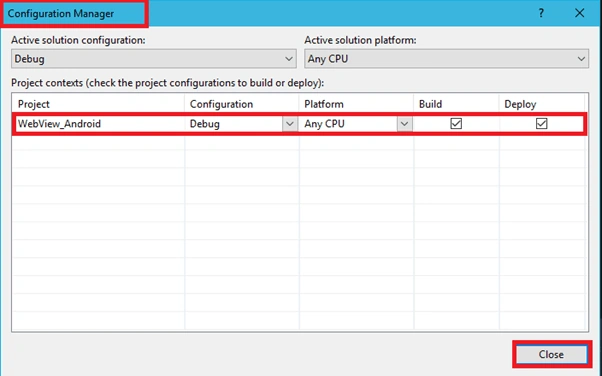
- Click Build menu, followed by selecting Configuration Manager.
- Configure your Android Application to deploy & build Setting. Click Close.
Step 7
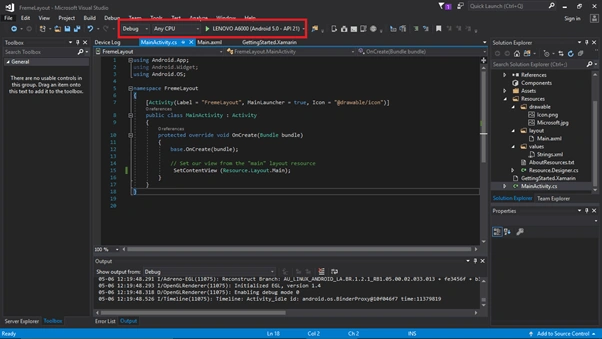
In this step, select Build & Depoly option, followed by clicking to start your Application.
Go to Run option, choose Debug, select any one simulator and run it.
Step 8
Output
- After a few seconds, the app will start running on your Android Simulator. You will see your app working, which is created successfully.

- Your FrameLayout Android Application is created succesfully.
Conclusion
Thus, we learned how to create FrameLayout Android Appliacation, using Visual Studio 2017.
Join the conversation! Your thoughts help the community grow.