

Introduction
Android is one of the most popular operating systems for mobile. You can create the database and manipulate the data in Android apps using SQLite. The database is used to store and retrieve the data. Here, I will show you how to work with SQLite in Android applications using Android Studio.
Requirements
- Android Studio
- Little knowledge of XML and Java.
- Android Emulator (or) Android mobile
- Download link (Android Studio)
Steps to be followed
Carefully follow the below steps to work with SQLite Android applications using Android Studio, and I have included the source code below.
Step 1
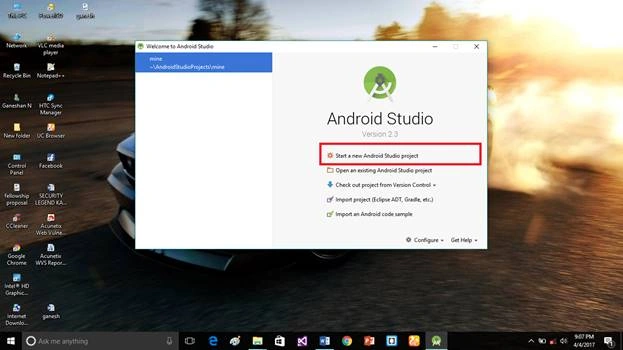
Open Android Studio and start a new project.
 Step 2
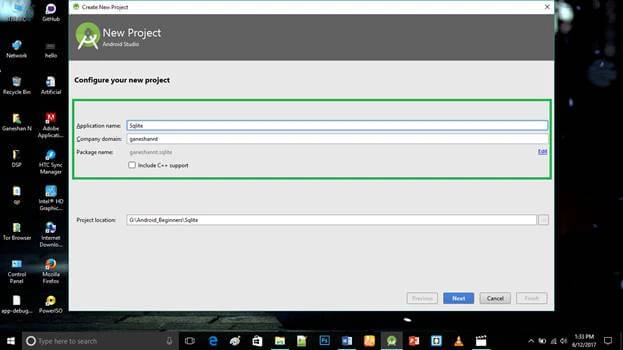
Put the application name and company domain. If you wish to use C++ for coding the project, mark the "Include C++ support" checkbox and click Next.
 Step 3
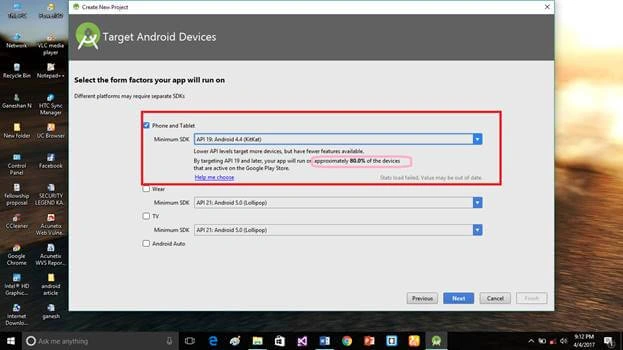
Select the Android minimum SDK version. After you chose the minimum SDK, it will show the approximate percentage of people using that SDK. Then, click Next.
 Step 4
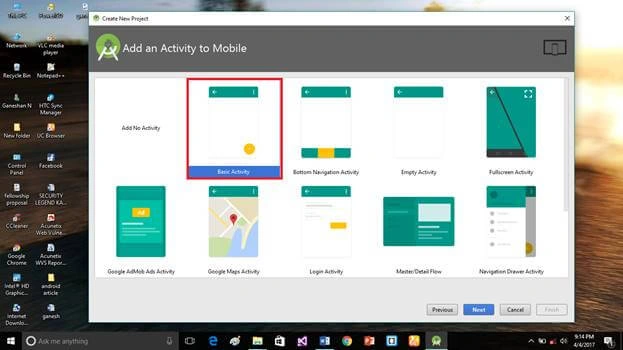
Choose "Basic Activity" and click Next.
 Step 5
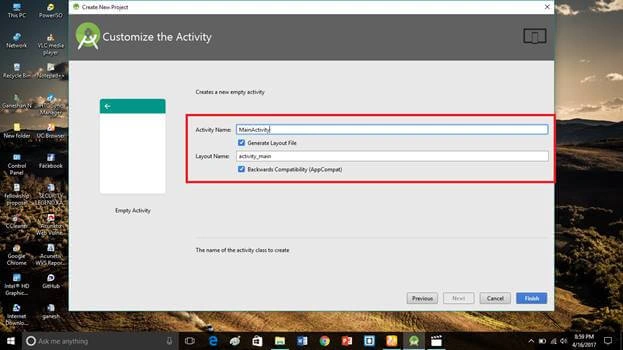
Put the activity name and layout name. Android Studio basically takes the java class name that you provide as an activity name. Click Finish.
 Step 6
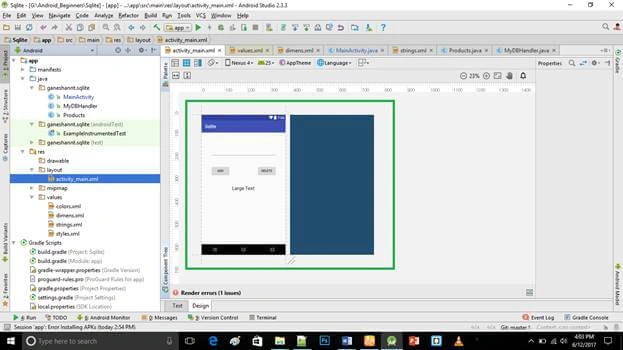
Go to activity_main.xml and click the text button. This XML file contains the designing code for the Android app. Into the activity_main.xml, copy and paste the below code.
Activity_main.xml code
- <RelativeLayout xmlns:android="http://schemas.android.com/apk/res/android"
- xmlns:tools="http://schemas.android.com/tools" android:layout_width="match_parent"
- android:layout_height="match_parent" android:paddingLeft="@dimen/activity_horizontal_margin"
- android:paddingRight="@dimen/activity_horizontal_margin"
- android:paddingTop="@dimen/activity_vertical_margin"
- android:paddingBottom="@dimen/activity_vertical_margin" tools:context=".MainActivity">
- <EditText
- android:layout_width="wrap_content"
- android:layout_height="wrap_content"
- android:id="@+id/user_Input"
- android:layout_alignParentTop="true"
- android:layout_centerHorizontal="true"
- android:layout_marginTop="69dp"
- android:width="300dp"
- android:inputType=""
- tools:ignore="LabelFor" />
- <Button
- android:layout_width="wrap_content"
- android:layout_height="wrap_content"
- android:text="@string/add"
- android:id="@+id/add_Button"
- android:layout_below="@+id/user_Input"
- android:layout_alignStart="@+id/user_Input"
- android:layout_marginTop="40dp"
- android:onClick="addButtonClicked" />
- <Button
- android:layout_width="wrap_content"
- android:layout_height="wrap_content"
- android:text="@string/delete"
- android:id="@+id/delete_Button"
- android:layout_alignTop="@+id/add_Button"
- android:layout_alignEnd="@+id/user_Input"
- android:onClick="deleteButtonClicked" />
- <TextView
- android:layout_width="wrap_content"
- android:layout_height="wrap_content"
- android:textAppearance="?android:attr/textAppearanceLarge"
- android:text="Large Text"
- android:id="@+id/records_TextView"
- android:layout_centerVertical="true"
- android:layout_centerHorizontal="true" />
- </RelativeLayout>
- package ganeshannt.sqlite;
- import android.app.Activity;
- import android.os.Bundle;
- import android.view.View;
- import android.widget.EditText;
- import android.widget.TextView;
- public class MainActivity extends Activity {
- // Declare references
- EditText userInput;
- TextView recordsTextView;
- MyDBHandler dbHandler;
- @Override
- protected void onCreate(Bundle savedInstanceState) {
- super.onCreate(savedInstanceState);
- setContentView(R.layout.activity_main);
- userInput = (EditText) findViewById(R.id.user_Input);
- recordsTextView = (TextView) findViewById(R.id.records_TextView);
- dbHandler = new MyDBHandler(this, null, null, 1);
- printDatabase();
- }
- //Print the database
- public void printDatabase(){
- String dbString = dbHandler.databaseToString();
- recordsTextView.setText(dbString);
- userInput.setText("");
- }
- //add your elements onclick methods.
- //Add a product to the database
- public void addButtonClicked(View view){
- // dbHandler.add needs an object parameter.
- Products product = new Products(userInput.getText().toString());
- dbHandler.addProduct(product);
- printDatabase();
- }
- //Delete items
- public void deleteButtonClicked(View view){
- // dbHandler delete needs string to find in the db
- String inputText = userInput.getText().toString();
- dbHandler.deleteProduct(inputText);
- printDatabase();
- }
- }
Step 8
Create a new MyDBHelper.java file (File ⇒ New ⇒Java class).
In MyDBHelper.java, copy and paste the below code. Java programming contains SQLite query. Do not replace your package name, otherwise, the app will not run.
MyDBHelper.java code
- package ganeshannt.sqlite;
- // This class handles all the database activities
- import android.database.sqlite.SQLiteDatabase;
- import android.database.sqlite.SQLiteOpenHelper;
- import android.database.Cursor;
- import android.content.Context;
- import android.content.ContentValues;
- public class MyDBHandler extends SQLiteOpenHelper{
- private static final int DATABASE_VERSION = 1;
- private static final String DATABASE_NAME = "productDB.db";
- public static final String TABLE_PRODUCTS = "products";
- public static final String COLUMN_ID = "_id";
- public static final String COLUMN_PRODUCTNAME = "productname";
- //We need to pass database information along to superclass
- public MyDBHandler(Context context, String name, SQLiteDatabase.CursorFactory factory, int version) {
- super(context, DATABASE_NAME, factory, DATABASE_VERSION);
- }
- @Override
- public void onCreate(SQLiteDatabase db) {
- String query = "CREATE TABLE " + TABLE_PRODUCTS + "(" +
- COLUMN_ID + " INTEGER PRIMARY KEY AUTOINCREMENT, " +
- COLUMN_PRODUCTNAME + " TEXT " +
- ");";
- db.execSQL(query);
- }
- //Lesson 51
- @Override
- public void onUpgrade(SQLiteDatabase db, int oldVersion, int newVersion) {
- db.execSQL("DROP TABLE IF EXISTS " + TABLE_PRODUCTS);
- onCreate(db);
- }
- //Add a new row to the database
- public void addProduct(Products product){
- ContentValues values = new ContentValues();
- values.put(COLUMN_PRODUCTNAME, product.get_productname());
- SQLiteDatabase db = getWritableDatabase();
- db.insert(TABLE_PRODUCTS, null, values);
- db.close();
- }
- //Delete a product from the database
- public void deleteProduct(String productName){
- SQLiteDatabase db = getWritableDatabase();
- db.execSQL("DELETE FROM " + TABLE_PRODUCTS + " WHERE " + COLUMN_PRODUCTNAME + "=\"" + productName + "\";");
- }
- // this is goint in record_TextView in the Main activity.
- public String databaseToString(){
- String dbString = "";
- SQLiteDatabase db = getWritableDatabase();
- String query = "SELECT * FROM " + TABLE_PRODUCTS + " WHERE 1";// why not leave out the WHERE clause?
- //Cursor points to a location in your results
- Cursor recordSet = db.rawQuery(query, null);
- //Move to the first row in your results
- recordSet.moveToFirst();
- //Position after the last row means the end of the results
- while (!recordSet.isAfterLast()) {
- // null could happen if we used our empty constructor
- if (recordSet.getString(recordSet.getColumnIndex("productname")) != null) {
- dbString += recordSet.getString(recordSet.getColumnIndex("productname"));
- dbString += "\n";
- }
- recordSet.moveToNext();
- }
- db.close();
- return dbString;
- }
- }
Step 9
Create a new Products.java file (File ⇒ New ⇒Java class).
In the Products.java file, copy and paste the below code. Do not replace your package name otherwise, the app will not run.
Products.java code
- package ganeshannt.sqlite;
- public class Products {
- private int _id;
- private String _productname;
- //Added this empty constructor in lesson 50 in case we ever want to create the object and assign it later.
- public Products(){
- }
- public Products(String productName) {
- this._productname = productName;
- }
- public int get_id() {
- return _id;
- }
- public void set_id(int _id) {
- this._id = _id;
- }
- public String get_productname() {
- return _productname;
- }
- public void set_productname(String _productname) {
- this._productname = _productname;
- }
- }
Step 10
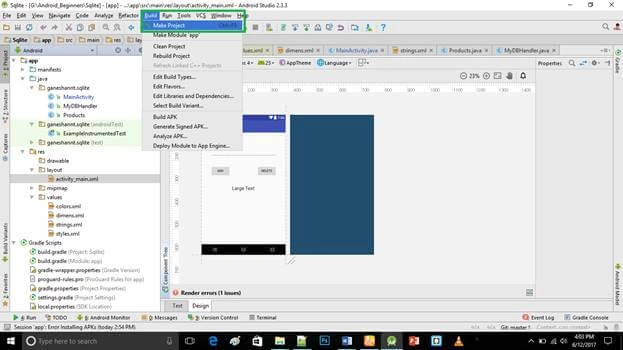
Click the "Make Project" option and run the project.
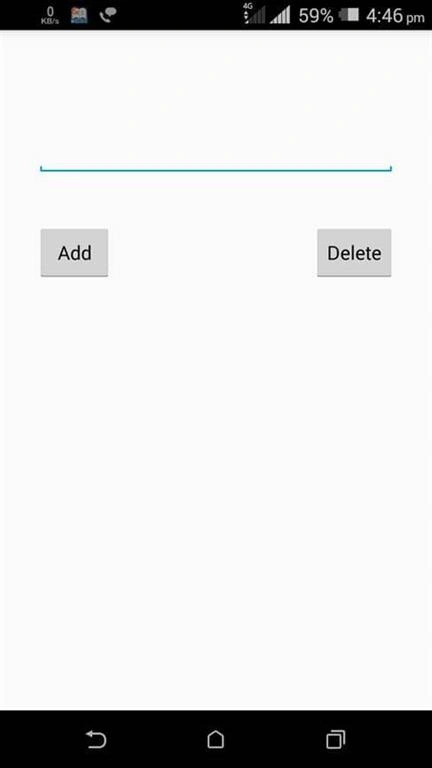
Here, we have successfully created a Text entry application.
 Add data
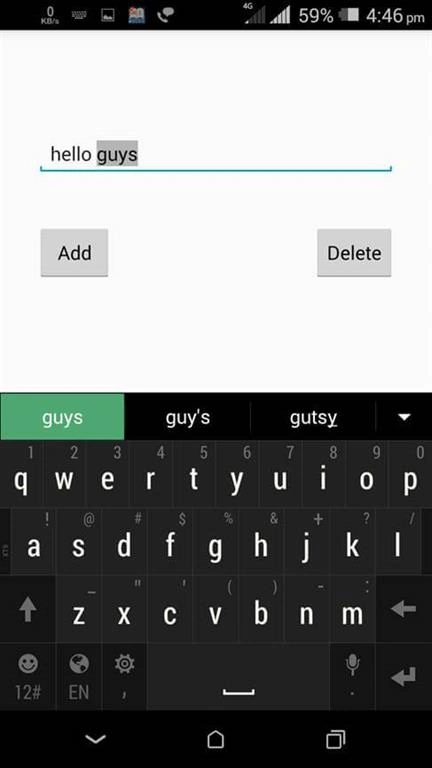
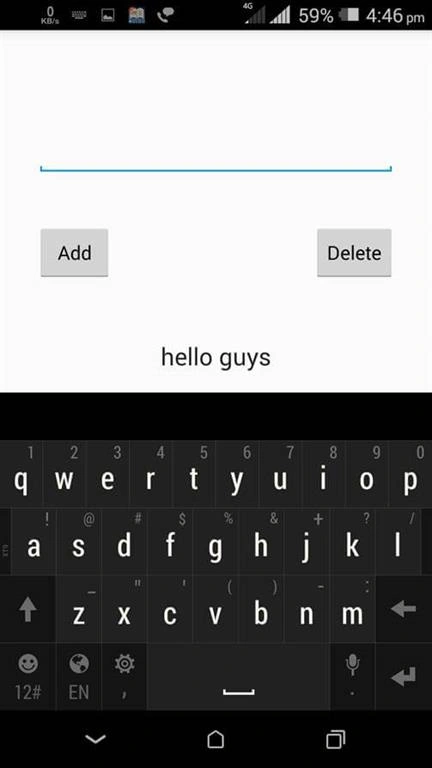 Delete data
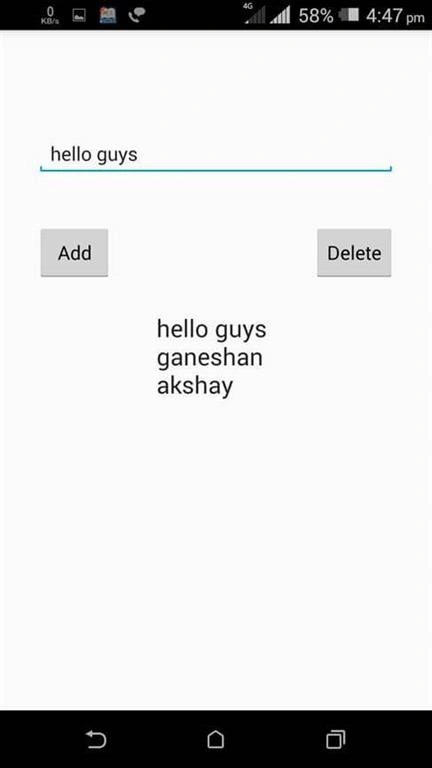 Deleted
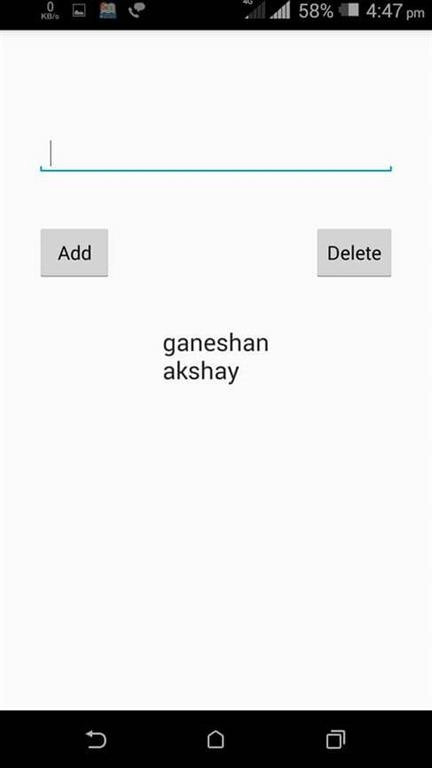 Don’t forget to like and follow me. If you have any doubt, just comment below.
Source code
https://github.com/GaneshanNT/sqlite
Rushi MehtaPosted Oct 22, 2018, 11:01 PM
Thanks this will help me in my project
deepak aPosted Jun 17, 2017, 6:36 AM
Interesting article......
Saravanakumar SekaranPosted Jun 14, 2017, 11:30 AM
Wow superb article !!!