

In this article, we will learn how to create an MS Access file & display the Data using Data Grid Option.
What is ADO CONTROL?
- ADO stands for ActiveX Data Object.
- The ADO Data Control is similar to the intrinsic data control and remote data control (RDC).
- The ADO Controls quickly create a connection to a database.
- Is an application program interface.
- Writing Windows applications get access to a relational or nonrelational database.
What are ADO.NET controls?
- .NET provides a bridge between the front-end controls and the back-end database.
- .NET objects encapsulate all the data access operations and the controls interact with these objects to display data, thus hiding the details of the movement of data.
- ADO.NET has three advantages - interoperability, scalability, and productivity.
Goals of ADO.NET
- To provide a disconnected data architecture, in addition, to support to the connected operation.
- Integrates tightly with XML.
- Interacts with a Variety of data sources through a common data representation.
- Optimizes data source access.
USE of ADO.NET
- To connect a front-end design and back-end database.
Need for Requirements
- Microsoft Access
- Visual Studio 2010 (any version)
- Windows Forms Application.
How to Connect ADO.net Connection in Visual Studio Windows Form Application in Step by step
Step 1
To Create an MS Access file
- Go to Start → All program → Microsoft office → Microsoft Access.
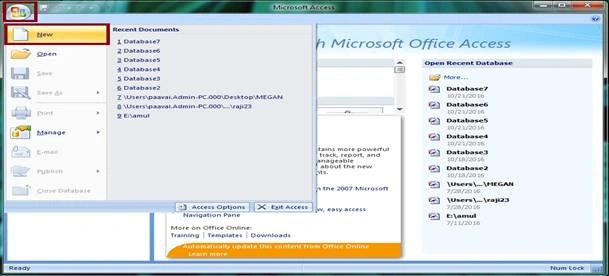
- Click the office button → New file
Step 2
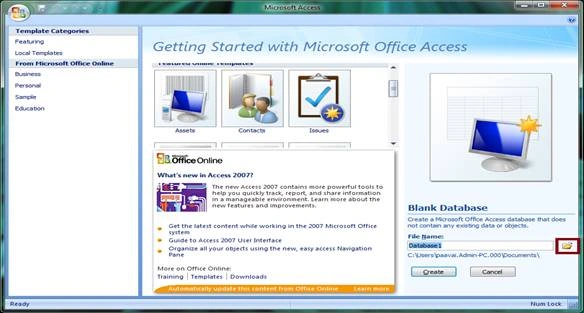
- After creating a new file, click on the Browse icon on the screen.
Step 3
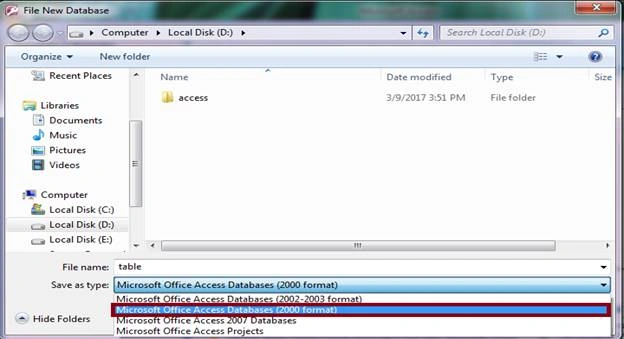
- Create a new table and choose Microsoft Access Database (2000 format).
Step 4
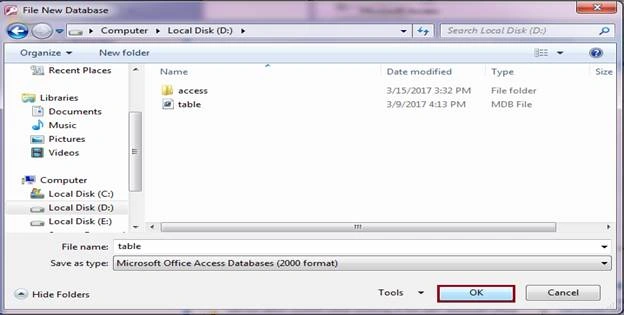
- Next, click OK button for the given tab.
Step 5
- Click the Create option.
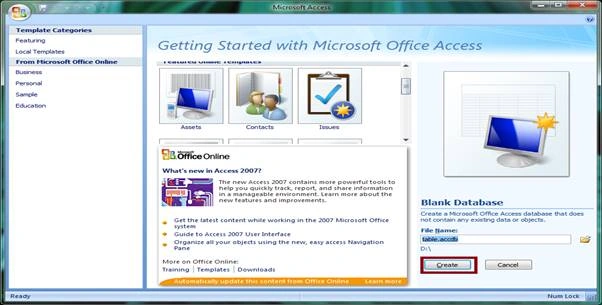
Step 7
- Now, the new table will be created in Database. Fill data in the new table.
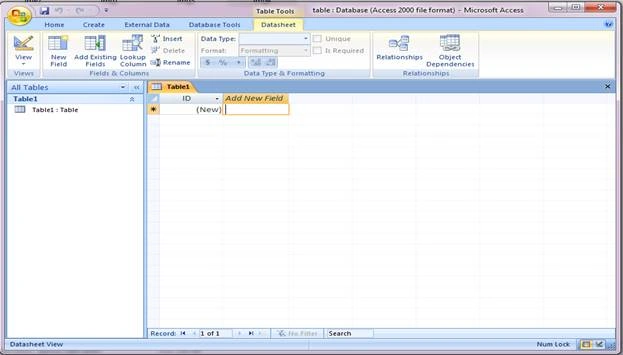
Step 8
- After filling the Data in Database, just Save that.
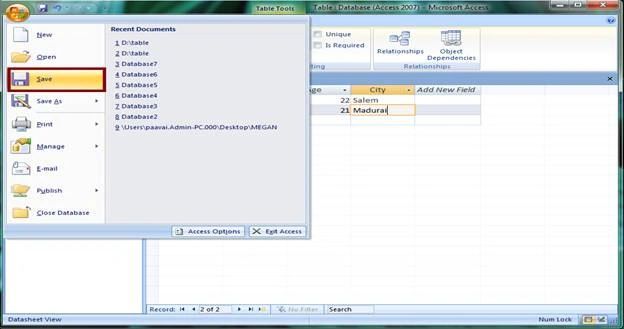
Step 9
- One dialog box will be open. Enter the table name for the given Data and press OK.
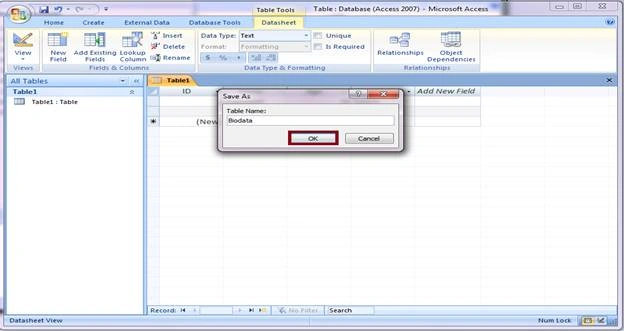
Step 10
- To create the Windows form Application to Display the content.
- Start → visual studio 2010 (any version) → New project → Windows form Application.
- Give the file name in your particular database name.
- Press ok to create a new form.
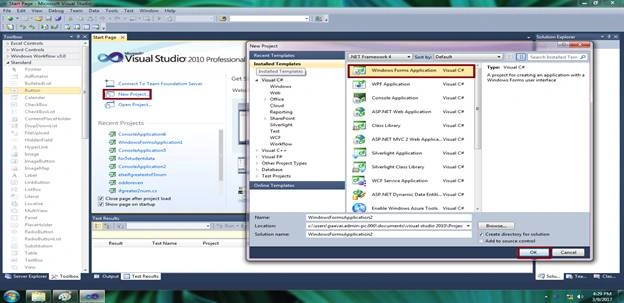
Step 11
- The new form will open.
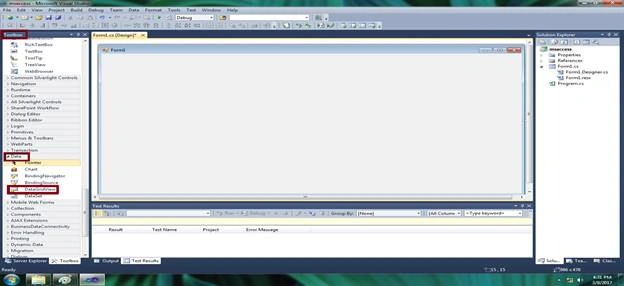
Step 12
- To draw the data grid view control on the form.
- In that control will be a toolbox.
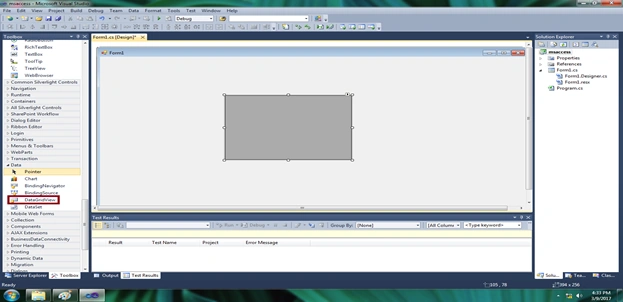
Step 13
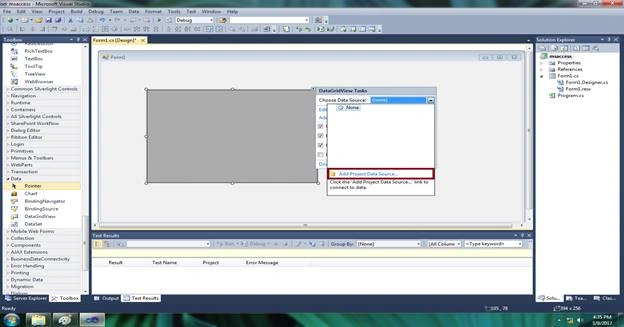
- To click on the top of the data grid view icon.
- And click choose data source
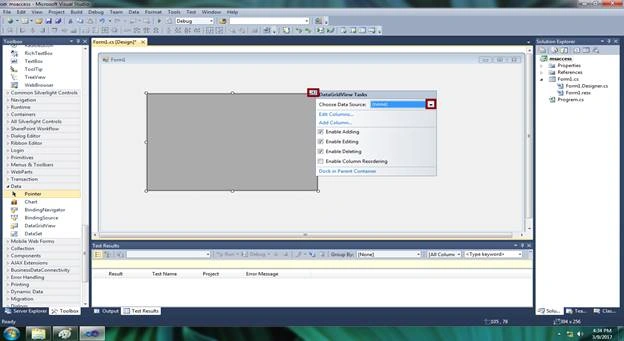
Step 14
- To click the Add project data source option.
Step 15
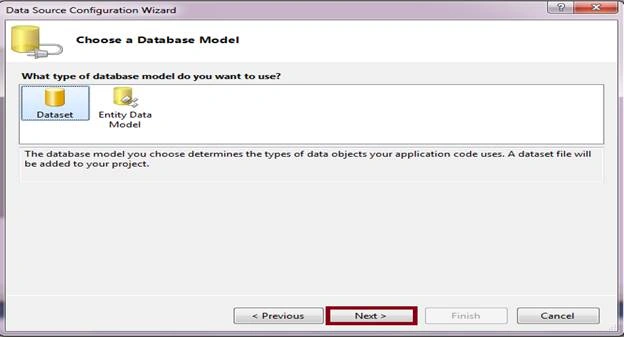
- The data source configuration wizard dialog box will be open to clicking the next button.
Step 16
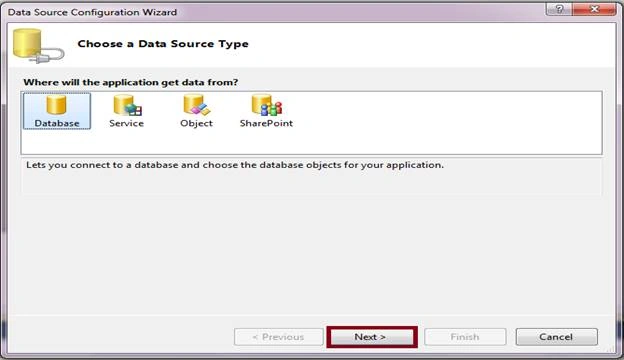
- The database icon will be selected and click the next button.
Step 17
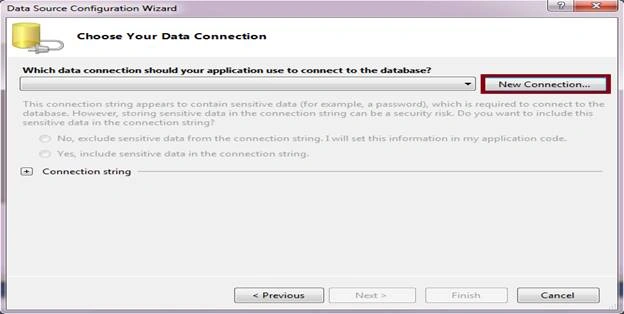
- Select a new connection button to select a database.
Step 18
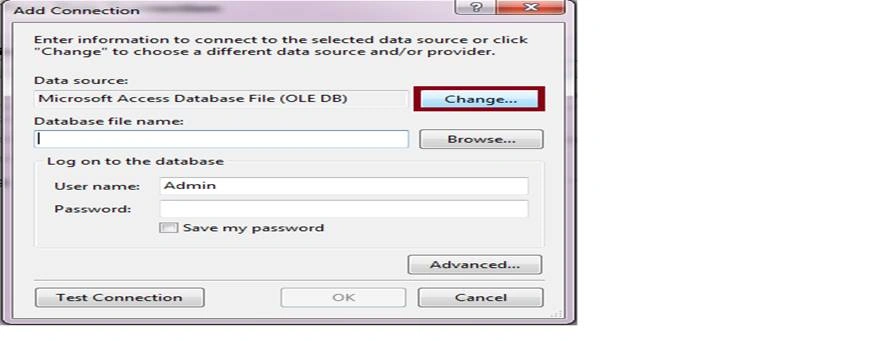
- Click the change option
Step 19
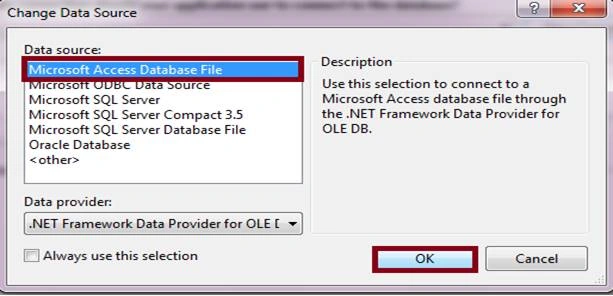
- Choose Microsoft Access Database File (OLE DB).
- Click the ok button.
Step 20
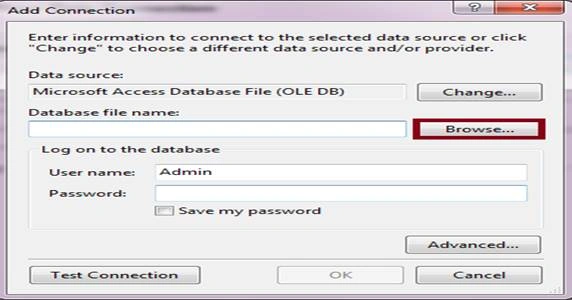
- After selecting the browse option select the saved table (Access file).
Step 21
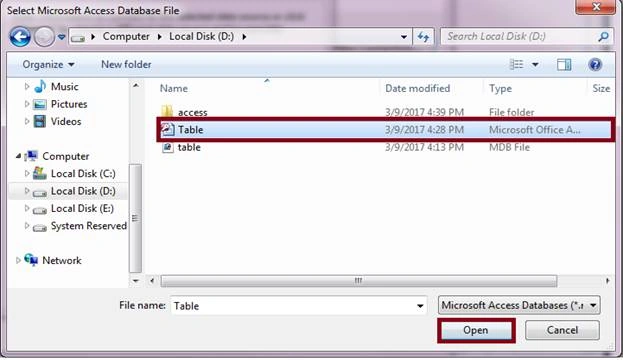
- To select the already saved file.
- Click the open button.
Step 22
- The data source configuration wizard dialog box will open and click the next button.
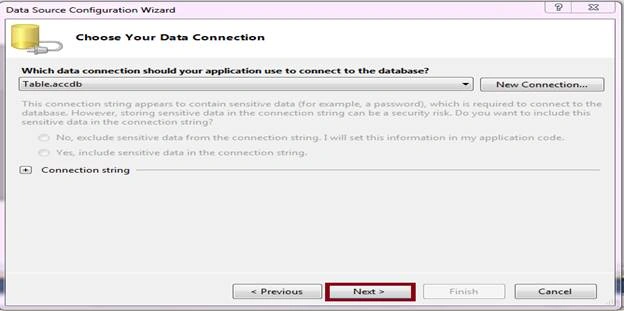
Step 23
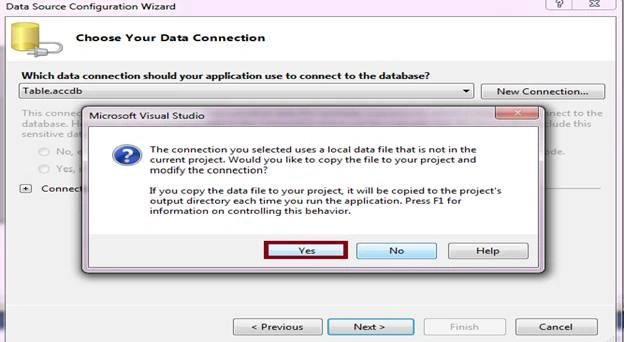
One dialog box will open and click the yes button.
Step 24
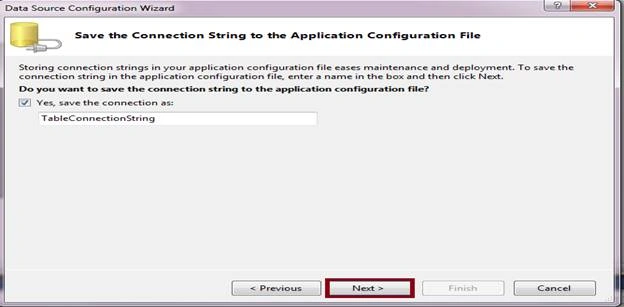
- The data source configuration wizard dialog box will open and click the next button.
Step 25
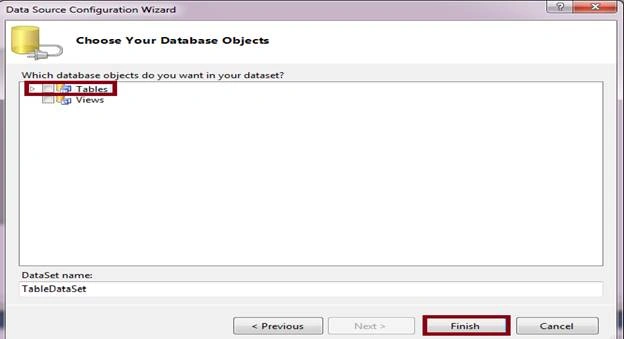
- To select the tables option in this given window.
Step 26
- To open the form design page.
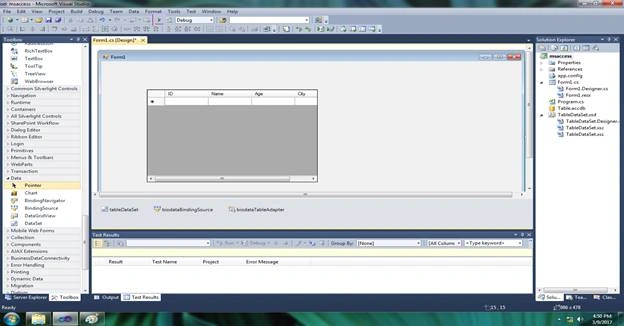
Step 27
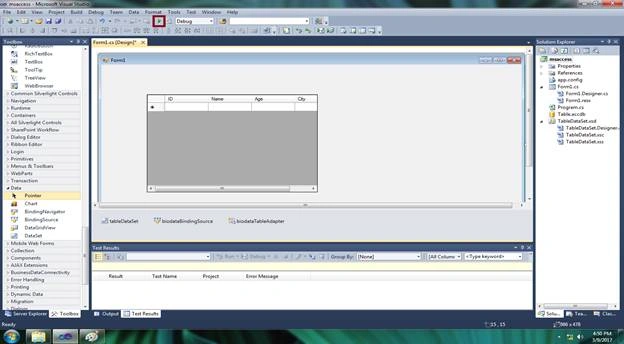
- Run the given program to press the F5 key (or) click the run option.
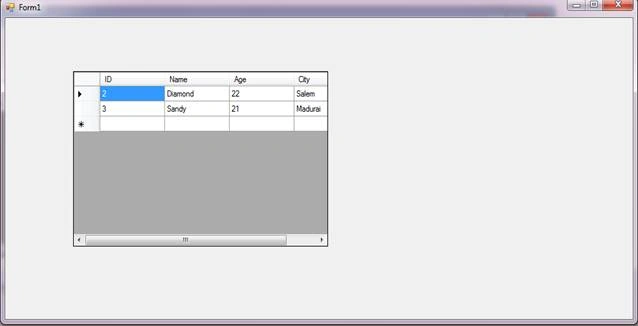
OUTPUT
- The output will be displayed in the Data Grid view box.
paul selviPosted Aug 27, 2019, 5:50 AM
Thank u very much ....
Mohammed AkhtarPosted Mar 19, 2018, 9:51 AM
Thank you so much, Very nice work.
Diamondantony JosephPosted Apr 7, 2017, 9:12 AM
Thank you so much mam...
Alagunila MeganathanPosted Apr 6, 2017, 2:12 PM
Nice one...Keep learning Diamond...Good Start...
Gayathri AnbazhaganPosted Apr 5, 2017, 7:26 AM
Nice....thanks for sharing
Manav PandyaPosted Apr 4, 2017, 11:24 PM
Thanks for sharing sir ...