

Introduction
In this article, we are going to create a Wave View in Android using Android Studio. It is a type of library which makes a wave in the UI. By using this, we can show the progress status in percentage. This view is widely used in mobile apps.
Step 1
Create a new project in Android Studio.
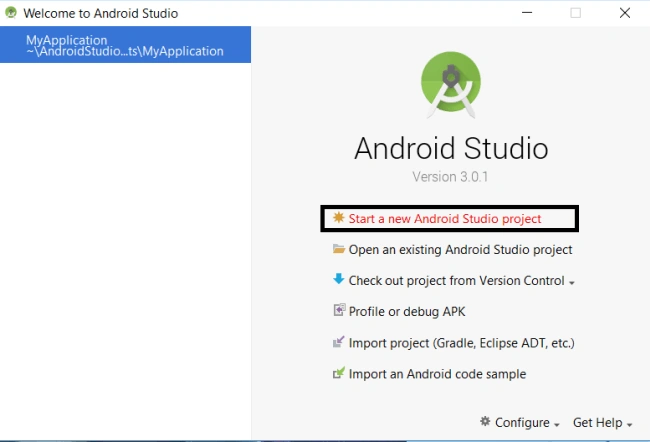
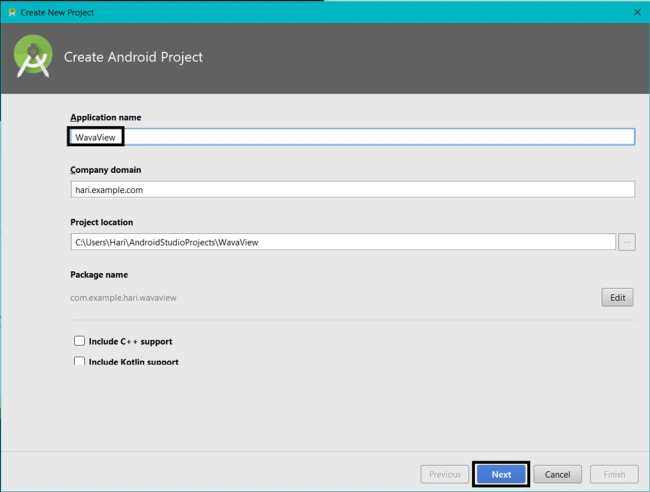
Give a name to the project and click "Next".
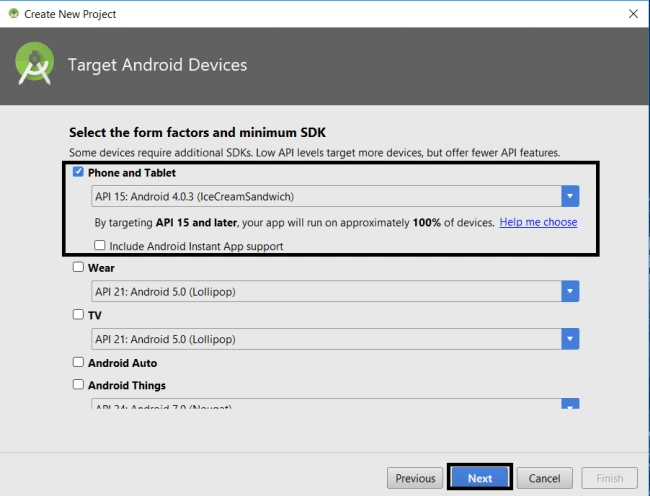
Select the "Phone and Tablet" option and click "Next".
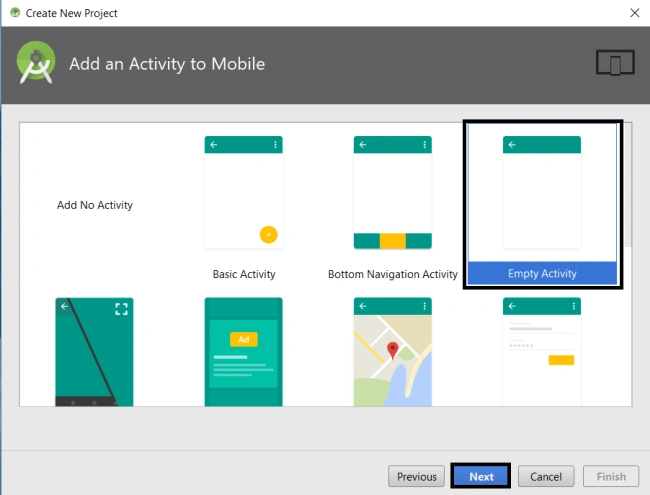
Select an empty activity and click "Next".
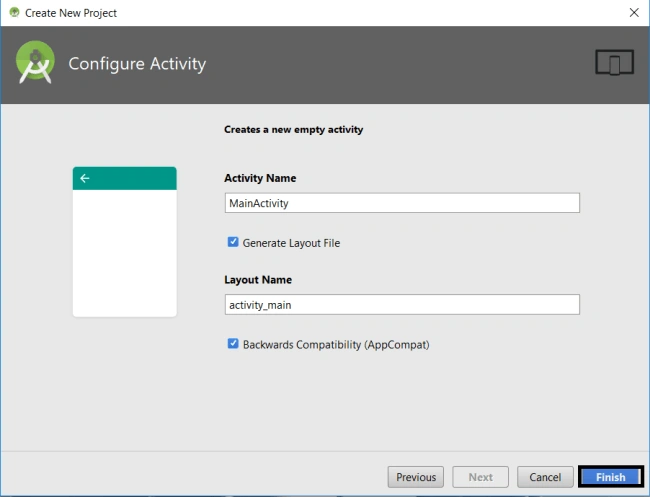
At last, give the activity a name and click on "Finish".
Step 2
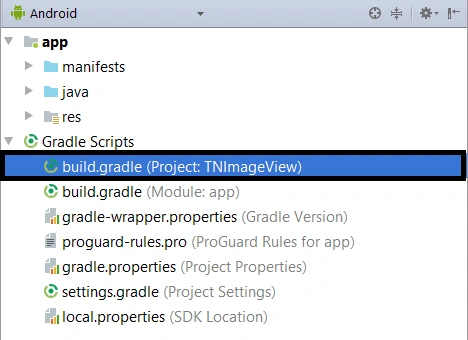
Locate the Gradle Scripts>>Build. Gradle 1.
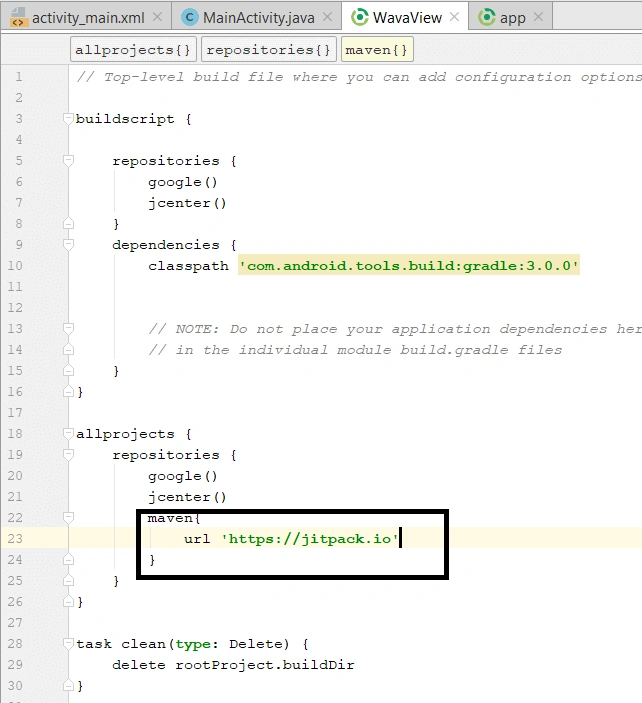
And, type the following dependency in your app's build.gradle.
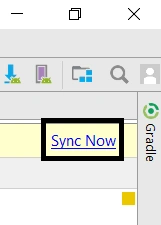
Then, Click the sync button in the top right corner and repeat this for step 3.
Code copy is here,
- maven{
- url 'https://jitpack.io'
- }
Step 3
Locate the Gradle Scripts>>Build. Gradle 2.
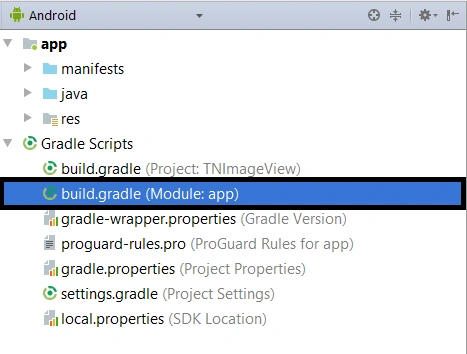
Type the following dependency in your app's build.gradle.
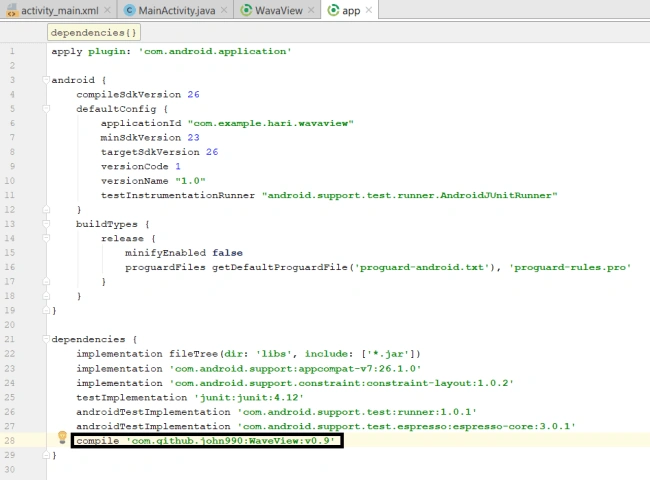
The code copy is here.
- compile 'com.github.john990:WaveView:v0.9'
Step 4
Next, go to app >> res >> layout >> activity_main.xml. Select activity page.
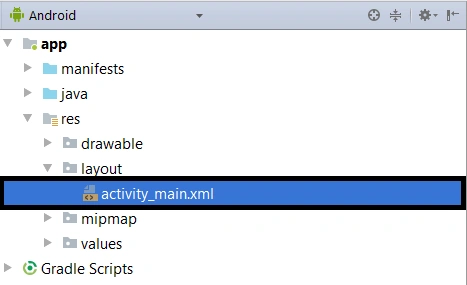
Just type the code as following.
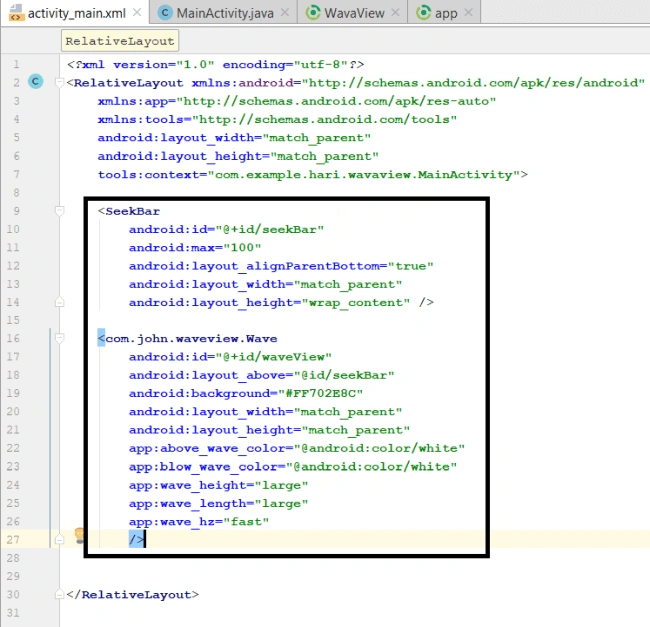
The code copy is here.
- <SeekBar
- android:id="@+id/seekBar"
- android:max="100"
- android:layout_alignParentBottom="true"
- android:layout_width="match_parent"
- android:layout_height="wrap_content" />
- <com.john.waveview.Wave
- android:id="@+id/waveView"
- android:layout_above="@id/seekBar"
- android:background="#FF702E8C"
- android:layout_width="match_parent"
- android:layout_height="match_parent"
- app:above_wave_color="@android:color/white"
- app:blow_wave_color="@android:color/white"
- app:wave_height="large"
- app:wave_length="large"
- app:wave_hz="fast"
- />
Step 5
Next, go to app >> java>>Mainactivity.java. Select Mainactivity page.
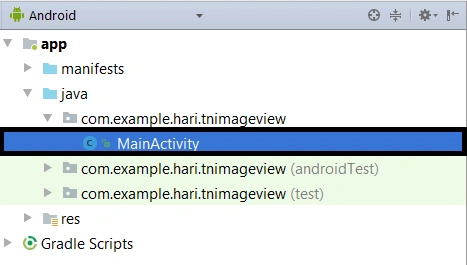
And just type the code as follows
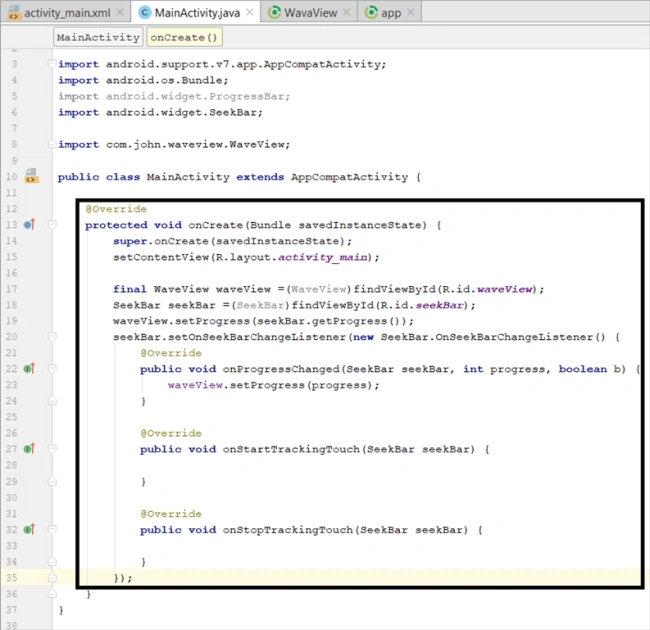
- import com.john.waveview.WaveView;
- public class MainActivity extends AppCompatActivity {
- @Override
- protected void onCreate(Bundle savedInstanceState) {
- super.onCreate(savedInstanceState);
- setContentView(R.layout.activity_main);
- final WaveView waveView =(WaveView)findViewById(R.id.waveView);
- SeekBar seekBar =(SeekBar)findViewById(R.id.seekBar);
- waveView.setProgress(seekBar.getProgress());
- seekBar.setOnSeekBarChangeListener(new SeekBar.OnSeekBarChangeListener() {
- @Override
- public void onProgressChanged(SeekBar seekBar, int progress, boolean b) {
- waveView.setProgress(progress);
- }
- @Override
- public void onStartTrackingTouch(SeekBar seekBar) {
- }
- @Override
- public void onStopTrackingTouch(SeekBar seekBar) {
- }
- });
Step 6
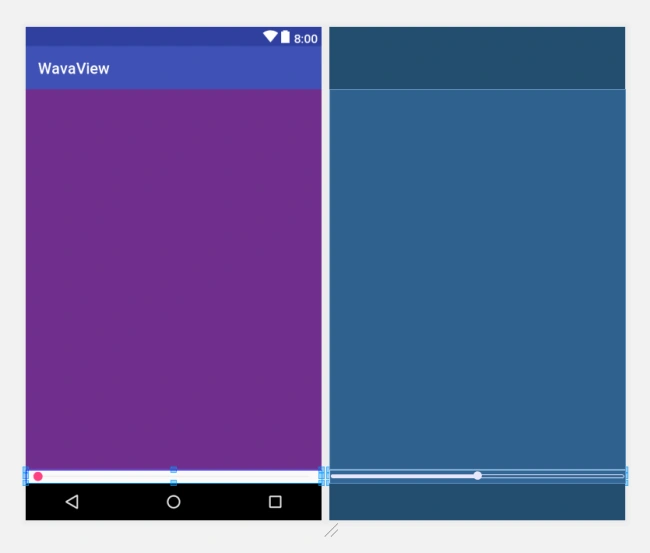
Verify the preview.

After the code is applied, the preview will appear like this.
Step 7
Next, go to Android Studio and deploy the application. Select an Emulator or your mobile with USB debugging enabled. Give it a few seconds to make installations and set permissions.
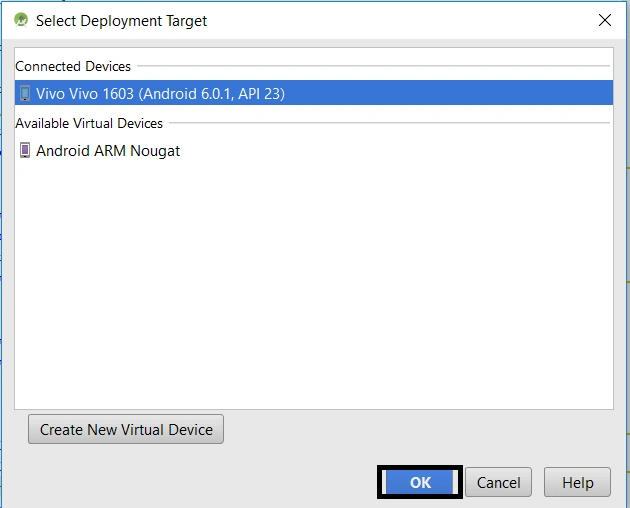
Run the application in your desired emulator (Shift + F10).
Explanation of source code
The source code used in the activitymain.xml file will insert the Wave View into the app and render the animation with attributes given.
Summary
We have just created the app to see how the Wave View works and learned where to use it.
*Support and Share, Thank you*
Join the conversation! Your thoughts help the community grow.