

Introduction
Virtual Local Area Networks (VLANs) are an important part of modern computer networks. They let network administrators split one physical network into smaller, separate networks. By setting up VLANs on a Cisco switch, administrators can make the network more secure, cut down unnecessary traffic, and improve performance.
This article gives a simple explanation of VLANs and shows step-by-step how to set them up on Cisco switches using the Command-Line Interface (CLI).
VLAN Ranges on Catalyst Switches
Creating VLANs is mainly about typing the right commands. This section explains how to set up and check different types of VLANs.
Different Cisco Catalyst switches can support many VLANs. The number is usually more than enough for most companies. For example, Catalyst 2960 and 3650 switches can handle more than 4,000 VLANs.
Normal range VLANs are numbered 1 to 1,005
Extended range VLANs are numbered 1,006 to 4,094
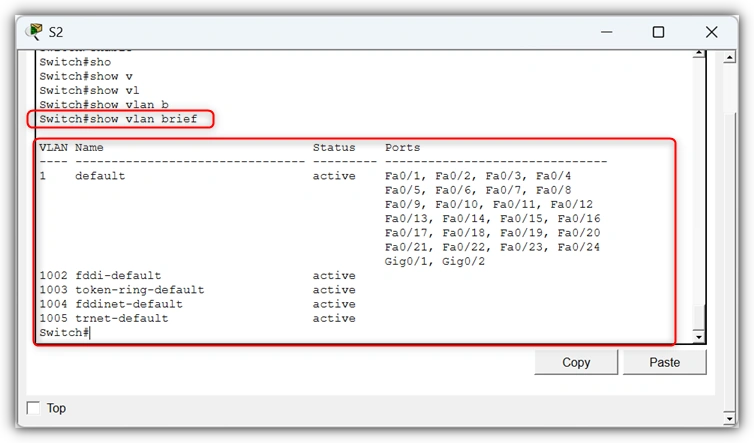
The diagram shows the default VLANs on a Catalyst 2960 switch using Cisco IOS Release 15.x.
Normal Range VLANs
Main points about normal range VLANs:
Used in most small, medium, and large business networks.
VLAN IDs go from 1 to 1005.
IDs 1002 to 1005 are reserved for old technologies (like Token Ring and FDDI).
VLAN IDs 1 and 1002–1005 are created automatically and cannot be deleted.
Their settings are saved in the switch’s flash memory in a file called vlan.dat.
When using VLAN Trunking Protocol (VTP), switches can share and sync VLAN information.
Extended Range VLANs
Main points about extended range VLANs:
Used by internet service providers (ISPs) and very large global companies.
VLAN IDs go from 1006 to 4094.
Their settings are saved in the running configuration by default.
They support fewer features than the normal range of VLANs.
To use extended range VLANs, the switch must be set to VTP transparent mode.
Note. The maximum VLAN ID is 4096, because the VLAN ID field in the IEEE 802.1Q header uses 12 bits.
VLAN Configuration
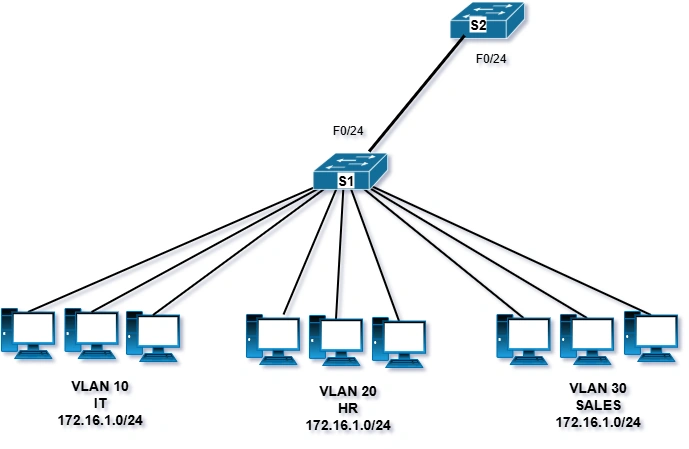
We will create four VLANs on a Cisco switch. For this demonstration, we will use Packet Tracer.
IT
HR
SALES
GUEST
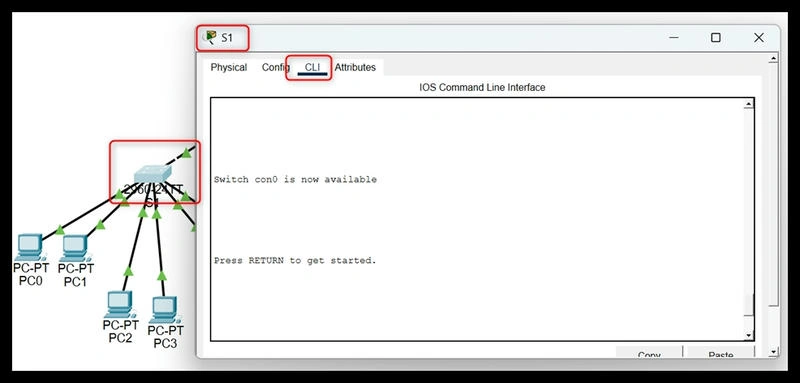
Step 1. Open the Switch
Go to Packet Tracer.
Then, select the S1 switch.
Next, click on the CLI tab.
S1> enable
S1#
Step 2. Go to Configuration Mode
S1# configure terminal
S1(config)#
Step 3. Create VLANs
S1(config)# vlan 10
S1(config-vlan)# name IT
S1(config-vlan)# exit

S1(config)# vlan 20
S1(config-vlan)# name HR
S1(config-vlan)# exit

S1(config)# vlan 30
S1(config-vlan)# name SALES
S1(config-vlan)# exit

S1(config)# vlan 40
S1(config-vlan)# name GUEST
S1(config-vlan)# exit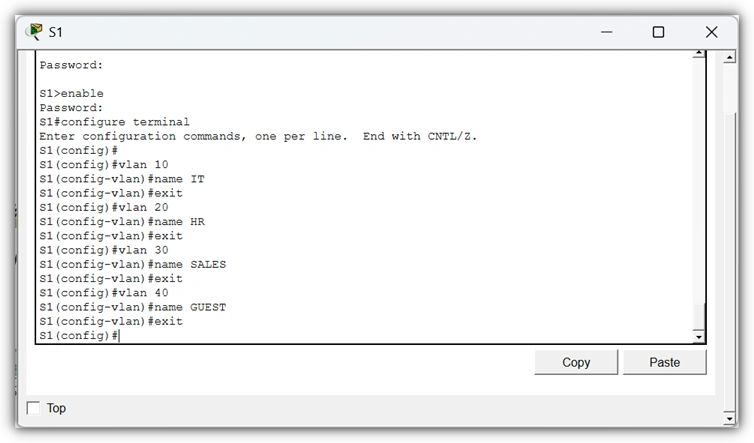
Step 4. Assign VLANs to Ports
IT VLAN
S1(config)# interface range fa0/1 - 5
S1(config-if-range)# switchport mode access
S1(config-if-range)# switchport access vlan 10
S1(config-if-range)# exit
HR VLAN
S1(config)# interface range fa0/6 - 10
S1(config-if-range)# switchport mode access
S1(config-if-range)# switchport access vlan 20
S1(config-if-range)# exit
SALES VLAN
S1(config)# interface range fa0/11 - 15
S1(config-if-range)# switchport mode access
S1(config-if-range)# switchport access vlan 30
S1(config-if-range)# exit
GUEST VLAN
S1(config)# interface range fa0/16 - 20
S1(config-if-range)# switchport mode access
S1(config-if-range)# switchport access vlan 40
S1(config-if-range)# exit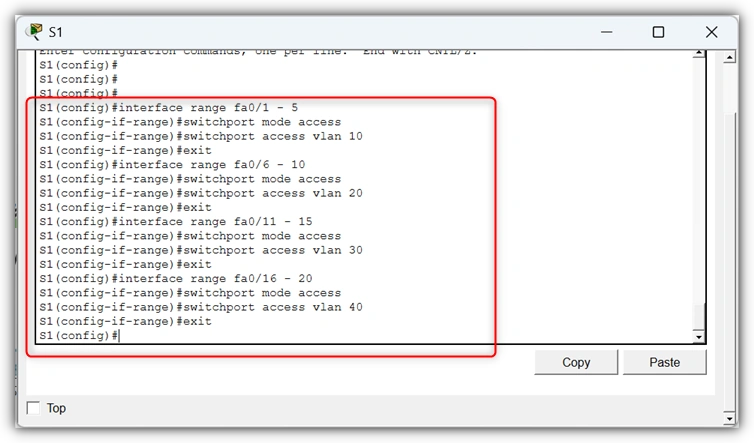
Step 5. Save the Setup
S1# copy running-config startup-config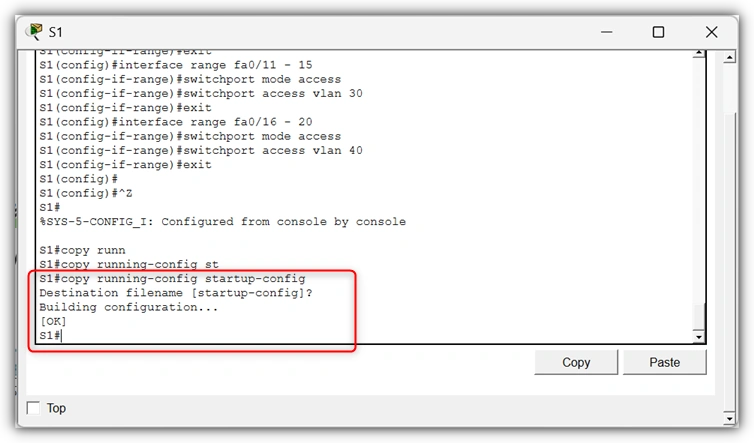
Step 6. Check VLANs
S1# show vlan brief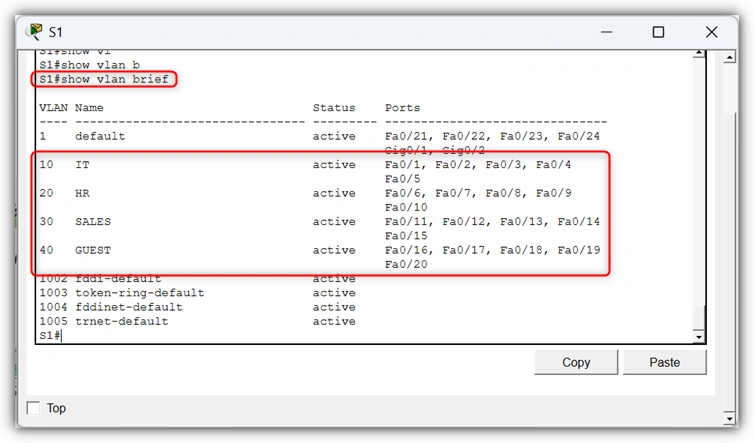
Conclusion
We made four VLANs on switch S1: IT, HR, SALES, and GUEST. Each VLAN has its own ports, so each department has its own network.
VLANs help keep networks safe, faster, and easier to manage. Now the departments can work separately, but still use the same switch.
Join the conversation! Your thoughts help the community grow.