

Introduction
When an app is registered in Azure AD, when using the Client Credentials flow, it needs to be added with client ID and client Secret for authentication and authorization. Note that the validity of the client credentials (Client ID and Client Secret) can be configured to a minimum of 6 months and extended to 3 years. More about creating an Azure AD App can be found in the references section. The scope of this article is to validate if the Client ID and Client Secret are valid and check that the App can perform the operations defined in scope. We will test using GET, POST, and DELETE operations using POSTMAN.
In the article, we will go through one of the App registrations in Azure, verify the scope and permissions, and validate the Client ID and Client Secret. Thanks to my colleague Sujit Nambiar for helping me write this article and troubleshoot the issues that I came across.
Validating Azure AD App
We will go through the steps below to examine the details of the Azure AD app, which we need to test using the POSTMAN tool.
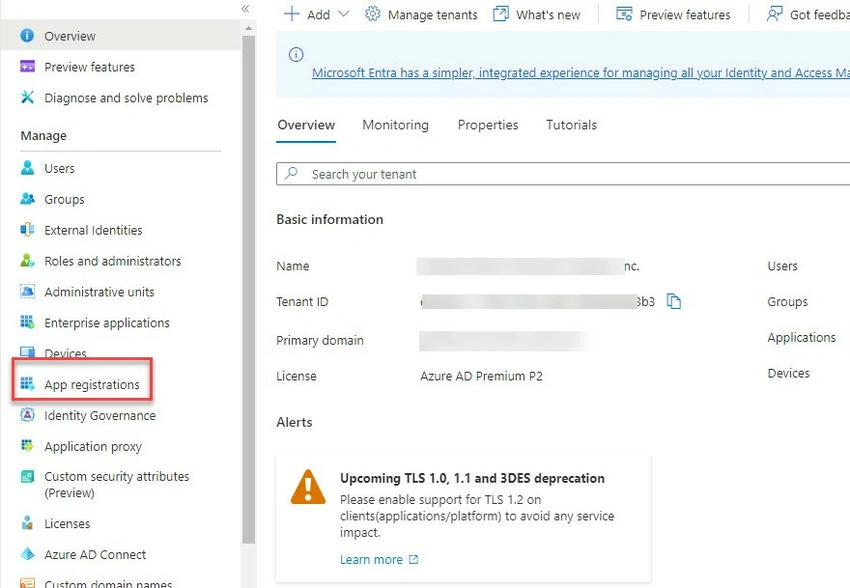
Step 1. Login to https://aad.portal.azure.com - Azure Active Directory and click on ‘Application Registrations’.
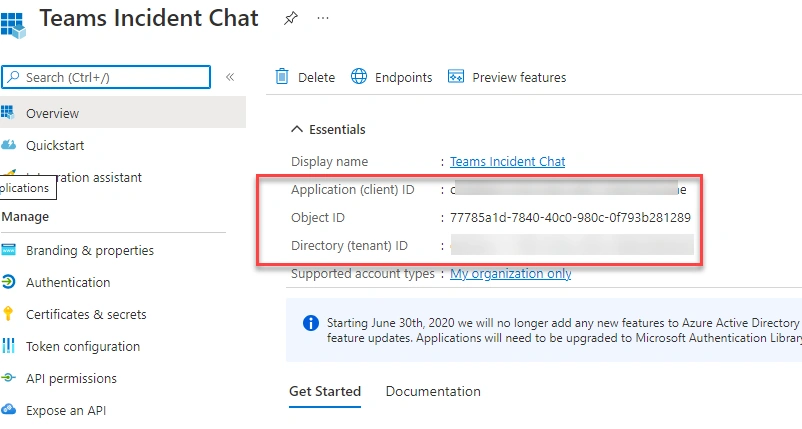
Step 2. Look for the application for which you need the details. In my case, below are the details that we can get.
- Client ID
- Tenant ID
Note. Client Secret value is only shown during the time of creation under ‘certificates and secrets. After you navigate away, then, the client's secret is hidden and shown as secure text.
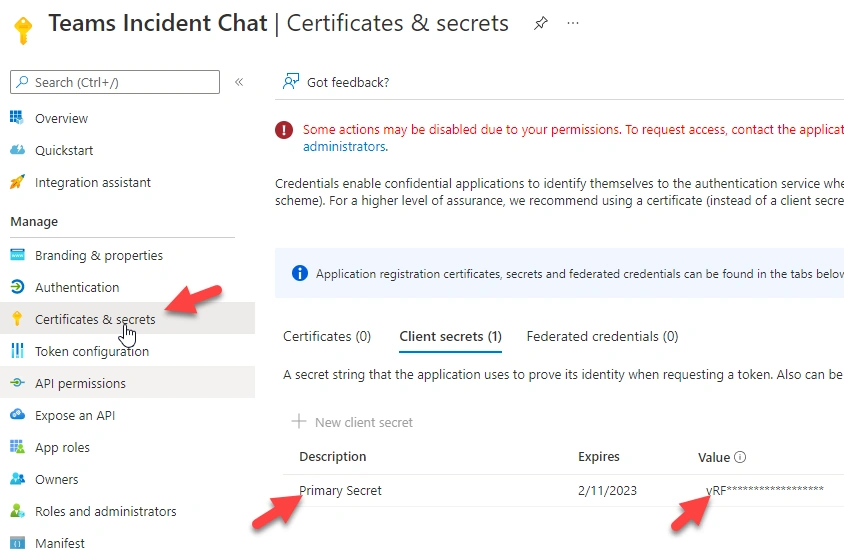
Step 3. Review the API permissions for the app and make sure it has the required scopes configured and has the admin consent granted.
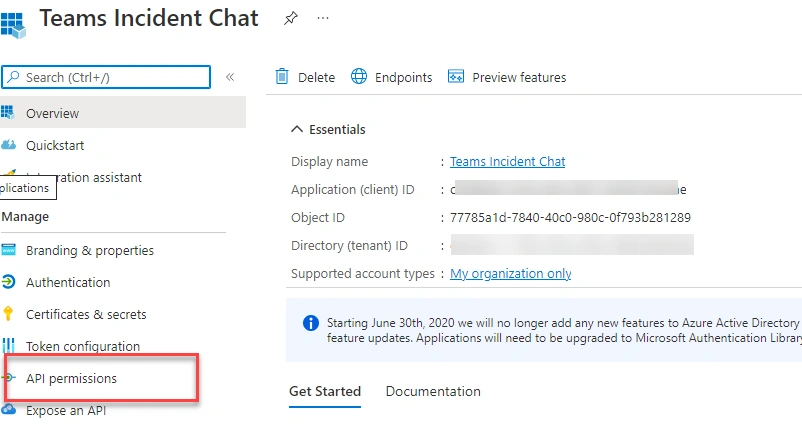
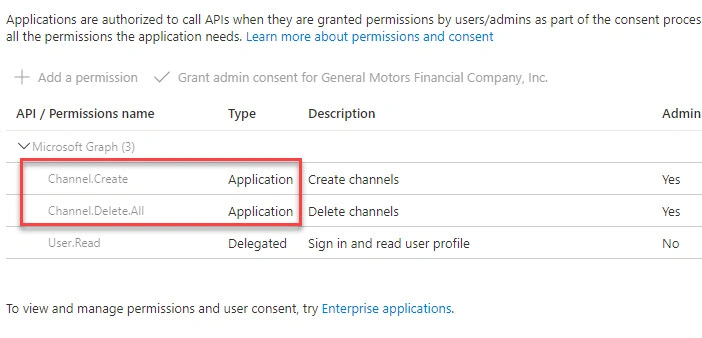
As shown in the screen capture it has the following application permissions defined. This is sufficient to create a channel and delete a channel using Graph API endpoints.
- Channel. Create
- Channel.Delete.All
These steps conclude with verifying the Enterprise Azure AD App and then validating the Azure AD App details.
Testing using POSTMAN
In this section, we will use the POSTMAN tool to test the Graph API End Points using the above Azure AD App details.
Step 1. Open the POSTMAN tool from your machine. Please refer to the references section on how to install POSTMAN on Windows 10.
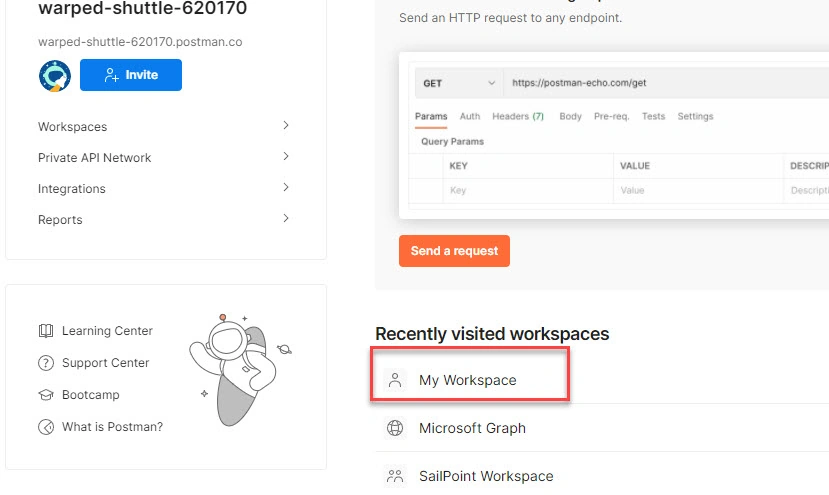
Step 2. From the home page, go to a workspace. You can go to any workspace. For this article, I am going to ‘My Workspace’.
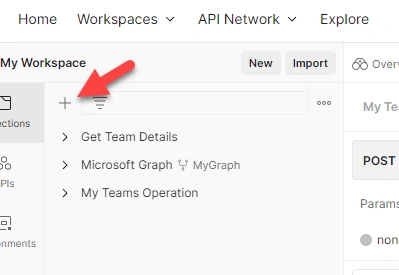
Step 3. On the next page, try to create a new collection by clicking on the + sign. It is easy to refer to the operation we performed for future reference. This step is not mandatory but encouraged.
Step 4. Rename the collection as ‘Teams Channel API Test’.
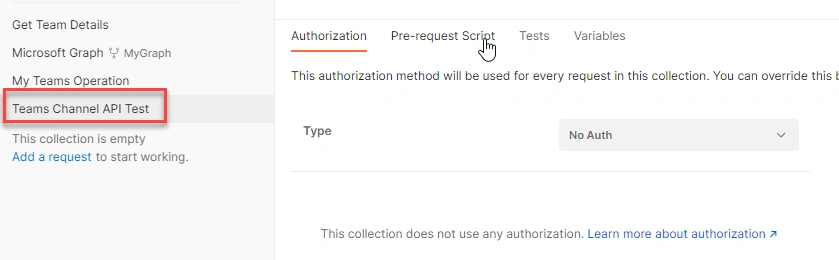
Step 5. In the next step, click on the ‘Add a request’ link.
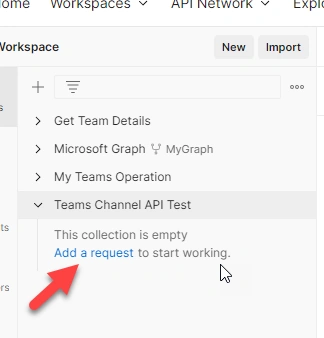
Step 6. Now rename the request to ‘Create Channel’. The graph endpoint to create the channel is
https://graph.microsoft.com/v1.0/teams/{TEAMID}/channels
The request type is ‘POST’.
Step 7. Now, it is required to get a Team ID where the channel needs to be created. The simple option is to go to Graph Explorer https://developer.microsoft.com/en-us/graph/graph-explorer and see where you have been added as owner or member. For this, you can log in to Graph Explorer with your organization ID and look for a sample query called ‘my joined teams’.
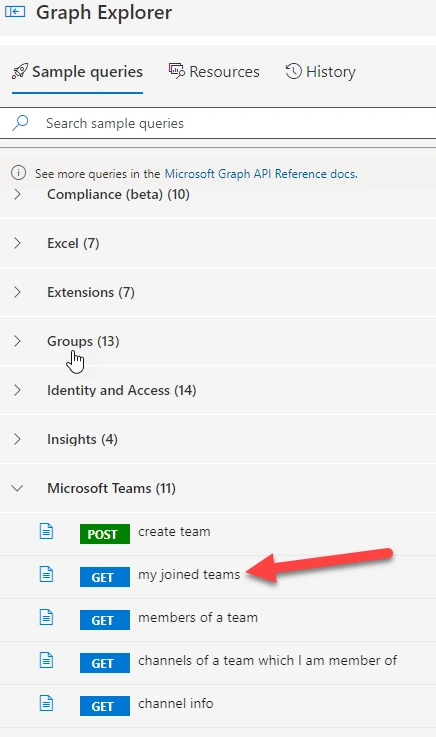
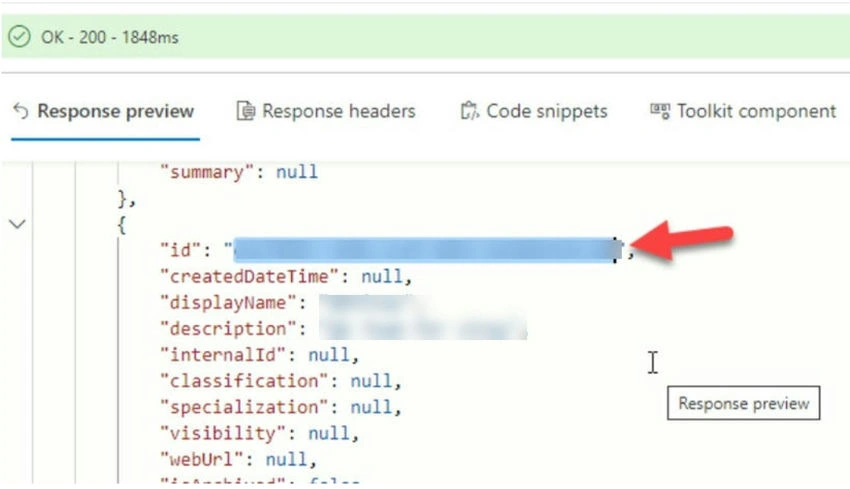
Step 8. On success, it should give you 200 responses, then look for the “id” property in the “value” array. In this case, I am taking the ID of a test time called ‘QAVinay’ where I am a member. The ID property can be found in the JSON response.
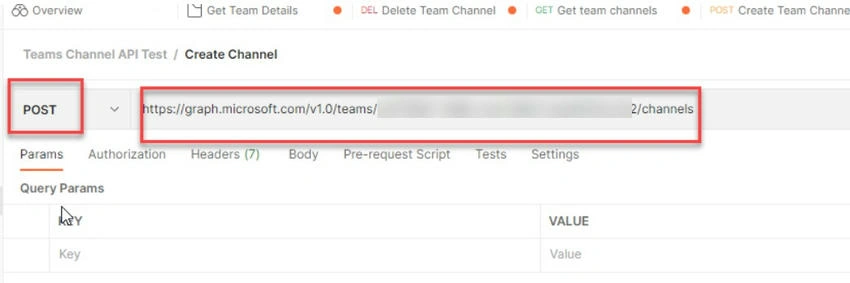
Step 9. Now we have the Team ID, and we are ready to test the API from the POSTMAN. Go back to the POSTMAN tool and format the URL as below. Change the request type to ‘POST’. From step 6 from the previous section, replace the ‘Team-ID’ with the ID value you got from the graph explorer.
https://graph.microsoft.com/v1.0/teams/c45709b7-369b-4cdf-8853-0cb84554c322/channels
The screen should look like below. The URL should be changed based on your team's ID property.
Step 10. Now go to the ‘Authorization’ tab, and select the ‘Type’ as ‘OAuth 2.0’.
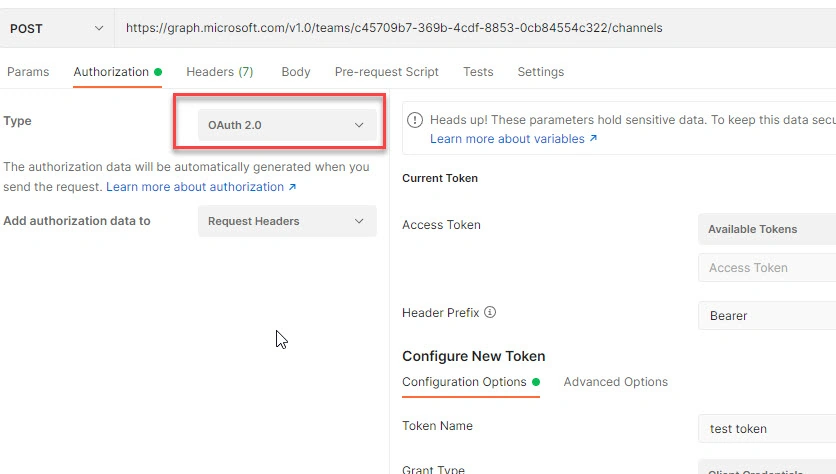
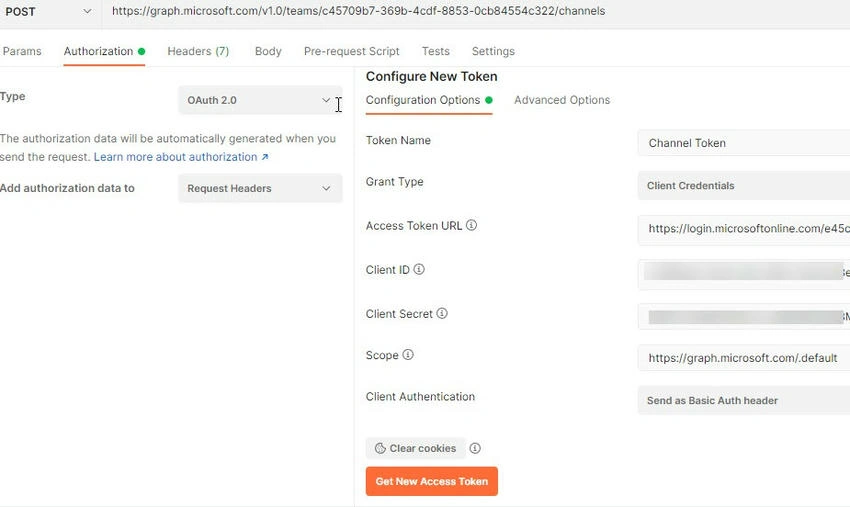
Step 11. In the configure the new token section, Enter the following.
- Token Name: It can be anything. I am entering as a ‘Channel Token’.
- Grant Type: ‘Client Credentials’. Since I already have Client ID and Client Secret for the App. Note: The Client Secret can only be seen once the Client ID is created. After you navigate away and come back, it will appear as secure text. Make sure you note the Client Secret when creating and configuring the app.
- Access Token URL: it should be in the format of https://login.microsoftonline.com/{TENANT-ID}/oauth2/v2.0/token. Replace {TENANT-ID} with your Azure AD Tenant ID. You can get the Tenant ID from the Azure AD App overview section, as mentioned above.
- Client ID: the value that you got while configuring the ‘Certificates and Secrets’.
- Client Secret: the value that you got while configuring the ‘Certificates and Secrets’.
- Scope: https://graph.microsoft.com/.default. This is a very important step. The default basically gets the scopes that are defined while creating the Azure AD App.
- Client Authentication: Leave it as default, which is ‘Send as Basic Auth Header’.
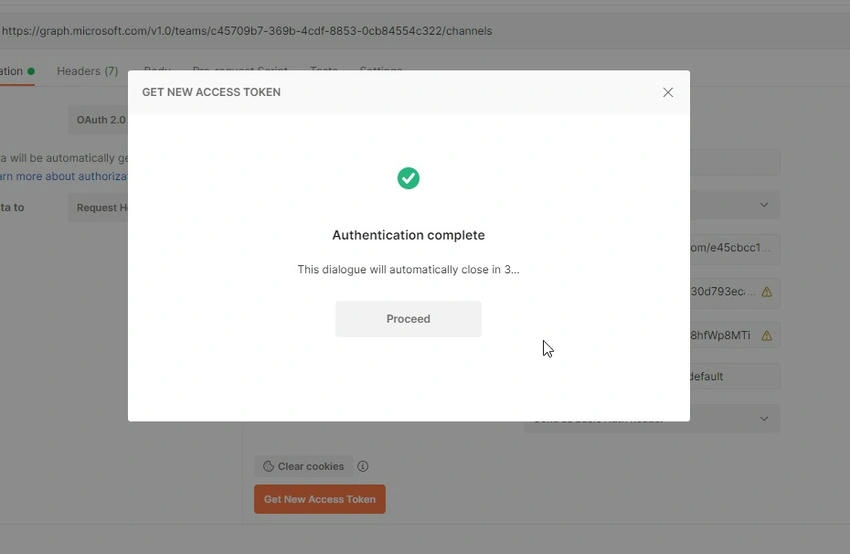
Step 12. On success, you will get the screen below.
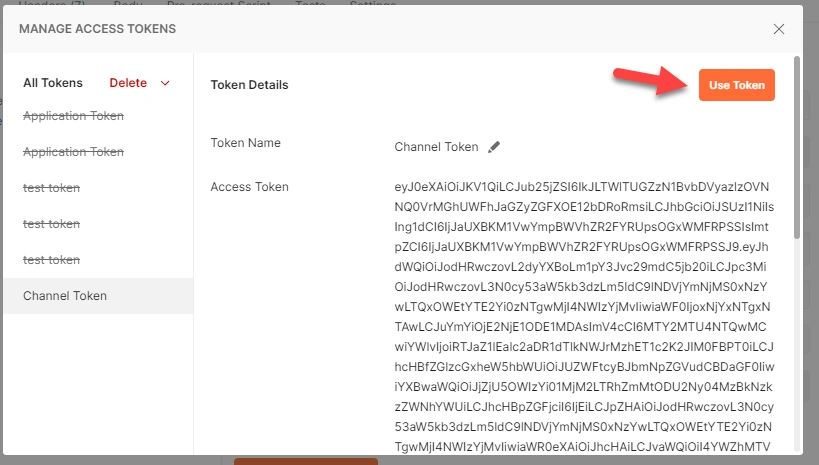
Step 13. Now click on ‘Use Token’. This means this token will be used to interact with Graph End Points.
Step 14. Now go to the ‘Body’ tab, select the ‘raw’ and give the properties in the JSON format. You can update the JSON properties below as needed.
{
  "displayName": "TestChannel08272025",
  "description": "This channel is where we debate all future architecture plans",
  "membershipType": "standard"
}
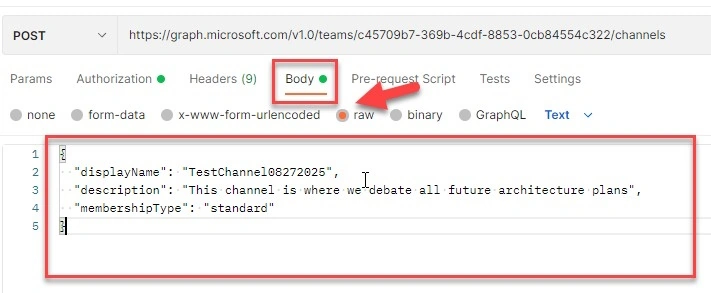
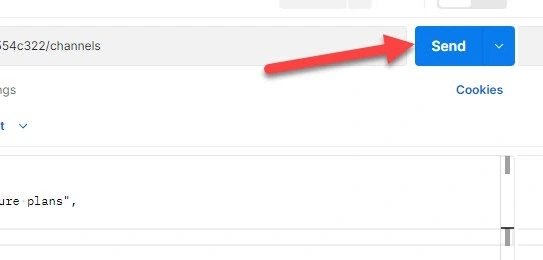
Step 15. Now, you are ready to test the Graph End Point to create a channel. Click on ‘Send’.
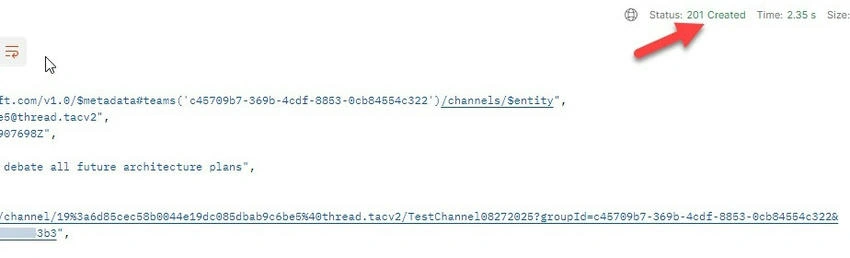
On success, you will get the following response, with the status ‘201’.
Step 16. Validate the channel creation by going to respective teams.
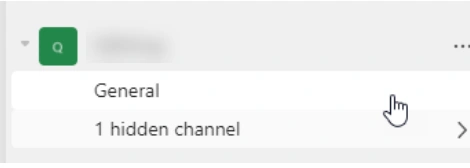
It initially shows ‘1 hidden channel’, and when clicking on it, it shows up.
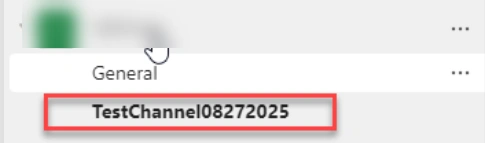
The above steps confirm that the channel creation is successful, the Azure AD Enterprise APP is working as expected and the APP has required API permissions defined.
Step 17. In the same way, we can test for channel deletion. The Graph API endpoint to delete the channel ID is,
Replace the {TEAM-ID} and {CHANNEL-ID}
Step 18. Now try to save the ‘Create Channel’ request in POSTMAN. This will help in reducing some repetitive steps for the next operation. Moreover, you can come back and execute this API test with very minimal clicks.
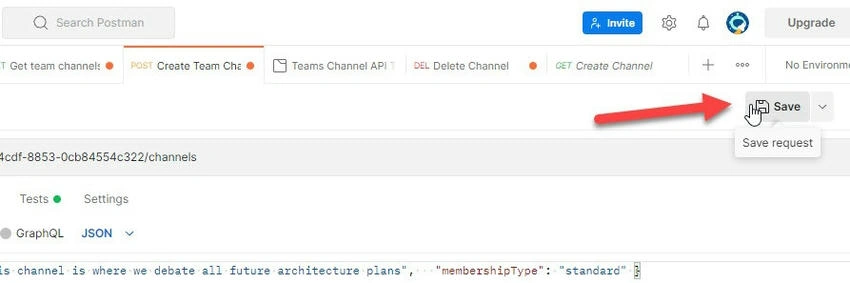
Step 19. Now try to save the ‘Create Channel’ request in POSTMAN as ‘Delete Channel’.
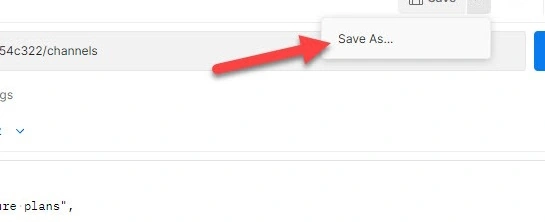
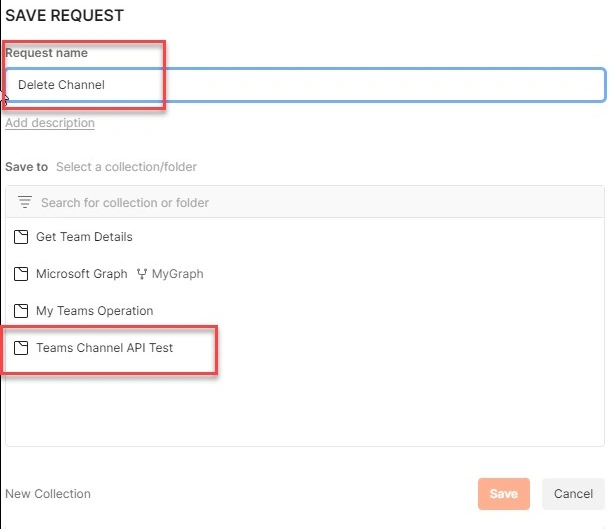
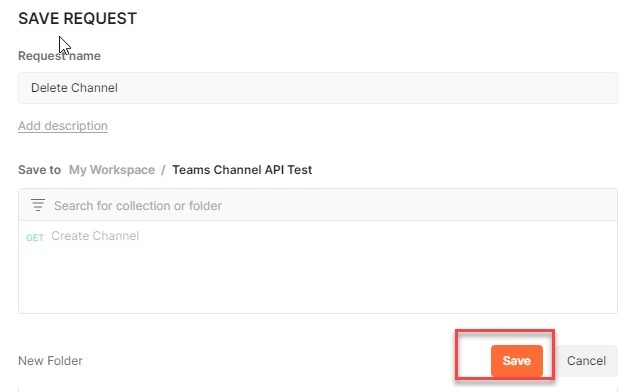
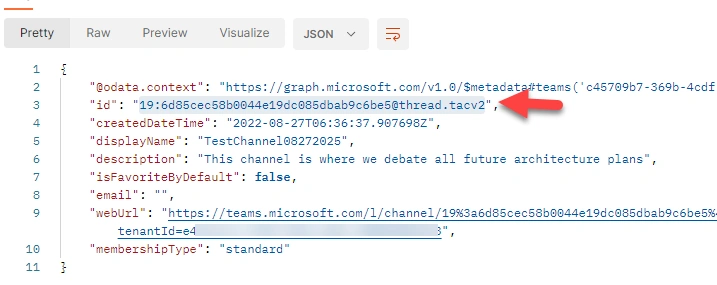
Step 20. Now change the method to ‘DELETE’ and then append the channel ID. The channel ID should be seen in the request body.
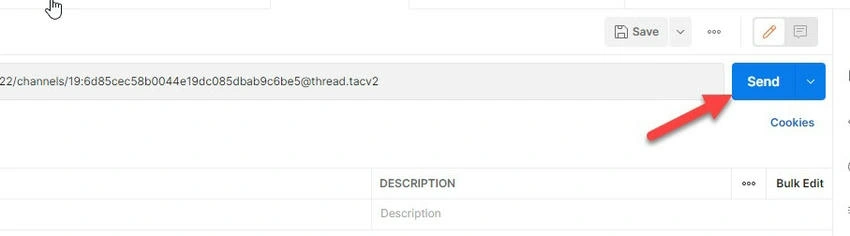
Step 21. For deleting the channel, there is no further configuration required, you can now click on ‘Send’.
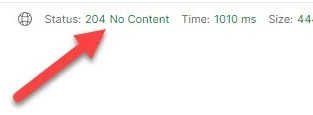
On success, the response should be 204 ‘No Content’.
Step 22. Go back to your teams and observe the previously created channel exists no more.
Only the ‘General’ channel is shown.
Conclusion
Thus, in this article, we have done the following
- Verified the Azure AD App and got the App Details
- Used POSTMAN tool to test App functions by interacting with Graph API endpoints.
References
Viknaraj ManogararajahPosted Aug 30, 2022, 8:18 AM
Good explanation. Thank you for sharing.