

In this article we are going to learn how to use Bitbucket Extensions with Visual Studio 2015. In the previous article we learned how to create Bitbucket account and new repositories and push repositories to a remote Bitbucket account but in that it was all manual process, but if we get a little automation in it that we are going to love it the right way. In this part we are going to add Bitbucket Extensions to project from visual studio “Extensions and Updates” and work a little faster.
Let’s Start.
“It’s Free for a Small team up to 5 Users and its Unlimited private repositories”
Pre prerequisite for Application
Visual Studio 2015
Create Bitbucket Account
For details of how to create Bitbucket account, you can refer to my previous article.
After creating Bitbucket account, next, we are going to be creating a new repository.
Creating New repository
For creating a new repository click on Create a repository button available on the dashboard.
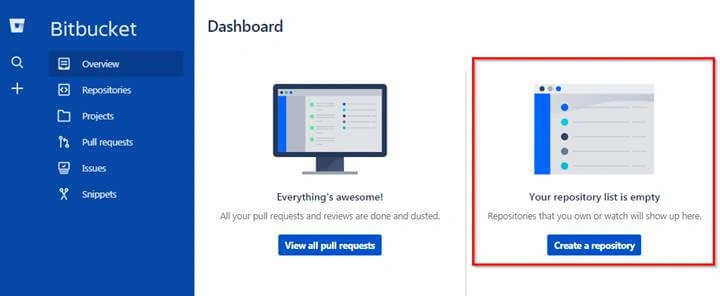
After clicking on Create a repository button a new screen of create a new repository will appear to you.
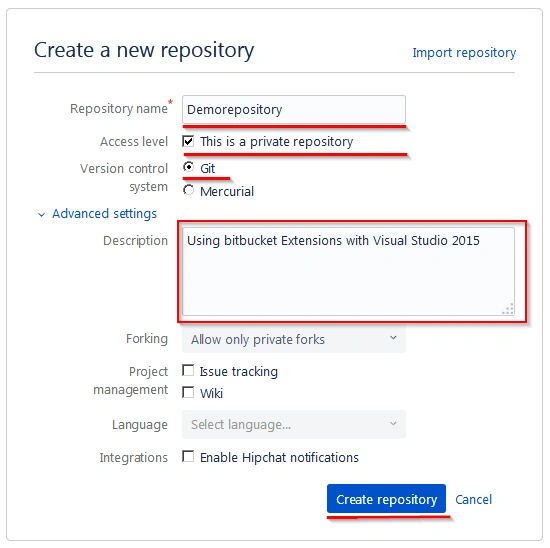
Steps for creating a new repository
- For Creating a repository enter repository name; for demo purposes I have entered the name “Demorepository”.
- Next, we are going to create a Private repository, and for doing that we need to check the checkbox of Access level.
- Next, do you want a README file in the repository? Then choose the drop down accordingly; there are 3 options in it. if you do not want any option then choose “No”.
- Yes, with a tutorial (for beginners)
- Yes, with a template
- No
[Optional option if you are creating new repository for the first time then only this question will appear]
- Next Version Control system there are 2 options available in that we are going to choose “Git” for this demo.
- Git
- Mercurial
- Next enter a description for repository if you want.
- Next comes forking; in this you will find 3 options. For the demo I am going to choose “Allow only private forks”
- Allow only private forks
- Allow forks
- No forks
- Next, in project management, there are 2 options. We are not choosing any options; for details of both options read the given below notes.
- Issue tracking
- Wiki
- Next language (Programming language) if you know in which Programming language you project is going to develop then you can choose a Programming language for this repository.
- Next comes Integrations; if you want this repository to be enabled with HipChat then you can choose this option.
Finally, click on Create repository to create “Demorepository” repository.
Notes for details
What is HipChat?
HipChat is a web service for an internal private online chat and instant messaging. As well as one-on-one and group/topic chat, it also features cloud-based file storage, video calling, searchable message-history and inline-image viewing
Referenced from:- https://en.wikipedia.org/wiki/HipChat
What is Forking?
Forking is taking the source code from an open source software program and developing an entirely new program.
Referenced from:- http://whatis.techtarget.com/definition/fork
What is Wikis?
When you add a repository to Bitbucket Cloud, you also get a wiki. The wiki is a simple place to keep documents. Some people use it as their project home page. The wiki is a Mercurial/Git repository, so you can clone it and edit it like any other source files, for example, take a look at the TortoiseHg wiki on Bitbucket Cloud.
What is Issue tracking?
When you add a repository to Bitbucket Cloud, you also get an issue tracker. This is the place to track your project's feature requests, bug reports, and other project management tasks. We keep the Bitbucket issue tracker very simple and yet somewhat flexible. It has just a few configurable fields (component, version, and milestone) – you can use them any way you want.
Referenced from:- https://confluence.atlassian.com/bitbucket/
Snapshot after creating repository
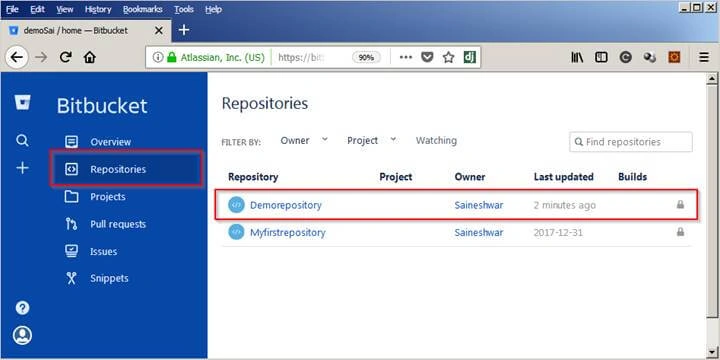
Now we have completed with creating repository next we are going to add Bitbucket Extension to visual studio.
Adding Bitbucket Extension to Visual Studio
For adding extension just click on Tools option from the menu inside that choose “Extensions and Updates” menu.
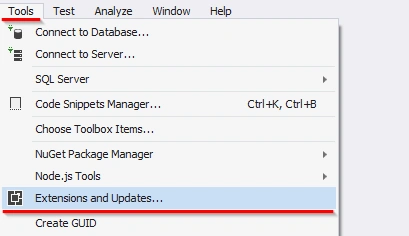
After clicking on “Extensions and Updates” a dialog of “Extensions and Updates” will pop up in that we are just going to choose “online” option from left pane inside that choose Visual studio gallery, next search “bitbucket” keyword in search box, after bitbucket package appears just click on download to download package.
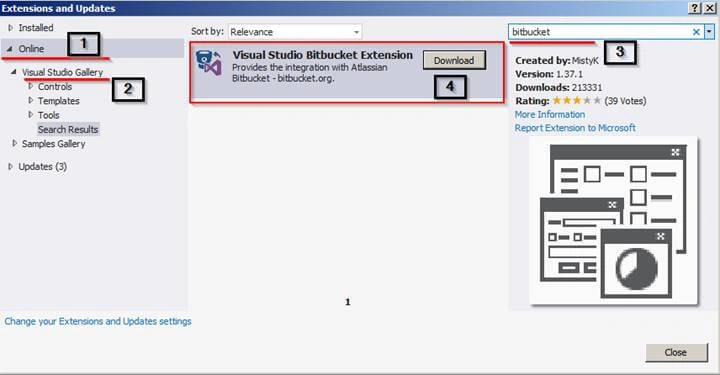
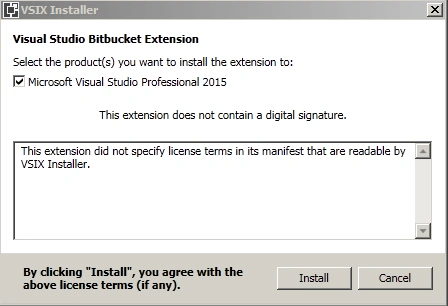
After installing bitbucket package it will ask for restarting visual studio.
Next, after restarting visual studio just click on Team explorer window of visual studio, you will see Bitbucket extension option.
Bitbucket Extension
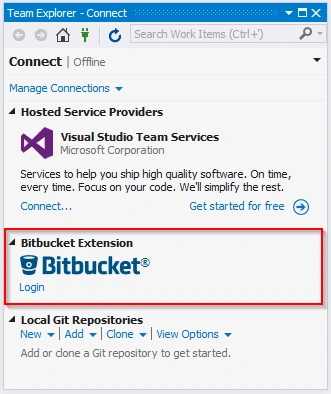
After installing Bitbucket extension now there is a link to log in to Bitbucket extension just click on Login link you will see Bitbucket Login window.
Bitbucket Extension Login View
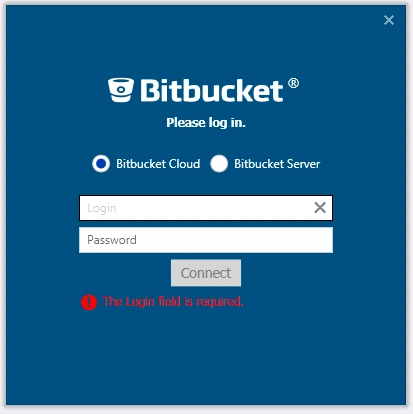
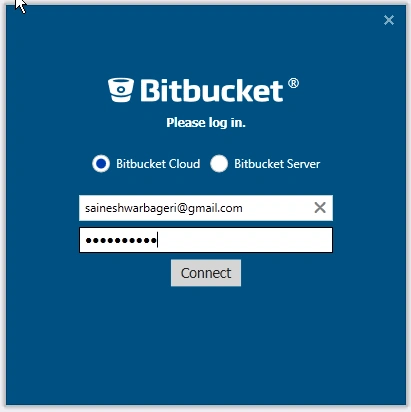
Now in Bitbucket extension, you are going to enter the same credentials which you have used to login into bitbucket portal.
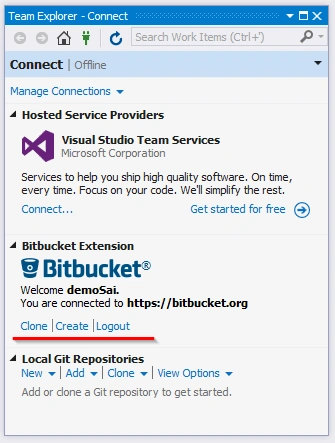
After login, it will show 3 Link
- Clone
- Create
- Logout
We are going to click on Clone Link to clone the repository.
After clicking on clone link it will show a Clone Repository Window with Repository which you have already cloned and also newly cloned.
You need to specify the local folder while cloning the repository where you need to keep cloned Repository.
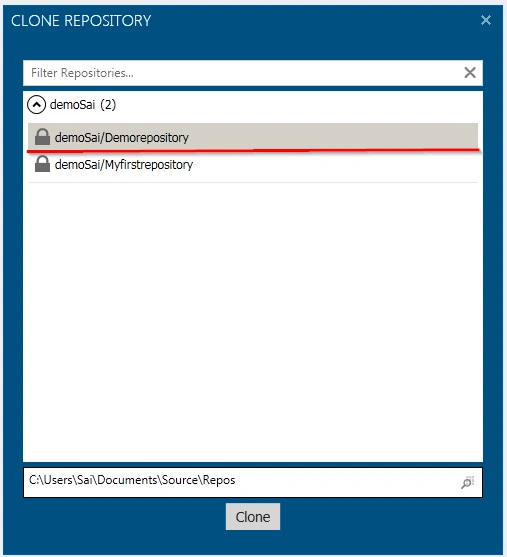
After specifying the local folder for Cloning Repository then choose the newly created Repository and click on Clone button.
A new window will popup of Team Explorer with cloned Repository and a message “The repository was cloned successfully” with that a link will appear “Create a new project or solution” just click on that link for creating a new project inside “Demorepository”.
Team Explorer view after cloning repository successfully
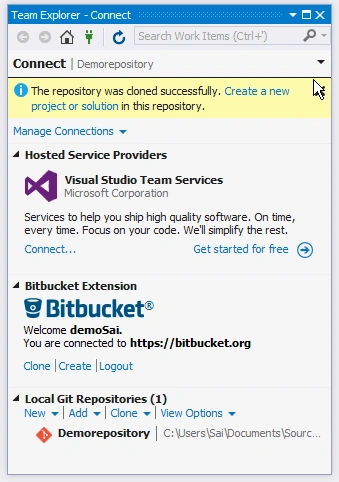
After clicking on “Create a new project or solution” link a new window for creating application will pop up.
Creating MVC Application
After clicking on “Create a new project or solution” link, a new dialog will pop up with the name “New Project”. In that, we are going to choose Visual C# Project Templates - Web - ASP.NET Web Application. Then, we are going to name the project as “DemoBitbucketExtension”.
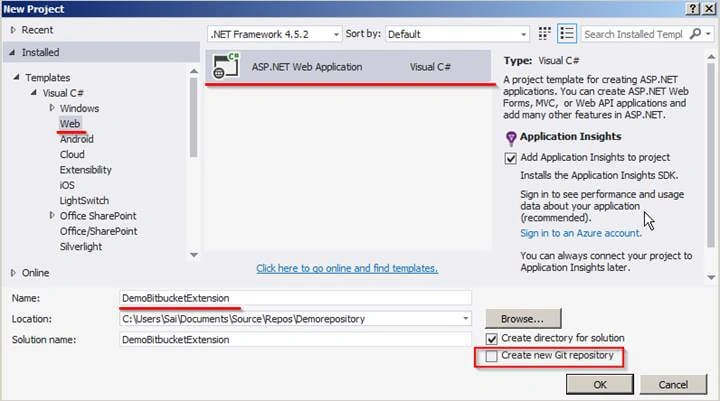
After naming the project we are going click on OK button to create a project.
A new dialog will pop up for choosing templates for Creating “ASP.NET Web Application” in that template, we are going to Create MVC application. That's why we are going to choose “MVC template” and next click on OK button to create a project.
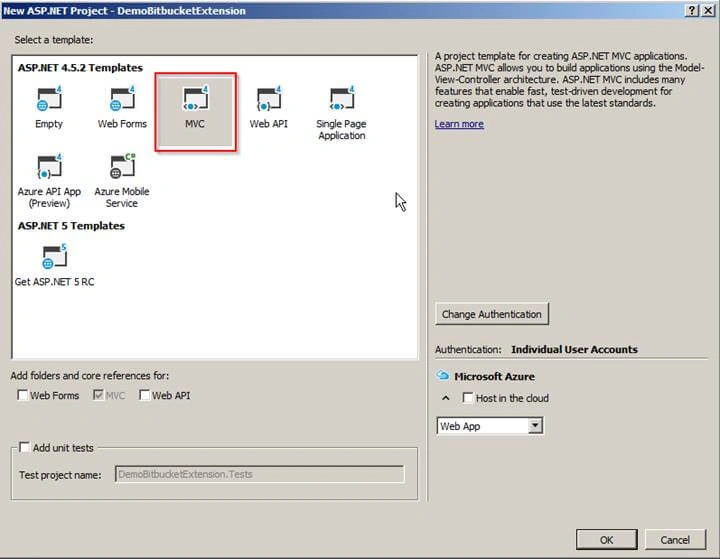
After clicking on OK button it will start to create a project.
Project Structure
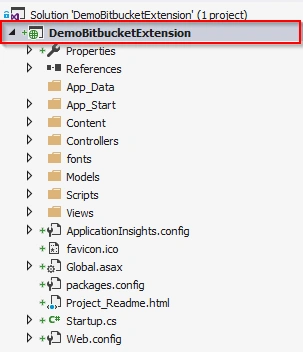
After creating a project now if you visit the cloned location which you have specified you will see a “.git” folder and a solution folder.
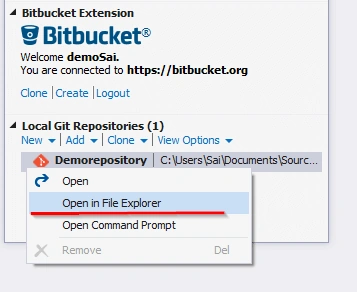
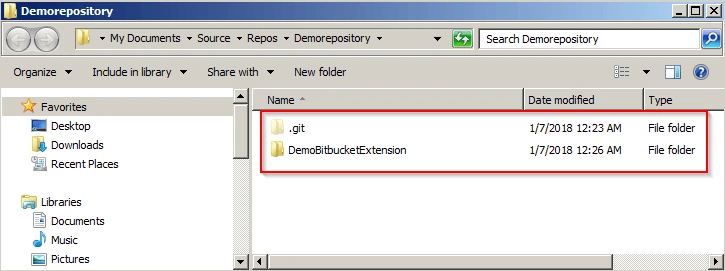
After having a look at repository location next double click on same “Demorepository” from Team Explorer, it will display a new window with 4 options.
- Changes
- Branches
- Pull Requests
- Sync
- Settings
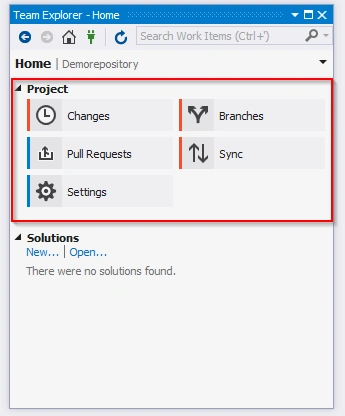
Now just click on changes view it will show entire application to commit.
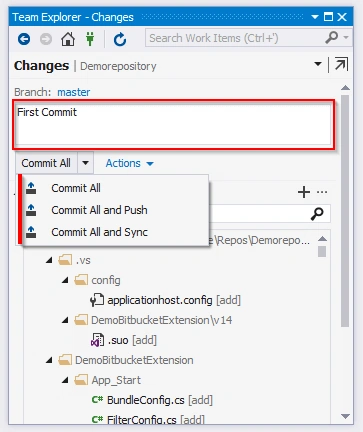
Next enter commit message to commit this repository to bitbucket server repository.
While committing u will see a button commit all but there are three options to commit
- Commit All (Commit only to local repository)
- Commit All and Push (Commit local as well as remote repository)
- Commit All and Sync (Commit to remote and also fetches changes from remote if any).
But for this demo, we are going to select on “Commit All and Push” option and click button.
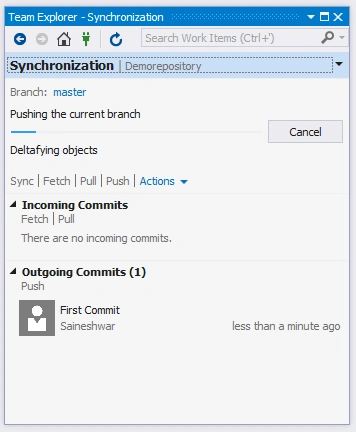
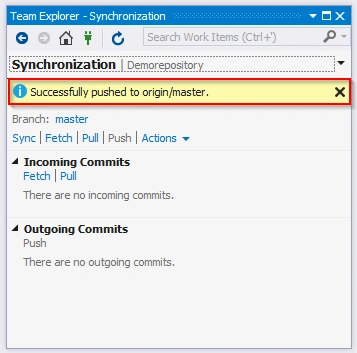
After completing with push repository it displays the message “Successfully pushed to origin/master”.
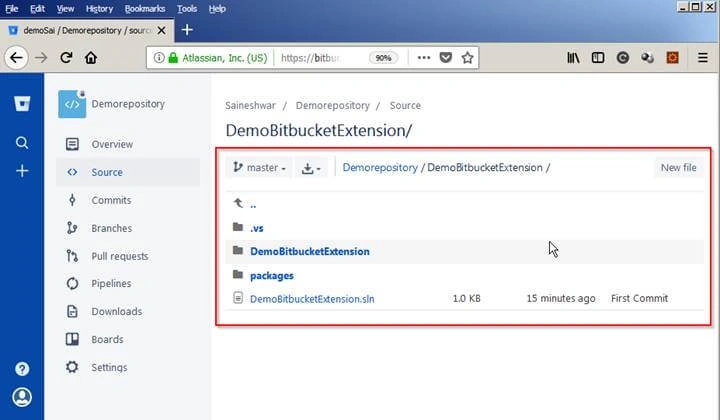
Now let’s check the online portal of bitbucket -- there is all the data which we have pushed along with the commit message which we have entered while committing.
Below is the source view of Demorepository
In this part, we have logged in o an online portal to see repository files which we have pushed from visual studio.
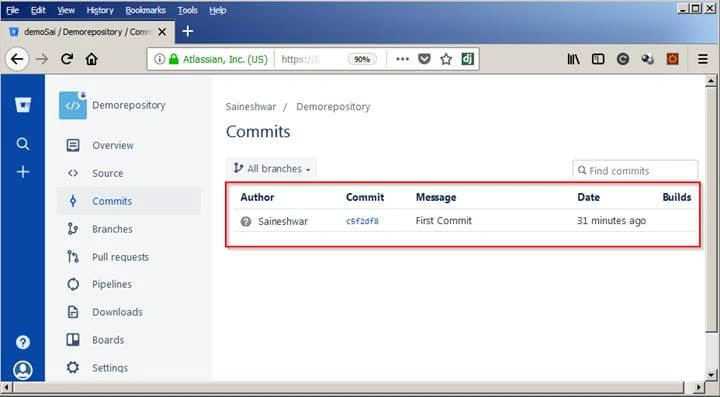
Commit view with Message
In this part, we can see our first commit message and commit which we have pushed from visual studio Bitbucket extension.
Finally, we have learned how to use Bitbucket Extension with Visual Studio 2015 in a step by step way. I hope you have liked this article.
Nazeer AhmedPosted Sep 7, 2018, 1:09 AM
Hell sir. I have added bitbucket extension to VS2015 and i have created two repositories in bitbucket cloud. but im unable to connect bitbucket cloud from VS. it's showing unauthorized/invalid credentials, even after providing right credentials.
bhagiPosted May 3, 2018, 5:54 AM
Adding Bitbucket Extension to Visual studio Professional 2015 is taking too much time. Downloading extension is done but the dialog is showing "installing". What might be the issue. Thanks in advance
Tridip BhattacharjeePosted Mar 9, 2018, 3:17 AM
Hello sir i read this article and try to use bitbucket from my pc. i used VS2013 to publish my project to bitbucket but i got error again and again when i tried. so i posted my problem in details in csharp forum http://www.c-sharpcorner.com/Forums/got-error-when-publish-project-to-bitbucket-from-vs2013 please tell me why i am getting that error if possible. one thing i like to mention that i did not use any bitbucket extension but you used it. i saw from VS2013 IDE we can add / publish our project changes to any git. git may could be GitHub or BitBucket or MS Git. so i did not use any bitbucket extension rather i directly try to publish my project to bitbucket from VS2013 IDE. first i create a login in bitbucket and then i create a repository there. later i add my project to git and commit. after commit i got publish button where i paste my bitbucket's repository url and click on publish button from VS IDE. then i got that error whose images is in my forum post. please help me. i tried lot to search google and post the same in bitbucket forum but still got no right answer. thanks
Sagar Pandurang KapPosted Jan 10, 2018, 11:45 PM
Very well explaineddd..
Nigel FernandesPosted Jan 10, 2018, 10:42 PM
What is the benefit of this extension over the already existing Git plugin ?