Introduction
We can use Google Maps in our Android application using some APIs and libraries. Google provides its maps application for use by us in any Android app and we can modify it depending on our requirements.
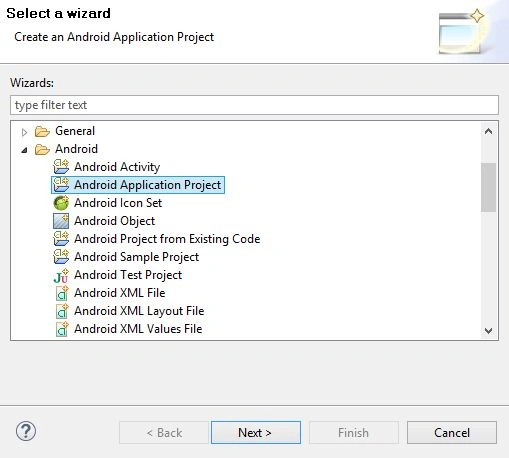
First, create an Android Activity Project on Eclipse. For that, go to File, then New and select Android Application Project.
Next:
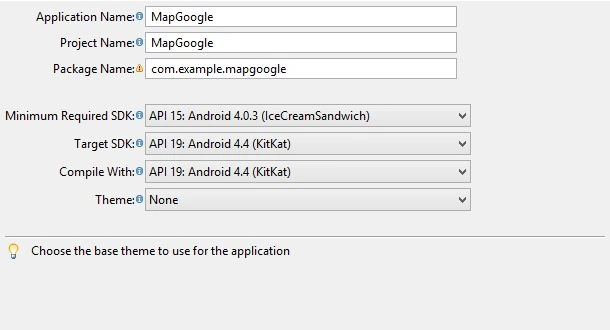
Set the SDK depending on your app, then click Next:
Next:
Next, set the Icon of the Android Application.
Finished.
Then import Google Play services from the SDK.
Location: <sdk>extras\Google \Google _play_services\libproject\Google -play-services_lib </sdk>
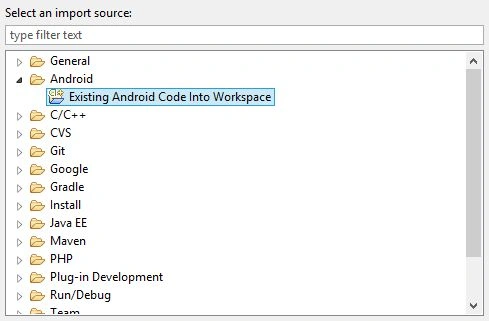
Right-click on the project and select Import.
Next
Click on Finish. I’ve already Imported the Google Play library. Therefore the Finish button is not shown as Enabled.
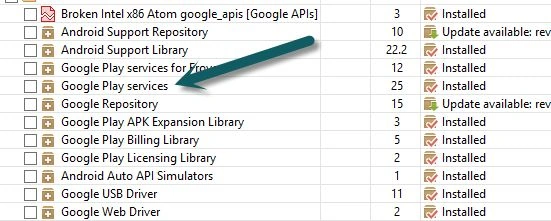
If you do not find the Google Play service library then open the Android SDK Manager and download it as in the following:
After download, add the Google Play service to your project:
- Add the Google Play service to your project.
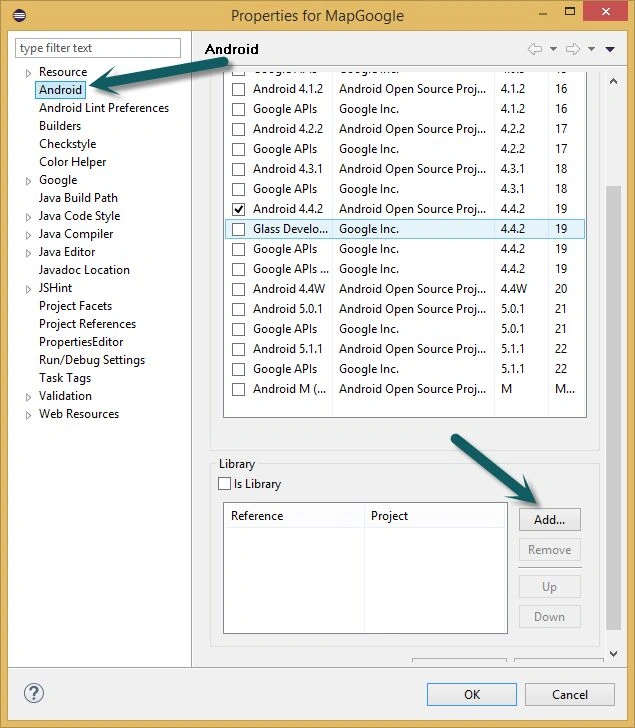
- Right-click on the project and go to Properties.
- Go to the Android menu and click the Add button.
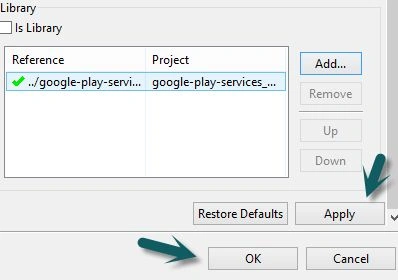
Select Google -play-service_lib and OK.
Click on Apply, then Ok.
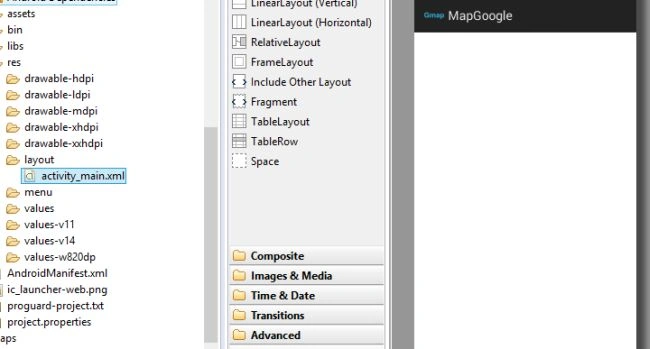
Open the activity_main.xml file.
Then drag the Fragment layout into the app screen.
A popup screen will show.
Select MapFragment and then OK.
Go to the activity_main.xml code part and change the property of width and height and replace “wrap_content” with “fill_parent”.
This is for showing the full-screen map.
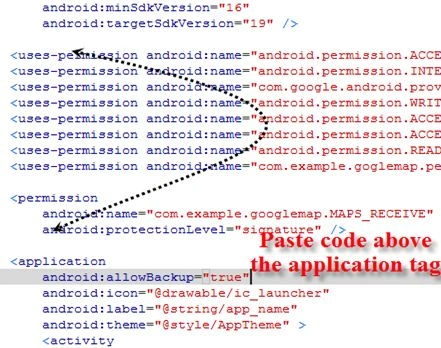
Open the AndroidManifest.xml code file and paste the code above the <application> tag:
- <uses-permission android:name="android.permission.ACCESS_NETWORK_STATE" />
- <uses-permission android:name="android.permission.INTERNET" />
- <uses-permission android:name="com.Google .android.providers.gsf.permission.READ_GSERVICES" />
- <uses-permission android:name="android.permission.WRITE_EXTERNAL_STORAGE" />
- <uses-permission android:name="android.permission.ACCESS_COARSE_LOCATION" />
- <uses-permission android:name="android.permission.ACCESS_FINE_LOCATION" />
- <uses-permission android:name="android.permission.READ_EXTERNAL_STORAGE" />
- <uses-permission android:name="com.example.goglemap.permission.MAPS_RECEIVE" />
- <permission
- android:name="com.example.Google map.MAPS_RECEIVE"
- android:protectionLevel="signature" />
It is shown in the following figure:
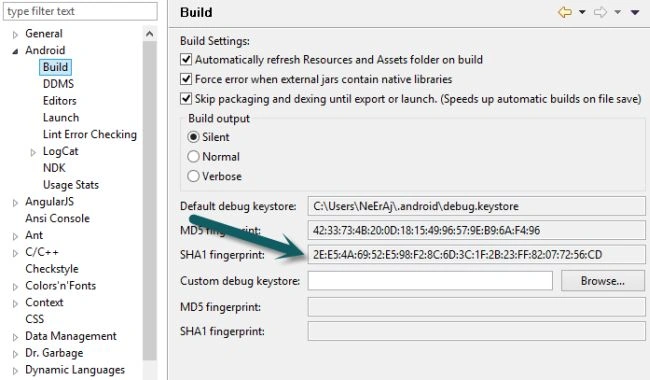
Then go to the Window tab, then Preferences and select the Android menu. Then click Build.
Copy SHA1 fingerprint:
And go to the
website.
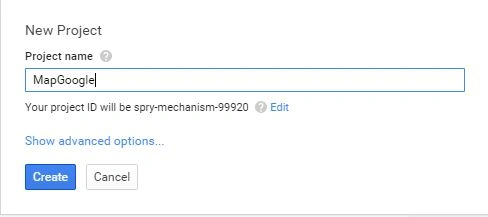
Create the project, then provide the name of the project.
You can decide any name depending on your choice.
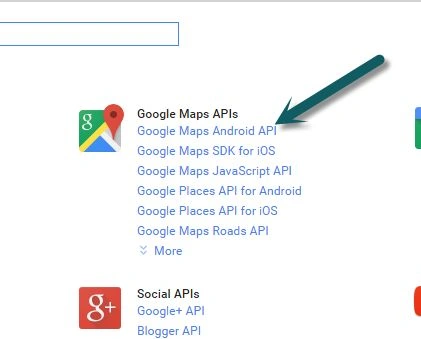
After clicking on the project then go to the APIs submenu.
Choose Google Maps Android API.
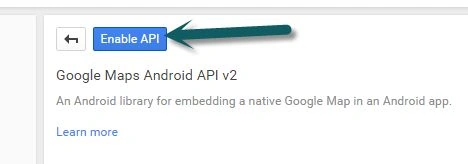
Enable Google Maps Android API v2.
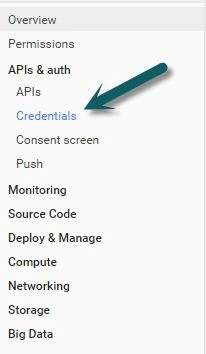
Go to the Credentials submenu.
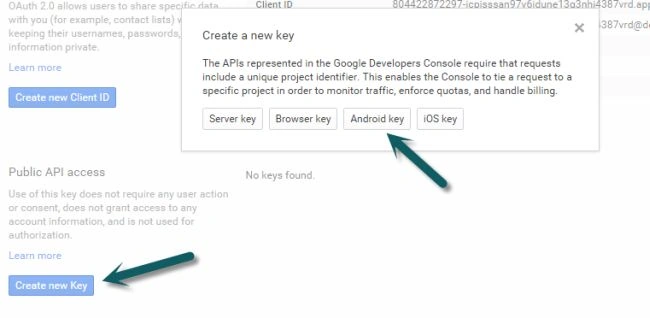
Click on first
Create new Key, then a pop-up screen will be visible. Now choose Android Key.
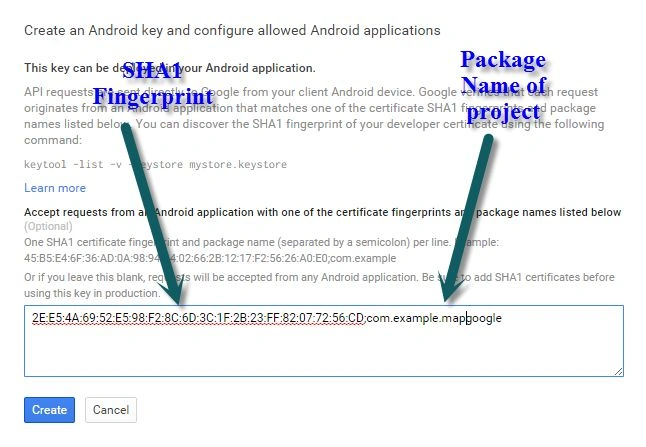
Copy the SHA1 Fingerprint in the text area and add a “;” (semicolon) and provide your project's package name.
Click on Create and Copy API Key.
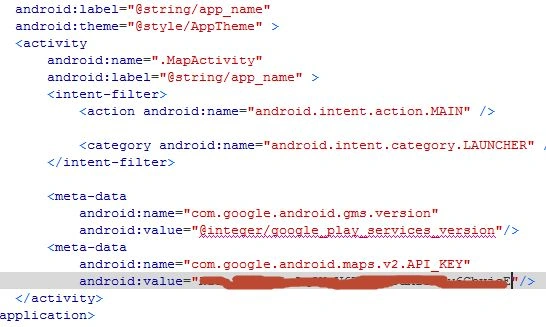
Then process again go to the AndroidManifest.xml code file and add the following code between the <Activity> tags.
- <meta-data
- android:name="com.Google .android.gms.version"
- android:value="@integer/Google _play_services_version"/>
- <meta-data
- android:name="com.Google .android.maps.v2.API_KEY"
- android:value="API_KEY"/>
Like the following figure:
Paste your Client Key into the value of Android
android:value="API_KEY", then open MainActivity.java and import the following two classes:
- import com.Google .android.gms.maps.Google Map;
- import com.Google .android.gms.maps.MapFragment;
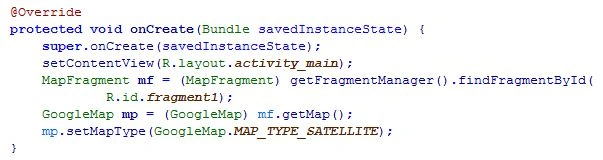
Write the following code in the onCreate() method:
- MapFragment mf=(MapFragment)getFragmentManager().findFragmentById(R.id.fragment1);
- Google Map mp=(Google Map)mf.getMap();
- mp.setMapType(Google Map.MAP_TYPE_SATELLITE);
Then run your project for the first time in AVD to build the .apk file, then move it into Android and install it.








Pankaj Kumar ChoudharyPosted Jul 8, 2015, 7:36 PM
Nice Article Neeraj...........
Santhakumar MunuswamyPosted Jul 8, 2015, 3:06 PM
Thanks for nice article. keep it up
Gowtham RajamanickamPosted Jul 8, 2015, 12:24 PM
great
Sibeesh VenuPosted Jul 8, 2015, 9:07 AM
Good One! Thanks for sharing
Neeraj KumarPosted Jul 8, 2015, 6:59 AM
Thank you Gopi Chand
Gopi ChandPosted Jul 8, 2015, 5:56 AM
Awesome