

Overview
Uploading files and folders to GitHub can be done using either the GitHub web interface (UI) or the command line (terminal). Both methods are suitable for different scenarios: the UI is best for small projects, while the terminal method is recommended for larger projects or when working with Git locally.
Method 1: Using the GitHub Web Interface
Create a Repository
Log in to GitHub and click the “New repository” button.
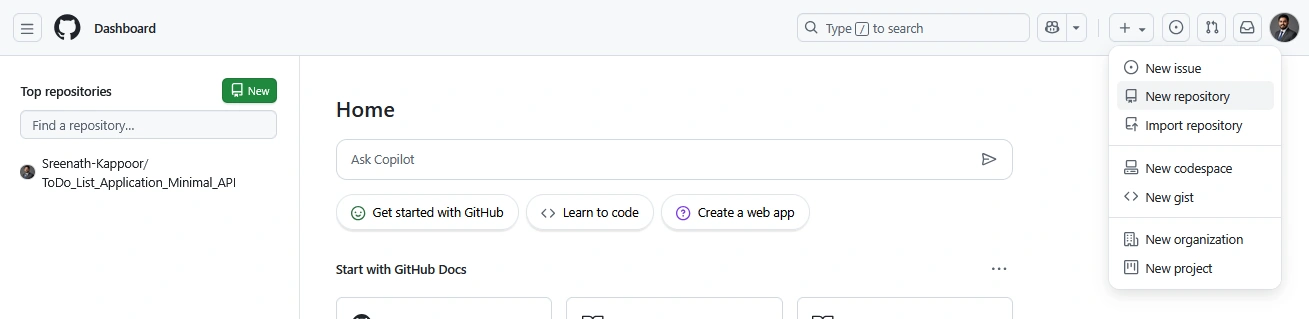
Enter a repository name, description, and choose whether it should be public or private.
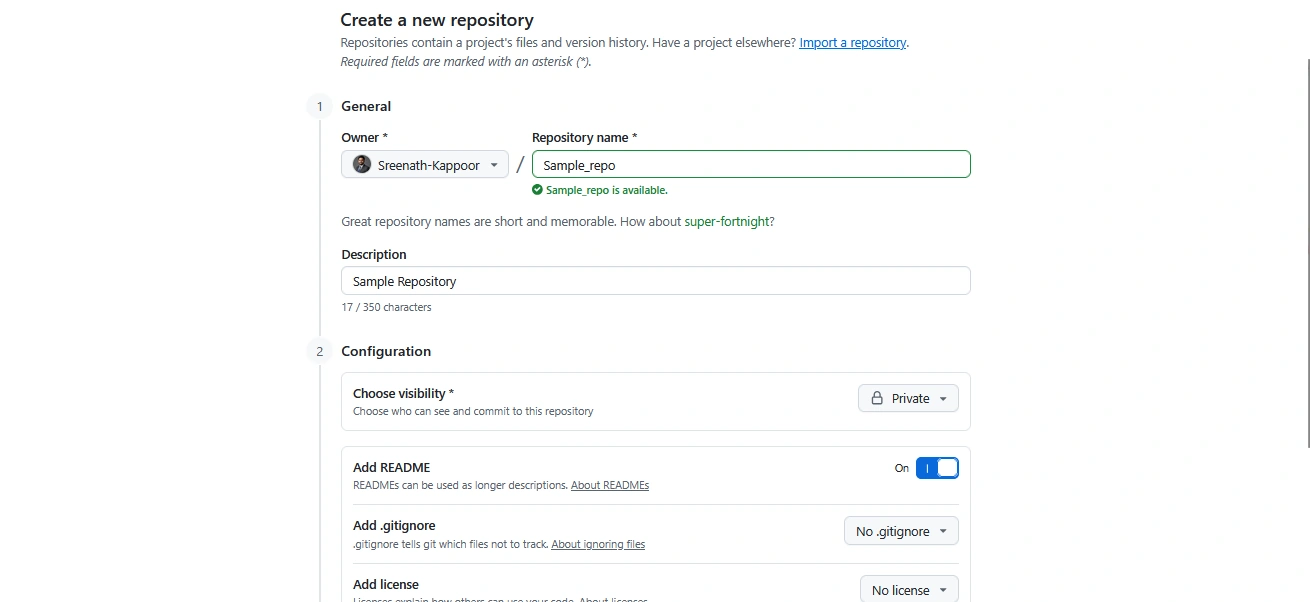
Optionally, initialize the repository with a README file.
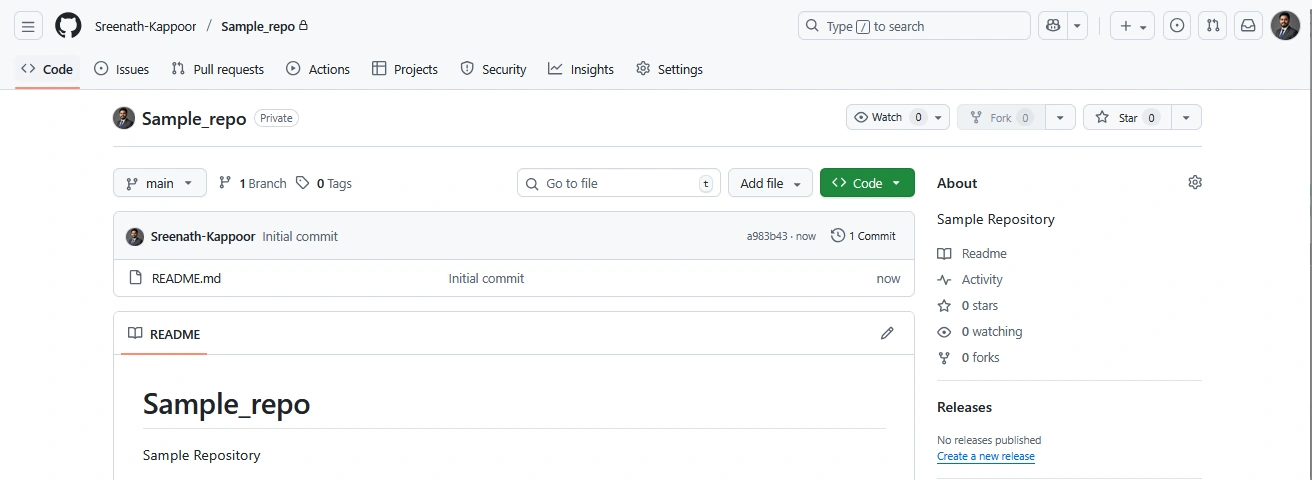
Upload Files
Navigate to the repository’s main page.
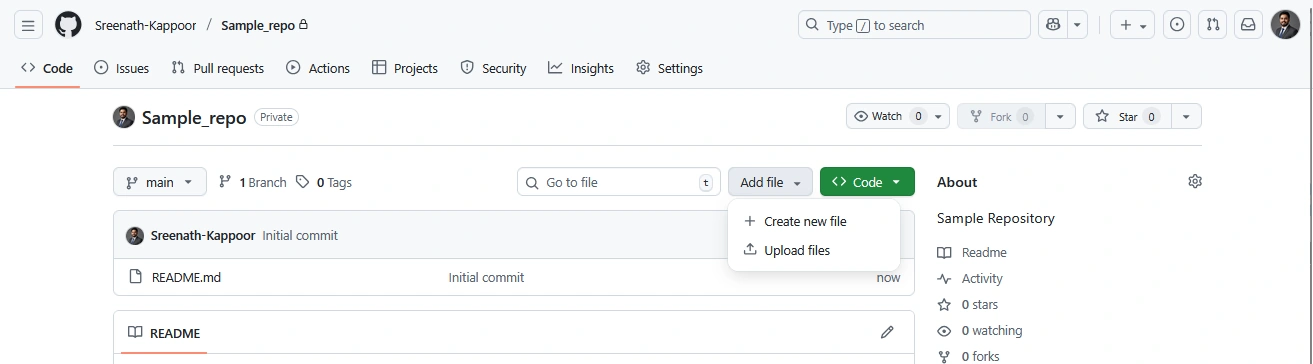
Click the “Add file” dropdown and select “Upload files”
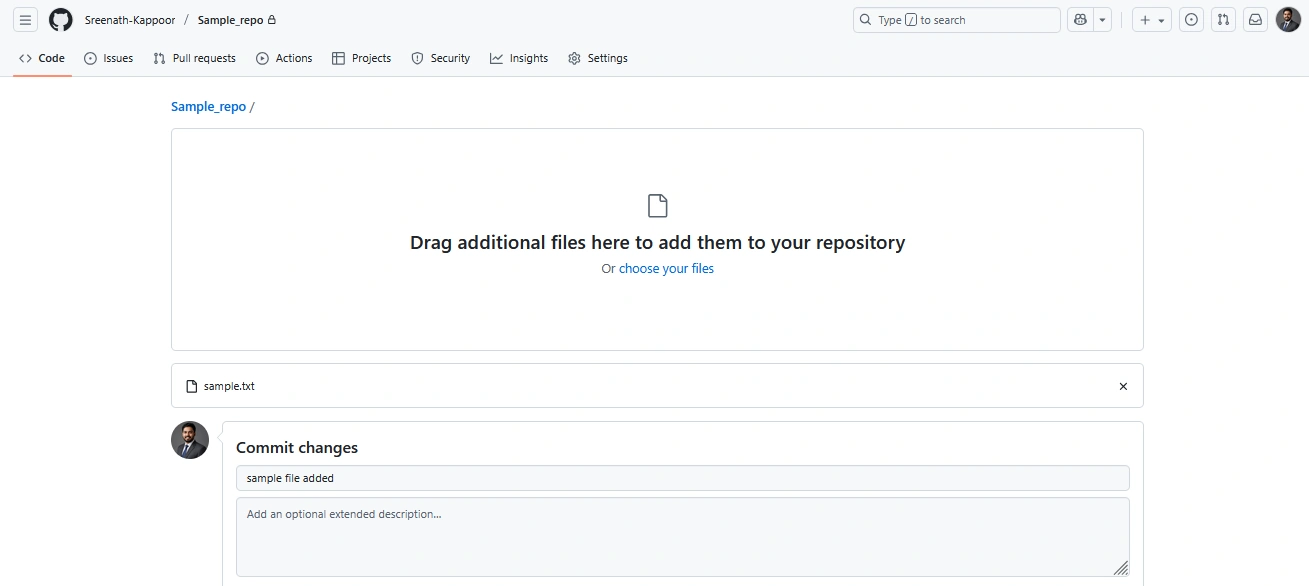
Drag and drop files or folders, or click “Choose your files” to browse.
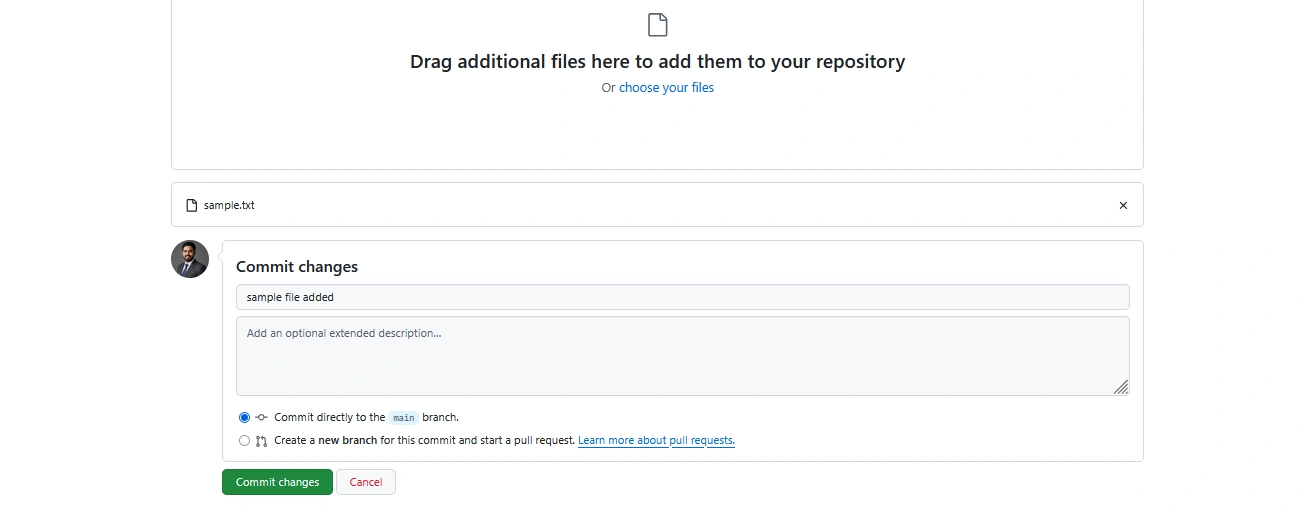
Add a commit message describing the changes.
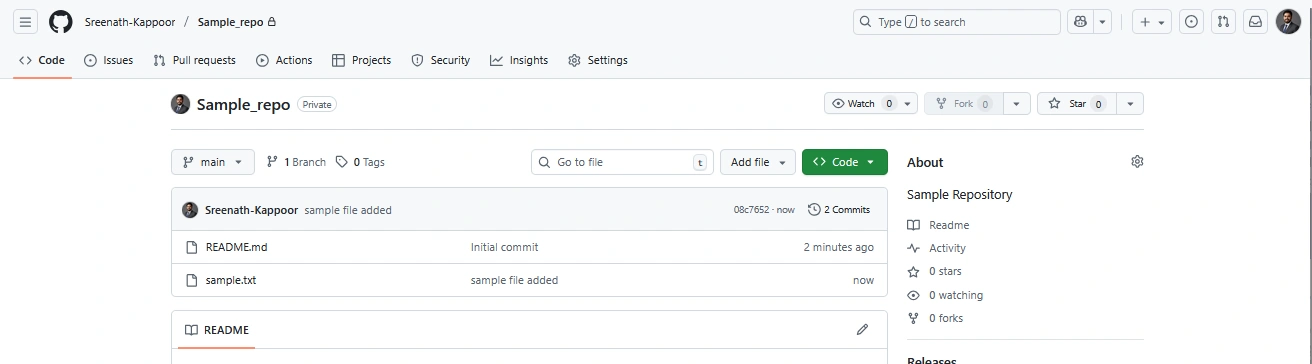
Click “Commit changes” to upload the files.
Method 2: Using the Terminal (Command Line)
Create an Empty Repository
On GitHub, create a new repository without initializing it with a README.
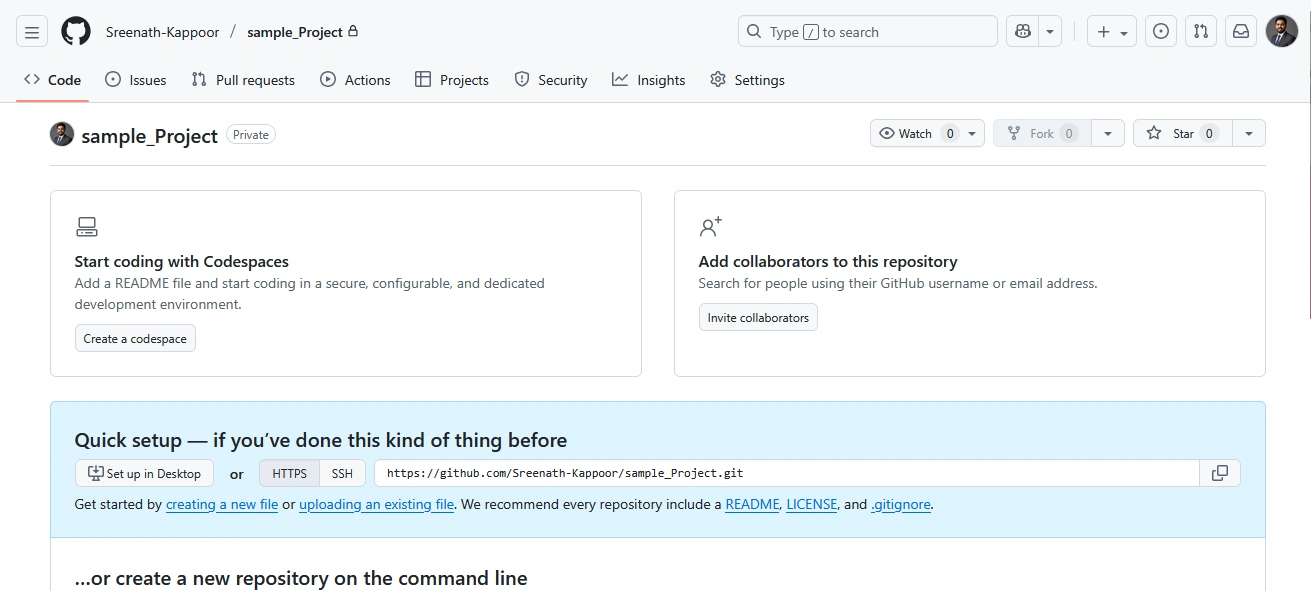
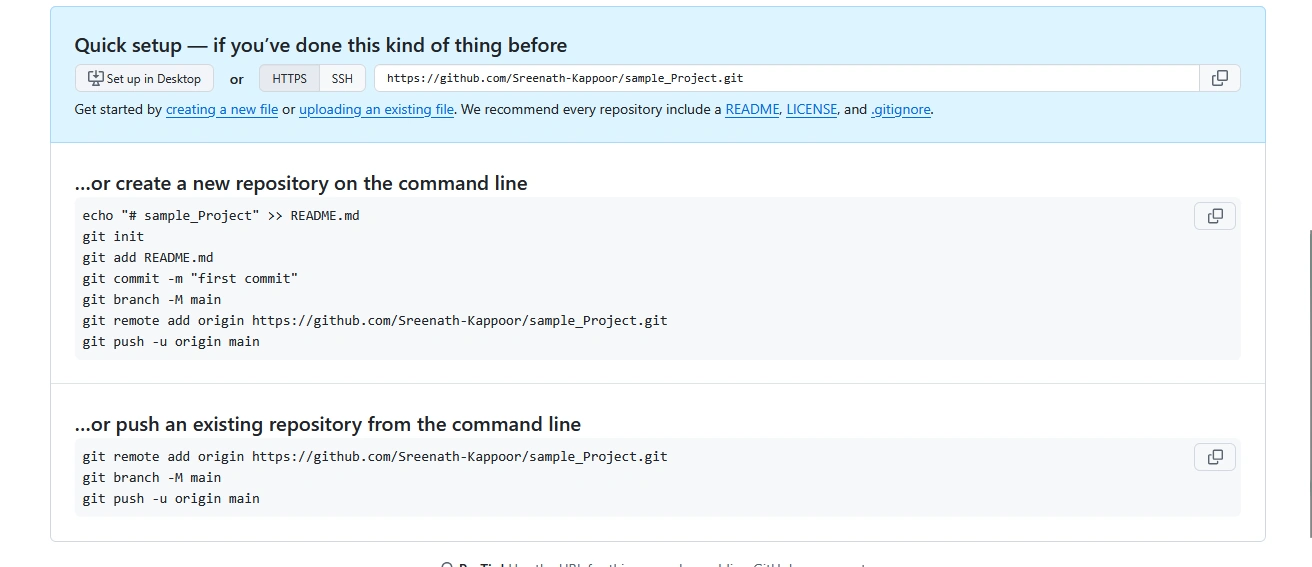
Initialize Git Locally
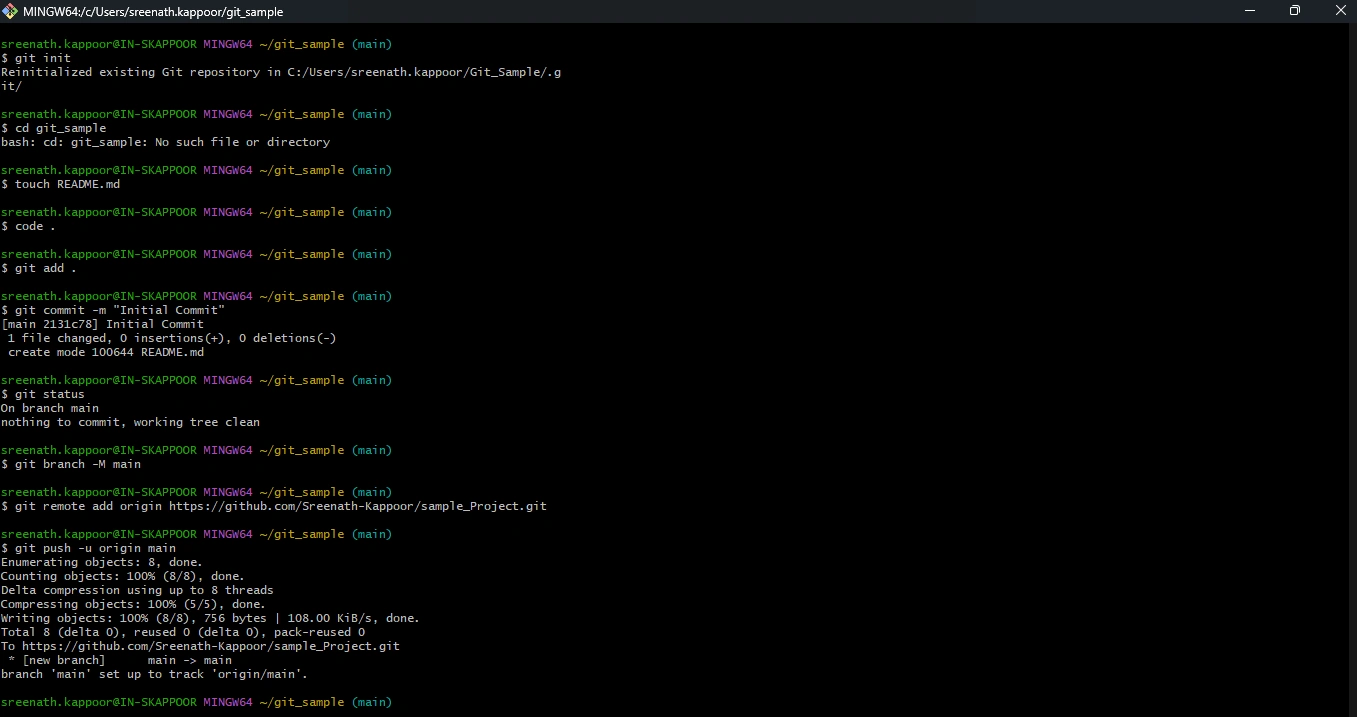
Open a terminal and navigate to your project folder.
Run git init to initialize the folder as a Git repository.
Create a README file: touch README.md.
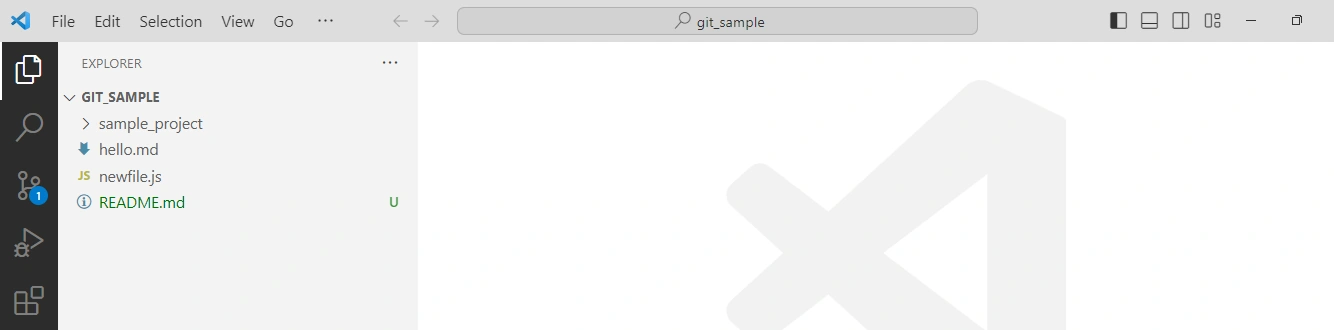
Stage and Commit Files
Stage all files: git add.
Commit the changes: git commit -m "Initial commit".
Link to GitHub Repository
Set the main branch: git branch -M main
Add the remote origin: git remote add origin <repository-url>
Push files to GitHub: git push -u origin main.
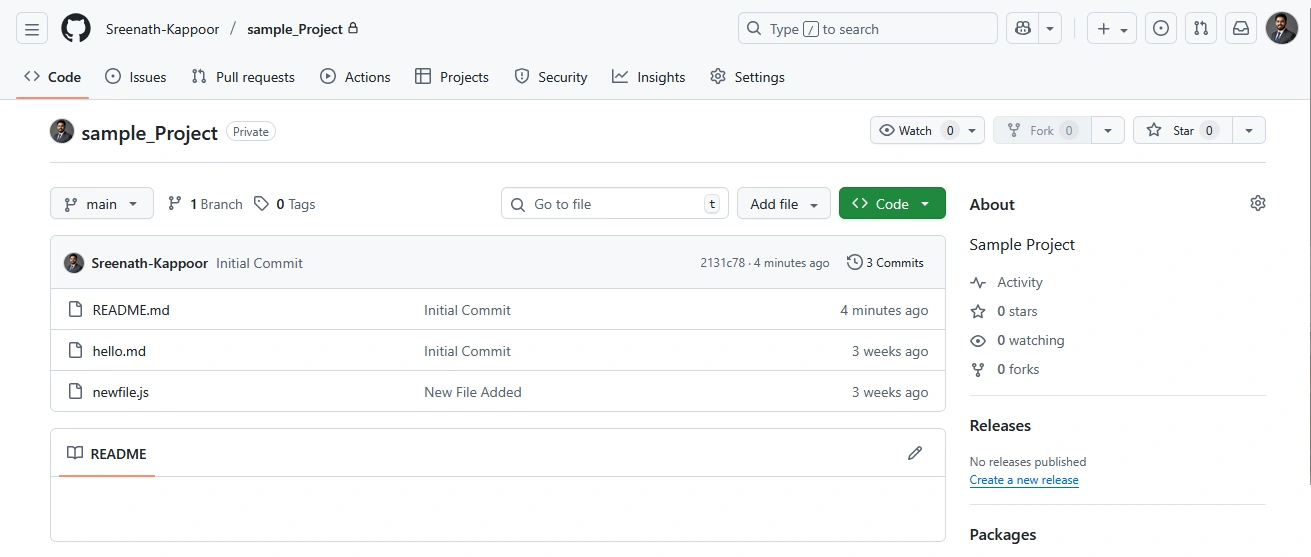
Best Practices
Always use a meaningful commit message to describe changes.
Avoid uploading sensitive data (passwords, API keys etc.) to public repositories.
For large files, consider using Git LFS (Large File Storage) or alternative hosting solutions.
Maintain a README file to document your project and provide instructions
| Method | Best For | Steps |
|---|---|---|
| Web UI | Small projects | Create repo, upload files, commit |
| Terminal | Large projects | Init, add, commit, push |
This provides a clear, step-by-step guide for uploading files and folders to GitHub, suitable for both beginners and experienced users.
Join the conversation! Your thoughts help the community grow.