
Introduction
AJAX (Asynchronous
JavaScript and XML) is a new web development technique use for the interactive
website. AJAX helps us develop web applications and retrieve a small amount of
data from a web server. AJAX consists of different types of technology.
- JavaScript
- XML
- Asynchronous Call to the server
Master Page : Master pages allow you to create a consistent look and behavior for all the pages (or group of pages) in the web application. A master page provides a template for other pages, with shared layout and functionality. The master page defines placeholders for the content, which can be overridden by content pages. The output result is a combination of the master page and the content page. When users request the content page, ASP.NET merges the pages to produce output that combines the layout of the master page with the content of the content page.
Master Page Property :
- Content Placeholder tag <asp:Content Placeholder>
- Content tag <asp:content>
- Go to File->New->WebSite
- Select ASP.NET Empty WebSite
Add MasterPage :
Step 2 : Go to Solution Explorer and right-click.
- Select Add->New Item
- Select Master Page
- Masterpage.master page open
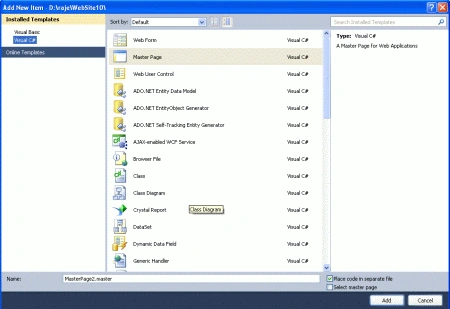
Step 3 : Go to Masterpage [Design Option] and drag Scriptmanager control from Toolbox.
- ScriptManager Control design outside the ContentPlaceHolder.
ScriptManagerControl :
<asp:ContentPlaceHolder
id="head"
runat="server">
</asp:ContentPlaceHolder>
</head>
<body>
<form
id="form1"
runat="server">
<div
style="background-color:
#00FFFF">
<asp:ScriptManager
ID="ScriptManager1"
runat="server">
</asp:ScriptManager>
<asp:ContentPlaceHolder
id="ContentPlaceHolder1"
runat="server">
Create Content page for the master page :
Step 4 : Go to Solution Explorer and right-click.
- Select Add->New Item
- Select WebForm
- Select MasterPage check box and click ok
- Default.aspx page open
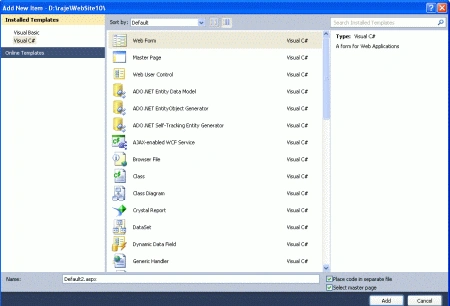
Add UpdatePanel inside the Content option.
Step 5 : Go to the Toolbox
and drag a UpdatePanel, Calendar Control inside the content option.
Control :
<asp:Content
ID="Content1" ContentPlaceHolderID="head"
Runat="Server">
</asp:Content>
<asp:Content
ID="Content2" ContentPlaceHolderID="ContentPlaceHolder1"
Runat="Server">
Content Page<br
/>
<asp:UpdatePanel
id="UpdatePanel1"
runat="server"
UpdateMode="Conditional">
<contenttemplate>
<fieldset>
<legend><strong>UpdatePanel<br
/> </strong></legend>
<asp:Calendar
id="Calendar1"
runat="server"
onselectionchanged="Calendar1_SelectionChanged" BackColor="#FF6699"
BorderColor="#CC0000"></asp:Calendar>
</fieldset>
</contenttemplate>
</asp:UpdatePanel>
</asp:Content>
Step 6 :
Now run the application by Pressing F5.
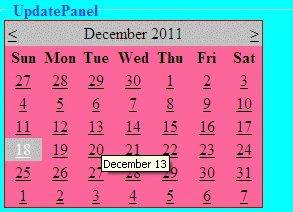
Step 7 : Click in the next
and previous month controls on the calendar.The calendar change without
refreshing the whole page.
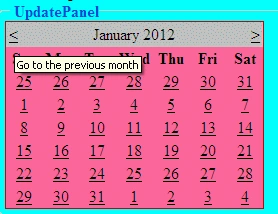
Add control to the MasterPage :
Step 8 : Go to MasterPage drag two button after the ScriptManager Control.
-
Right-click in Button and select property option
- Set the ID of Button and Text property in the Button Control
asp:Button
ID="decrement" runat="server"
Text="-"
OnClick="MasterButton_Click"
Width=" 40px"/>
<asp:Button
ID="increment"
runat="server"
Text="+"
OnClick="MasterButton_Click"
Width="40px"/>
Step 9 :
Now double-click in the page option and write a code.
Code :
public
partial class
MasterPage : System.Web.UI.MasterPage
{
protected void
Page_Load(object sender,
EventArgs e)
{
ScriptManager1.RegisterAsyncPostBackControl(increment);
ScriptManager1.RegisterAsyncPostBackControl(decrement);
}
Step 10 :
Now go to [Design] option and click in
Button control and write a code.
Code :
protected
void MasterButton_Click(object
sender, EventArgs e)
{
switch (((Control)sender).ID)
{
case
"increment":
this.Offset =
this.Offset + 1;
break;
case
"decrement":
this.Offset =
this.Offset - 1;
break;
}
((UpdatePanel)ContentPlaceHolder1.FindControl("UpdatePanel1")).Update();
Calendar cal = ((Calendar)ContentPlaceHolder1.FindControl("Calendar1"));
DateTime newDateTime =
DateTime.Today.Add(new
TimeSpan(Offset, 0, 0, 0));
cal.SelectedDate = newDateTime;
}
Define Public property named offset in the MasterPage:
Property :
public
Int32 Offset
{
get
{ return (Int32)(ViewState["Offset"]
?? 0); }
set
{ ViewState["Offset"] =
value; }
}
Step 11 : Now go to the
content page[Design]option and click in calendar control write a code.
Code :
protected
void Calendar1_SelectionChanged(object
sender, EventArgs e)
{
DateTime selectedDate =
Calendar1.SelectedDate;
Master.Offset =
((TimeSpan)Calendar1.SelectedDate.Subtract(
DateTime.Today)).Days;
}
Step 12 : In a content [design] option double -click in page and define the page-load event and write a code.
Code :
public
partial class
_Default : System.Web.UI.Page
{
protected void
Page_Load(object sender,
EventArgs e)
{
DateTime newDateTime =
DateTime.Today.Add(new
TimeSpan(Master.Offset, 0, 0,
0));
Calendar1.SelectedDate = newDateTime;
}
Add Master Directive :
Step 13 : Go to the content page [Source] option define the MasterPage Directive.
<%@ MasterType VirtualPath="MasterPage.master" %>
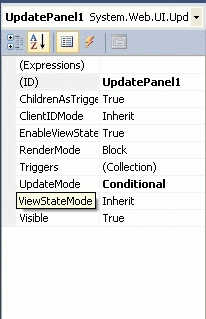
Step 14 : In the property window set the UpdatePanelUpdateModeProperty.
- Define property :Conditional
Step 15 : Now run the application by Pressing F5.
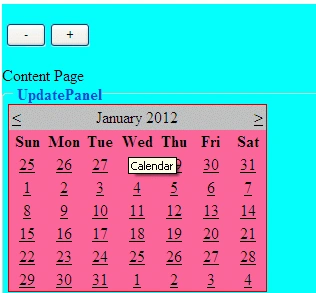
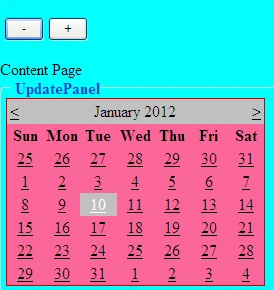
Step 16 : Now select date on the calendar and then click in increment(+) button on the master page to change the selected date.
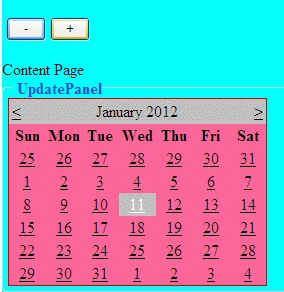
Now click in increment(+) button option
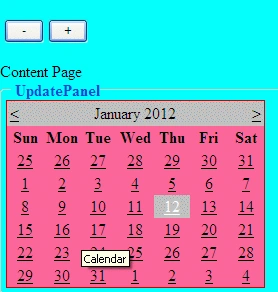
Step 17 : Now select date on the calendar and then click in decrement(-) button on the master page to change the selected date.
samrat mattePosted Jul 19, 2017, 7:05 AM
Getting error : The type name 'Site1' does not exist in the type 'System.Web.UI.WebControls.Panel'. "Site1" is my master page name.