

Introduction
Before we start to code let us first understand a few things.
What is MEAN?
So, basically MEAN stands for MongoDB, Express, AngularJS, and NodeJS.
Now the question is, what are these?
Now we will use these amazing full-stack Javascript frameworks to build a Todo Web Application.
Let us now see which version we will be using for this tutorial.
Instruction
- Clone the project: https://github.com/amitsin6h/todo-mean-app/
- Cloud9 with blank Ubuntu project
Step 1
Let’s start first by installing Nodejs.
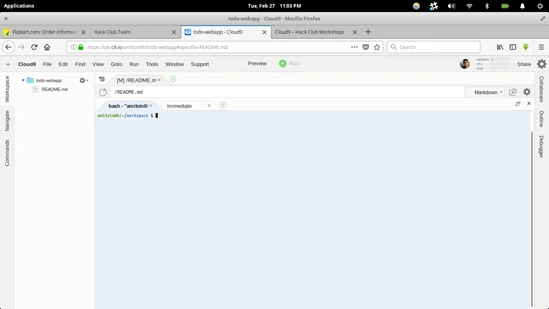
To build our project we need to install Nodejs. Let’s see how to do that below.
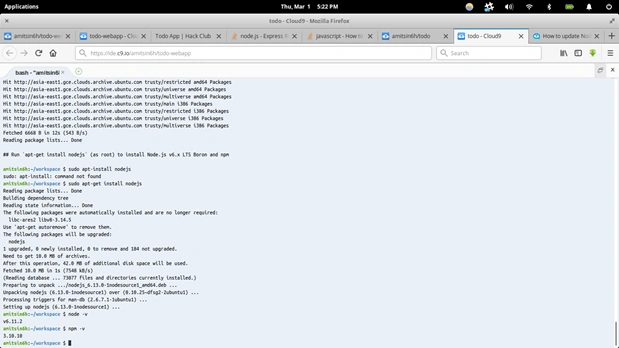
Type the below command in the terminal to install nodejs.
- $ sudo –s
- $ curl -sL https://deb.nodesource.com/setup_6.x | sudo -E bash -
- $ sudo apt-get install nodejs
- $ exit
Once the installation process is done we can check our nodejs version using the below command.
$ node –v (display the node version)
We can also check our npm (Node Package Manager) version using the below command.
$ npm –v (display the npm version)
Node Package Manager is basically used to build projects and to download nodejs library.
Once done, we can now move to Step 2.
Step 2
Installing MongoDB.
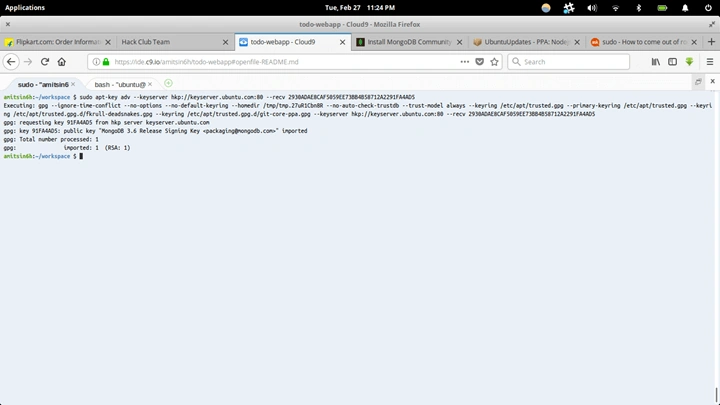
To install MongoDB we need to run the below command.
- $ sudo apt-key adv --keyserver hkp://keyserver.ubuntu.com:80 --recv 2930ADAE8CAF5059EE73BB4B58712A2291FA4AD5
- $ echo "deb [ arch=amd64 ] https://repo.mongodb.org/apt/ubuntu trusty/mongodb-org/3.6 multiverse" | sudo tee /etc/apt/sources.list.d/mongodb-org-3.6.list
- $ sudo apt-get update
- $ sudo apt-get install -y mongodb-org
Once we install our MongoDB, now we are ready for Step 3.
Step 3
Building our project. To build using the below command
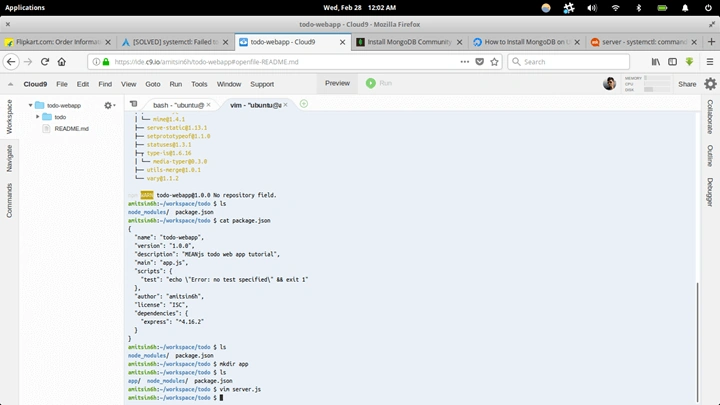
- First, create a separate directory for your project, in our case, it is [todo]
- Run $ npm init command it will ask few things related to project like version and will create pacakage.json for the project.
Step 4
Installing Express. We can install express using the below command.
$ npm install express –save
and this will install the express and also add the package in the pacakage.json folder.
Our Complete Project Structure
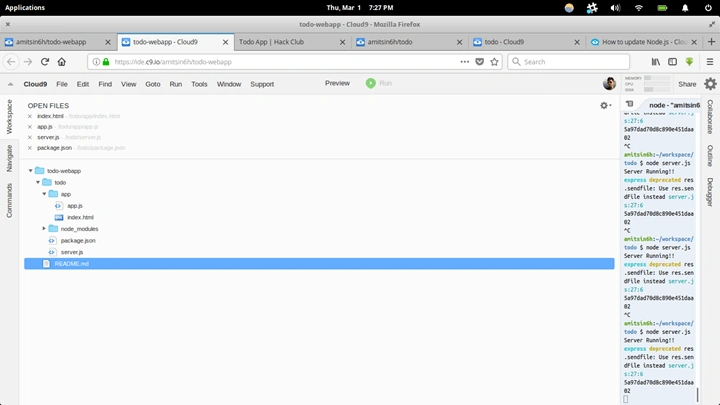
Step 5
Starting our Nodejs Server.
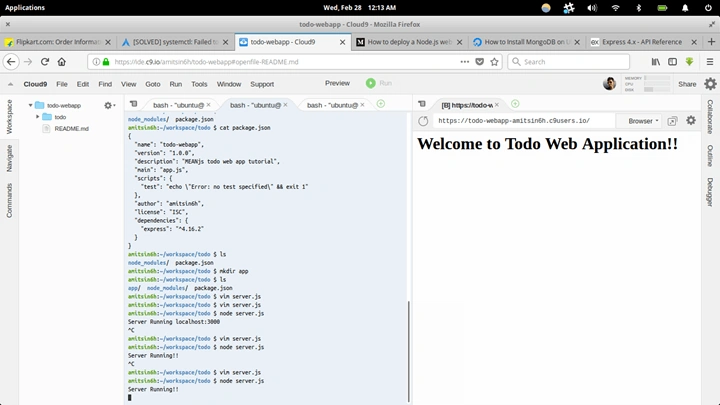
Lets first create server.js file inside todo folder
todo/server.js
- //calling express library
- var express = require('express');
- var app = express();
- //GET request
- app.get('/', function(req, res){
- res.send('<h1>Welcome to Todo Web Application!!');
- });
- app.listen('8080', function(){
- console.log('Server Running!!');
- });
Now let’s start our server using the below command.
$ nodes server.js
Wooo!! Server Running :)
Now to access our application we need to follow the guide shown in the below image.
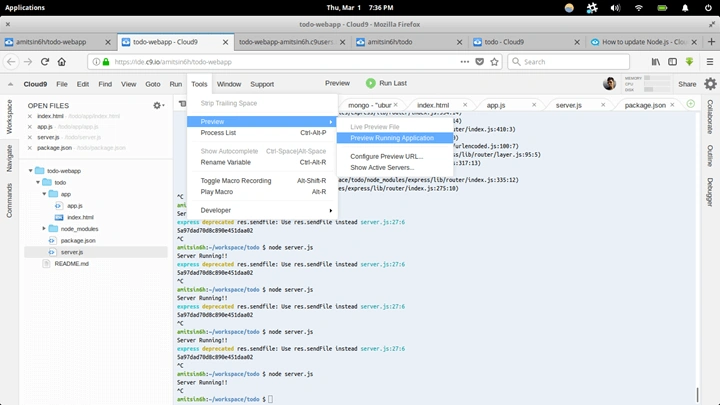
Now we will build our application frontend using Angularjs.
Step 6 - Creating Our Frontend
Before we build our front end let's create a folder named [app] inside the todo folder where we will store our frontend files and then we will see how to connect our fronted with the server.
Now let’s start building our frontend using Angularjs.
todo/app/index.html
- <!doctype html>
- <html lang="en" ng-app="todoApp">
- <head>
- <!-- Required meta tags -->
- <meta charset="utf-8">
- <meta name="viewport" content="width=device-width, initial-scale=1, shrink-to-fit=no">
- <!-- Bootstrap CSS -->
- <link rel="stylesheet" href="https://maxcdn.bootstrapcdn.com/bootstrap/4.0.0/css/bootstrap.min.css" integrity="sha384-Gn5384xqQ1aoWXA+058RXPxPg6fy4IWvTNh0E263XmFcJlSAwiGgFAW/dAiS6JXm" crossorigin="anonymous">
- <script src="https://ajax.googleapis.com/ajax/libs/angularjs/1.6.4/angular.min.js"></script>
- <script type="text/javascript" src="app/app.js"></script>
- <title>Todo App | MEANjs</title>
- <style type="text/css">
- .bg-hackclub{
- background: #F34C5E;
- color: #fff;
- }
- </style>
- <link rel="stylesheet" href="https://maxcdn.bootstrapcdn.com/font-awesome/4.7.0/css/font-awesome.min.css" type="text/css" />
- </head>
- <body>
- <div class="jumbotron jumbotron-fluid bg-hackclub">
- <div class="container">
- <h1 class="display-4">Todo App</h1>
- <p class="lead">This is MEANjs built in web application for Hack Club.</p>
- </div>
- </div>
- <div class="container">
- <div class="row" ng-controller="createTodoController">
- <div class="col-md-6 offset-md-2">
- <div class="input-group input-group-lg">
- <input type="text" ng-model="todo.task" class="form-control" placeholder="Write your daily task here....." aria-label="Large" aria-describedby="inputGroup-sizing-sm">
- </div>
- </div>
- <div class="col-sm-3">
- <button type="button" ng-click="createTodo()" class="btn btn-outline-info btn-lg" >Add Task</button>
- </div>
- </div>
- <hr>
- <div ng-controller="myCtrl">
- <div class="row" ng-repeat="task in tasks.data">
- <div class="col-md-7 offset-md-2">
- <div class="input-group mb-3">
- <div class="input-group-prepend">
- <div class="input-group-text">
- <input type="checkbox" aria-label="Checkbox for following text input">
- </div>
- </div>
- <h1 class="form-control">{{task.task}}</h1>
- <div class="input-group-append">
- <div class="input-group-text bg-danger" ng-click="deleteTask(task._id)">
- <i class="fa fa-trash-o text-white"></i>
- </div>
- </div>
- </div>
- </div>
- </div>
- </div>
- </div>
- </div>
- </div>
- <!-- Optional JavaScript -->
- <!-- jQuery first, then Popper.js, then Bootstrap JS -->
- <script src="https://code.jquery.com/jquery-3.2.1.slim.min.js" integrity="sha384-KJ3o2DKtIkvYIK3UENzmM7KCkRr/rE9/Qpg6aAZGJwFDMVNA/GpGFF93hXpG5KkN" crossorigin="anonymous"></script>
- <script src="https://cdnjs.cloudflare.com/ajax/libs/popper.js/1.12.9/umd/popper.min.js" integrity="sha384-ApNbgh9B+Y1QKtv3Rn7W3mgPxhU9K/ScQsAP7hUibX39j7fakFPskvXusvfa0b4Q" crossorigin="anonymous"></script>
- <script src="https://maxcdn.bootstrapcdn.com/bootstrap/4.0.0/js/bootstrap.min.js" integrity="sha384-JZR6Spejh4U02d8jOt6vLEHfe/JQGiRRSQQxSfFWpi1MquVdAyjUar5+76PVCmYl" crossorigin="anonymous"></script>
- </body>
- </html>
Create an app.js file to load our angularjs components.
todo/app/app.js
- var app = angular.module('todoApp', []);
- app.controller('createTodoController', function($scope,$http) {
- $scope.createTodo = function(){
- //console.log($scope.todo);
- $http.post('api/create/todo', $scope.todo)
- .then(function(success){
- //success callback
- console.log($scope.todo);
- console.log(success.status);
- }, function(error){
- //error callback
- console.log(error.status);
- });
- }
- });
- app.controller("myCtrl", function($scope, $http) {
- $http.get("api/get/tasks")
- .then(function (tasks) {
- $scope.tasks = tasks;
- //console.log(tasks);
- });
- $scope.deleteTask = deleteTask;
- function deleteTask(taskId) {
- $http.delete("/api/delete/task/"+taskId)
- .then(function(){
- //success callback
- console.log('success');
- },function(error){
- //error callback
- console.log('Error');
- });
- }
- });
Step 7
Let’s create our Database.
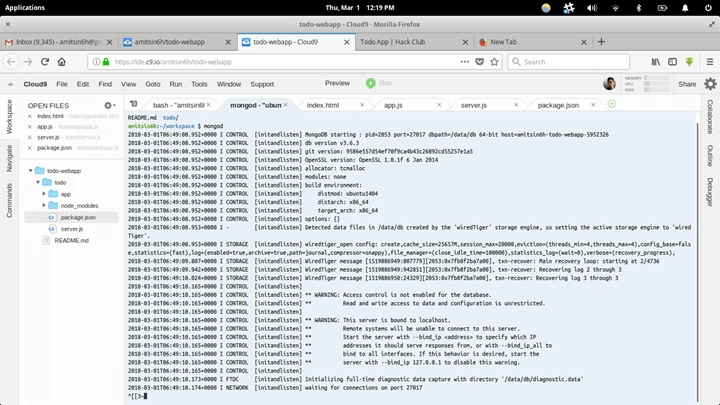
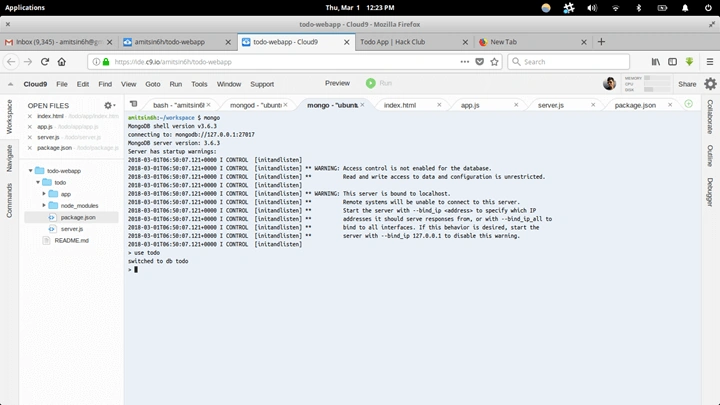
For creating a database using MongoDB first we need to run our MongoDB server using the below command
$ mongod
Once we see our server is running now we are required to create database. So quickly move into a new terminal tab and run the below command for creating a database using MongoDB.
- $ mongo
- $ use todo
Once we are done now we need to connect our MongoDB with our MEANjs application.
Note
Don’t stop the MongoDB server otherwise it won’t get connected with our MEANjs application.
Don’t stop the MongoDB server otherwise it won’t get connected with our MEANjs application.
Step 8 - Connecting to MongoDB
To connect first we need to call the mongodb library used by the express.
So let's install the mongoose library
$ npm install mongoose –save
This will install mongoose and will add it to the package.json file.
Step 9
Installing Body-Parser to parse middleware.
Use the below command to install.
$ npm install body-parser --save
Step 10
Working with Backend.
Now we will work with our server.js file.
In this file we will do the following things.
- Connection request to mongodb
- Create a Model to store our daily task
- Work HTTP GET, POST and DELETE method
- Configure our app to use stactic files and body-parser
Todo/server.js
- //calling express library
- var express = require('express');
- var app = express();
- var bodyparser = require('body-parser');
- var mongoose = require('mongoose');
- //connecting to MongoDB
- mongoose.connect('mongodb://127.0.0.1:27017/todo');
- //creating model
- var TaskSchema = mongoose.Schema({
- task: {type:String}
- }, {collection: 'task'});
- var TaskModel = mongoose.model("TaskModel", TaskSchema);
- //configure app
- app.use('/app', express.static(__dirname + '/app')); //use static file
- app.use(bodyparser.json()); // for parsing application/json
- app.use(bodyparser.urlencoded({ extended: true })); // for parsing application/x-www-form-urlencoded
- //GET request
- app.get('/', function(req, res){
- res.sendfile('app/index.html');
- });
- //POST request to save todo task in database
- app.post("/api/create/todo", createTodo);
- function createTodo(req, res) {
- var todoTask = req.body;
- //console.log(todoTask);
- //save the todoTask in db
- TaskModel
- .create(todoTask)
- .then(
- function (success) {
- console.log('Success');
- },
- function (error) {
- console.log('Error');
- }
- )
- res.json(todoTask);
- }
- //GET all task
- app.get("/api/get/tasks", getAllTasks);
- function getAllTasks(req, res) {
- TaskModel
- .find()
- .then(
- function (tasks) {
- res.json(tasks);
- },
- function (err) {
- res.sendStatus(400);
- });
- }
- //DELETE task
- app.delete("/api/delete/task/:id", deleteTask);
- function deleteTask(req, res) {
- var taskId = req.params.id;
- //console.log(taskId);
- TaskModel
- .remove({_id: mongoose.Types.ObjectId(taskId)})
- .then(function () {
- res.sendStatus(200);
- },
- function () {
- res.sendStatus(400)
- });
- }
- app.listen('8080', function(){
- console.log('Server Running!!');
- });
Step 11
Now let’s run our Todo MEANjs Application.
To run we know which command we have to use
$ node server.js
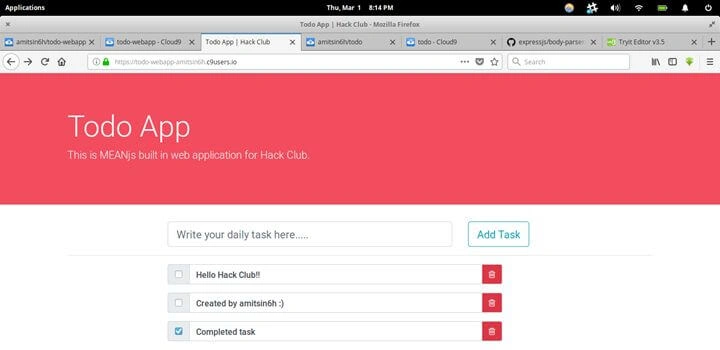
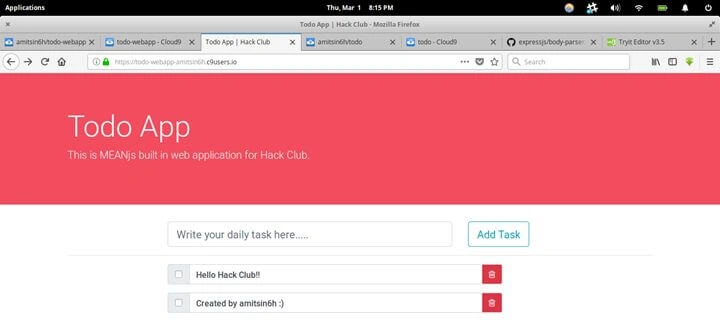
Now create tasks, check the completed task, and delete.
Thank You!!
Join the conversation! Your thoughts help the community grow.