

Introduction
In this article, I am going to tell you how to implement Template Driven Form in the Angular 11 project. In this article, I am covering how to create projects, implement template-driven forms, get forms data, set data in form and validation.
In this article, I’m using bootstrap for designing forms so if you do not know how to add bootstrap in Angular 11 then please refer to the below article first.
- Add Bootstrap 5 in Angular 11
- Also Refer: Events In Angular
In This Article,:
- Create new project
- Create Simple Form Design
- Make Form Template Driven Form
- Get form Data with the name attribute
- Get Data using Local Variable
- Set Data in Form
- Validation in Form
Create New Project
On my pc, there is already Angular’s latest version installed. If you do not have angular in your system you can install it in a few steps. You can refer to angular’s official website to learn how to install angular.
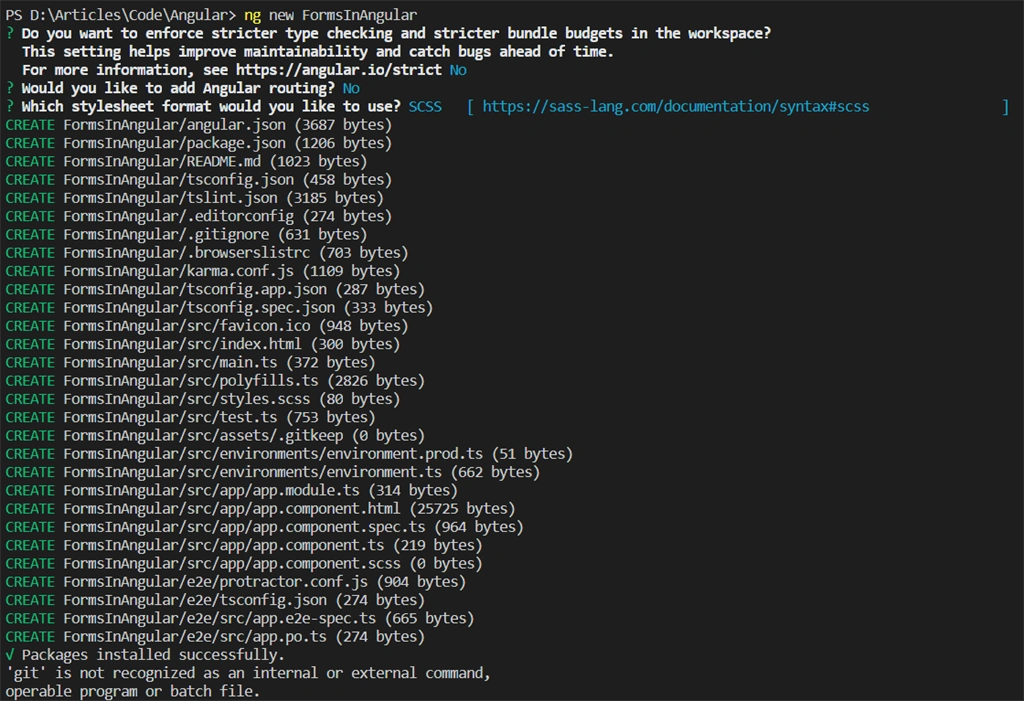
Run the following command to create a new Angular project. Here ng means Angular, new determine that create a new project and FormsInAngular is the project name.
- ng new FormsInAngular
After running this command you will ask some questions about add routing and which style sheet you want to use in your project. You can choose as per your requirement.
Create Simple Form Design
Create a form as per your requirement here I create a form that has textbox, dropdown, and checkbox.
- <div class="row mt-1">
- <form>
- <div class="form-group col-6 m-2 p-2">
- <label for="inputAddress2">Name</label>
- <input type="text" class="form-control" name="name" id="name" placeholder="Name" >
- </div>
- <div class="form-group col-6 m-2 p-2">
- <label for="inputEmail4">Email</label>
- <input type="email" class="form-control" id="email" name="email" placeholder="Email" >
- </div>
- <div class="form-group col-6 m-2 p-2">
- <label for="inputPassword4">Password</label>
- <input type="password" class="form-control" id="password" name="password" placeholder="Password" >
- </div>
- <div class="form-group col-6 m-2 p-2">
- <label for="inputAddress">Address</label>
- <input type="text" class="form-control" name="address" id="address" placeholder="1234 Main St" >
- </div>
- <div class="form-group col-6 m-2 p-2">
- <label for="inputCity">City</label>
- <input type="text" class="form-control" id="city" name="city" >
- </div>
- <div class="form-group col-4 m-2 p-2">
- <label for="state">State</label>
- <select id="state" name="state" class="form-control" >
- <option selected>Choose...</option>
- <option>Gujarat</option>
- <option>UP</option>
- <option>Delhi</option>
- </select>
- </div>
- <div class="form-group col-3 m-2 p-2">
- <label for="inputZip">Zip</label>
- <input type="text" class="form-control" id="zip" name="zip" >
- </div>
- <div class="form-group m-2 p-2">
- <div class="form-check">
- <input class="form-check-input" type="checkbox" id="isMarried" name="isMarried" >
- <label class="form-check-label" for="isMarried">
- Married
- </label>
- </div>
- </div>
- <button type="submit" class="btn btn-primary m-2 p-2">Submit Form</button>
- </form>
- </div>
Make Form Template Driven Form
Step 1
Add FormsModule in your Module import array. For using forms in Angular we need to import this.
- import { FormsModule } from '@angular/forms'; // Import this module for use forms
- import { BrowserModule } from '@angular/platform-browser';
- import { NgModule } from '@angular/core';
- import { AppComponent } from './app.component';
- @NgModule({
- declarations: [
- AppComponent
- ],
- imports: [
- BrowserModule,
- FormsModule // Add this module for use forms
- ],
- providers: [],
- bootstrap: [AppComponent]
- })
- export class AppModule { }
Step 2
Assign your form as ngForm as below give your form name using # and assign ngForm to it. Now your form is treated as template-driven form.
- <form #DemoForm="ngForm"></form>
Get form Data with name attribute
Step 1
Add ngModel attribute in an element.
Step 2
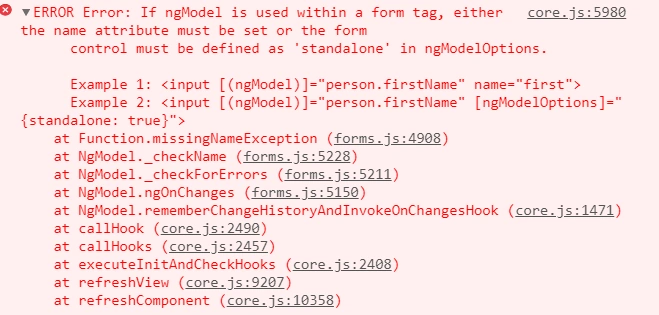
As you see in the above form design that we are given name attribute to every element because if we are using ngModel and not given name attribute that it gives an error like below. So if you do not need to give a name to your element give it.
Step 3
Add submit event in form and call that function which we will create in .ts file and pass your form name without # in the parameter.
- <form #DemoForm="ngForm" (ngSubmit)="onSubmit(DemoForm)">
Step 4
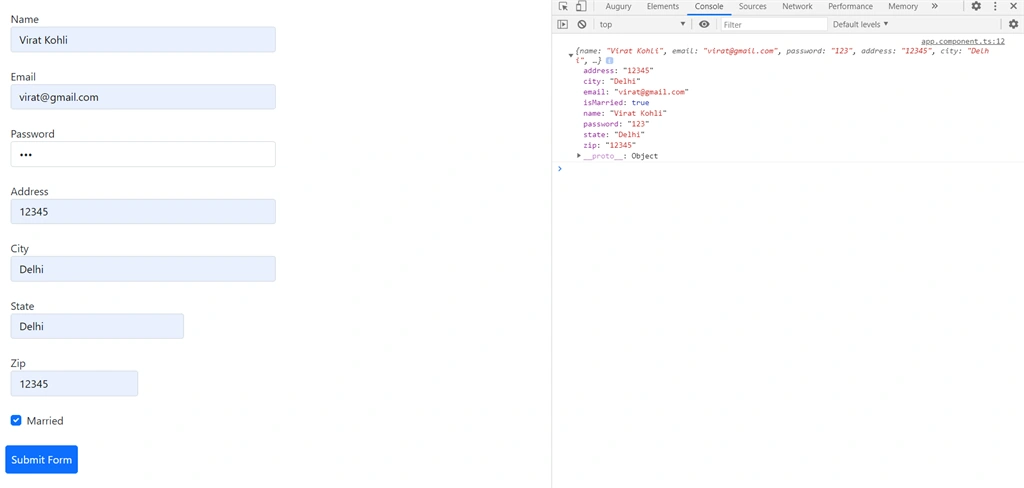
Create a function in .ts file to show data that takes one parameter form. You can get the value of form in an object with property same as your name given in name attribute. For value use YourFormParament.value .
- import { Component } from '@angular/core';
- @Component({
- selector: 'app-root',
- templateUrl: './app.component.html',
- styleUrls: ['./app.component.scss']
- })
- export class AppComponent {
- title = 'FormsInAngular';
- onSubmit(DemoForm){
- console.log(DemoForm.value);
- }
- }
Output
Get Data using Local Variable
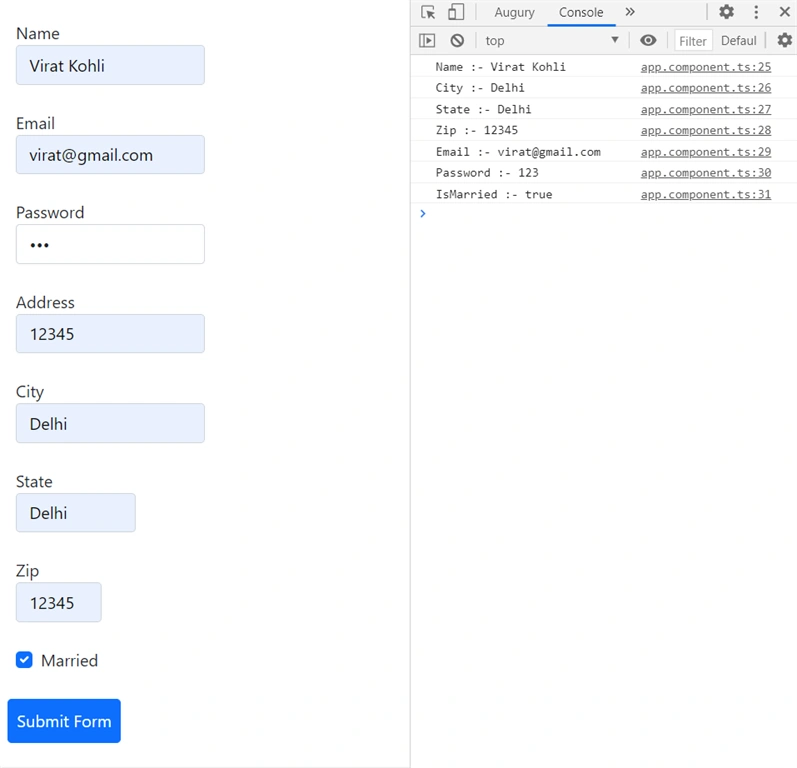
We can also use local variables or objects for getting data from the form. Here we define some variables in .ts file and use them in form. Here are ts file changes.
- import { Component } from '@angular/core';
- @Component({
- selector: 'app-root',
- templateUrl: './app.component.html',
- styleUrls: ['./app.component.scss']
- })
- export class AppComponent {
- title = 'FormsInAngular';
- name: string = "";
- city: string = "";
- state: string = "";
- address: string = "";
- zip: string = "";
- email: string = "";
- password: string = "";
- isMarried: boolean;
- onSubmit(DemoForm) {
- //local variable
- console.log("Name :- " + this.name);
- console.log("City :- " + this.city);
- console.log("State :- " + this.state);
- console.log("Zip :- " + this.zip);
- console.log("Email :- " + this.email);
- console.log("Password :- " + this.password);
- console.log("IsMarried :- " + this.isMarried);
- }
- }
On the design side change ngModel attribute as below. Assign the variable which you created. If you create an object like a person and in-person you have a name, email, etc. then assign it as a person.name, person.email, etc.
- <div class="row mt-1">
- <form #DemoForm="ngForm" (ngSubmit)="onSubmit(DemoForm)">
- <div class="form-group col-6 m-2 p-2">
- <label for="inputAddress2">Name</label>
- <input type="text" class="form-control" name="name" id="name" placeholder="Name" [ngModel]="name">
- </div>
- <div class="form-group col-6 m-2 p-2">
- <label for="inputEmail4">Email</label>
- <input type="email" class="form-control" id="email" name="email" placeholder="Email" [ngModel]="email">
- </div>
- <div class="form-group col-6 m-2 p-2">
- <label for="inputPassword4">Password</label>
- <input type="password" class="form-control" id="password" name="password" placeholder="Password" [ngModel]="password">
- </div>
- <div class="form-group col-6 m-2 p-2">
- <label for="inputAddress">Address</label>
- <input type="text" class="form-control" name="address" id="address" placeholder="1234 Main St" [ngModel]="address">
- </div>
- <div class="form-group col-6 m-2 p-2">
- <label for="inputCity">City</label>
- <input type="text" class="form-control" id="city" name="city" [ngModel]="city">
- </div>
- <div class="form-group col-4 m-2 p-2">
- <label for="state">State</label>
- <select id="state" name="state" class="form-control" [ngModel]="state">
- <option selected>Choose...</option>
- <option>Gujarat</option>
- <option>UP</option>
- <option>Delhi</option>
- </select>
- </div>
- <div class="form-group col-3 m-2 p-2">
- <label for="inputZip">Zip</label>
- <input type="text" class="form-control" id="zip" name="zip" [ngModel]="zip">
- </div>
- <div class="form-group m-2 p-2">
- <div class="form-check">
- <input class="form-check-input" type="checkbox" id="isMarried" name="isMarried" [ngModel]="isMarried">
- <label class="form-check-label" for="isMarried">
- Married
- </label>
- </div>
- </div>
- <button type="submit" class="btn btn-primary m-2 p-2">Submit Form</button>
- </form>
- </div>
Set Data in Form
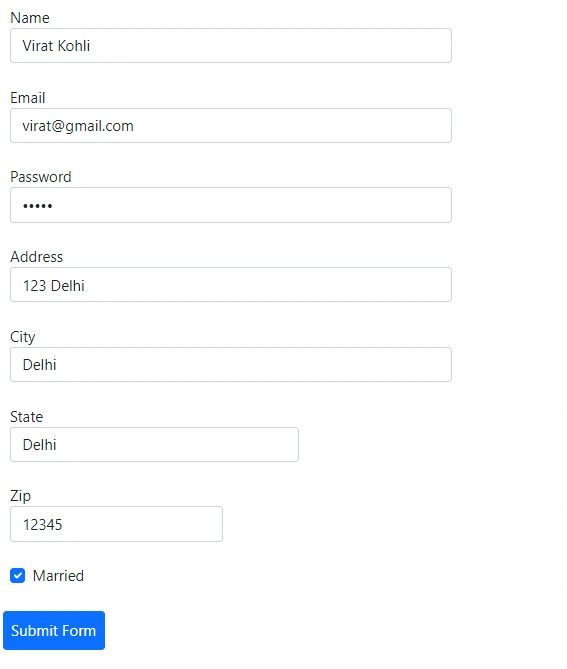
Giving value to elements in Template-driven forms is very easy. You need to assign value to a variable or object which you use. As you can see below here I only assign data to variables and it’s reflected in form. ngModel has two-way binding so we can get data using variable and also bind data using that variable.
- import { Component } from '@angular/core';
- @Component({
- selector: 'app-root',
- templateUrl: './app.component.html',
- styleUrls: ['./app.component.scss']
- })
- export class AppComponent {
- title = 'FormsInAngular';
- name: string = "Virat Kohli";
- city: string = "Delhi";
- state: string = "Delhi";
- address: string = "123 Delhi";
- zip: string = "12345";
- email: string = "[email protected]";
- password: string = "12345";
- isMarried: boolean = true;
- onSubmit(DemoForm) {
- //forms value
- console.log(DemoForm.value);
- //local variable
- console.log("Name :- " + this.name);
- console.log("City :- " + this.city);
- console.log("State :- " + this.state);
- console.log("Zip :- " + this.zip);
- console.log("Email :- " + this.email);
- console.log("Password :- " + this.password);
- console.log("IsMarried :- " + this.isMarried);
- }
- }
Output
Validation in Form
If you see any type of form it has validation. In simple form, it also has at least required validation. In Template Driven form we can also use validation.
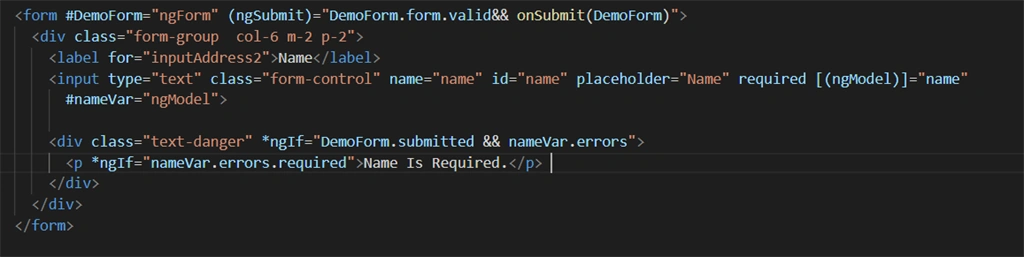
Here are changes which you need to do in your existing form.
Explanation
- Here first of all we add conditions in submitting an event that our form is valid than the call submits method.
- In the element we add two attributes first is required and second, we define the template variable and assign it to ngModel. Here you need to note one thing that your template variable and local variable name must be different otherwise it gives an error.
- Next, we add div and add directive ngIf. In that condition, we define that is form is submitted and that element has an error. Here form submitted condition is required because when we use this without condition then its shows an error on the form load and that is not right.
- And in that div, we also define another condition that our element has required the error or not because the element has many types of error like invalid email, required, min, max, etc.
- <div class="row mt-1">
- <form #DemoForm="ngForm" (ngSubmit)="DemoForm.form.valid&& onSubmit(DemoForm)">
- <div class="form-group col-6 m-2 p-2">
- <label for="inputAddress2">Name</label>
- <input type="text" class="form-control" name="name" id="name" placeholder="Name" required [(ngModel)]="name" #nameVar="ngModel">
- <div class="text-danger" *ngIf="DemoForm.submitted && nameVar.errors" >
- <p *ngIf="nameVar.errors.required"> Name Is Required.</p>
- </div>
- </div>
- <div class="form-group col-6 m-2 p-2">
- <label for="inputEmail4">Email</label>
- <input type="email" class="form-control" id="email" name="email" placeholder="Email" [(ngModel)]="email" #emailVar="ngModel" required>
- <div class="text-danger" *ngIf="DemoForm.submitted &&emailVar.errors" >
- <p *ngIf="emailVar.errors.required"></p>Email Is Required.
- </div>
- </div>
- <div class="form-group col-6 m-2 p-2">
- <label for="inputPassword4">Password</label>
- <input type="password" class="form-control" id="password" name="password" placeholder="Password" [(ngModel)]="password" #passwordVar="ngModel">
- </div>
- <div class="form-group col-6 m-2 p-2">
- <label for="inputAddress">Address</label>
- <input type="text" class="form-control" name="address" id="address" placeholder="1234 Main St" [(ngModel)]="address" #addressVar="ngModel">
- </div>
- <div class="form-group col-6 m-2 p-2">
- <label for="inputCity">City</label>
- <input type="text" class="form-control" id="city" name="city" [(ngModel)]="city" #cityVar="ngModel">
- </div>
- <div class="form-group col-4 m-2 p-2">
- <label for="state">State</label>
- <select id="state" name="state" class="form-control" [(ngModel)]="state" #stateVar="ngModel">
- <option selected>Choose...</option>
- <option>Gujarat</option>
- <option>UP</option>
- <option>Delhi</option>
- </select>
- </div>
- <div class="form-group col-3 m-2 p-2">
- <label for="inputZip">Zip</label>
- <input type="text" class="form-control" id="zip" name="zip" [(ngModel)]="zip" #zipVar="ngModel">
- </div>
- <div class="form-group m-2 p-2">
- <div class="form-check">
- <input class="form-check-input" type="checkbox" id="isMarried" name="isMarried" [(ngModel)]="isMarried" #isMarriedVar="ngModel">
- <label class="form-check-label" for="isMarried">
- Married
- </label>
- </div>
- </div>
- <button type="submit" class="btn btn-primary m-2 p-2">Submit Form</button>
- </form>
- </div>

Output
Conclusion
So here we created Template Driven form, set data in form, get data from a form and also use validation. If you find this article useful kindly like this article and share it with your friends. Thank You.
Join the conversation! Your thoughts help the community grow.