

Introduction
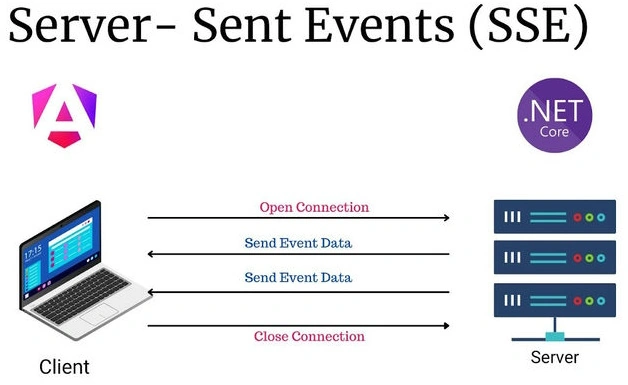
Server-Sent Events (SSE) is a server push technology enabling a server to push real-time updates to the browser over a single HTTP connection. This article demonstrates how to implement SSE in a .NET Core API to push updates to an Angular UI in real-time.
Prerequisites
- .NET Core SDK
- Node.js and Angular CLI
- Visual Studio or Visual Studio Code
- Basic knowledge of .NET Core, Angular, and HTTP protocols
Step 1. Setting Up the .NET Core Web API.
Create a New .NET Core Web API Project
 dotnet new webapi -n QuickNotifyAPI
cd QuickNotifyAPI
Implement SSE in the Controller
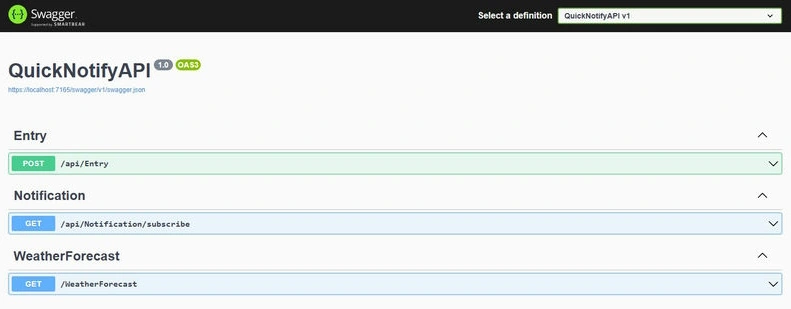
Create a NotificationController to handle SSE connections and push updates to the client.
using Microsoft.AspNetCore.Http;
using Microsoft.AspNetCore.Mvc;
using System.Collections.Concurrent;
using System.Text;

namespace QuickNotifyAPI.Controllers
{
    [Route("api/[controller]")]
    [ApiController]
    public class NotificationController : ControllerBase
    {
        private static readonly ConcurrentDictionary<string, StreamWriter> _clients = new ConcurrentDictionary<string, StreamWriter>();

        [HttpGet("subscribe")]
        public async Task Subscribe(CancellationToken cancellationToken)
        {
            Response.Headers.Add("Content-Type", "text/event-stream");
            var clientId = Guid.NewGuid().ToString();
            var clientStream = new StreamWriter(Response.Body, Encoding.UTF8);
            _clients.TryAdd(clientId, clientStream);

            try
            {
                while (!cancellationToken.IsCancellationRequested)
                {
                    await Task.Delay(1000, cancellationToken);
                }
            }
            catch (TaskCanceledException) { }
            finally
            {
                _clients.TryRemove(clientId, out _);
            }
        }

        public static async Task SendNotificationAsync(string message)
        {
            foreach (var client in _clients.Values)
            {
                try
                {
                    await client.WriteLineAsync($"data: {message}\n");
                    await client.FlushAsync();
                }
                catch (Exception) { }
            }
        }
    }
}
Create an Endpoint to Add Entries and Trigger Notifications
using Microsoft.AspNetCore.Http;
using Microsoft.AspNetCore.Mvc;

namespace QuickNotifyAPI.Controllers
{
    [Route("api/[controller]")]
    [ApiController]
    public class EntryController : ControllerBase
    {
        [HttpPost]
        public async Task<IActionResult> CreateEntry([FromBody] string entry)
        {
            try
            {
                await NotificationController.SendNotificationAsync($"New entry created: {entry}");
                return Ok(new { StatusCode = 200, message = "Entry created", entry });
            }
            catch (Exception ex)
            {
                return Ok(new { StatusCode = 400, message = "Something went wrong", entry });
            }
        }
    }
}
Step 2. Setting Up the Angular Frontend.
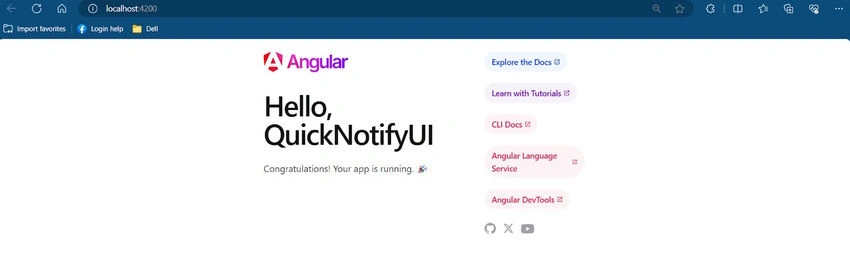
Create a New Angular Project
ng new QuickNotifyUI


Create a Service to Handle SSE
- Generate a new service: PushNotify.
- Generate service ng Cli ‘ng generates service PushNotify’.
import { Injectable } from '@angular/core'; @Injectable({ providedIn: 'root' }) export class PushNotifyService { constructor() { } } - SSE Functionalities Implemented In PushNotifyService.
Using the Service in a Component
Now, you can use this service in your component by calling getNotify().
import { Injectable } from '@angular/core';
import { Observable } from 'rxjs';

@Injectable({
  providedIn: 'root'
})
export class PushNotifyService {
  eventSource!: EventSource;
  url = 'https://localhost:7165/api/Notification/subscribe';

  constructor() { }

  getNotify() {
    return new Observable(obs => {
      this.eventSource = new EventSource(this.url);

      this.eventSource.onerror = (error) => {
        console.log(error);
      }

      this.eventSource.onmessage = (message) => {
        obs.next(message.data);
      }
    });
  }
}
Component to Display Live Notifications
import { ChangeDetectorRef, Component, OnInit } from '@angular/core';
import { RouterOutlet } from '@angular/router';
import { PushNotifyService } from './push-notify.service';

@Component({
  selector: 'app-root',
  templateUrl: './app.component.html',
  styleUrls: ['./app.component.css']
})
export class AppComponent implements OnInit {
  title = "QuickNotify";

  constructor(private notify: PushNotifyService, private cdf: ChangeDetectorRef) { }

  ngOnInit(): void {
    this.notify.getNotify().subscribe({
      next: (data: any) => {
        this.title = data;
        console.log(typeof (data));
        this.cdf.detectChanges();
      }
    });
  }
}
Update Component Template
<h1>Hello, {{ title }}</h1>
Running the Applications
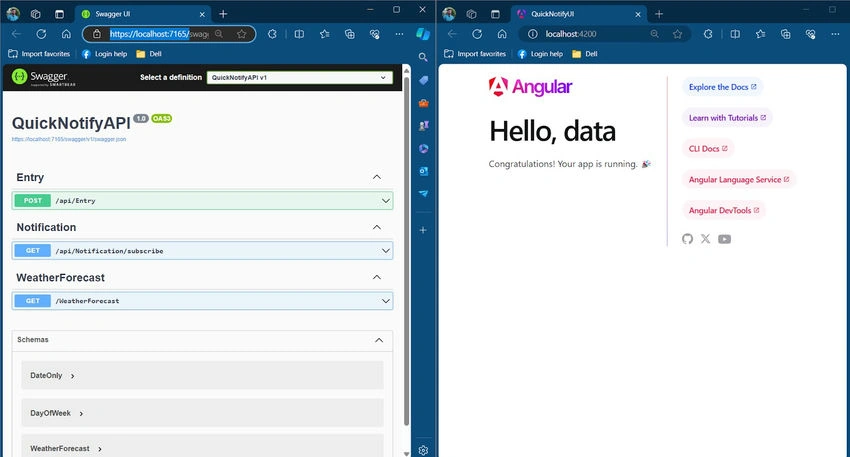
Both Applications run CLI here.
Run the .NET Core Web API
dotnet run
Run the Angular Application
ng serve
Open Your Browser
- Angular: Navigate to http://localhost:4200 to see the live notifications.
- .NET core API: Navigate to https://localhost:7165/ to see live APIs (send event Api Here )
Here both Applications run snaps.
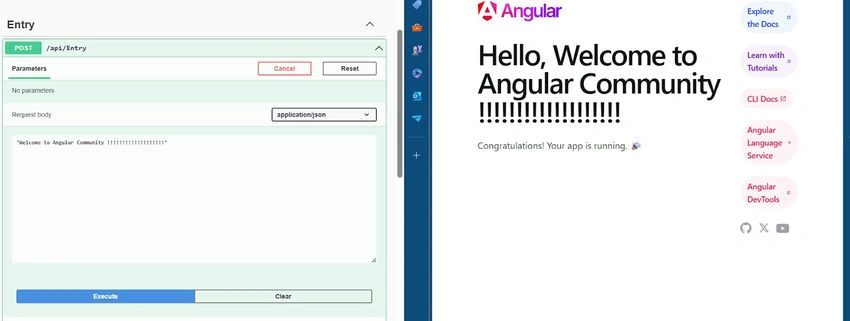
Test Creating an Entry
Use tools like Postman or create a simple Angular form to send a POST request to the EntryController to create a new entry. For example, using Postman, send a POST request to https://localhost:7165/api/Entry with a JSON body like: "Welcome to Angular Community".
Conclusion
This guide demonstrated how to implement Server-Sent Events (SSE) in a .NET Core Web API to push real-time updates to an Angular frontend. SSE is an efficient way to achieve real-time communication from server to client, suitable for applications requiring live updates such as notifications, live scores, or monitoring dashboards.
Join the conversation! Your thoughts help the community grow.