
Introduction
This article explains how to use a SlidingDrawer in your activity. A SlidingDrawer hides the content from the screen and allows the user to bring content onto the screen. You can use a sliding drawer vertically or horizontally or both. A SlidingDrawer can only be used inside a RelativeLayout and FrameLayout. In the XML file, you will use a SlidingDrawer with one button to handle the layout and an imageview that you want to drag.
In a Java class file, you will set the SlidingDrawer on setOnDarwablwCloseListener that closes the sliding drawer when you will click on the handle button. Inside the onDrawableClose you will set the handle button on the setBackgroundResource that sets the background resource on button click. After this, to open the sliding drawer you will set the SlidingDawer on setDawableOpenListener that opens the drawer when you will click on the handle button.
Step 1
Create an XML file and write this:
Step 2
- <RelativeLayout xmlns:android="http://schemas.android.com/apk/res/android"
- xmlns:tools="http://schemas.android.com/tools"
- android:layout_width="match_parent"
- android:layout_height="match_parent"
- android:paddingLeft="@dimen/activity_horizontal_margin"
- android:paddingRight="@dimen/activity_horizontal_margin"
- android:paddingTop="@dimen/activity_vertical_margin"
- android:paddingBottom="@dimen/activity_vertical_margin"
- tools:context=".MainActivity"
- android:background="#d1e7df">
- <SlidingDrawer
- android:layout_width="fill_parent"
- android:layout_height="fill_parent"
- android:content="@+id/content"
- android:handle="@+id/handle" android:id="@+id/slidingDrawer"
- android:layout_centerVertical="true"
- android:layout_centerHorizontal="true">
- <Button
- android:id="@+id/handle"
- android:layout_width="wrap_content"
- android:layout_height="wrap_content"
- android:background="@drawable/up"/>
- <LinearLayout
- android:id="@+id/content"
- android:layout_width="fill_parent"
- android:layout_height="fill_parent"
- android:orientation="vertical">
- <ImageView
- android:layout_height="fill_parent"
- android:layout_width="fill_parent"
- android:background="@drawable/img"
- >
- </ImageView>
- </LinearLayout>
- </SlidingDrawer>
- </RelativeLayout>
- package com.slidingdrawerexample;
- import android.app.Activity;
- import android.os.Bundle;
- import android.widget.Button;
- import android.widget.SlidingDrawer;
- public class MainActivity extends Activity {
- SlidingDrawer sliding;
- Button button;
- @Override
- protected void onCreate(Bundle savedInstanceState) {
- super.onCreate(savedInstanceState);
- setContentView(R.layout.activity_main);
- sliding=(SlidingDrawer)findViewById(R.id.slidingDrawer);
- button=(Button)findViewById(R.id.handle);
- sliding.setOnDrawerCloseListener(new SlidingDrawer.OnDrawerCloseListener() {
- @Override
- public void onDrawerClosed() {
- button.setBackgroundResource(R.drawable.down);
- }
- });
- sliding.setOnDrawerOpenListener(new SlidingDrawer.OnDrawerOpenListener() {
- @Override
- public void onDrawerOpened() {
- button.setBackgroundResource(R.drawable.up);
- }
- });
- }
- }
Step 3
Android Menifest file
Step 4
Output Screen
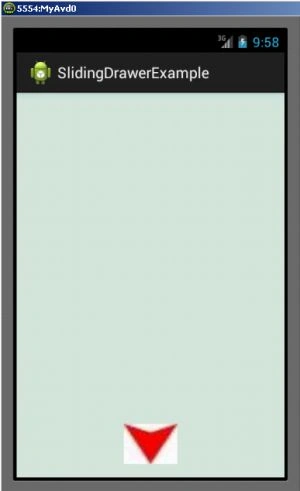 Step 5
When you slide the button:
Step 5
When you slide the button:
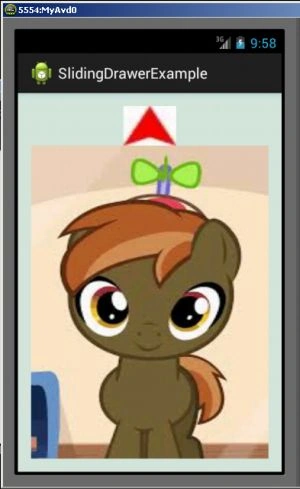
- <?xml version="1.0" encoding="utf-8"?>
- <manifest xmlns:android="http://schemas.android.com/apk/res/android"
- package="com.slidingdrawerexample"
- android:versionCode="1"
- android:versionName="1.0" >
- <uses-sdk
- android:minSdkVersion="7"
- android:targetSdkVersion="17" />
- <application
- android:allowBackup="true"
- android:icon="@drawable/ic_launcher"
- android:label="@string/app_name"
- android:theme="@style/AppTheme" >
- <activity
- android:name="com.slidingdrawerexample.MainActivity"
- android:label="@string/app_name" >
- <intent-filter>
- <action android:name="android.intent.action.MAIN" />
- <category android:name="android.intent.category.LAUNCHER" />
- </intent-filter>
- </activity>
- </application>
- </manifest>
Join the conversation! Your thoughts help the community grow.