

Introduction
This article provides an example of a confirmation box in the Web API. We often use a confirmation box for verifying or accepting information. It has two buttons, "OK" and "Cancel". If we click on the "Ok" button then the TextBox returns the value true and if the "Cancel" button is clicked then the TextBox returns false.
The following provides an example of a confirmation box.
Step 1
First create an application:
- Start Visual Studio 2013.
- From the Start window select "New Project".
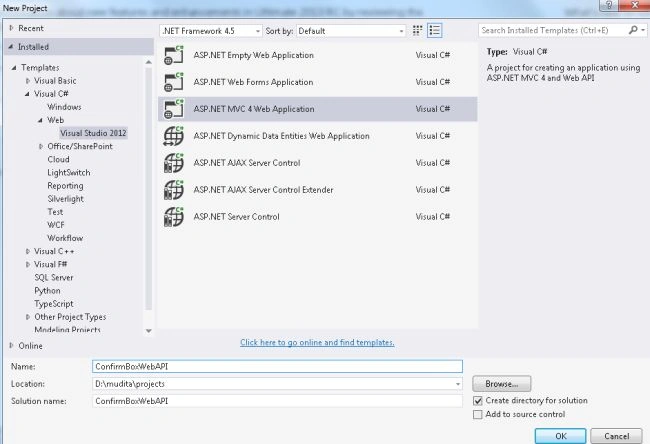
- From the new project window select "Installed" -> "Visual C#" -> "Web" -> "Visual Studio 2012".
- Select "ASP.NET MVC4 Web Application" and click the "Ok" button.
- From the "MVC4 project" window select "Web API".
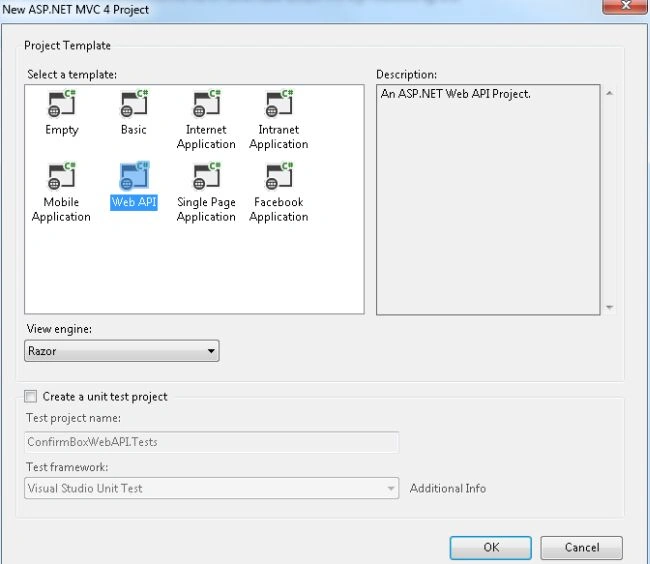
- Click on the "OK" button.
Step 2
Now add a Model class in the model folder as in the following:
- In the "Solution Explorer".
- Right-click on the "Model folder" -> "Add" -> "Class".
- Select "Installed" -> "Visual C#" and select "Class".
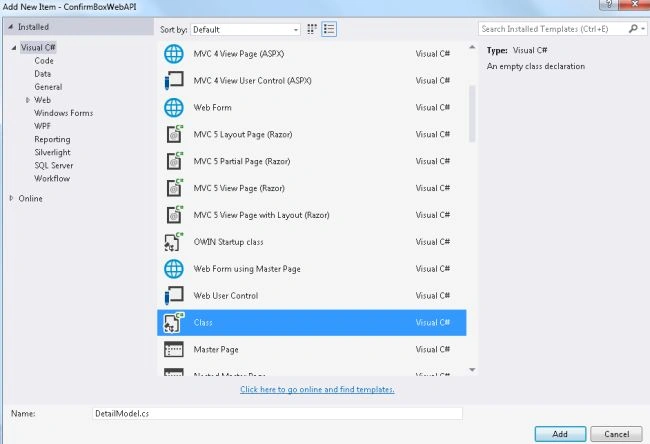
- Click on the "OK" button.
- using System;
- using System.Collections.Generic;
- using System.Linq;
- using System.Web;
- namespace ConfirmBoxWebAPI.Models
- {
- public class DetailModel
- {
- public int ID { get; set; }
- public string Name { get; set; }
- public string Address { get; set; }
- }
- }
Step 3
In the "HomeController" add some code. This file exists:
- In the "Solution Explorer".
- Expand the "Controller" folder.
- Select the "HomeController".
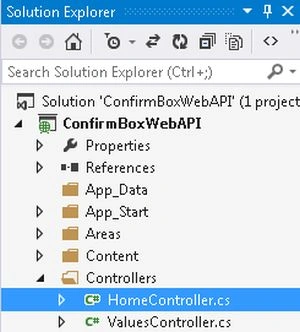
Add the following code:
- using System;
- using System.Collections.Generic;
- using System.Linq;
- using System.Web;
- using System.Web.Mvc;
- using ConfirmBoxWebAPI.Models;
- namespace ConfirmBoxWebAPI.Controllers
- {
- public class HomeController : Controller
- {
- [HttpGet]
- public ActionResult Index()
- {
- return View();
- }
- [HttpPost]
- public ActionResult Display(DetailModel info)
- {
- return View(info);
- }
- }
- }
Step 4
Now create a View.
- In the "HomeController".
- Right-click on the Action method "Display".
- Select "Add View".
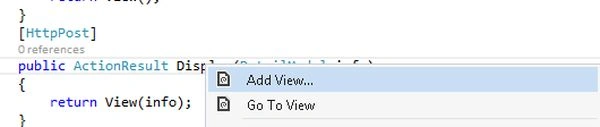
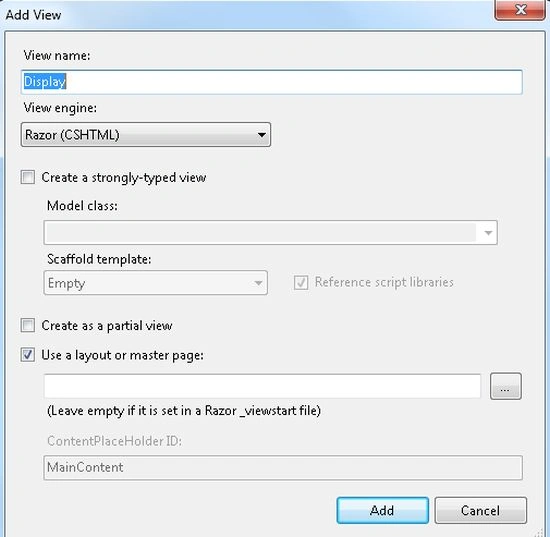
- Change the name of the view and click on the "Add" button.
Add the following code:
- @model ConfirmBoxWebAPI.Models.DetailModel
- @{
- ViewBag.Title = "Display";
- }
- <h2>Display</h2>
- Id:: @Model.ID<br />
- Name:: @Model.Name <br />
- Address:: @Model.Address <br />
Step 5
In the View provide the following code.
-
In the "Solution Explprer".
-
Expand the "Views Folder".
-
Select "Home" -> "Index .cshtml".
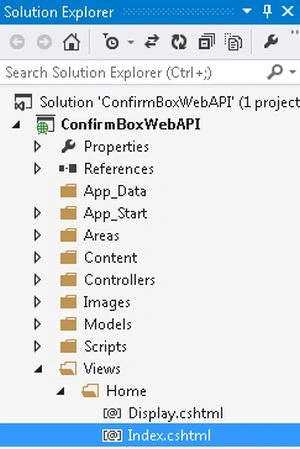
Add the following code.
- @model ConfirmBoxWebAPI.Models.DetailModel
- @{
- ViewBag.Title = "Index";
- }
- <h2>Example of confermation Box</h2>
- <script type="text/javascript">
- function Show() {
- var Item = {
- Name: $("#Name").val(),
- Address: $("#Address").val()
- };
- if (Item.Name != "" && Item.Address != "") {
- var r = confirm("Are you sure you want to submit the record?");
- if (r==true)
- {
- return true;
- }
- else
- {
- return false;
- }
- }
- else {
- var t = confirm("Please insert the record");
- if (t == true) {
- return false;
- }
- }
- }
- </script>
- @using (Html.BeginForm("Display", "Home"))
- {
- @Html.Label("Name");
- @Html.TextBoxFor(m => m.Name)<br />
- @Html.Label("Address");
- @Html.TextBoxFor(m => m.Address)<br />
- <input type="submit" value=" submit" onclick="javascript: return Show();" />
- }
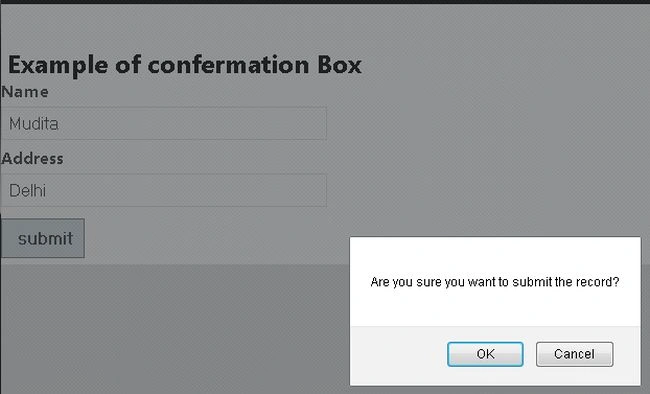
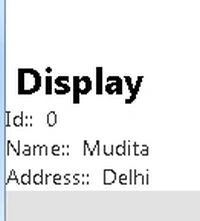
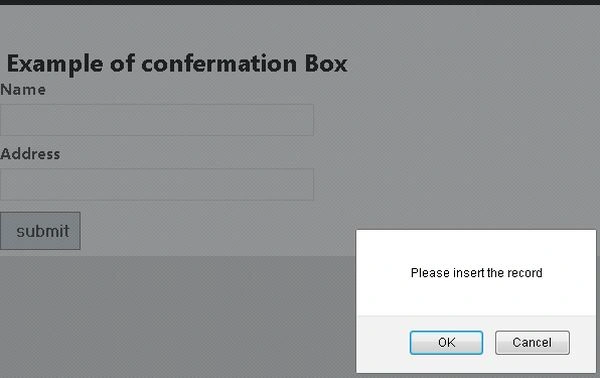
In the code above we define a function "Show()" in which we take the value of the variable. If the TextBox value is not empty then it displays the message "are you sure you want to submit the record" now if you click on "Ok" then it shows the TextBox value. If the textboxes are empty then it shows the message "please insert the record". If Ok is clicked again then it returns the textboxes.
Step 6
Now execute the application.
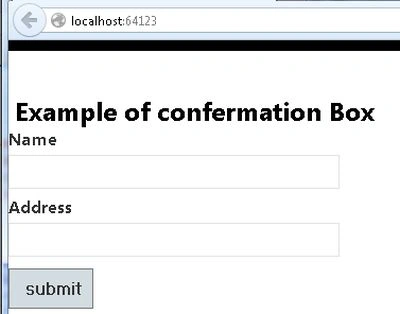
Insert the values into the textboxes and click on the "Submit" button.
Without inserting the value, click on the submit button.
Join the conversation! Your thoughts help the community grow.