

Introduction
Let me take you back to the first time I set up a Docker Swarm cluster. I had two laptops, a Raspberry Pi, and more enthusiasm than experience. I imagined a smooth orchestration setup in minutes. Spoiler alert: it took a few more than "a few" minutes. But the learning I gained from getting it working was priceless.
Setting up a Swarm is often seen as the technical turning point where curiosity meets hands-on implementation. You’ve read about what Docker Swarm can do—now it’s time to bring it to life.
This chapter walks you through everything you need to build your own Swarm cluster from scratch, even if you’ve never done it before. We’ll keep the commands simple, the language friendly, and the goals clear. Whether you’re on a personal laptop or spinning up cloud instances, by the end of this chapter, you’ll have a functional Docker Swarm cluster—and the confidence to deploy on it.
Prerequisites: What You Need Before You Swarm
Let’s start with the basics. You don’t need a data center or a dozen servers to follow along. You just need:
Tools You Need:
- Docker installed on each node (manager and worker)
- At least two to three Linux machines or VMs (even VirtualBox or cloud instances work fine)
- Basic familiarity with the Linux terminal
- Access to SSH between machines (optional but helpful)
Tip: For testing, you can create multiple VMs on a single machine using VirtualBox and VMware Workstation or even use tools like Docker Machine or Multipass.
Steps to create a Swarm Cluster
Now, the fun begins. We'll build the cluster piece by piece.
Let’s say you have:
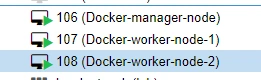
manager-node: The machine that will control your Swarmworker-node-1andworker-node-2: Machines that will run your app containers
Let’s start by initializing the manager.
Step 1. Initialize the Swarm on the Manager Node
Log in to your manager node and run:
docker swarm init --advertise-addr <MANAGER-IP>
Replace <MANAGER-IP> with the actual IP address of the manager node (like 192.168.0.114).
This command:
- Initializes Docker Swarm mode
- Promotes this node to manager
- Sets up the internal Raft store
- Outputs a
docker swarm joincommand to add worker nodes
You’ll see an output like this:
Swarm initialized: current node (xxxxxxx) is now a manager.

To add a worker to this swarm, run the following command:

docker swarm join \
--token SWMTKN-1-xxxxx-xxxxx \
192.168.0.114:2377

Make a note of that join command, you’ll use it on your worker nodes.
Step 2. Join the Workers to the Swarm
Now, SSH into worker-node-1 and worker-node-2 and run the join command you got earlier:
docker swarm join \
--token SWMTKN-1-xxxxx-xxxxx \
192.168.0.114:2377
Each node will respond with:
This node joined a swarm as a worker.
Boom. You’ve got yourself a multi-node Swarm cluster.


Step 3. Verify the Cluster
Back on your manager node, run:
docker node ls
This lists all nodes in the Swarm:

You’re the proud owner of a working Swarm. Pat yourself on the back—this is a big milestone!
Swarm Init and Join Commands Explained
Let’s break down the key commands used here—because understanding them helps you troubleshoot later.
docker swarm init
This command
- Enables Swarm mode on a node
- Creates a Raft store
- Elects the node as a manager (and leader, if it’s the first)
- Advertises the IP so other nodes can join
The --advertise-addr flag is crucial. It tells other nodes where to find the manager.
Pro Tip: Always use a static IP or DNS for your manager node, especially in production environments.
The join token
When you ran swarm init, Docker generated a secure join token. This token:
- Authenticates a node’s intent to join the cluster
- Ensures only approved nodes join as workers or managers
You can retrieve the token anytime using:
docker swarm join-token worker
docker swarm join-token manager
This is great for scaling your cluster dynamically.
Mistakes to Avoid
Let’s talk about what can go wrong—because it probably will at some point.
- Using wrong IP for
--advertise-addr: If you use a local IP like127.0.0.1, other nodes won’t be able to reach the manager. Always use the IP that’s reachable from other machines. - Running
initon more than one node: Only one node should initialize the Swarm. Other nodes should join it, not create their own. - Forgetting to open port
2377:Swarm uses port2377for control traffic between manager and worker nodes. Make sure it’s open in your firewall or security group rules.
Real-World Example: Building a Mini Dev Cluster
In one of my earlier projects, I had to build a lightweight dev environment for testing microservices. Instead of using Kubernetes (which was overkill for our needs), I used Docker Swarm.
I set up:
This article demonstrates a Docker Swarm setup using Proxmox VE as the virtualization platform. Three VMs are configured: one as the Docker manager node and two as worker nodes. The environment is ideal for practicing container orchestration and service deployment in a clustered setup.
The entire setup took 15 minutes. I could deploy stacks, perform rolling updates, and manage services with ease—all from one CLI. And it was lightweight, fast, and cheap.
For small-to-medium-sized projects, Swarm is a dream.
Conclusion
You did it, you set up a working Docker Swarm cluster!
Let’s recap what you’ve learned:
- What’s needed to prepare your system for Swarm
- How to initialize a manager node
- How to join workers using tokens
- Best practices and common mistakes
- How do these commands fit into real-world use cases
At this point, you're not just reading about orchestration—you’re doing it. You’ve built the foundation for running distributed apps, scaling containers, and deploying services reliably.
Join the conversation! Your thoughts help the community grow.