
Introduction
This article explains how to send an Email in Android. Android Studio is used to create the sample.
This application will send an email on a button click. In this, you will first create an XML file and use three textViews, three editTexts, and a button. So the first edittext will use the email id of the recipient, the second edittext will use the subject and the third will contain the message. On a button click, you can send the email. We use an intent to send the email so you will get the intent in the intent object. You will call the putExtra() method that es the email id, subject and text.
- Intent i=new Intent(Intent.ACTION_SEND);
- i.putExtra(Intent.EXTRA_EMAIL,new String[]{to});
- i.putExtra(Intent.EXTRA_SUBJECT,subject);
- i.putExtra(Intent.EXTRA_TEXT,message);
- i.setType("meassge/rfc822");
- startActivity(Intent.createChooser(i,"choose:"));
Use the following procedure to create a sample of sending an Email in Android.
- <RelativeLayout xmlns:android="http://schemas.android.com/apk/res/android"
- xmlns:tools="http://schemas.android.com/tools"
- android:layout_width="match_parent"
- android:layout_height="match_parent"
- android:paddingLeft="@dimen/activity_horizontal_margin"
- android:paddingRight="@dimen/activity_horizontal_margin"
- android:paddingTop="@dimen/activity_vertical_margin"
- android:paddingBottom="@dimen/activity_vertical_margin"
- tools:context=".MainActivity">
- <LinearLayout
- android:layout_height="wrap_content"
- android:layout_width="wrap_content"
- android:orientation="horizontal"
- >
- <TextView
- android:id="@+id/textView1"
- android:ems="4"
- android:textSize="30dp"
- android:layout_width="wrap_content"
- android:layout_height="wrap_content"
- android:text="To" />
- <EditText
- android:layout_marginLeft="0dp"
- android:id="@+id/editText1"
- android:layout_width="200dp"
- android:layout_height="wrap_content"
- />
- </LinearLayout>
- <LinearLayout
- android:layout_height="wrap_content"
- android:layout_width="wrap_content"
- android:layout_marginTop="100dp"
- android:orientation="horizontal">
- <TextView
- android:id="@+id/textView1"
- android:ems="4"
- android:textSize="30dp"
- android:layout_width="wrap_content"
- android:layout_height="wrap_content"
- android:text="Subject" />
- <EditText
- android:layout_marginLeft="0dp"
- android:id="@+id/editText2"
- android:layout_width="200dp"
- android:layout_height="wrap_content"
- />
- </LinearLayout>
- <LinearLayout
- android:layout_height="wrap_content"
- android:layout_width="wrap_content"
- android:orientation="horizontal"
- android:layout_marginTop="200dp">
- <TextView
- android:id="@+id/textView1"
- android:ems="4"
- android:textSize="30dp"
- android:layout_width="wrap_content"
- android:layout_height="wrap_content"
- android:text="Message" />
- <EditText
- android:layout_marginLeft="0dp"
- android:id="@+id/editText3"
- android:layout_width="200dp"
- android:inputType="textImeMultiLine"
- android:layout_height="wrap_content"
- />
- </LinearLayout>
- <Button
- android:id="@+id/buttonSend"
- android:layout_width="150dp"
- android:text="Send"
- android:layout_marginLeft="100dp"
- android:layout_height="wrap_content"
- android:layout_marginTop="350dp"></Button>
- </RelativeLayout>
Step 2
Create a Java class file.
We use an intent to send an email so you will get the intent in the intent object. You will call the putExtra() method that es the email id, subject and text as in the following:
Step 3
Android Manifest. xml file
In the Android Manifest.xml file you will provide the internet permission as in the following:
- package com.sendemail;
- import android.content.Intent;
- import android.os.Bundle;
- import android.app.Activity;
- import android.view.Menu;
- import android.view.View;
- import android.widget.Button;
- import android.widget.EditText;
- public class MainActivity extends Activity {
- EditText editText1,editText2,editText3;
- @Override
- protected void onCreate(Bundle savedInstanceState) {
- super.onCreate(savedInstanceState);
- setContentView(R.layout.activity_main);
- editText1=(EditText)findViewById(R.id.editText1);
- editText2=(EditText)findViewById(R.id.editText2);
- editText3=(EditText)findViewById(R.id.editText3);
- Button buttonSend=(Button)findViewById(R.id.buttonSend);
- buttonSend.setOnClickListener(new View.OnClickListener() {
- @Override
- public void onClick(View v) {
- String to=editText1.getText().toString();
- String subject=editText2.getText().toString();
- String message=editText3.getText().toString();
- Intent i=new Intent(Intent.ACTION_SEND);
- i.putExtra(Intent.EXTRA_EMAIL,new String[]{to});
- i.putExtra(Intent.EXTRA_SUBJECT,subject);
- i.putExtra(Intent.EXTRA_TEXT,message);
- i.setType("meassge/rfc822");
- startActivity(Intent.createChooser(i,"choose:"));
- }
- });
- }
- @Override
- public boolean onCreateOptionsMenu(Menu menu) {
- // Inflate the menu; this adds items to the action bar if it is present.
- getMenuInflater().inflate(R.menu.main, menu);
- return true;
- }
- }
- <?xml version="1.0" encoding="utf-8"?>
- <manifest xmlns:android="http://schemas.android.com/apk/res/android"
- package="com.sendemail"
- android:versionCode="1"
- android:versionName="1.0" >
- <uses-sdk
- android:minSdkVersion="7"
- android:targetSdkVersion="16" />
- <application
- android:allowBackup="true"
- android:icon="@drawable/ic_launcher"
- android:label="@string/app_name"
- android:theme="@style/AppTheme" >
- <activity
- android:name="com.sendemail.MainActivity"
- android:label="@string/app_name" >
- <intent-filter>
- <action android:name="android.intent.action.MAIN" />
- <category android:name="android.intent.category.LAUNCHER" />
- </intent-filter>
- </activity>
- </application>
- <uses-permission android:name="android.permission.INTERNET"></uses-permission>
- </manifest>
Step 4
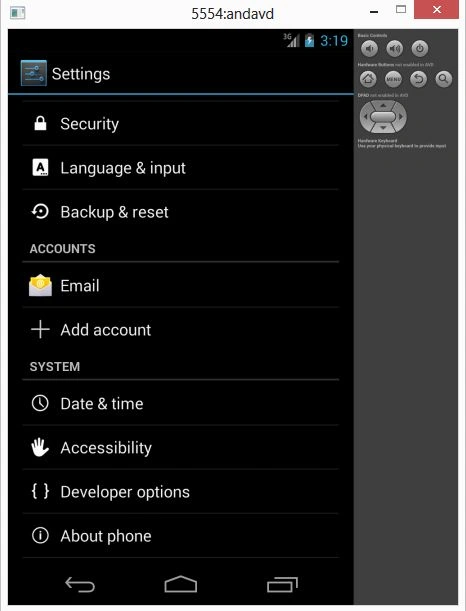
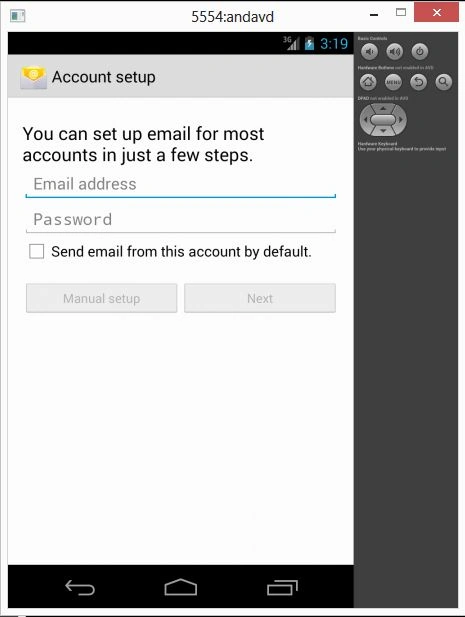
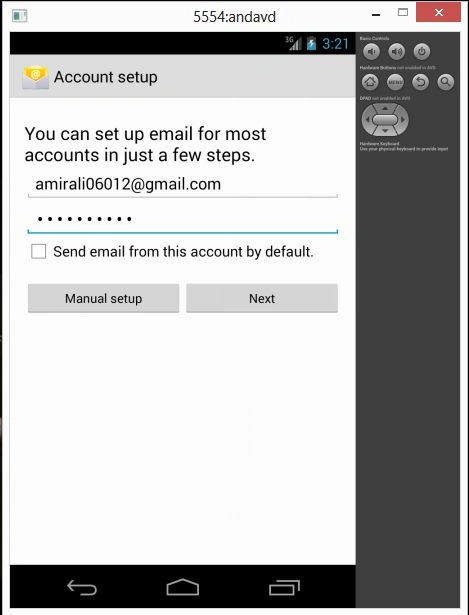
To run this application in the emulator you need to create an id form to send the Email. To create the id you go to the emulator settings and select add account; it will provide you a new page where you will enter your email id and word.
Join the conversation! Your thoughts help the community grow.