

Introduction
In this article, we will discuss how to create a Xamarin.Forms app for selecting the dates for appointments, meetings, and for setting reminders. So, let's dive into the article.
Prerequisites
In this article, we will discuss how to create a Xamarin.Forms app for selecting the dates for appointments, meetings, and for setting reminders. So, let's dive into the article.
Prerequisites
- Windows 10
- Xamarin Package
- Visual Studio 2017 Community Edition
Step 1
- Open your Visual Studio 2017 Community Edition.
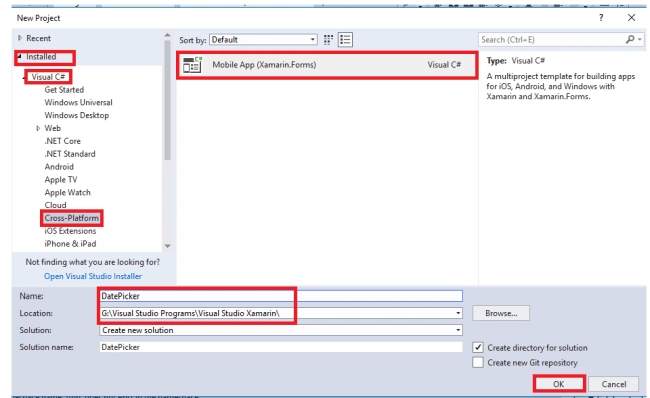
- Go to File -> New -> Project. Then, a new window will appear.
- Then, under Installed, select Visual C# -> Cross-Platform.
- On the right side of the window, select Mobile App (Xamarin.Forms). Then, give the name of the project and save it in your required location.
- Click OK.
Step 2
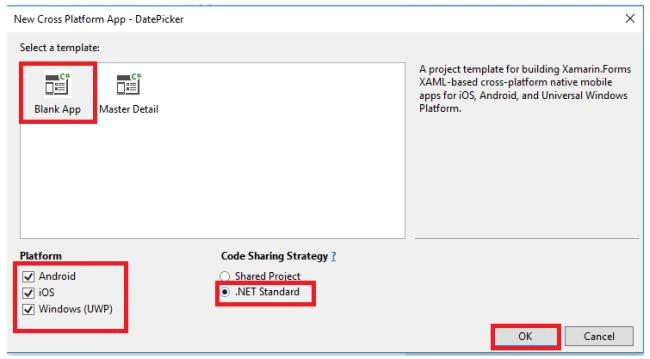
- Now, a new window will appear on your screen. Under template, select Blank App.
- Select all platforms or your required platforms for executing your application.
- Then, select .NET Standard and click OK.
Step 3
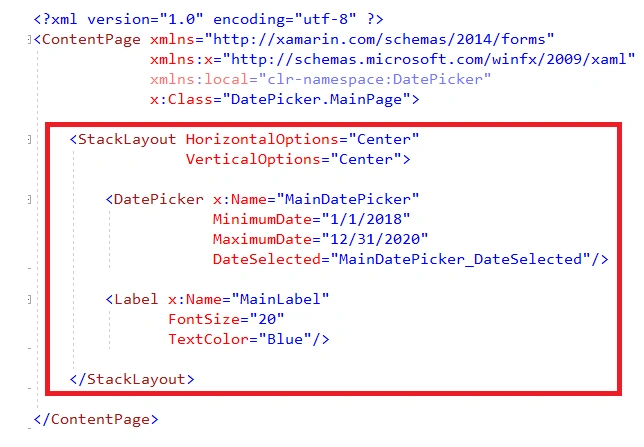
After creating your project, open MainPage.xaml for writing the UI part of your application.
XAML Code
- <?xml version="1.0" encoding="utf-8" ?>
- <ContentPage xmlns="http://xamarin.com/schemas/2014/forms" xmlns:x="http://schemas.microsoft.com/winfx/2009/xaml" xmlns:local="clr-namespace:DatePicker" x:Class="DatePicker.MainPage">
- <StackLayout HorizontalOptions="Center" VerticalOptions="Center">
- <DatePicker x:Name="MainDatePicker" MinimumDate="1/1/2018" MaximumDate="12/31/2020" DateSelected="MainDatePicker_DateSelected" />
- <Label x:Name="MainLabel" FontSize="20" TextColor="Blue" /> </StackLayout>
- </ContentPage>
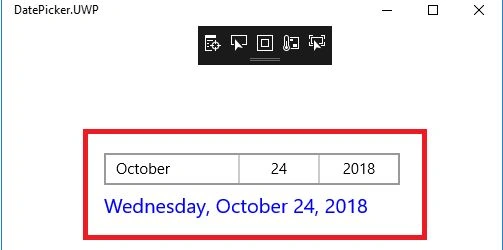
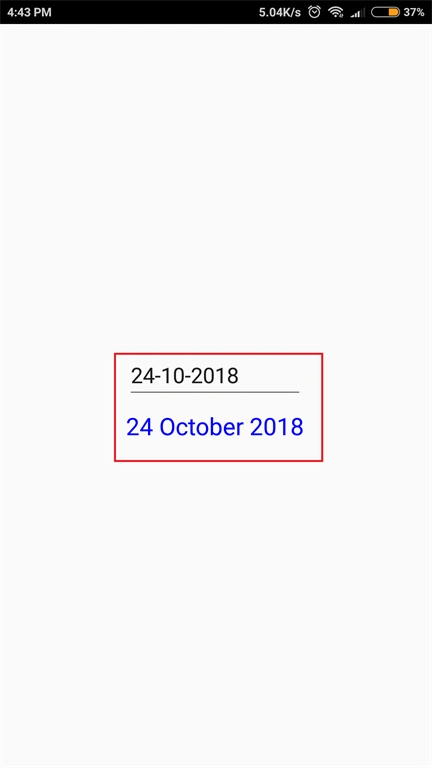
In this, we use DatePicker for displaying the calendar. For that calendar, let us set the minimum and maximum ranges of that calendar. Then, use an event for displaying the date on the label.
Step 4
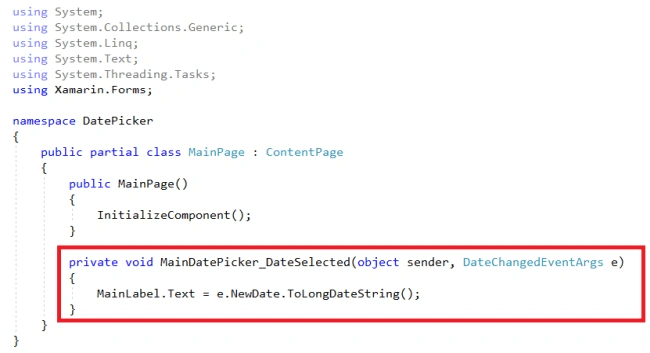
Now, open MainPage.xaml.cs file for writing the code.
C# Code
Now, open MainPage.xaml.cs file for writing the code.
C# Code
- using System;
- using System.Collections.Generic;
- using System.Linq;
- using System.Text;
- using System.Threading.Tasks;
- using Xamarin.Forms;
- namespace DatePicker {
- public partial class MainPage: ContentPage {
- public MainPage() {
- InitializeComponent();
- }
- private void MainDatePicker_DateSelected(object sender, DateChangedEventArgs e) {
- MainLabel.Text = e.NewDate.ToLongDateString();
- }
- }
- }
Step 5
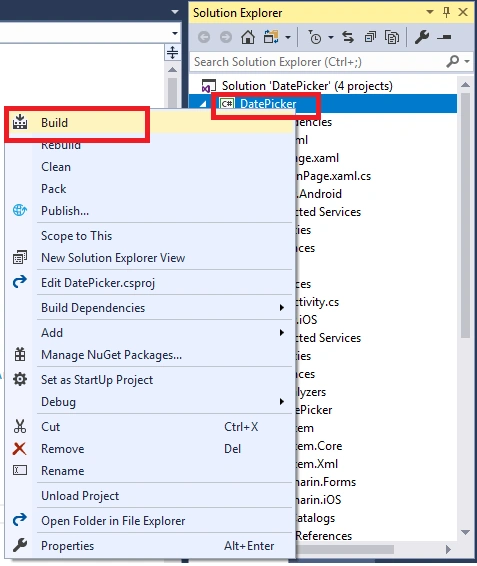
Now, set the project's Portable file for "Startup Project" and build the project.
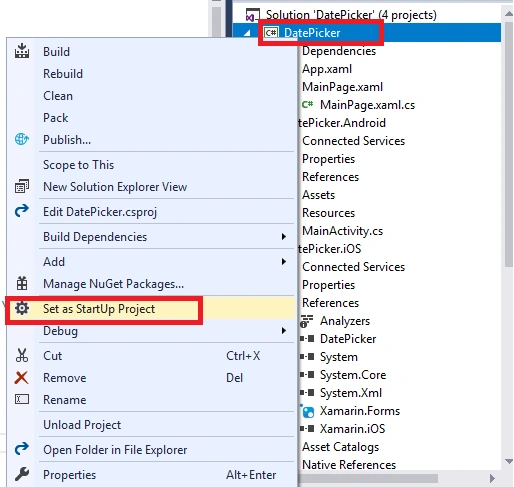
Now, set the project's Portable file for "Startup Project" and build the project.
Step 6
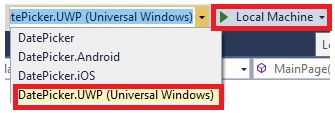
- Now, select the platform for executing your application. I am selecting UWP platform for executing the app.
- Click on the Local Machine to deploy your app on your machine.
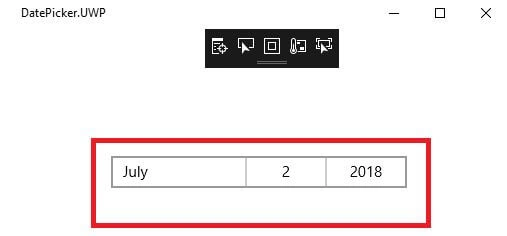
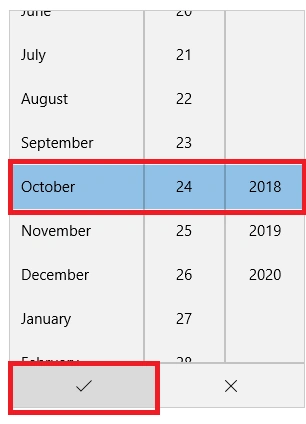
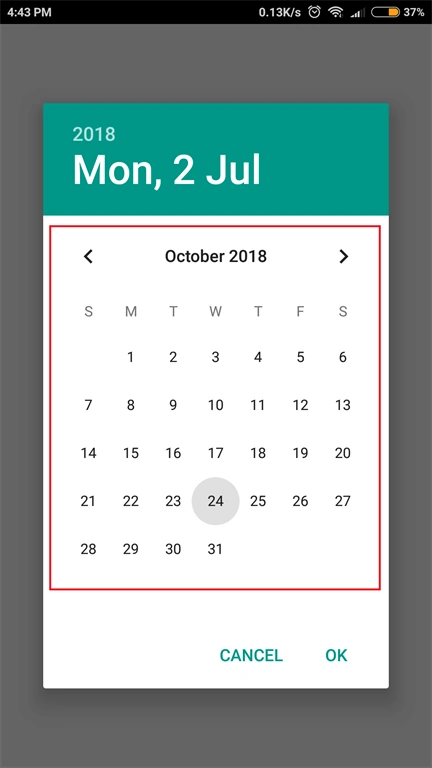
Now, I am selecting the date on the calendar.
Now, I am deploying the same app on my mobile phone using Xamarin Live Player.
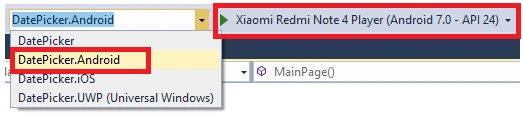
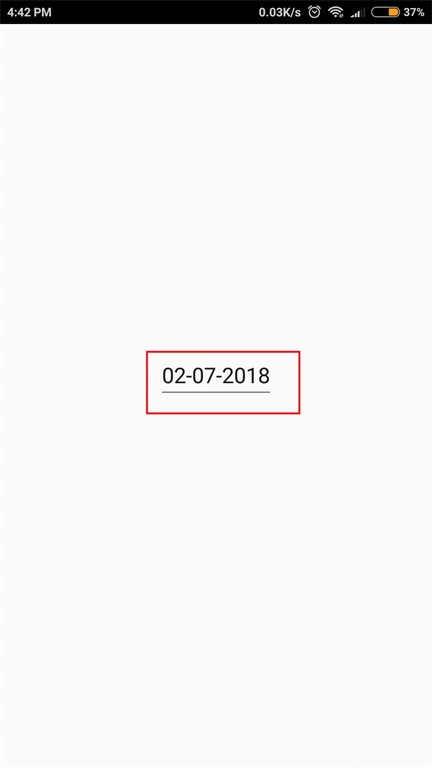
On the calendar, I am selecting the date.
Conslusion
Now, we have successfully created the Xamarin app for selecting a required date.
arjun kakkarPosted Apr 28, 2019, 6:17 AM
When we keep the current date as selected and hit OK or Done, the DateSelected event is not triggered. Is there a way to address this.
chi baoPosted Mar 1, 2019, 12:29 AM
Do you have example
chi baoPosted Mar 1, 2019, 12:29 AM
I want only view and choose month and year>
Pratik ShirsePosted Jul 17, 2018, 3:26 AM
How to show message box or Toast in this
Viknaraj ManogararajahPosted Jul 14, 2018, 11:12 PM
Nice Article, Thank you for sharing.........