

This article describes how to use a section separator(;) in LightSwitch Visual Studio 2012.
It is used to define sections along with separate format strings for positive, negative, and zero numbers.
The semicolon (;) is a conditional format specifier that we can apply to various format patterns. In order to produce this behavior, a custom format string consists of up to three sections separated by semicolons. These sections are:
- One section:
The Format String that applies to all values.
- Two Sections:
Here the first section of the Format String applies to positive values or zero and the second section applies to negative values. Suppose that the number to be formatted is negative but it becomes zero after rounding then depending on the format pattern for the second section, that zero will be formatted depending on the first section.
- Three Sections:
Here the first section of the Format String applies to positive values, the second section applies to negative values and the third applies to zero values. Suppose the second section has nothing between the two semicolons. In that case the first section applies to all the values.
Suppose the number to be formatted consists of non-zero but it becomes zero after rounding then depending on the format pattern for the first or second section then that zero will be formatted depending on the third section.
The following is the procedure for creating a sample showing how to use Section Separator delimiters on a Screen.
Step 1
Open the LightSwitch Application in Visual Studio 2012 and go to the Solution Explorer.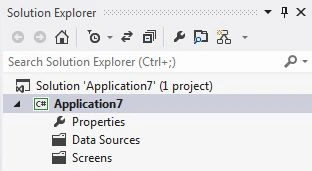
Right-click on the Data Source and choose "Add Table".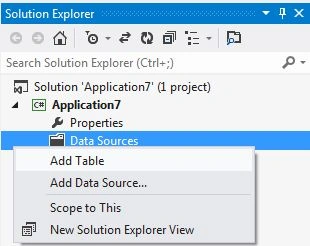
The table appears in the table designer window. Insert the records in the following table.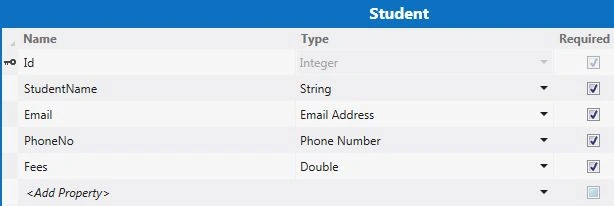
Step 2
Now once again go to the Solution Explorer, right-click on "Screens" and choose "Add Screen".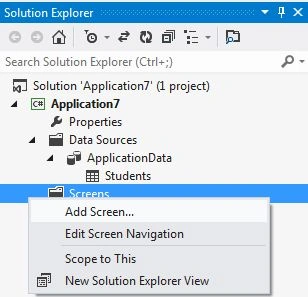
The Add New Screen dialog box appears. Select the "Editable Grid Screen" from the Screen Template, inside the screen information, choose "Student" under screen data and provide some name to the Screen and click the "OK" button.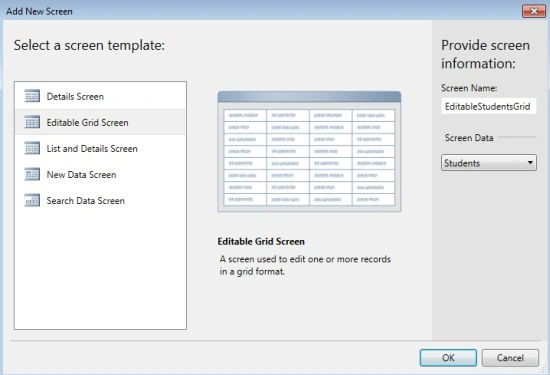
The Screen Designer appears as shown below.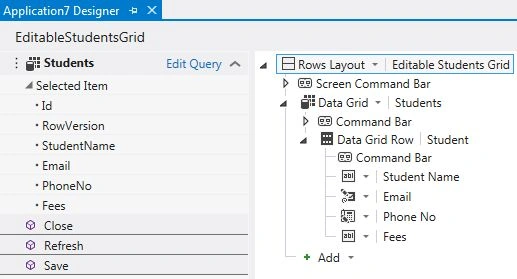
Step 3
Press F5 to run the application. Provide the information. 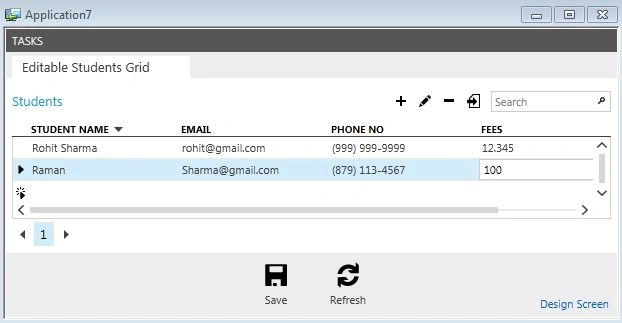
Step 4
Now stop debugging the application. From the Table Designer select the "Fees" record as shown in the figure below.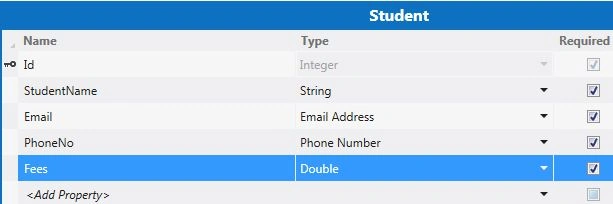
Then go to the Format Pattern of the Property window in the table designer and enter "#0.0#;(#0.0#)" in the format pattern as shown below.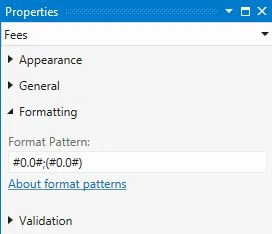
Press F5 to run the application. Provide a positive value in the "Fees" column.
Click on the "Save" button; we will get the following output: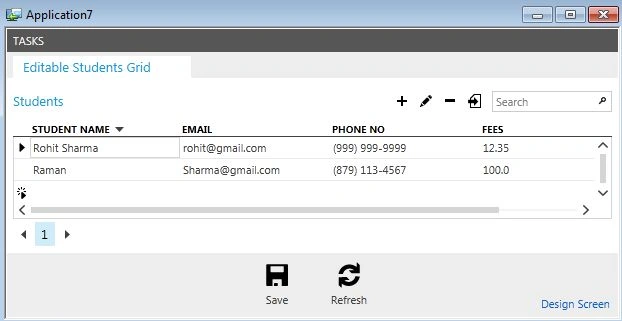
Step 5
Now stop debugging the application and then go to the Format Pattern of the Property window in the table designer and enter "#0.0#;(#0.0#)" in the format pattern as shown below.
Once again press F5 to run the application. Provide a zero value in the "Fees" column.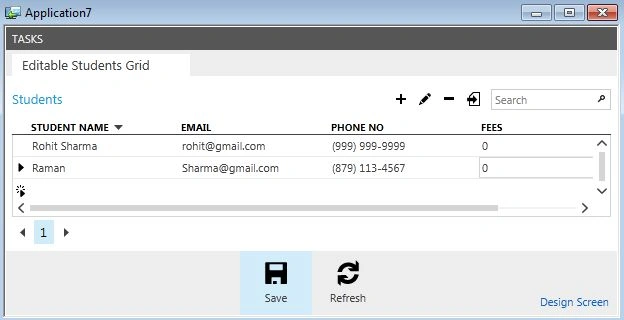
Click on the "Save" button; we will get the following output.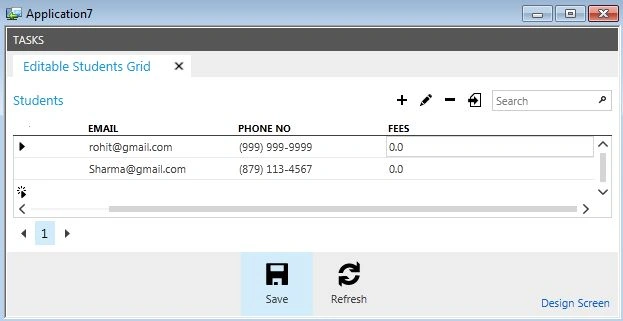
Step 6
Now stop debugging the application and go to the Format Pattern of Property window in the table designer and enter "#0.0#;(#0.0#)" in the format pattern as shown below.
Once again press F5 to run the application. Provide a negative value in the Fees column.
Click on the "Save" button; we will get the following output.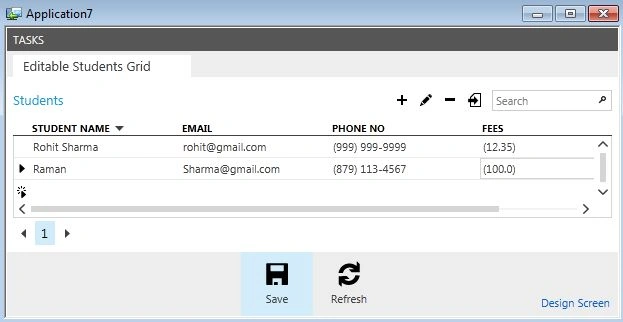
Step 7
You can also enter the "#0.0#;(#0.0#);-\0-" pattern in the format pattern property window.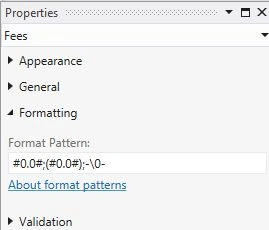
Again press F5 to run the application. Provide a zero value in the "Fees" column.
Click on the "Save" button; we will get the following output.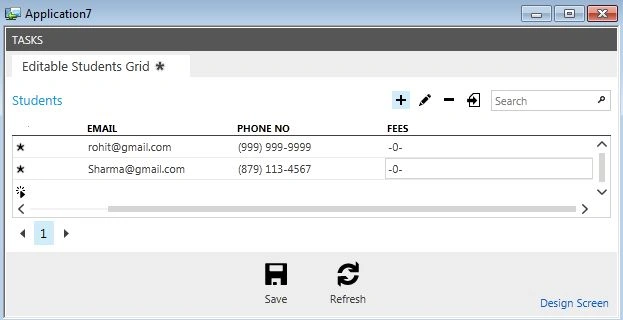
Join the conversation! Your thoughts help the community grow.