

Hi everyone here I will describe the search service application in SharePoint 2013.
So first let us see the differences between the SharePoint 2010 and SharePoint 2013 search service applications.
| SharePoint 2010 | SharePoint 2013 |
| No PDF iFilter | Added PDF iFilter |
| No Fast Search | Builtin Fast Search |
| No Search analytics | Added Search analytics |
| Create 3 Content DB | Create 4 Content DB |
Let us begin to configure the search service application using SharePoint 2013. Before that create one domain user and register that user.
- In managed account (CA-> Security -> configure managed account).
Here I created one domain user and named it Search_admin.
Go to Configure service application using Central Administration (CA -> Application Management -> Manage service application) and click the new button on the top ribbon and click search service application.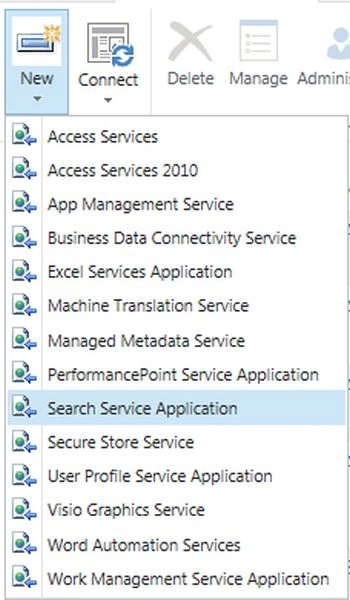
- After clicking search service application, the following window will pop up. Provide a name for the service application.
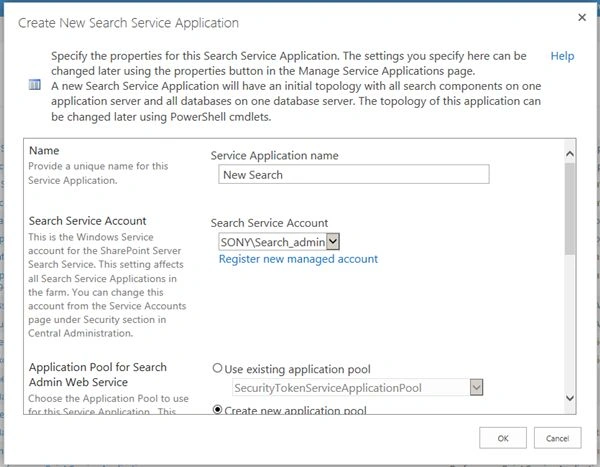
- I gave the name for the service application New Search and created a new application pool for the search admin web service and named it SearchPool and made a domain user (Search_admin) as a configurable.
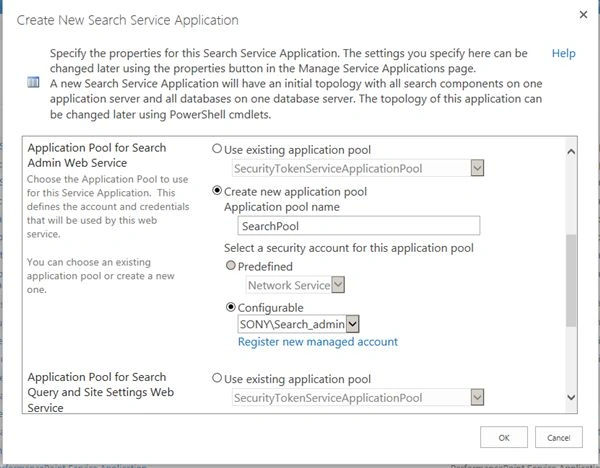
- Next create a new application pool for the search query and site setting web service, here I used the name SearchQuery and made a domain user (Search_admin) as a configurable. That you can see in the following window.
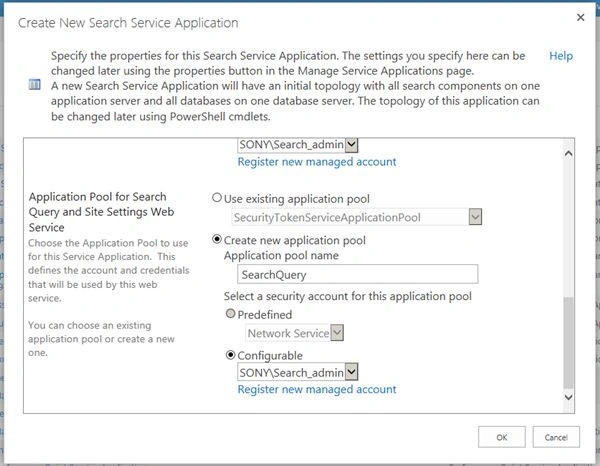
- Once configuring everything, click OK to create a new search service application instance. Then a new search service application is created with a search service application proxy.

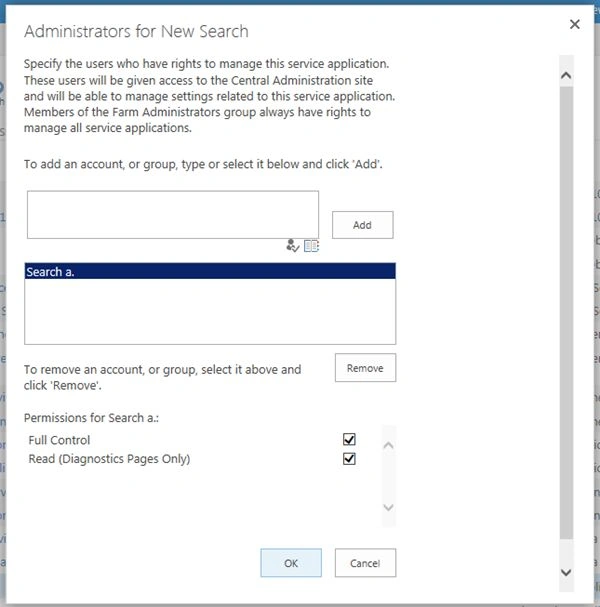
- Before entering into the search service application make a domain user (Search_admin) as administrator for the newly create service instance.
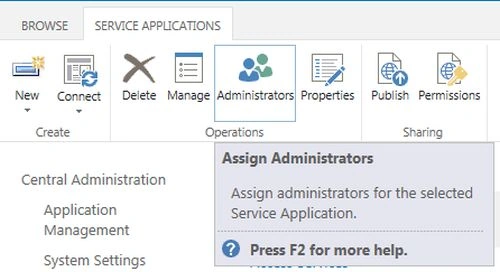
- So click Administrator on the top of the ribbon and make that domain user (search_admin) as the administrator and provide full control for that user then click OK.
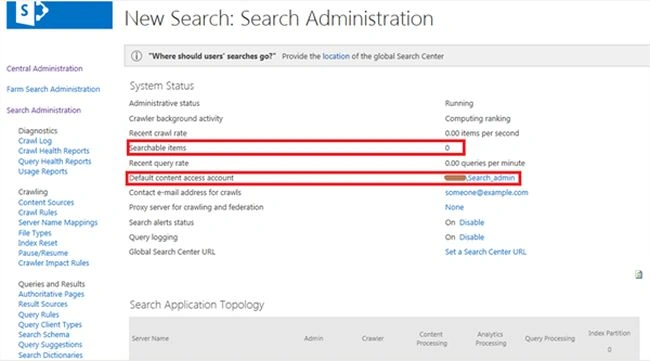
Now open the new search service application instance to configure the content source.
The following figure can explain for you about the search administration, here the searchable content is zero and the default content access account is Search_admin with the privilege to read the content from the local SharePoint site and UNC.
- Next I will add a content source to the search service application, so in the left quick launch bar you can see the content source in the crawling category by clicking. You can see that in the following window.
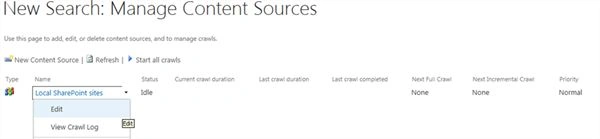
- Just click the existing content source and add the URL of the web applications that you need to crawl the content of.
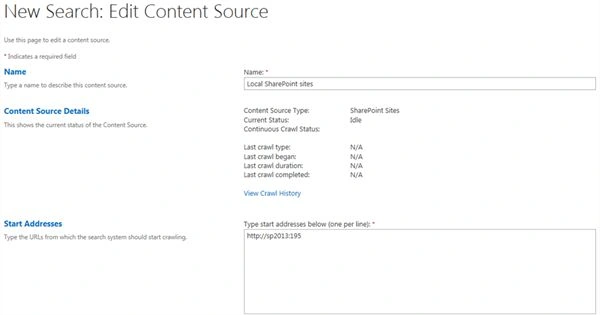
- Then provide a crawl type and timing then click OK.
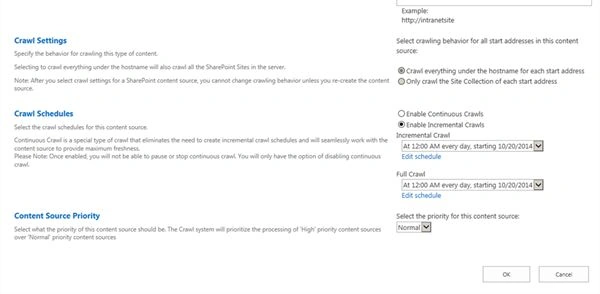
- Next I will create a new content source that will crawl the content from my local computer, so click add new content source from the top of the screen then you can see the following window.
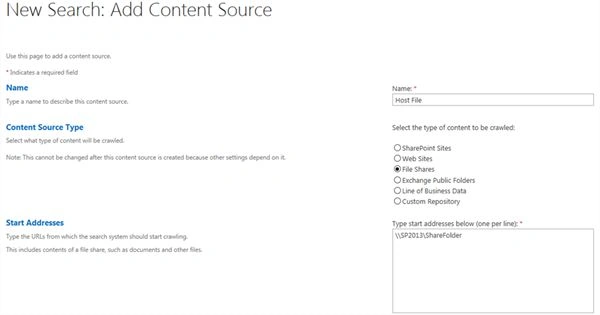
- Just give a name for the content source and select File share then provide an address of which path you need to crawl then set the crawl timing then click OK.
Note: the path folder should be shared.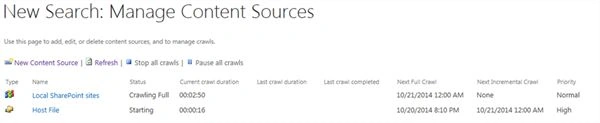
- Once you have configured everything the crawl system will start crawling content from SharePoint Sites and UNC path, you can see the crawl log by clicking the crawl log from the left quick launch bar.
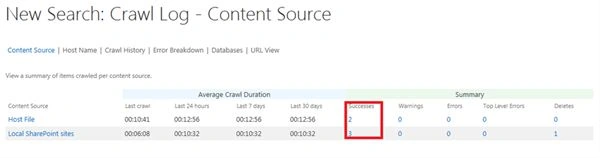
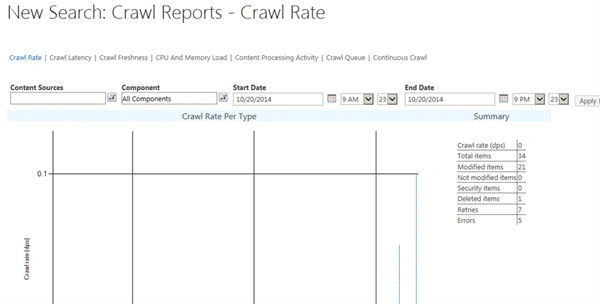
- Here you can see the successes crawl content from the crawl log without any error and below you can see the crawl analytics.
In case you cannot crawl the content or you get an error while crawling, kindly check the policy for the web application to see whether the search crawl administrator has full Read control.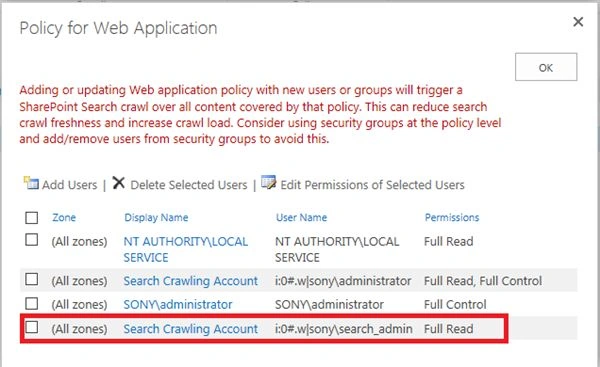
Join the conversation! Your thoughts help the community grow.