

Scripting elements
Types of scripting elements
- Comment tag
- Directive tag
- Scriptlet tag
- Expression tag
- Declaration tag
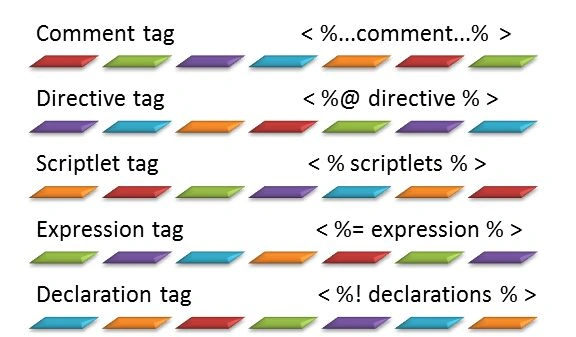
But, we generally have the following three types.
- Scriptlet tag
- Expression tag
- Declaration tag
JSP Comment tag
A JSP comment tag is used in JSP pages when you are creating something. When you want to explain the procedure you are using to build the JSP pages, you can put your explanation in comment tags. These comments are only seen in JSP pages and not included in the servlet source code during the translation phase. They are not in the HTTP response.
Note
A pure JSP comment is called a "hidden comment". It is not visible at the client site and the syntax is given below.
Syntax
- < % ...comment lines.. % >
Note
The HTML comment is known as an "output comment". It is visible at the client site and the syntax is given below.
Syntax
- <!.. comment lines ..>
The following is an example to illustrate this tag.
- <html>
- <head>
- <meta http-equiv="Content-Type" content="text/html; charset=UTF-8">
- <title>JSP Comment tag</title>
- </head>
- <%
- int a=1;
- int b=2;
- int c=a+b;
- %>
- <body>
- < %.. This will add the two numbers ..% >
- <br>
- <br>
- The addition of two numbers is <% out.println(c);%>
- </body>
- </html>
Output
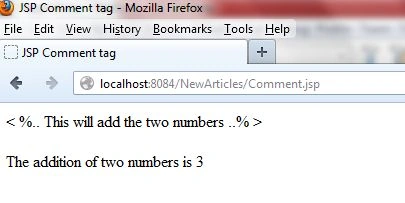
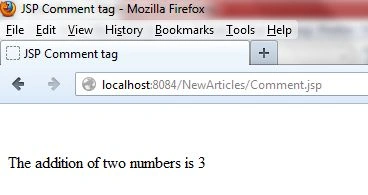
In the preceding output, you can see the comment is shown because we have used a pure JSP comment. If we use the HTML comment <!...comment…> then the comment will not be shown. Let's have a look at the next output with HTML comments.
Output
JSP Directive tag
Directive tags are used to provide special instructions to the web container, during the page translation.
Syntax
- <%@ directives %>
- page
- include
- taglib
Page directive
The page directive defines various types of page-independent properties (such as language, session, errorPage, and so on) that communicate to the web container, during the translation.
Syntax
- <%@ page… %>
import attribute
For example:
- <%@ page import="java.util.Calendar" %>
- Or
- <%@ page import="java.util.Date" %>
language attribute
For example:
- <%@ page language="java" %>
ErrorPage attribute
For example:
- <%@ page errorPage="error.jsp" %>
isErrorPage attribute
For example:
- <%@ page isErrorPage="true" %>
- Or
- <%@ page isErrorPage ="true" %>
contentType attribute
The "contentType" attribute defines the Multipurpose Internet Mail Extensions (MIME) type, for the JSP response.
For example:
- <%@ page contentType="text/html" %>
Session attribute
For example:
- <%@ page session="true" %>
- Or
- <%@ page session="false" %>
isThreadsafe attribute
The "isThreadSafe" attribute defines whether the JP page is thread-safe, or not.
For example:
- <%@ page isThreadSafe= "true" %>
- Or
- <%@ page isThreadSafe= "false" %>
autoFlush attribute
For example:
- <%@ page autoFlush="true" %>
Buffer attribute
The "buffer" attribute specifies buffering characteristics for the server output response object.
For example:
- <%@ page buffer="none" %>
- Or
- <%@ page buffer="10kb" %>
info attribute
The "info" attribute provides a description of the JSP page.
For example:
- <%@ page info="This page is built by Gopi" %>
extends attribute
For example:
- <%@ page extends="somePackage.SomeClass" %>
Include directives
The "include directives" indicates the web container to copy everything from the included file and paste it in the current JSP page.
The syntax is as following:
- <%@ include file="filename.jsp" %>
Example
include.jsp
- <html>
- <head>
- <meta http-equiv="Content-Type" content="text/html; charset=UTF-8">
- <title>Include page</title>
- </head>
- <body>
- <%@include file="add.jsp" %>
- </body>
- </html>
add.jsp
- <html>
- <head>
- <meta http-equiv="Content-Type" content="text/html; charset=UTF-8">
- <title>Addition Page</title>
- </head>
- <%
- int a=2;
- int b=3;
- int c=a+b;
- %>
- <body>
- The sum of two numbers is:
- <%
- out.println(c);
- %>
- </body>
- </html>
Output

Taglib directives
The syntax of the taglib directive is as follows:
- <%@ taglib prefix="prefixOfTag" uri="uriOfTagLibrary"%>
- Or
- <%@ taglib prefix="mine" uri="randomName"%>
URI is the unique name for the tag library.
Example
The tag we are using in this example is the userName.
- <html>
- <head>
- <meta http-equiv="Content-Type" content="text/html; charset=UTF-8">
- <title>Taglib page</title>
- </head>
- <%@ taglib prefix="mine" uri="yourTags" %>
- <body>
- Hello..!! <mine:userName/>
- </body>
- </html>
JSP Scriptlet tag
The syntax is as follows:
- <% Java code %>
Let's see a simple JSP scriptlet tag example.
- <html>
- <head>
- <meta http-equiv="Content-Type" content="text/html; charset=UTF-8">
- <title>Sciptlet tag page</title>
- </head>
- <body>
- <% out.println("This is Scriptlet tag");%>
- </body>
- </html>
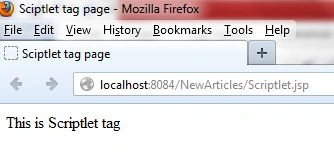
Output
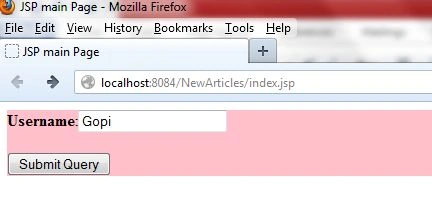
Index.jsp
- <html>
- <head>
- <meta http-equiv="Content-Type" content="text/html; charset=UTF-8">
- <title>JSP main Page</title>
- </head>
- <body>
- <div id="Login" style="background-color: pink">
- <form action="Scriptlet.jsp" method="post">
- <strong>Username</strong>:<input type="text" name="uname"><br><br>
- <input type="submit" name="Login">
- </form>
- </div>
- </body>
- </html>
Output
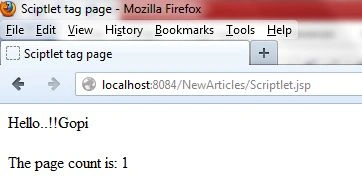
Scriptlet.jsp
- <html>
- <head>
- <meta http-equiv="Content-Type" content="text/html; charset=UTF-8">
- <title>Sciptlet tag page</title>
- <%
- int count=0;
- %>
- </head>
- <body>
- <%
- String name=request.getParameter("uname");
- out.println("Hello..!!"+name);
- %>
- <br>
- <br>
- The page count is:
- <% out.println(++count);%>
- </body>
- </html>
Output: After submitting
JSP Expression tag
The syntax is as follows:
- <%= expression%>
Let's see a simple example of this.
- <html>
- <head>
- <meta http-equiv="Content-Type" content="text/html; charset=UTF-8">
- <title>Expression tag Page</title>
- </head>
- <body>
- <div style="background-color: pink">
- <%= "Welcome to expresssion tag"%>
- </div>
- </body>
- </html>
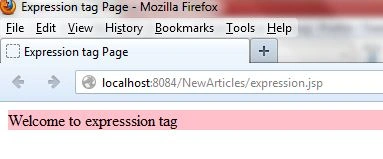
Output
Another example
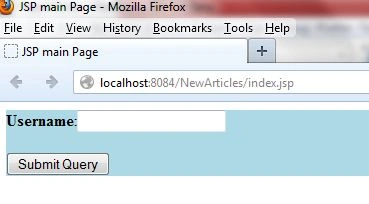
Index.jsp
- <html>
- <head>
- <meta http-equiv="Content-Type" content="text/html; charset=UTF-8">
- <title>JSP main Page</title>
- </head>
- <body>
- <div id="Login" style="background-color:lightblue">
- <form action="expression.jsp" method="post">
- <strong>Username</strong>:<input type="text" name="uname"><br><br>
- <input type="submit" name="Login">
- </form>
- </div>
- </body>
- </html>
Output
Expression.jsp
- <html>
- <head>
- <meta http-equiv="Content-Type" content="text/html; charset=UTF-8">
- <title>Expression tag Page</title>
- </head>
- <body>
- <div style="background-color: pink">
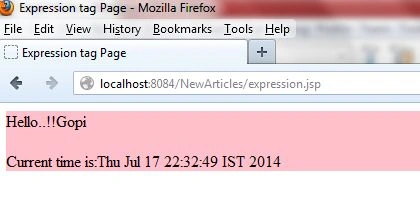
- <%= "Hello..!!"+request.getParameter("uname")%>
- <br>
- <%="Current time is:"+java.util.Calendar.getInstance().getTime()%>
- </div>
- </body>
- </html>
Output: After submitting
JSP Declaration tag
Syntax of declaration tag
- <%! Field or method declaration %>
Example that declares fields
- <html>
- <head>
- <meta http-equiv="Content-Type" content="text/html; charset=UTF-8">
- <title>Declaration tag Page</title>
- </head>
- <body>
- <div style="background-color: pink">
- <%!
- int a=4;
- int b=2;
- int c=a+b;
- %>
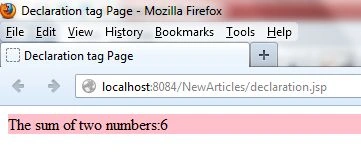
- <%="The sum of two numbers:"+c%>
- </div>
- </body>
- </html>
Output
An example that declares the method
- <html>
- <head>
- <meta http-equiv="Content-Type" content="text/html; charset=UTF-8">
- <title>Declaration tag Page</title>
- </head>
- <body>
- <div style="background-color: pink">
- <%!
- int cube(int n){
- return n*n*n;
- }
- %>
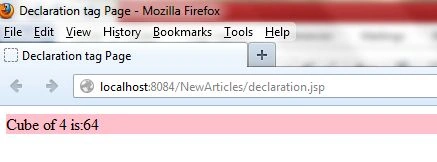
- <%="Cube of 4 is:"+cube(4)%>
- </div>
- </body>
- </html>
Output
Join the conversation! Your thoughts help the community grow.