

Introduction
Figure 1: Raspberry Pi
Kit Explanation
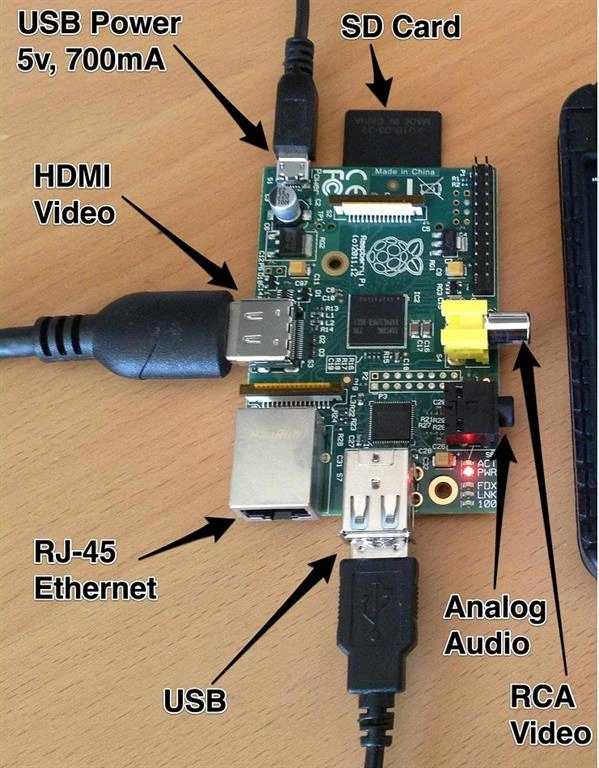
Figure 2: Kit Explanation
HDMI Cable

Figure 3 - HDML Cable
HDMI (High-Definition Multimedia Interface) is a proprietary audio/video interface to transfer the uncompressed video data and the compressed or uncompressed digital audio data from HDMI-compliant source device, such as a display controller to a compatible computer monitor, video projector, digital television or a digital audio device. HDMI is a digital replacement for the analog video standards.
USB Power & Cable
Figure 4: USB Cable
- USB was designed to standardize the connection of the computer peripherals (including keyboards, pointing devices, digital cameras, printers, portable media players, disk drives and network adapters) to the personal computers, both to communicate and to supply the electric power.
- It has become commonplace for other devices, such as smartphones, PDAs, and video game consoles. USB has effectively replaced a variety of earlier interfaces, such as parallel ports, as well as separate power chargers for portable devices.
RJ-45 Ethernet
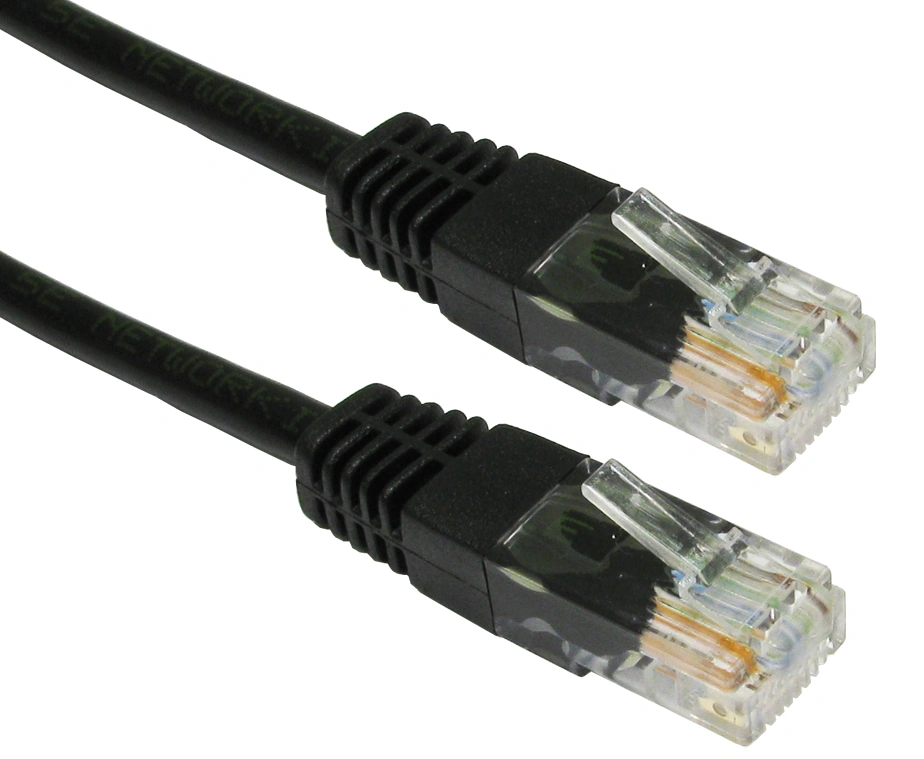
Figure 5: RJ-45 Ethernet
- RJ45 (computers), an unkeyed 8P8C modular connector is used for Ethernet computer network cables (incorrectly referred to as RJ45).
- Ethernet is a family of computer networking technologies commonly used in local area networks (LANs) and metropolitan area networks (MANs).
- It was commercially introduced in 1980 and first standardized in 1983 as IEEE 802.3 and has since been refined to support higher bit rates and longer link distances. Over time, Ethernet has largely replaced competing wired LAN technologies such as a token ring, FDDI and ARCNET.
SD Card
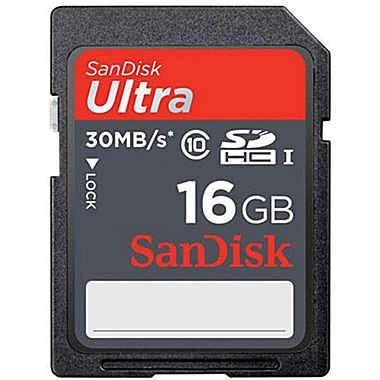
Figure 5: SD Card
- Secure Digital (SD) is a non-volatile memory card format developed by the SD Card Association (SDA) for use in portable devices.
- The standard was introduced in August 1999 by the joint efforts between SanDisk, Panasonic (Matsushita Electric), and Toshiba as an improvement over MultiMediaCards (MMC) and has become the industry standard.
- The three companies formed SD-3C, LLC, a company, which licenses and enforces the intellectual property rights associated with SD memory cards, SD hosts, and ancillary products.
Analog Audio
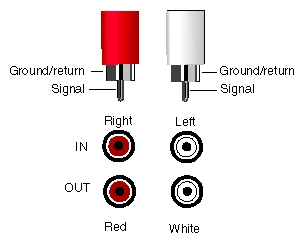
Figure 6: Analog Audio
- Audio recordings are of two basic types- analog and digital. Analog refers to an audio recorded, using the methods, which replicates the original sound waves. Vinyl records and the cassette tapes are the examples of the analog mediums.
- Digital audio is recorded by taking the samples of the original sound wave at a specified rate.
RCA Video Cable
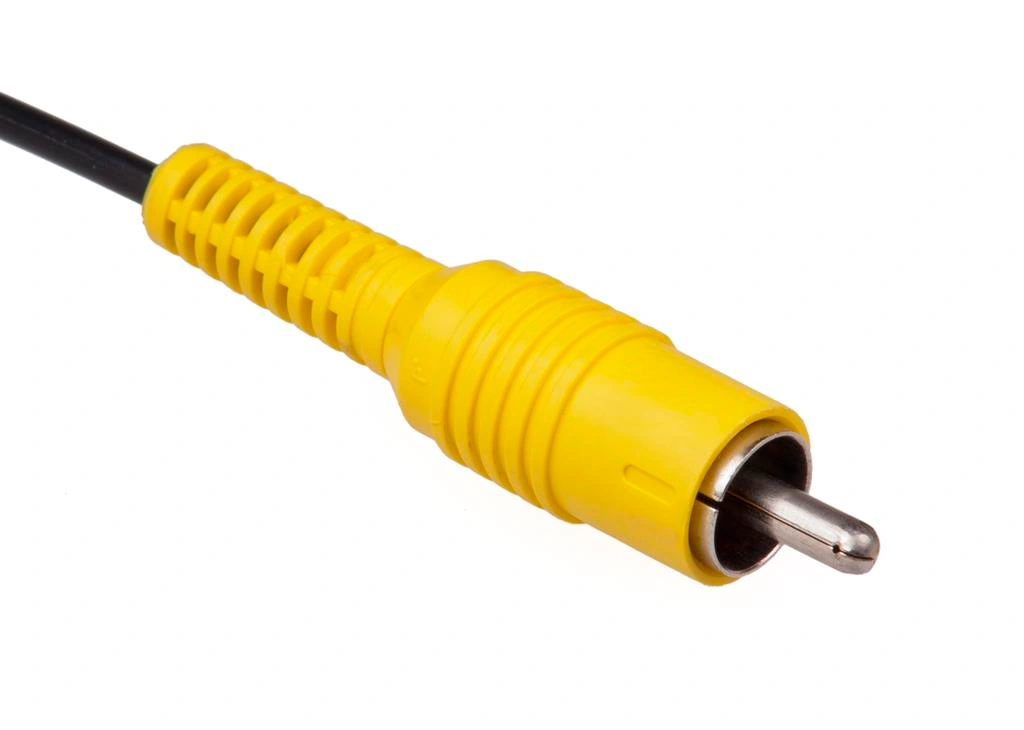
Figure 7: RCA Video Cable
- Composite video (one channel) is an analog video transmission (without audio), which carries the standard definition video typically at 480i or 576i resolution. Video information is encoded on one channel, unlike the higher-quality S-video (two channels) and the even higher-quality component video (three or more channels).
- Composite video is usually in the standard formats such as NTSC, PAL, and SECAM and is often designated by the CVBS initialism, for color, video, blanking, and sync or simply as video.
Installing The OS To The Kit
- First step is to download the OS in the link.
- Click the link or copy the link and download the OS.
- Install the OS to SD Card and fix in the Raspberry Pi and install the OS as usual.
Connecting the Raspberry Pi To the Computer
- The laptop needs to have Windows 10 OS. Connect the power cable to the port and another side to the computer.
- Connect Ethernet cable also to the port and another side of the cable will be connected to the computer.
Set Up The Network Connection
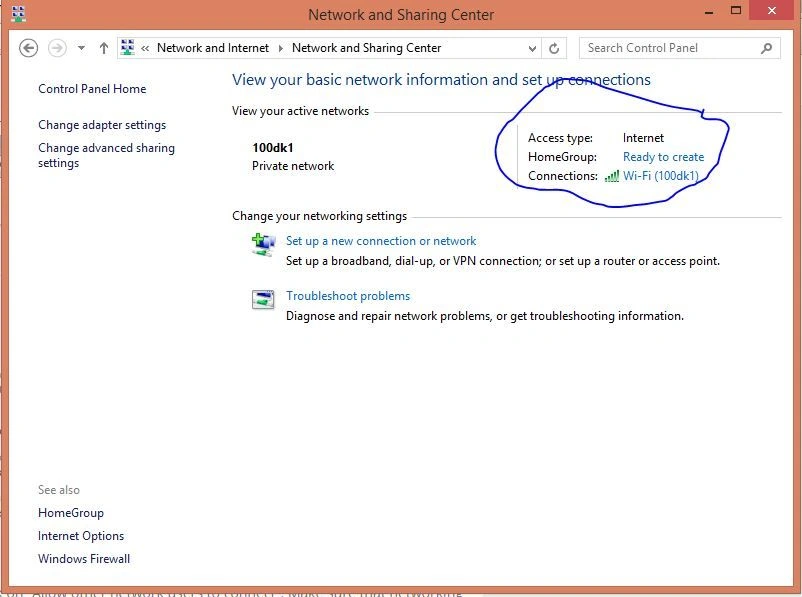
Figure 8: Network Setting
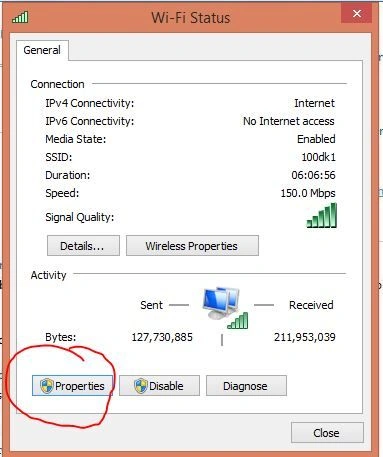
Figure 9: Wifi Status
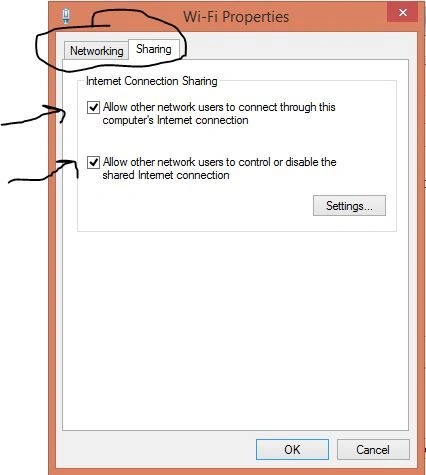
Figure 10: Wifi Property
Scan The IP Address
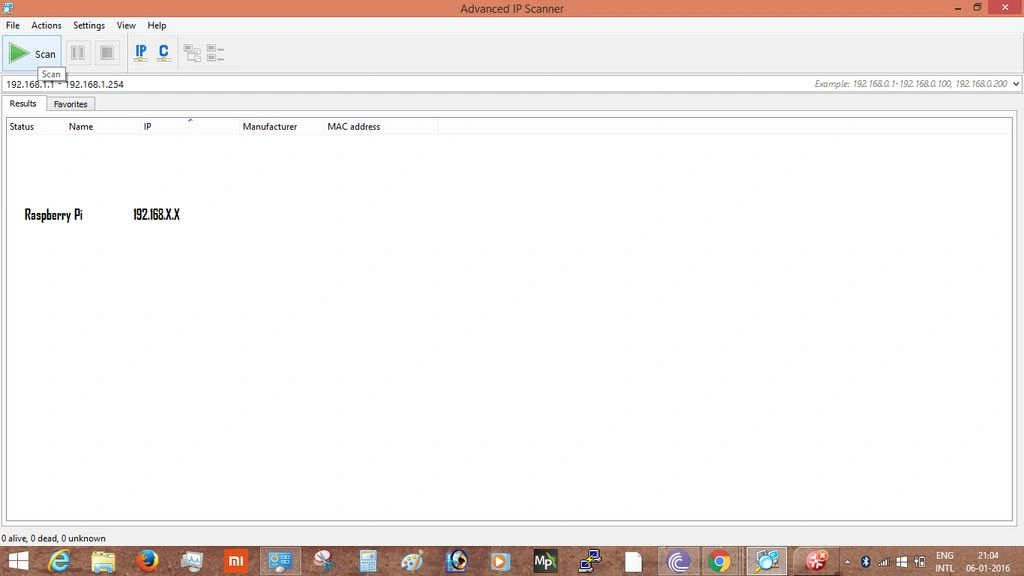 Connect Raspberry Pi with SSH Terminal
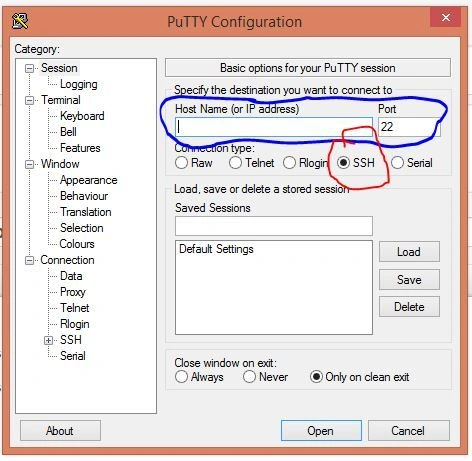
Figure 11: Scanning Address
Figure 12: Putty Section
- Open Putty.exe
- Select the port no as 22 and select the SSH radio button.
- Type the IP address of Raspberry Pi found out from the IP scanner in the previous step.
The terminal will be opened.
- default login for Raspberry Pi is: pi
password: raspberry
- Now, type the commands, mentioned below.
- $ sudo apt-get update
- $ sudo apt-get install tightvncserver
- After the successful installation of the tightvncserver, type the commands, mentioned below to start VNC Server.
- $ vncserver :1
- You will be prompted to enter and confirm a password. This will be asked only once, during the first time setup. Enter an 8 digit password and make a note of it!
Connect the VNC Server
- Open the VNC Server program.
- Now, type the IP address of Raspberry Pi and amend it with:1
example 192.168.137.20:1 ( This tells the port number).
- Now, click connect and another Window will pop up and will ask you to enter the password.
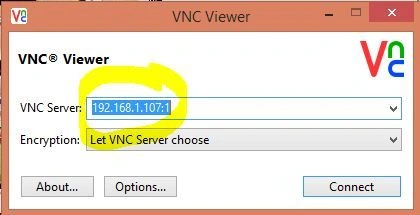 Figure13: VNC Viewer
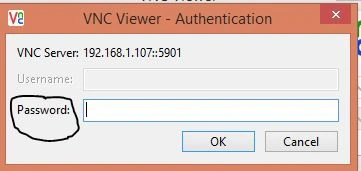 Figure 14: VNC Authentication
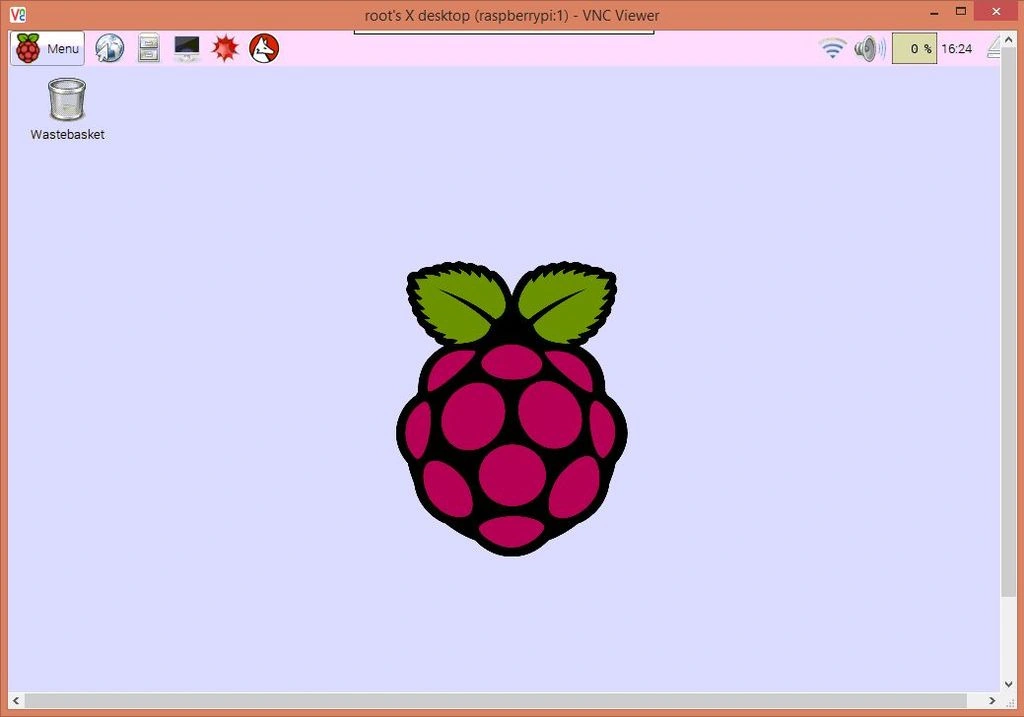 Figure 15: View The Image
Output
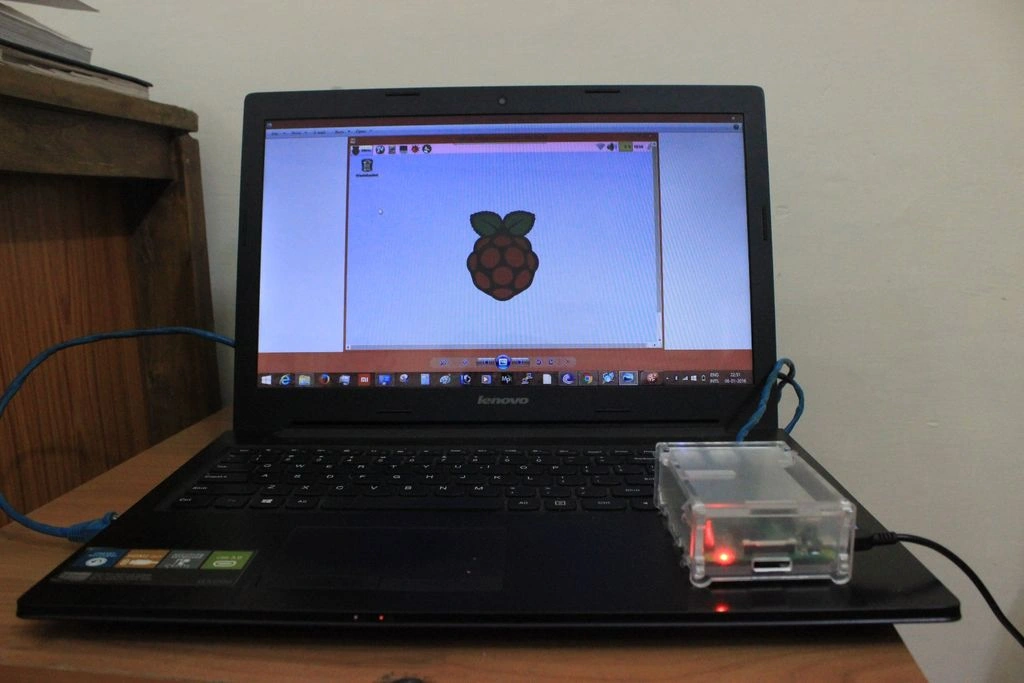
Figure 16: Output
Hadshana KamalanathanPosted Jul 21, 2018, 8:07 PM
Good one..
Hussain PatelPosted Nov 2, 2016, 10:35 AM
Cool that's nice - I have a similar article and more on my website http://hussainpatel.com
RajaPosted Oct 31, 2016, 8:00 AM
Good one...
Madhanmohan DevarajanPosted Oct 25, 2016, 4:11 PM
Good one
BeginnerPosted Oct 24, 2016, 7:12 AM
Good
SubashPosted Oct 24, 2016, 12:39 AM
Nice article
Shamim UddinPosted Oct 24, 2016, 12:32 AM
Nice