

Introduction
In this article, we will learn the step-by-step implementation for developing horizontal menus with submenu options in canvas PowerApps. We will make use of a collection and a PowerApps component to easily reuse the navigation menu across multiple screens. This will also highlight the currently active screen in the navigation bar.
Implementation
Let's see the step-by-step implementation for the horizontal navbar in PowerApps.
Step 1. Create screens
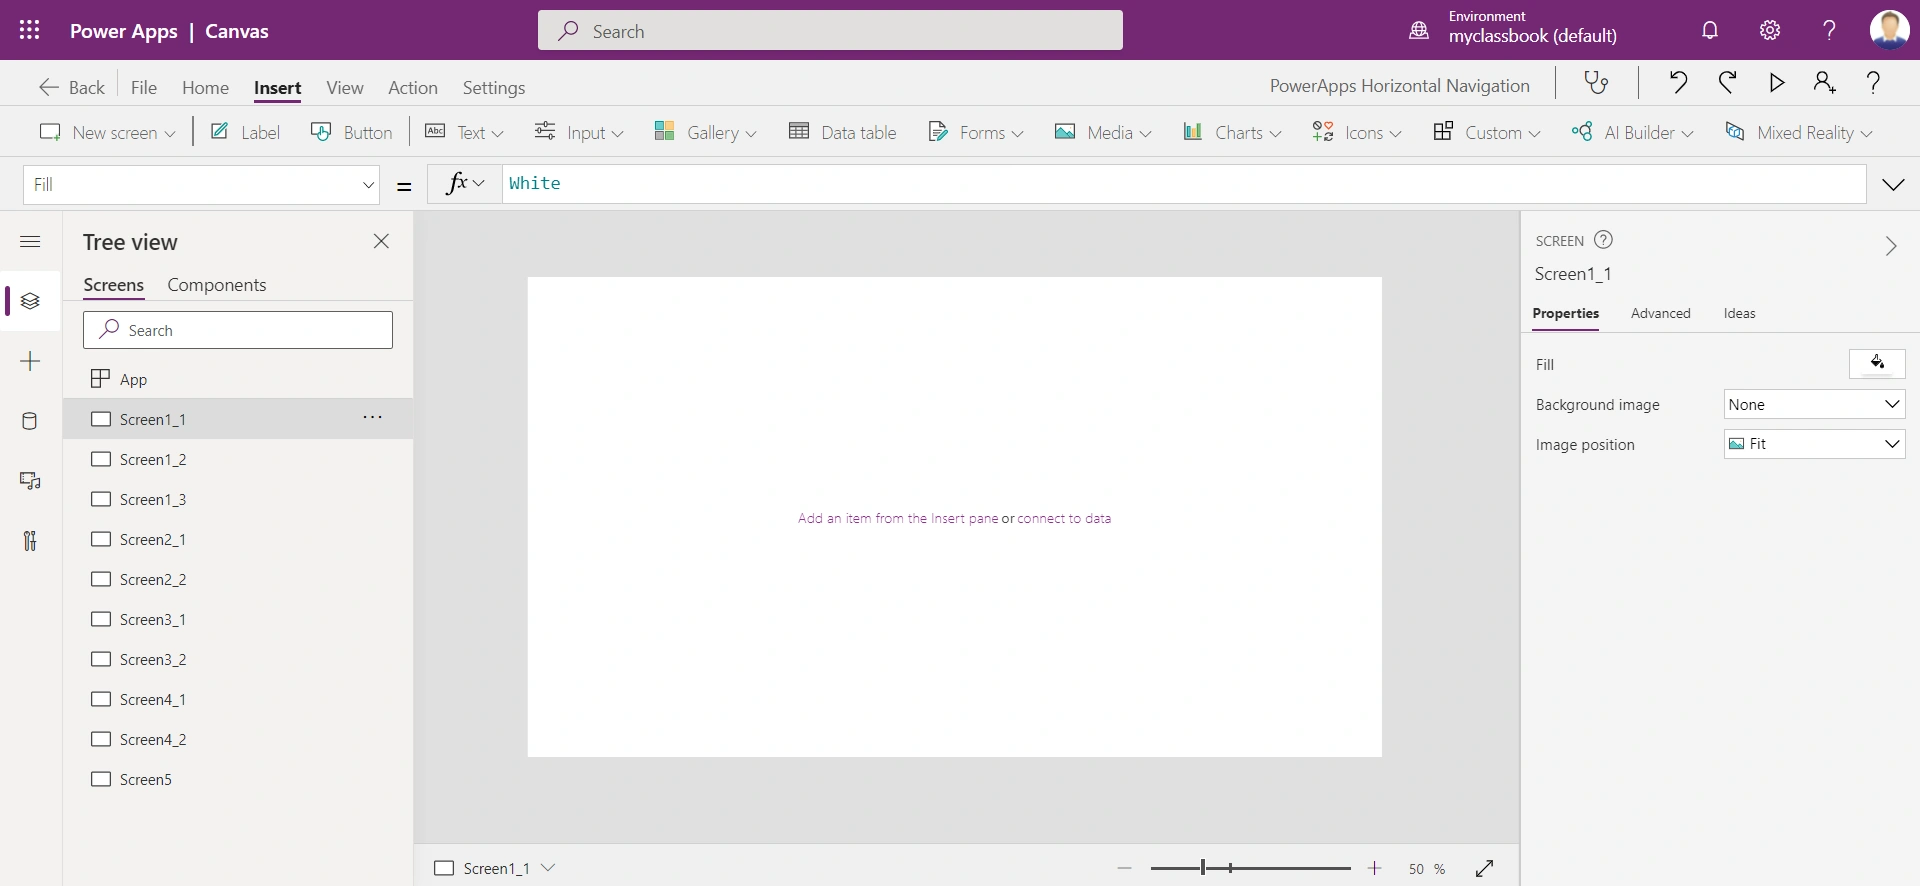
In this case, I have created 10 screens as shown below.
Step 2. Define the collection
We will define a collection that will store the menu, submenu, screen names, and ParentTab.
- For the items, which has ParentTab value as blank indicates that those are the parent menu items.
- For defining the child items i.e. submenu, set the ParentTab value to the Title value of the Parent item as shown below.
- Each set of menu-submenu should have same Id value.
Set the OnStart property of the App to:
ClearCollect(colHorizontalMenu,

{Title:"Property",Screen:Blank(), Id:1, ParentTab: ""},
{Title:"Property 1",Screen:Screen1_1, Id:1, ParentTab: "Property"},
{Title:"Property 2",Screen:Screen1_2, Id:1, ParentTab: "Property"},
{Title:"Property 3",Screen:Screen1_3, Id:1, ParentTab: "Property"},

{Title:"Owner",Screen:Blank(), Id:2, ParentTab: ""},
{Title:"Owner 1",Screen:Screen2_1, Id:2, ParentTab: "Owner"},
{Title:"Owner 2",Screen:Screen2_2, Id:2, ParentTab: "Owner"},

{Title:"Sales",Screen:Blank(), Id:3, ParentTab: ""},
{Title:"Sales 1",Screen:Screen3_1, Id:3, ParentTab: "Sales"},
{Title:"Sales 2",Screen:Screen3_2, Id:3, ParentTab: "Sales"},

{Title:"Contractor",Screen:Blank(), Id:4, ParentTab: ""},
{Title:"Contractor 1",Screen:Screen4_1, Id:4, ParentTab: "Contractor"},
{Title:"Contractor 2",Screen:Screen4_2, Id:4, ParentTab: "Contractor"},

{Title:"Settlement",Screen:Screen5, Id:5, ParentTab: ""}

);
Step 3. Define the color theme
Add the color theme on the OnStart property of the App:
Set(varMenuPrimaryColor, RGBA(4, 42, 61, 1));
Set(varMenuSecondaryColor, RGBA(4, 166, 235, 1));
Step 4. Define the variable for the active tab
We will use a variable named varTabSelected for storing the Id of the active menu. Define this variable to OnStart property of the App:
Set(varTabSelected, 1);
Step 5. Add a component
Step 5.1. Add a new component (say HorizontalMenuComponent) with the below properties:
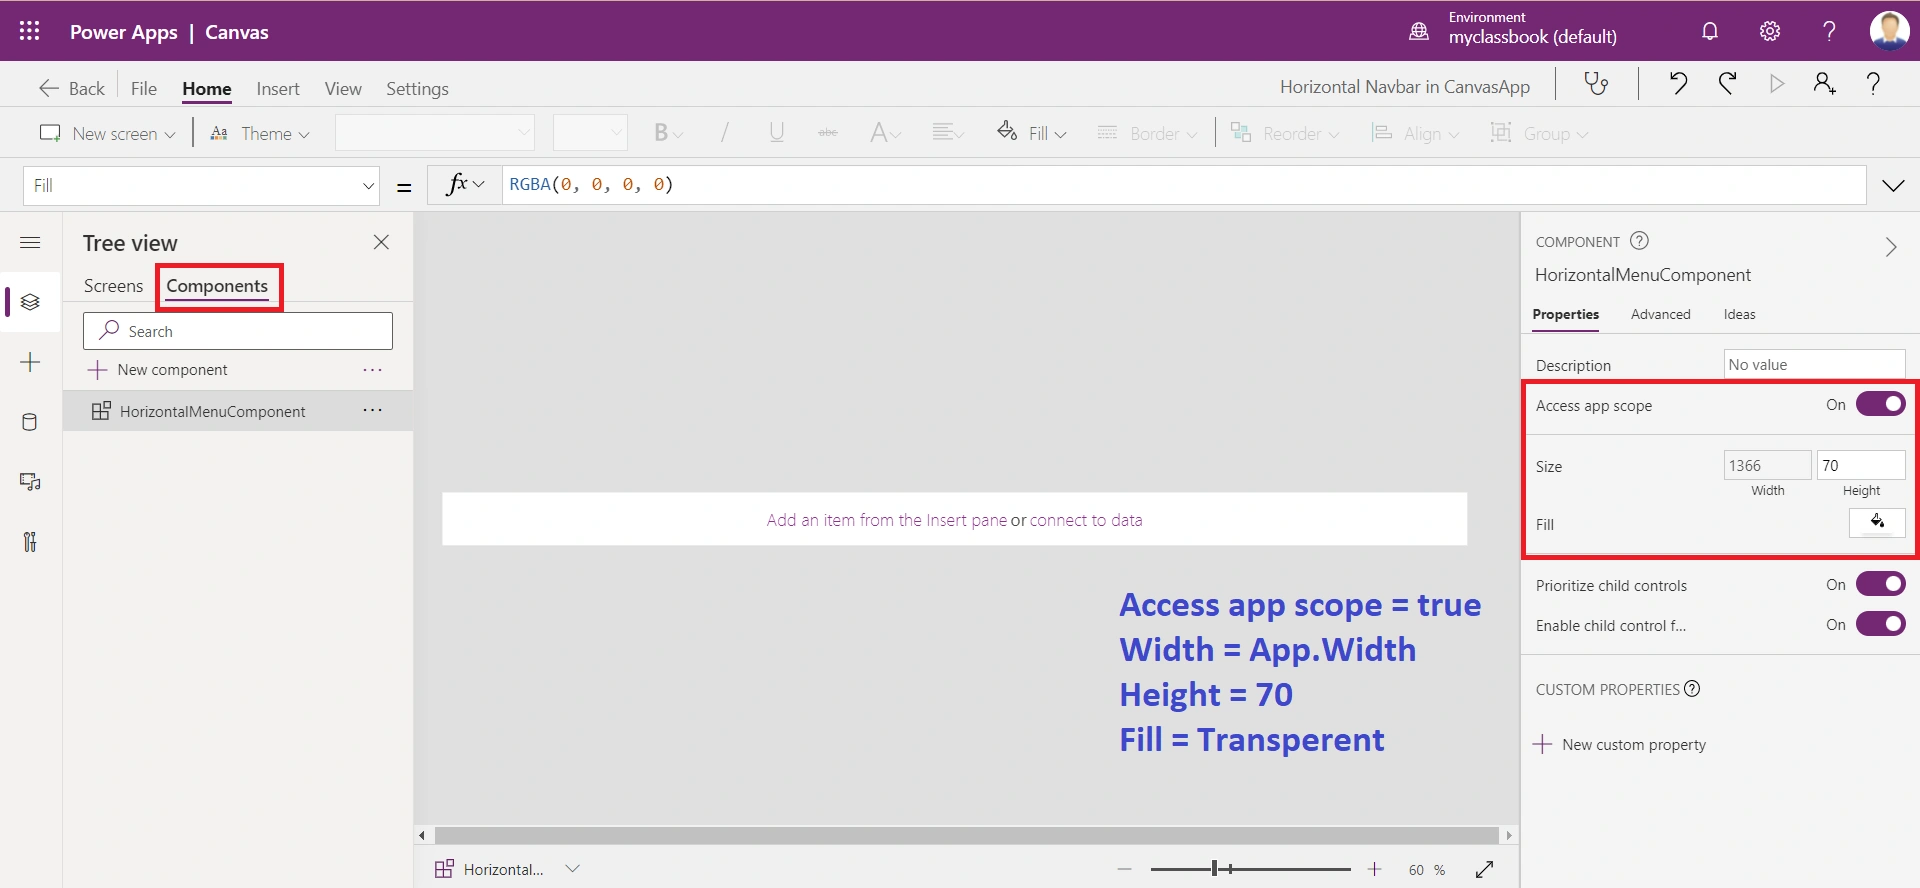
- Width = App.Width
- Height = 70
- We will update the height to dynamic in the next steps, but for now, keep it 70
- Fill = Transparent
- Access spp scope = ON
- This property allows you to access variables defined in the OnStart property of the app. You can find this property in the right side of the component properties.
Step 5.2. Add a rectangle control to show the fixed background. Set the properties as below:
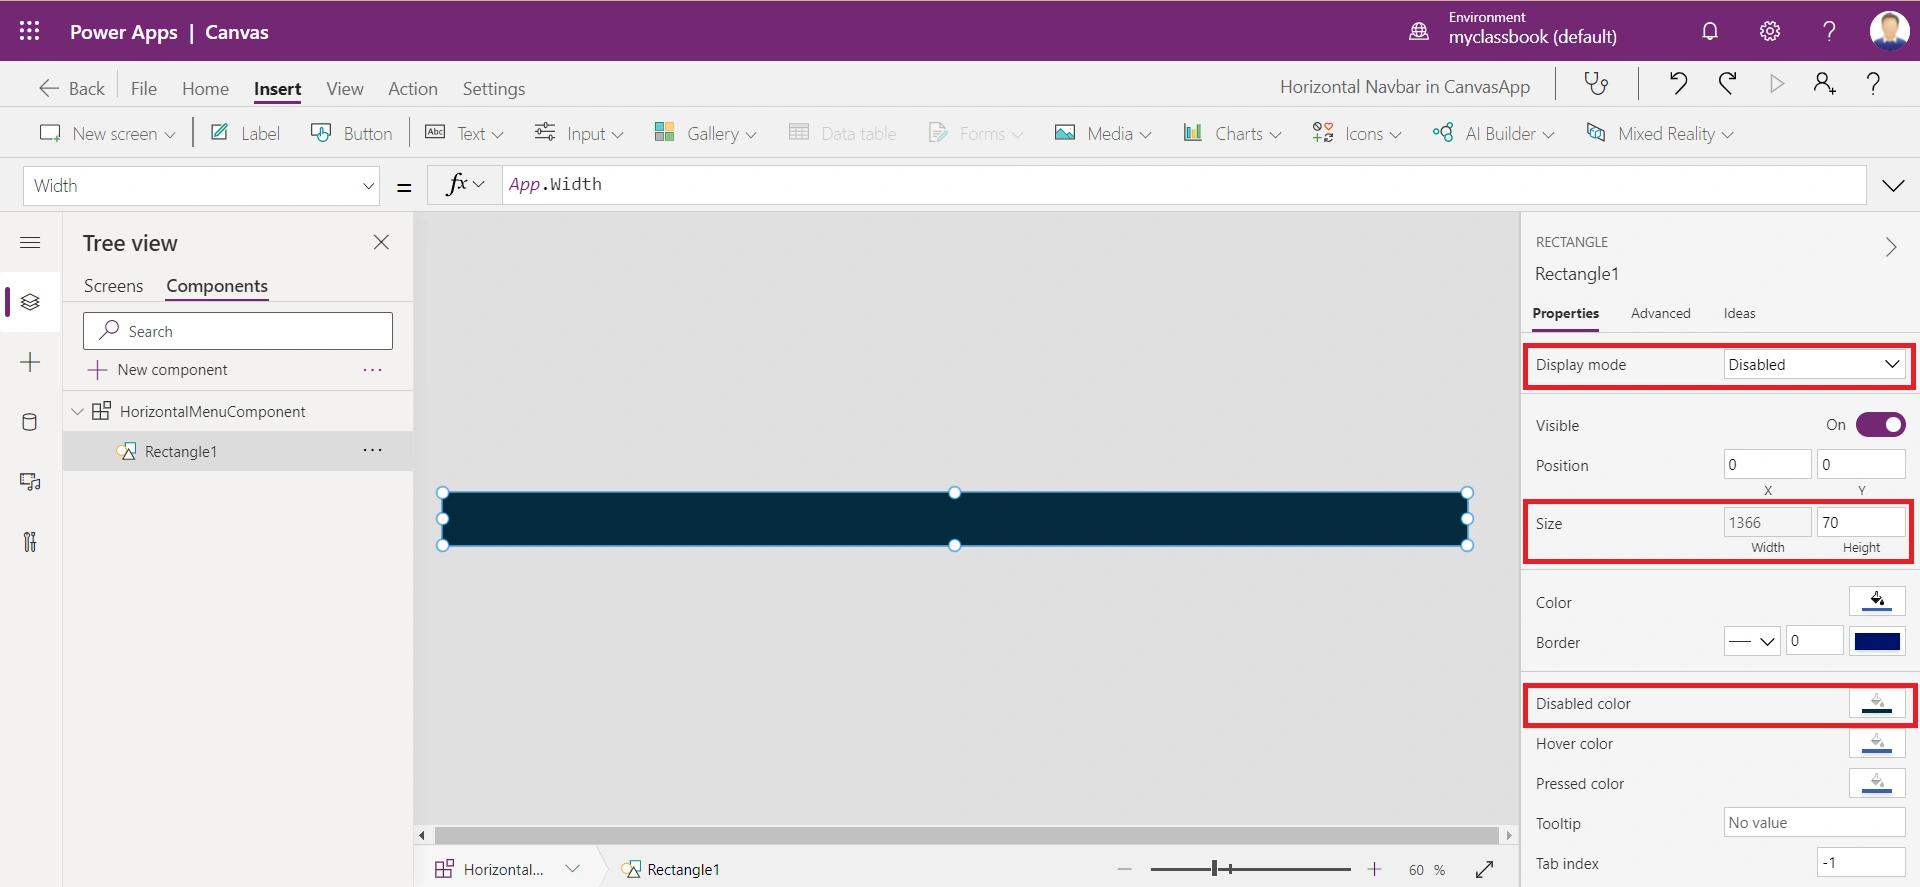
- DisplayMode = DisplayMode.Disabled
- So that it will not have a hover effect.
- DisabledFill = varMenuPrimaryColor
- X = 0, Y =0
- Width = App.Width
- Height = 70
- This should be the same as the component height.
Step 5.3. Add a blank horizontal gallery (say Gallery1) which we will use for showing the parent menu items. Use the below properties for a better look and feel:
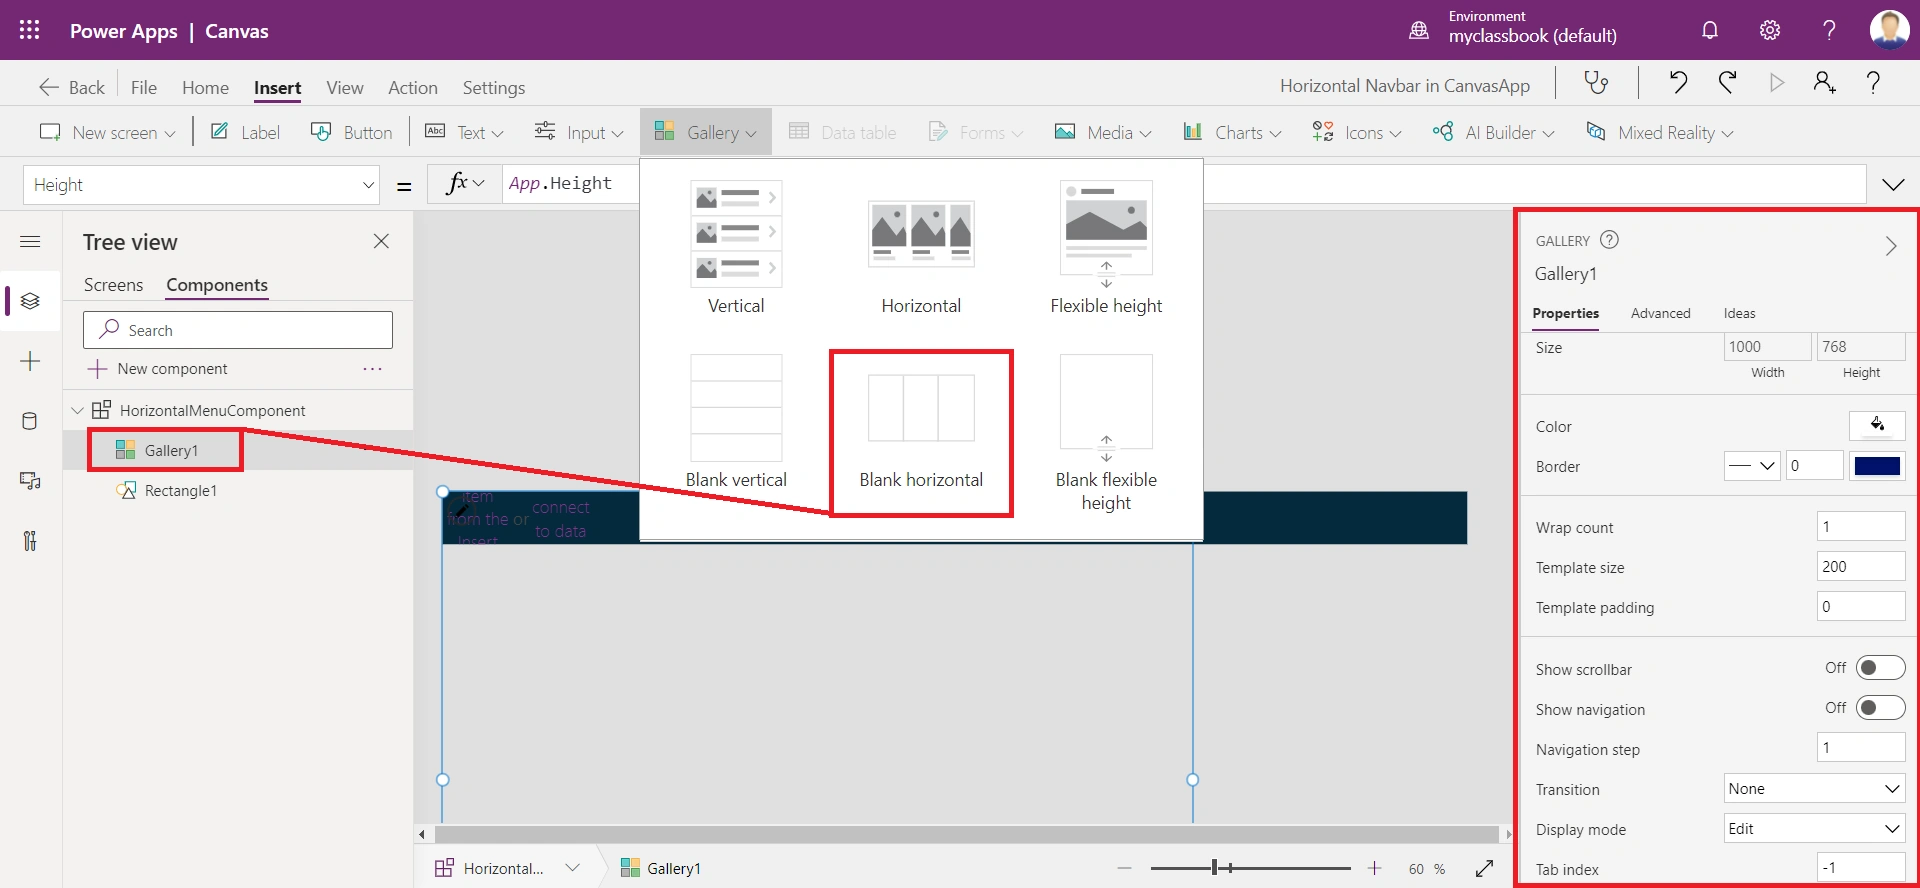
- Items = GroupBy(Filter(colHorizontalMenu, Id = varTabSelected || ParentTab = "") ,"Id","GroupMenu")
- We have filtered the collection to only show the parent menu items along with the submenu items of the active tab.
- TemplateSize = 200
- This will be the width of each main menu item.
- Show Scrollbar = Off
- X = 0, Y = 0 (You can change the X position if you want the center-aligned menu)
- Width = CountRows(Self.AllItems)*Self.TemplateWidth
- This will cover all the parent items horizontally and removes the horizontal scrolling.
- Height = App.Height
- So that it can show all the submenu items vertically.
- TemplatePadding = 0
Step 5.4. Add a nested blank flexible height gallery (say Gallery2) inside the horizontal gallery - Gallery1 to show the submenu items. use the below properties for a better look and feel:
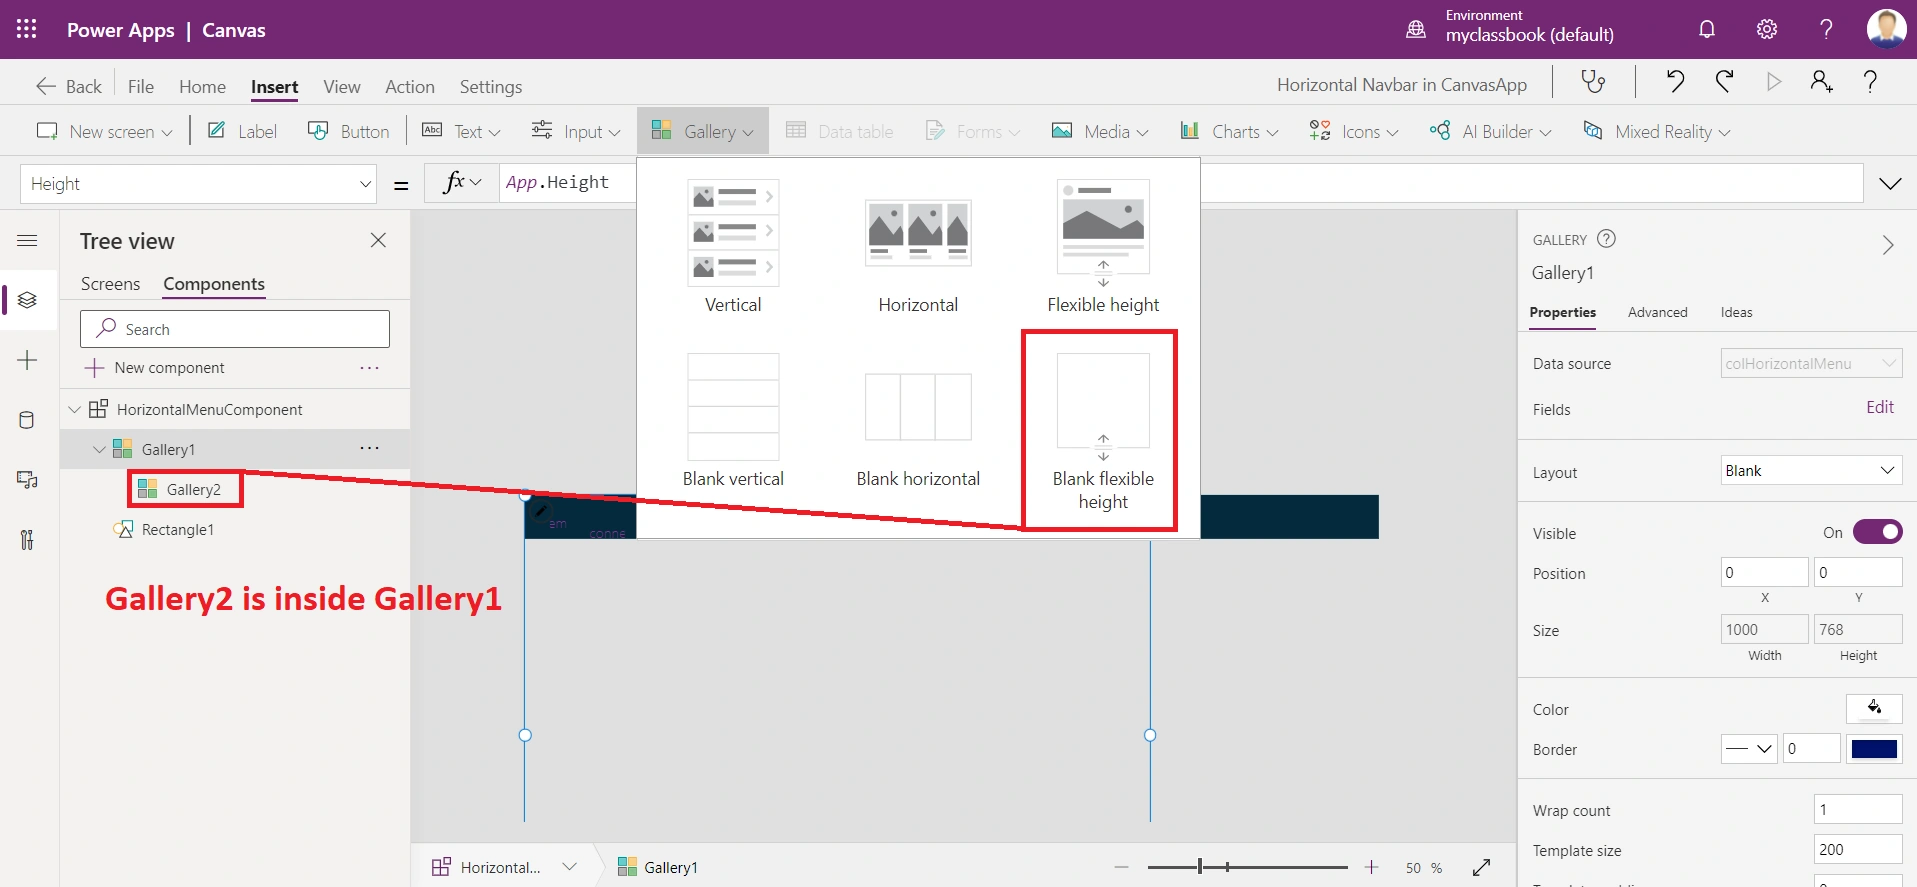
- Width = 200
- This is the same width we are using for parent items (Step 5.3)
- Height = 600
- Items = AddColumns(ThisItem.GroupMenu, "Id", ThisItem.Id)
- We will use the GroupMenu property of the parent item. This will only show the submenu options of the parent item.
- ShowScrollbar = false
- TemplateSize = 40
- TemplatePadding = 0
Step 5.5. Add a button (say Button1) inside the blank flexible height gallery - Gallery2
We will use the button to show the menu and submenu items.
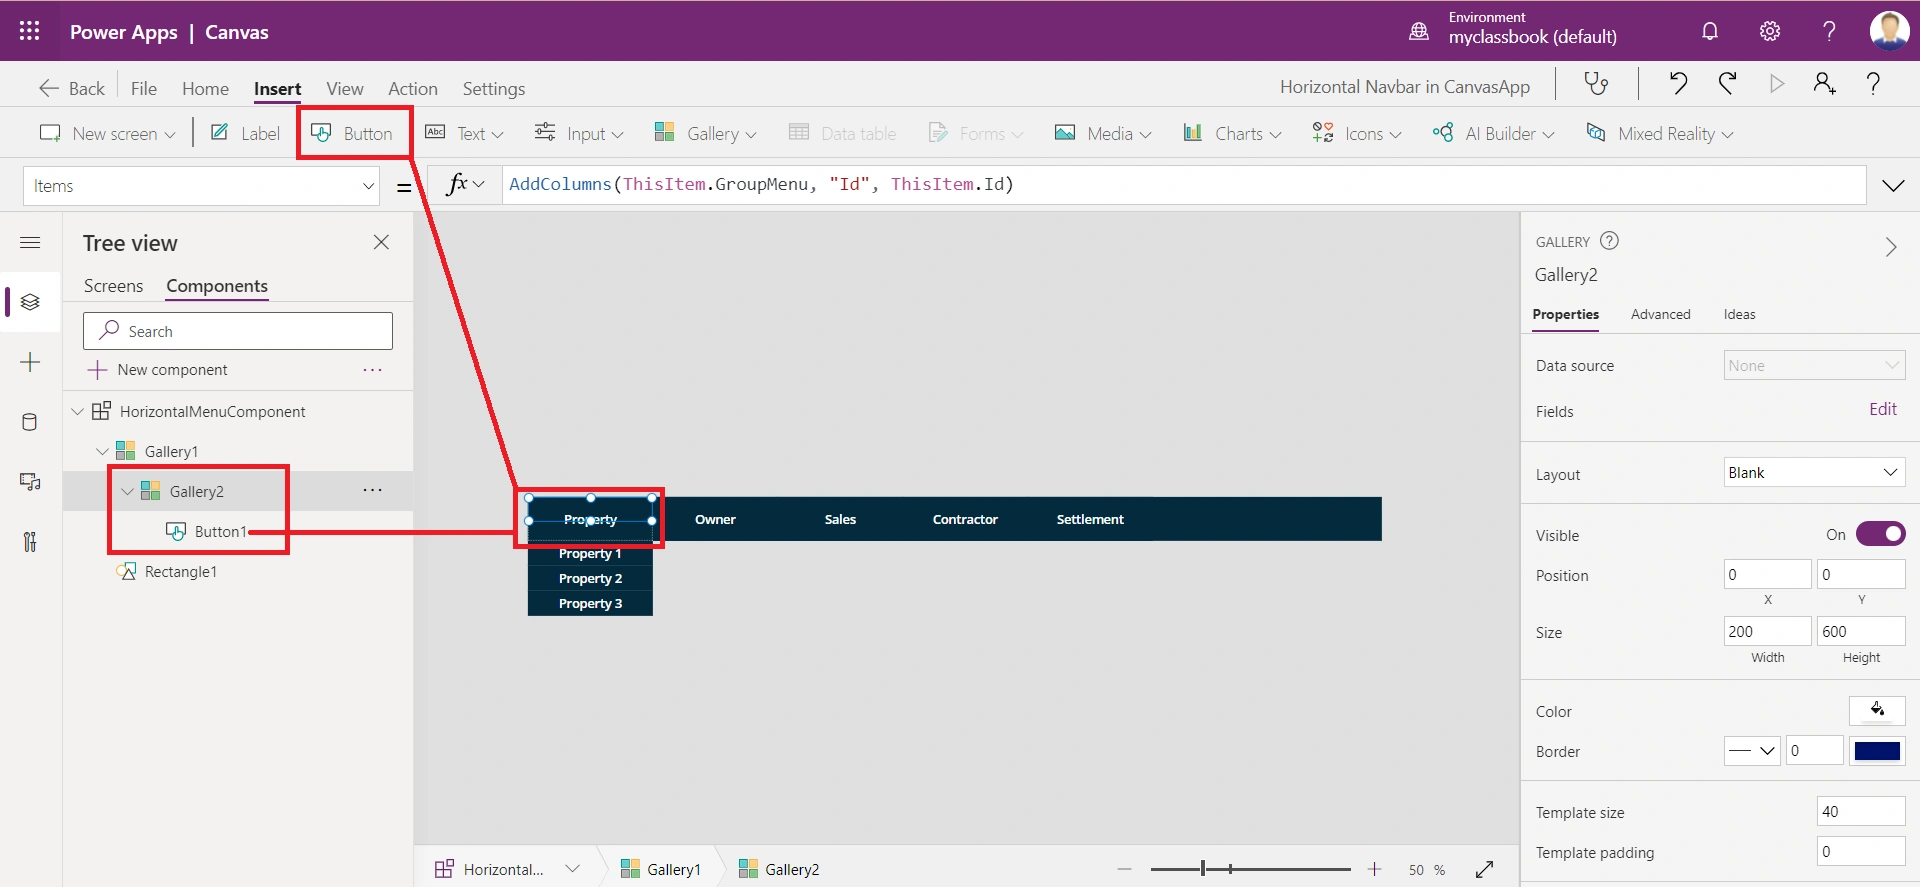
- Width = 200
- Same as the width of the parent gallery
- X = 0, Y = 0
- To remove spacing
- Height = If(IsBlank(ThisItem.ParentTab), 70, 40)
- To show different heights for Parent items and submenu items.
- BorderThickness = 0
- Border radius = 0
- Fill = If(ThisItem.Id = LookUp(colHorizontalMenu, Screen = App.ActiveScreen).Id && IsBlank(ThisItem.ParentTab), varMenuSecondaryColor, varMenuPrimaryColor)
- This will show different colors for the Active menu item
- Text = ThisItem.Title
- To show the tile of the menu-submenu
- OnSelect = If(varTabSelected=ThisItem.Id, Set(varTabSelected,0), Set(varTabSelected,ThisItem.Id)); Navigate(ThisItem.Screen)
- This will update the varTabSelected variable and also navigate the user to the respective screen.
- HoverFill = ColorFade(varMenuSecondaryColor, -20%)
- FocusedBorderThickness = 0
Step 5.6. Add a downward icon inside the blank flexible height gallery - Gallery2 to show that the menu has child items
This step is optional but good to have. It will indicate that the menu has child items.
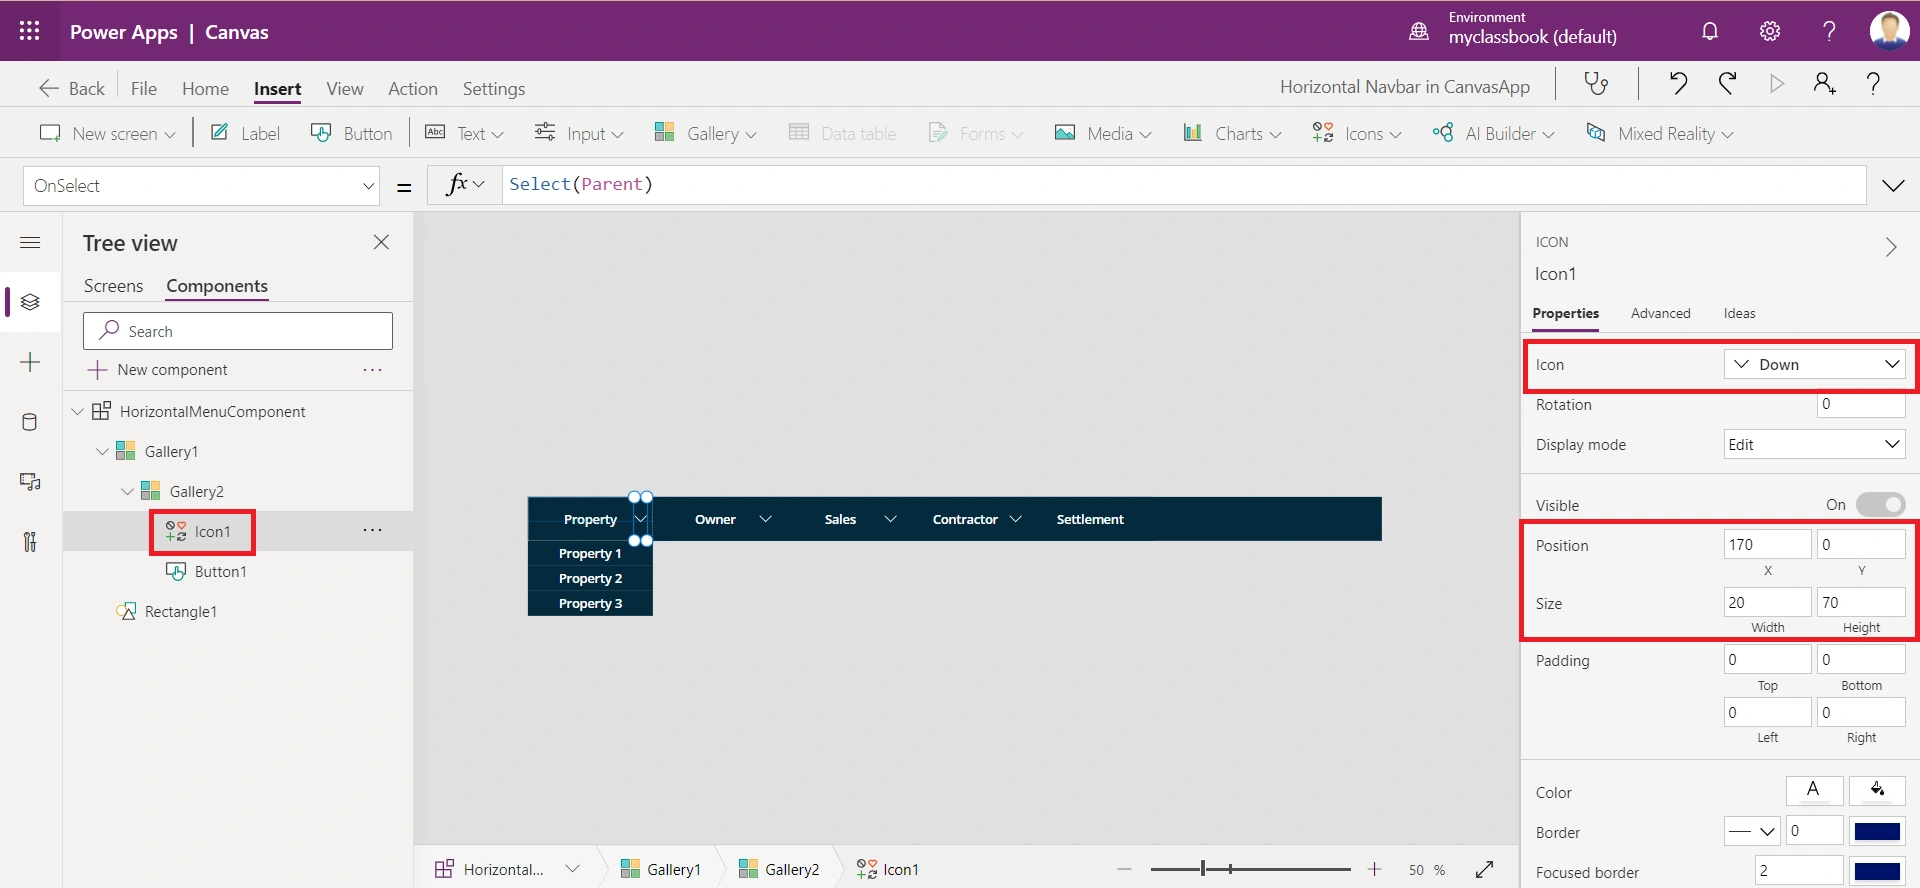
- Width = 20
- Height = 70
- X = 170
- This you can change according to your menu title length
- Y = 0
- Visible = IsBlank(ThisItem.ParentTab) && CountRows(Filter(colHorizontalMenu, Id = ThisItem.Id)) > 1
- This will hide the icon if any parent menu does not have child menus.
Step 6. Logic to update the height when the submenu is opened
In step 5.1, we have set the component height to 70. It will not expand if we click on the parent menu item. So to make a dynamic height component, we have to follow below steps:
Add a hidden label (say Label1) to the root level of the component and set the Text property to:
If(
    CountRows(
        Filter(
            Gallery2.AllItems,
            Id = varTabSelected
        )
    ) = 0,
    70,
    App.Height
)
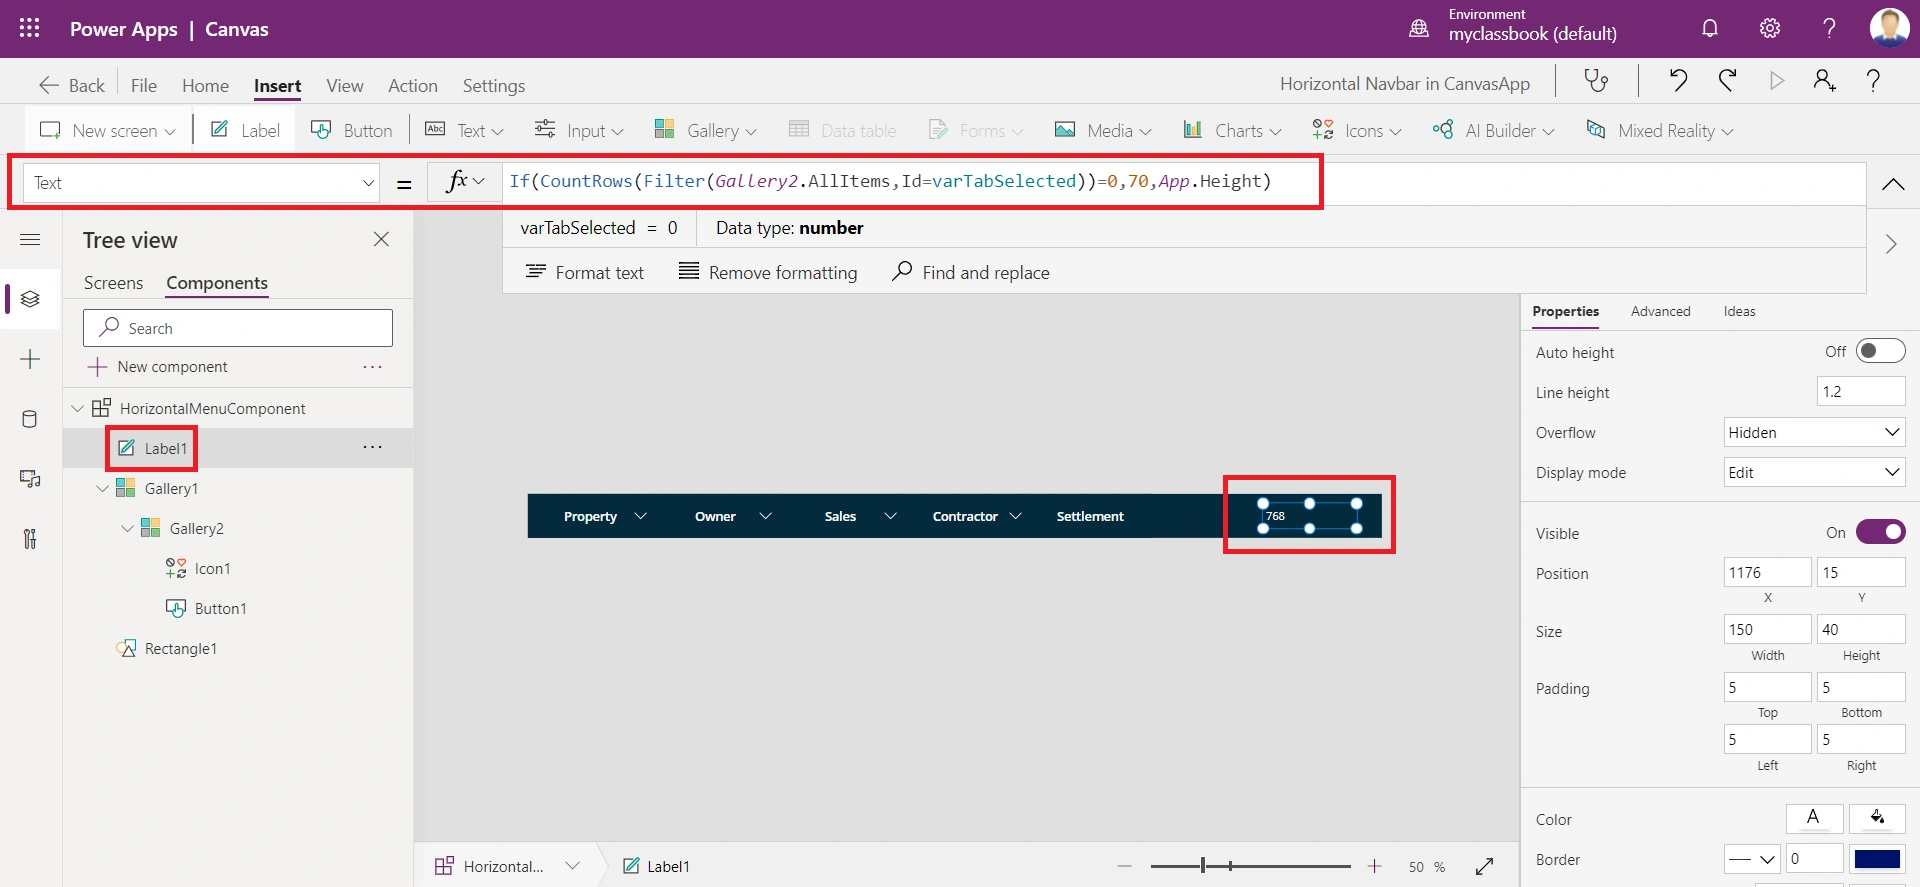
Now we will use the label text property as the dynamic height of the Component. But, we cannot use it because child controls cannot be used to set the parent controls height. As a workaround, we will have to define the custom output property.
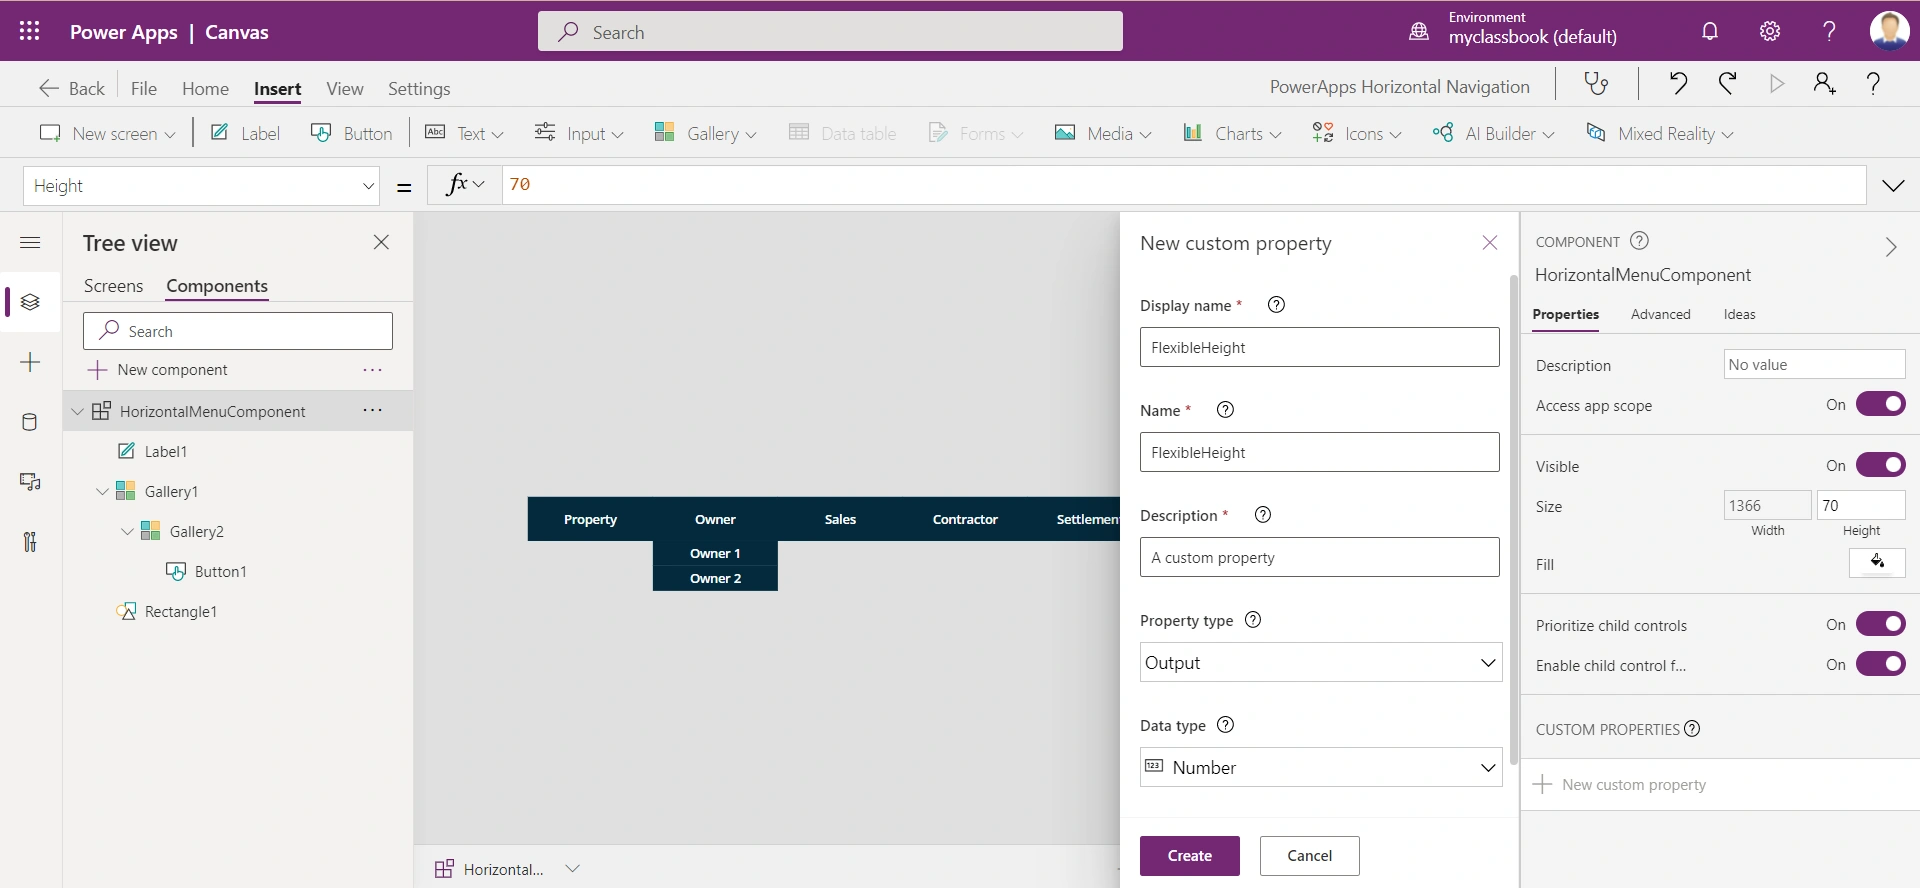
Step 7. Create output property
Add an output property (say FlexibleHeight) with data type as Number
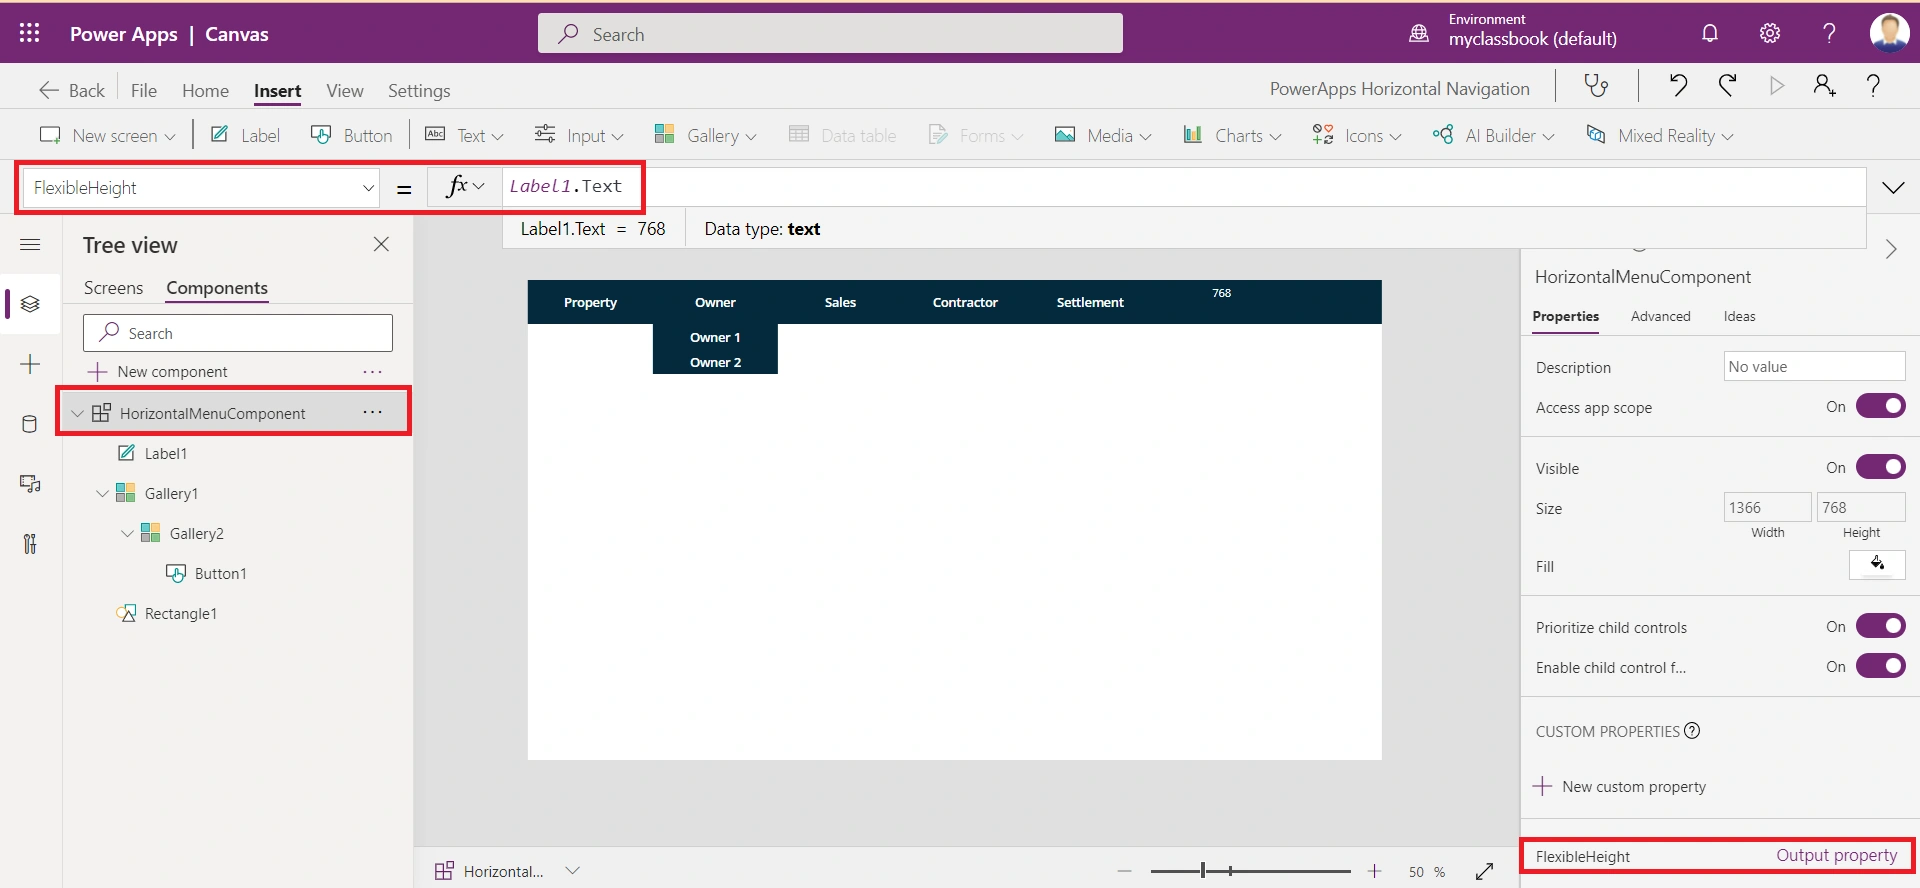
Step 8. Set the value of the custom property
Set the property value to Label1.Text
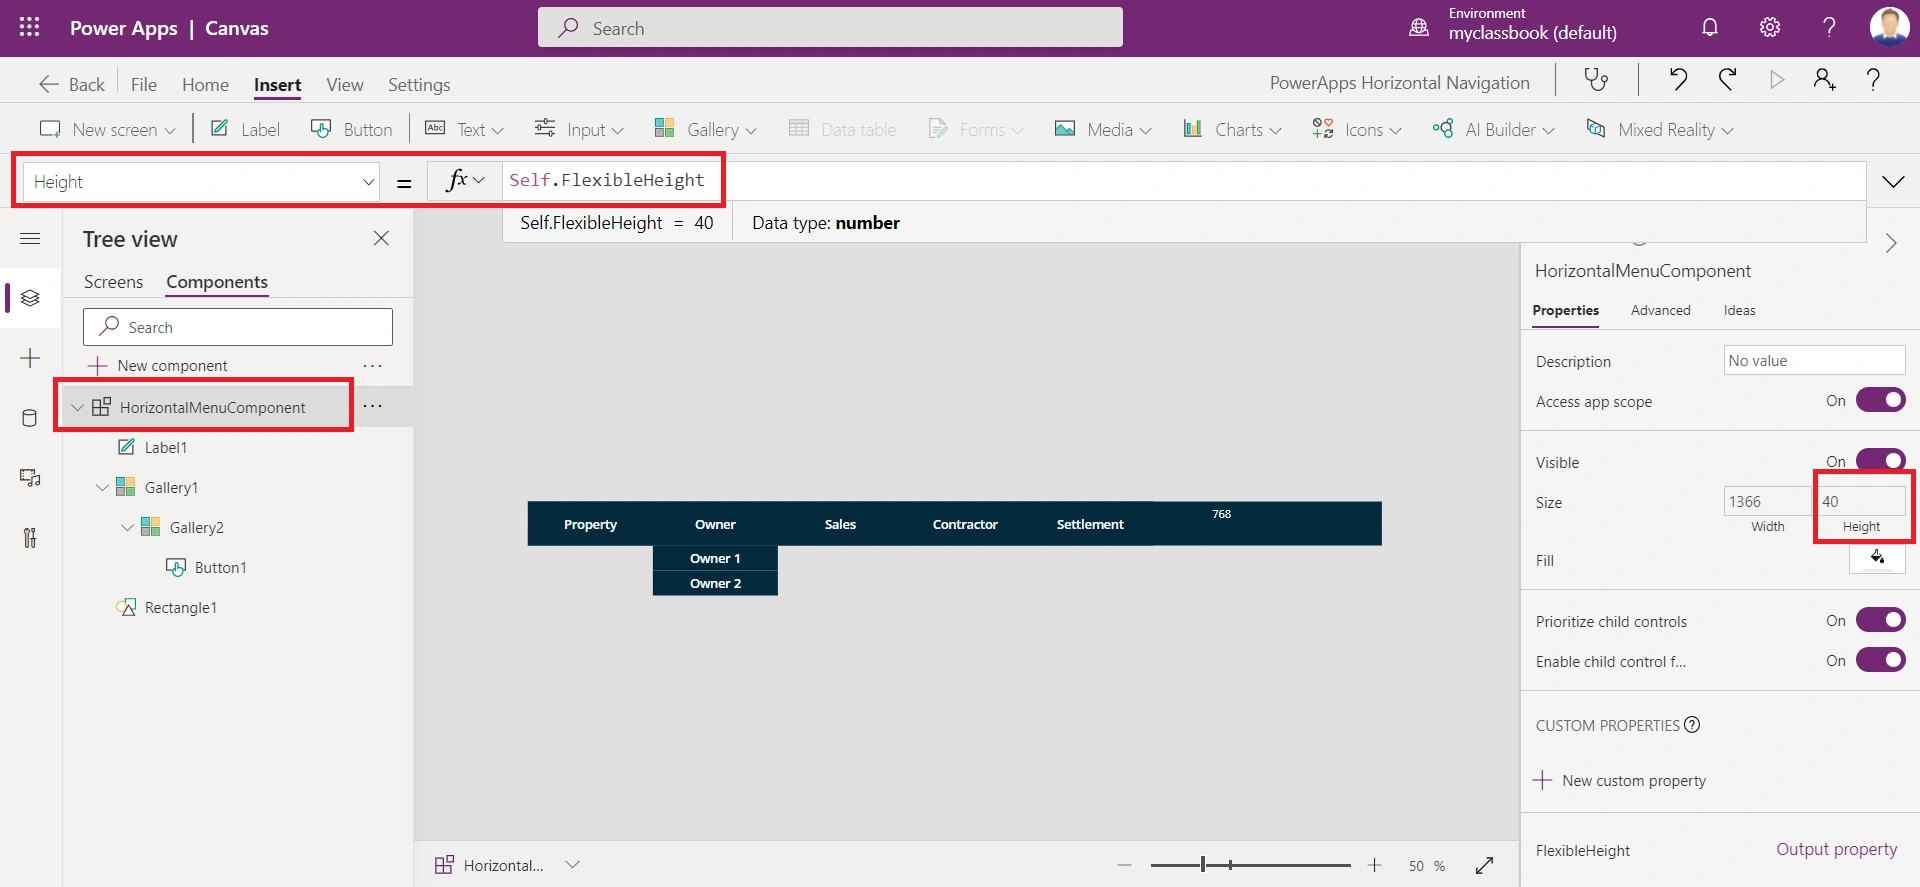
Step 9. Set the height of the component
Set the height of the component to the value of the custom property created in step 5.
Height = Self.FlexibleHeight
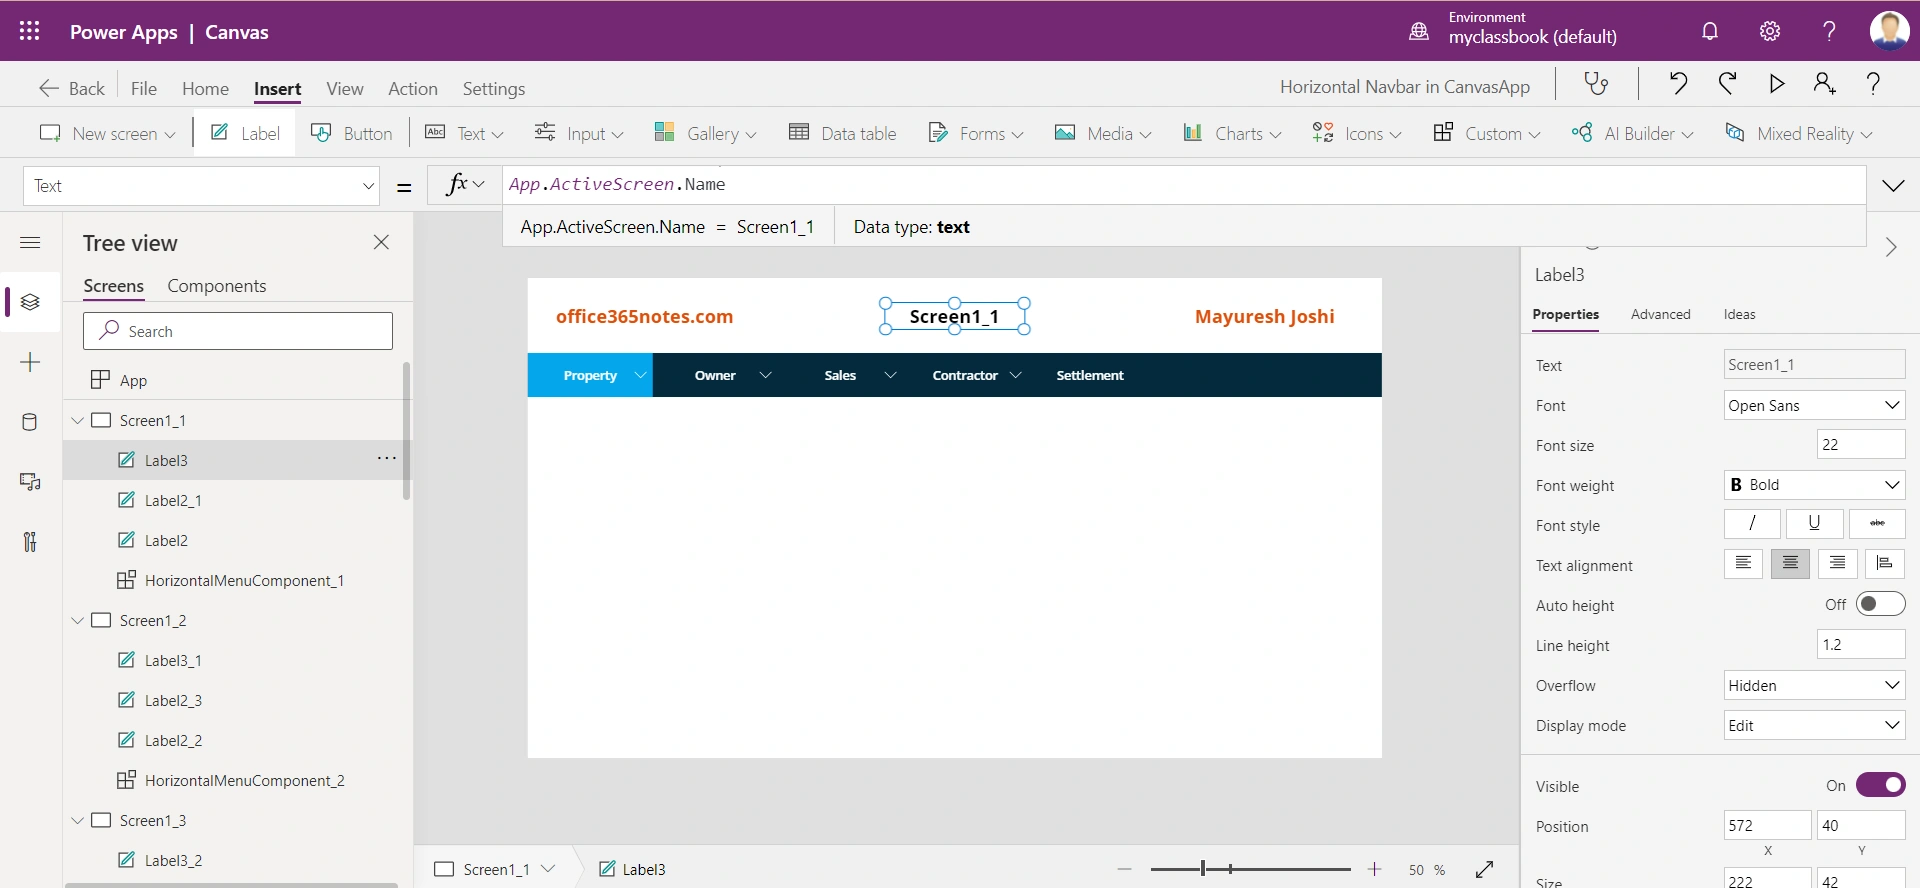
Step 10: Add the component on all the Screens
I have added the component to all the screens. For testing purposes, I have added one label at the top of each screen with Text property as App.ActiveScreen.Name. It will help us to show the screen name.
Output
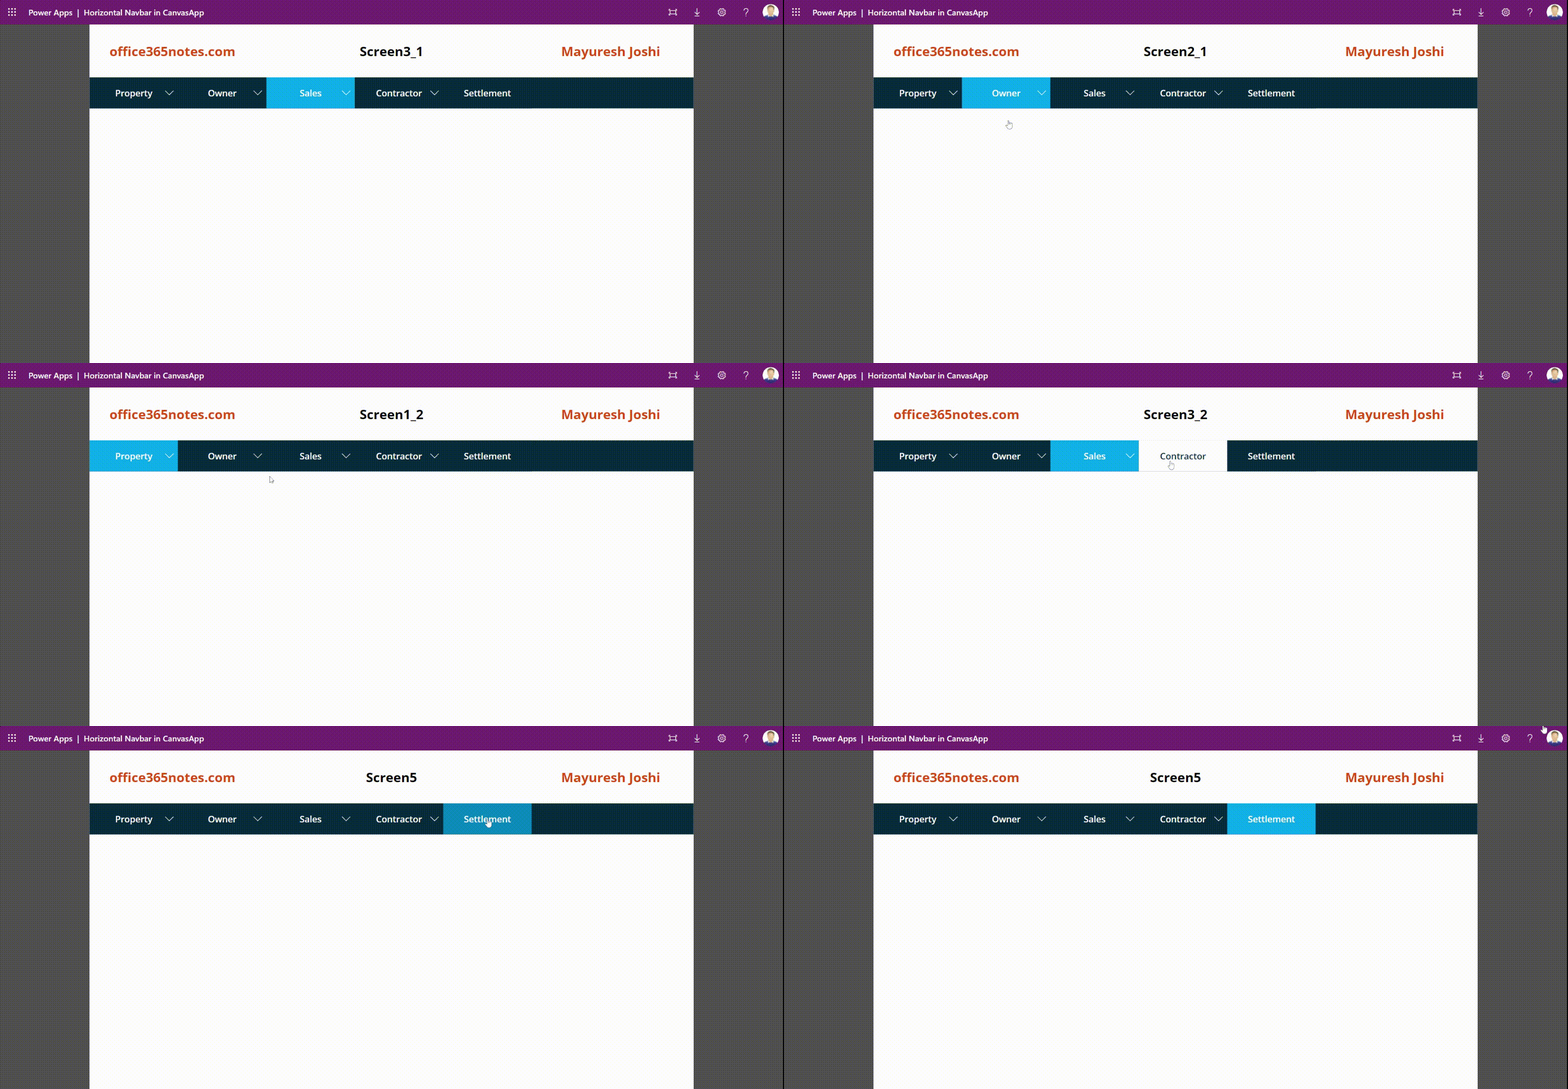
I hope you liked this article. If you have any queries please let me know in the comment section below. Thanks for reading!
Srirang NetakePosted Sep 17, 2024, 12:25 PM
In this line Items = GroupBy(Filter(colHorizontalMenu, Id = varTabSelected || ParentTab = "") ,"Id","GroupMenu"), we now need to use single quotes instead of double quotes for it to work otherwise it gives error.
Mary AwopiledaPosted Feb 21, 2024, 8:41 AM
I have a question please. My nav bar is very finnicky. Sometimes when I click on the submenu items, it navigates to the Parent Tab 1. I need help please
Nagarajan ElumalaiPosted Sep 13, 2023, 4:01 PM
Hi, Width = CountRows(Self.AllItems)*Self.TemplateWidth. this one throws error as circular referencing . Could you please help
Aakash MauryaPosted Jul 26, 2023, 12:27 PM
Excellent article, please correct the Step-4, it should be Set(varTabSelected, 0); and not Set(varTabSelected, 1);
Kuro SpiffPosted May 4, 2023, 9:15 AM
Lovely article but i have come up with a reoccurring issue. I have 3 tabs on the horizontal menu and only one with tab with 2 drop downs for 2 sub pages. When I click on the first drop down for the first page, it does not seem to work the first time around, only when I click on the second drop down does the first start to work. is there a property I need to set or reset something on the parent page?
Love ThakkerPosted Apr 20, 2023, 9:35 AM
How can we handle 3rd level ?
Bujjibabu KJPosted Mar 28, 2023, 2:58 PM
HiIs there any possibility to open Component or Gallery in same screen instead of Navigate to another screen.
DanielPosted Jul 27, 2022, 10:04 AM
Hi, is it possible to make this work in a vertical direction or not?
rene netoPosted Apr 13, 2022, 9:23 PM
When I download and open the app, I can only switch between screens after navigating to screen 05. It seems that switching screens is only allowed if I go to screen5. Sorry for the english, i'm brazilian.
Mayuresh JoshiPosted Apr 2, 2022, 4:12 AM
Update:1) OnStart, Set(varTabSelected, 0); instead of Set(varTabSelected, 1); 2) Use Label1.Text = If(varTabSelected = 0, 70, App.Height)