

Supposing there is an existing data in an SQL database, be it Azure or an on-premise database server, you are required to make the data available for CRUD operations in SharePoint for your users. This is a scenario where this article will be of help to you. In this article, I will show you how you can perform CRUD operations on Azure SQL database from a SharePoint web part. Note that the steps are same for on-premise SQL database except for the steps required in setting up Azure database.
In this article, I will be covering -
- How to set up SQL database in Azure.
- Creating restful web API and connect to the Azure SQL database.
- Publish the API to Azure.
- Enable cross-origin in the Web API.
In part 2 of this article, I will be covering -
- How to create SPFX web part
- Consume the Web API created in part 1 of the Spfx web part
- Implement CRUD operations in the Spfx web part
- Deploy to SharePoint Online
Setting up SQL Azure database
Log in to your Azure account and follow the steps below to create an SQL database (note that you can create a trial Azure account for testing purpose).
The steps are pretty straightforward.
Step 1
Enter a name for your database as shown below.
Step 2
Create a new server, name it, and click the "Select" button to select the server on which to create the database.
Step 3
Then, click "Create" to create the database (note the creation process might take some time, and you might have to refresh the page to see the new database).
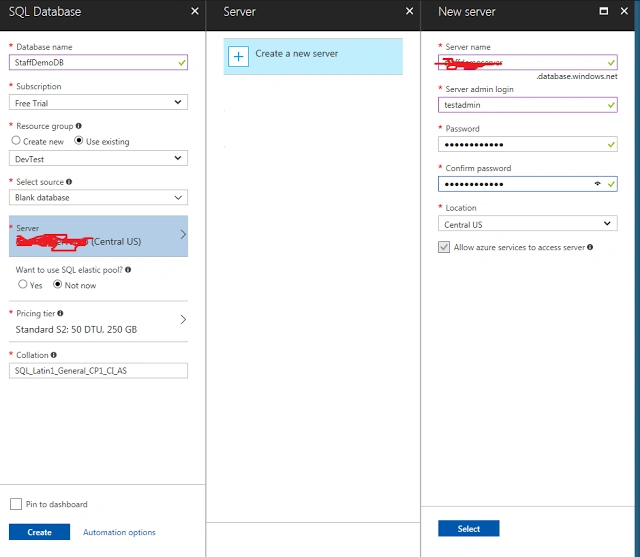
Ensure that you remember your password***.
The next step is to create a firewall rule and add your current client IP address to it. This step is important for you to connect to the database server from your client system.
Step 4
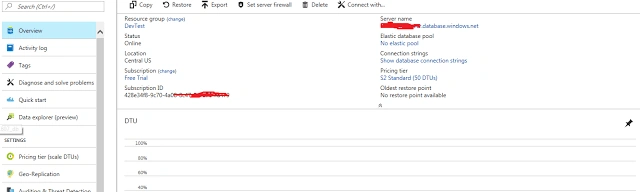
Click on the newly created database. You should see an interface similar to the one below. Note down the server name (i.e. yourserver.database.windows.net). You will need it when you want to connect to the server.
Step 5
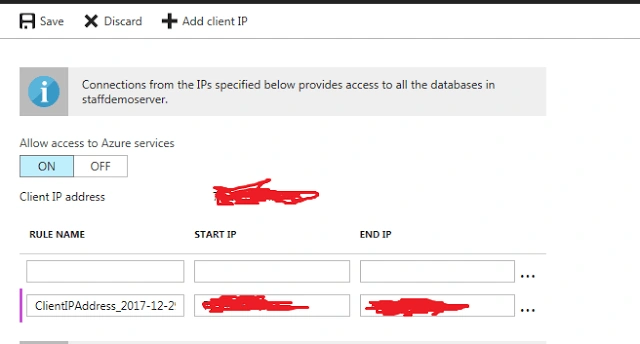
Click on "Set Server Firewall" in the toolbar.
Step 6
Click "Add client IP" in the toolbar to add your current client IP address to the firewall. Note your public IP will be automatically retrieved.
Step 7
Click "Save" to finish the process.
Now, you are done with the first task. The next step is to create our web API solution.
Let's fire up Visual Studio. I will be using Visual Studio 2017 community edition.
Creating RESTful web API and connect to the Azure SQL database
Before you start this step, ensure you download SQL Server Management Studio here if you don't already have it installed. We will need it to connect to our database. You could also connect to it within VS but I prefer using SSMS.
Step 1
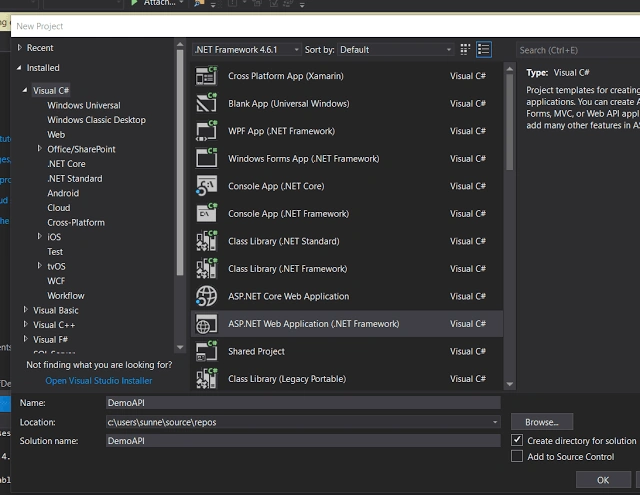
Launch Visual Studio and create a new ASP.NET Web Application project.
Step 2
Name it DemoAPI or whatever you like.
Step 3
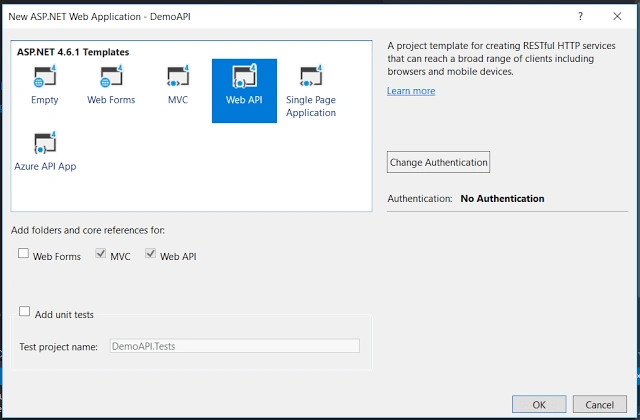
Follow the screenshot below to complete the process. When you are done, click OK.
Now, let's connect to our database server and create a table in our database
Step 4
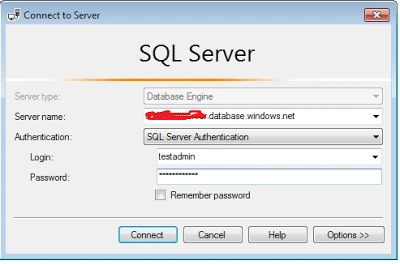
Open SQL Server Management Studio and connect your server (the server name you saved earlier).
Step 5
Put in the server login Id and password you created when you set up the server inAzure
Step 6
Click Connect to open the server.
Step 7
Run the script below to create a table in your database. Be sure to change the database name to match the database you created earlier.
- Use StaffDemoDB
- Go
- Create table Employees
- (
- ID int primary key identity,
- FirstName nvarchar(50),
- LastName nvarchar(50),
- Gender nvarchar(50),
- Salary int
- )
- Go
- Insert into Employees values ('Mark', 'Hastings', 'Male', 9000)
- Insert into Employees values ('Jas', 'Hastings', 'Male', 78000)
- Insert into Employees values ('Mark', 'Mikel', 'Female', 6000)
- Insert into Employees values ('Mitchell', 'Hastings', 'Male', 6000)
- Insert into Employees values ('Mark', 'Jones', 'Male', 68000)
- Insert into Employees values ('Kunle', 'Amaka', 'Female', 6000)
- Insert into Employees values ('Mark', 'Peters', 'Female', 4000)
- Insert into Employees values ('Deji', 'Hastings', 'Male', 6000)
- Insert into Employees values ('Tao', 'Oyemade', 'Male', 7000)
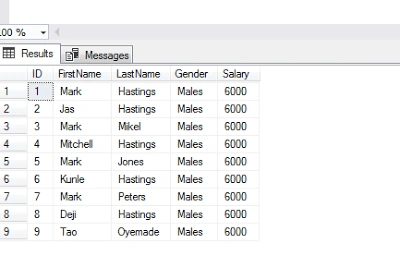
If everything works fine, your Employee table should be created and look like this:
The next step is to create connection to our db using ADO.NET Entity Data Model
Step 8
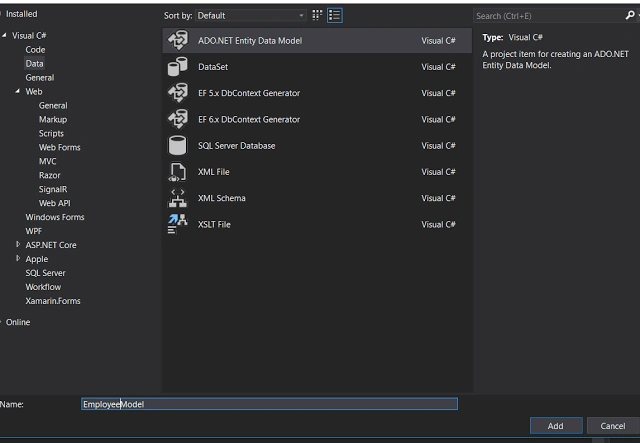
In the solution explorer of your project, right click on Models folder, select Add >> New Item >> Data and click ADO.NET Entity Data Model
Step 9
Name it EmployeeModel
Step 10
Click Add, then select EF Designer from database in the next screen and click Next
Step 11
In the Choose your database connection, click New Connection and supply details to connect to your database, click Ok and click Next
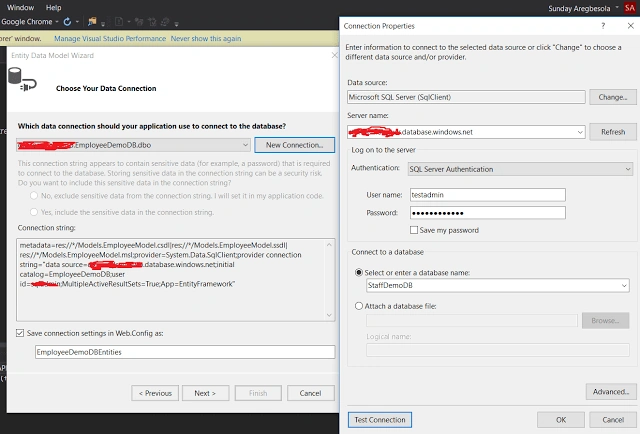
Step 12
Select Entity framework 6x and click Next
Step 13
Select your table and click Finish
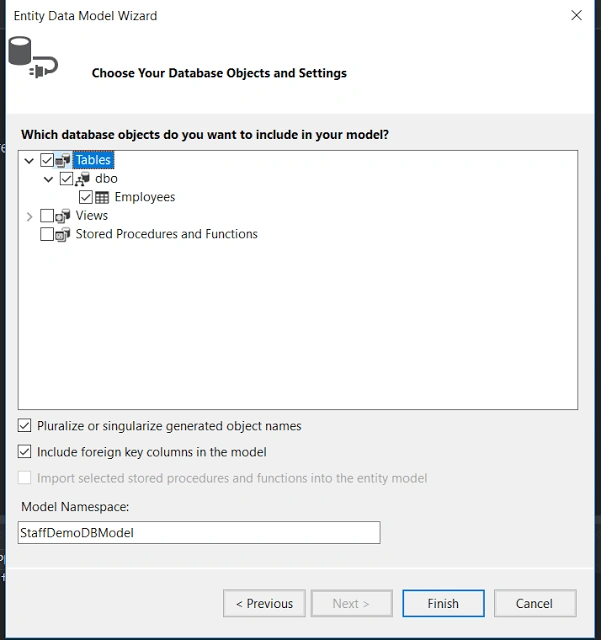
The next step is to publish our API to azure. Follow the steps below to do this
Publish the API to Azure
Before publishing the API, lets create a Get operation to fetch our list of employees from the database
Step 1
Right click on the Controller folder >> Add > Controller.. >> Web API 2 Controller -Empty
Step 2
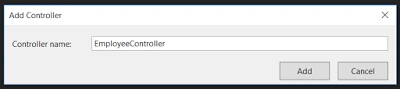
Name it Employee. Note you only have to rename the highlighted part. If you use Employee as advised, you will have EmployeeController as name. See the image below
Step 3
Click Add
Step 4
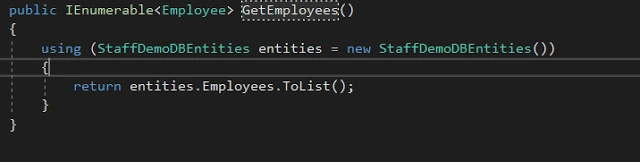
Type out the code below into your controller. If you have used the same database and table name, you should have no error
Step 5
Now let's publish. Right click the project name and click publish...
Step 6
Click on Microsoft Azure App Service and select Create New
Step 7
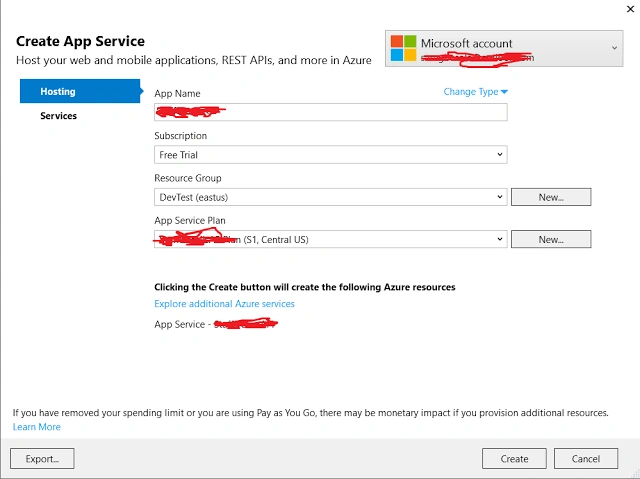
Create an App Name with other settings as shown below. You can leave the default names if you wish. When you are done, click Create. This may take some time to complete.
Step 8
When it is finished, your web API will be published to Azure and opens in browser
Step 9
To test your web API, append /api/employee to the end of the URL displayed in the browser. You should have something like this "http://apiname.Azurewebsites.net/api/employee". Notice the last parameter in the URL-"employee". If you did not name your controller employee, this URL won't work for you. You have to use the name of your controller.
Step 10
When you open the URL, you should see your data in XML format, or JSON if you have formatted your output.
The last step in this article is to enable cross-origin resource sharing
Enable cross-origin in the Web API
To be able to call this web API from another domain other than Azure, you need to enable cross-origin attribute in your code. Since we are going to be calling this API in SharePoint, we will add this attribute to our code.
Step 1
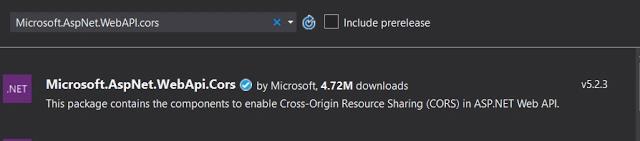
Right-click on your project Manage NuGet Packages >> Microsoft.ASPNET.WebAPI.Cors
Step 2
Click Install to add it to your project.
Step 3
Click Ok to the warning and accept the installation
Step 4
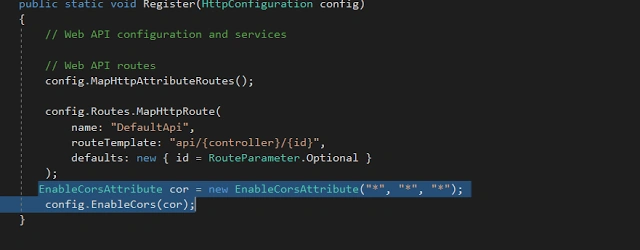
Once installation completes, open WebAPIConfig.cs in App_Start folder and add the following highlighted code inside the Register method
Note
The * in the above code means I want to accept all domains, apply it to all headers and methods. This may not be what you want to do in production. Be sure to understand what you are doing.
Step 5
Right click your project and click publish to publish your changes to Azure.
Summary
Now we have completed part 1 of this article. We have seen how we can publish web API to Azure and enable cross origin for resource sharing with other domains. In part 2 of this article, we will discuss how we can call this API within our spfx web part.
Until then, happy coding.
Shriram PophaliPosted Feb 3, 2021, 6:30 AM
Very nice article and detailed explanation! Only one thing would like to add "Allow Azure services and resources to access this server" needs to be set as "Yes" in Azure SQL DB Firewall Settings when calling Azure SQL DB from Azure App Service API. By default it is "No".
Kuma HomesPosted Apr 22, 2020, 8:26 PM
Hi Sunday, we are hoping to redo the existing SP2010 Visual web part (with SQL database) to work with the new SharePoint 2019 on-prem. Are there any changes in Sp2019 to performs a similar solution? or any other MS suported methods to develop custom web parts with SQL database ? im working on VS 2019 can i use Sharepoint 2019 empty template ?
Rajesh NPosted Jun 6, 2018, 7:59 AM
Great article to know about how to perform CRUD operations on Azure SQL database from a SharePoint web part. Great thanks for sharing this helpful article here also, thanks much for sharing link to Part 2 of this article to know more about the additional process to set up SQL Azure database.