

Introduction
In this article we will discuss how to navigate between pages using Xamarin Forms. Page Navigation is used to switch between two or more pages in an application.
Prerequisites
In this article we will discuss how to navigate between pages using Xamarin Forms. Page Navigation is used to switch between two or more pages in an application.
Prerequisites
- Windows10
- Visual Studio 2017 Community Edition
- Xamarin Package
Step 1
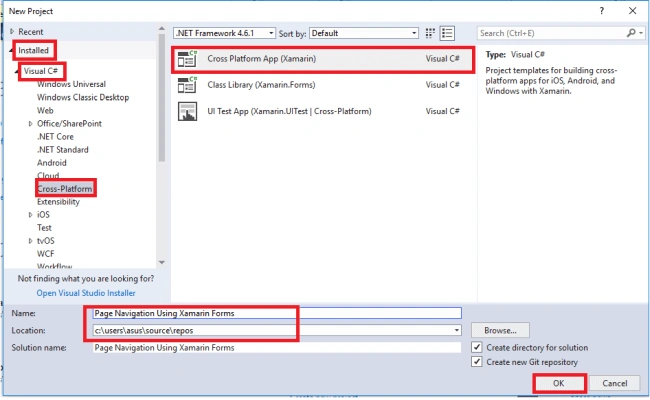
Open Visual Studio 2017 Community Edition then go to File -> New -> Project click on Project. Now, a new window will open in that window under installed select Visual C# -> Cross -Platform. Now, select Cross Platform App (Xamarin), now give the name of the project and set the location for that folder and then click OK.
Step 2
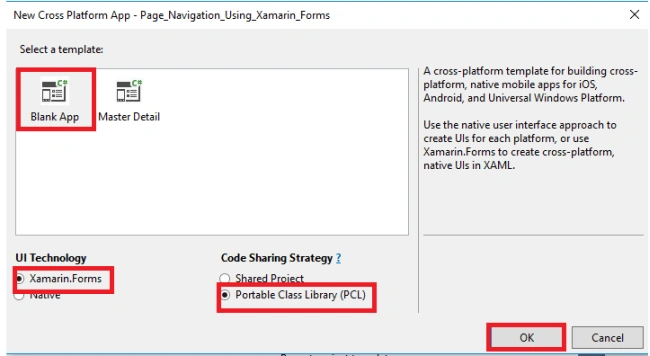
Now a new window will open. In that window select Blank App and then select Xamarin.Forms and select Portable Class Library (PCL) and click OK.
Step 3
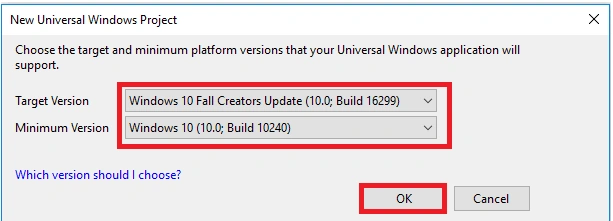
Now, select the Minimum Version and Target Version for UWP application and then click OK.
Step 4
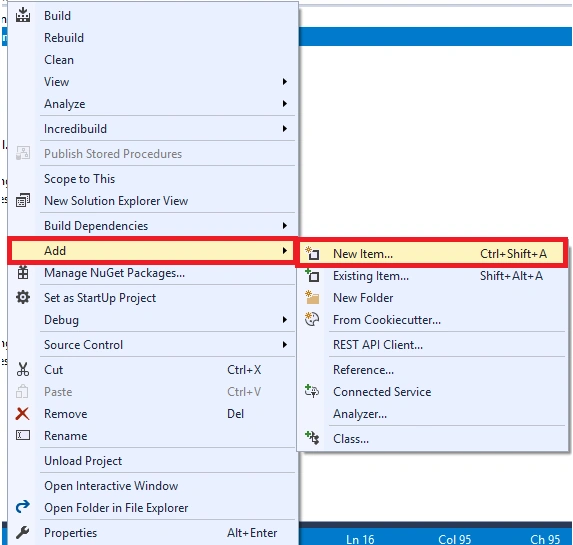
Now, in Solution Explorer under Portable class right click and go to Add -> New Item and click on it.
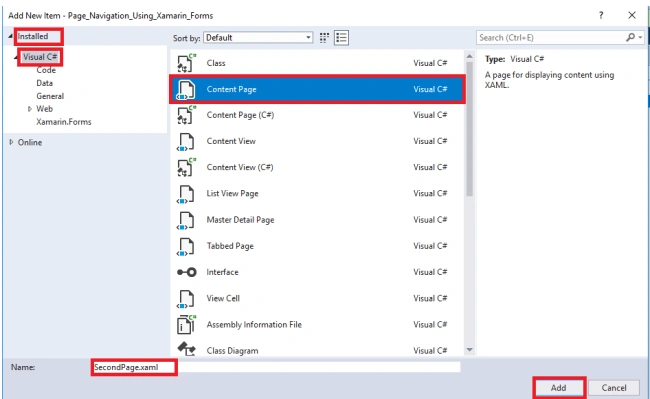
Now, a new window will open; in that window under installed select Visual C# select Content Page and give the name of that file i.e., when we click on navigate button then it will navigate to this page and click OK.
Step 5
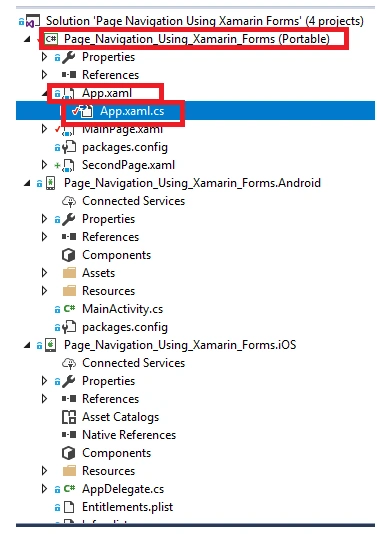
Now, in Solution Explorer under Portable expand App.xaml and select App.xaml.cs file.
Now, under public add the navigation command:
C# Code
MainPage = new NavigationPage(new Page_Navigation_Using_Xamarin_Forms.MainPage());

Step 6
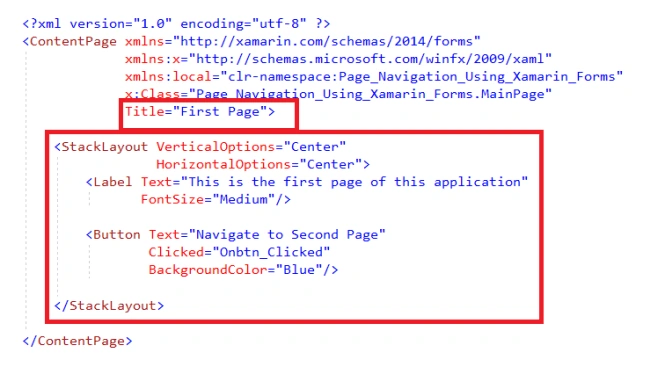
Now open the MainPage.xaml file and set the Title of the MainPage and write the XAML code for MainPage.
XAML Code
Open Visual Studio 2017 Community Edition then go to File -> New -> Project click on Project. Now, a new window will open in that window under installed select Visual C# -> Cross -Platform. Now, select Cross Platform App (Xamarin), now give the name of the project and set the location for that folder and then click OK.
Step 2
Now a new window will open. In that window select Blank App and then select Xamarin.Forms and select Portable Class Library (PCL) and click OK.
Step 3
Now, select the Minimum Version and Target Version for UWP application and then click OK.
Step 4
Now, in Solution Explorer under Portable class right click and go to Add -> New Item and click on it.
Now, a new window will open; in that window under installed select Visual C# select Content Page and give the name of that file i.e., when we click on navigate button then it will navigate to this page and click OK.
Step 5
Now, in Solution Explorer under Portable expand App.xaml and select App.xaml.cs file.
Now, under public add the navigation command:
C# Code
MainPage = new NavigationPage(new Page_Navigation_Using_Xamarin_Forms.MainPage());
Step 6
Now open the MainPage.xaml file and set the Title of the MainPage and write the XAML code for MainPage.
XAML Code
- <?xml version="1.0" encoding="utf-8" ?>
- <ContentPage xmlns="http://xamarin.com/schemas/2014/forms" xmlns:x="http://schemas.microsoft.com/winfx/2009/xaml" xmlns:local="clr-namespace:Page_Navigation_Using_Xamarin_Forms" x:Class="Page_Navigation_Using_Xamarin_Forms.MainPage" Title="First Page">
- <StackLayout VerticalOptions="Center" HorizontalOptions="Center">
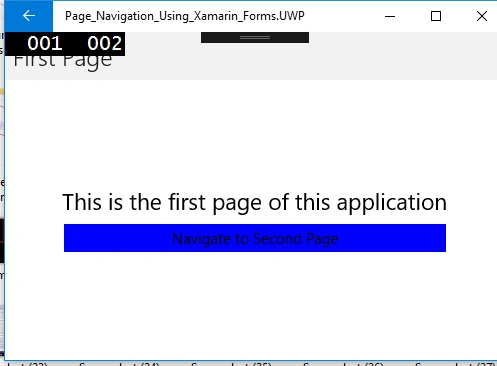
- <Label Text="This is the first page of this application" FontSize="Medium" />
- <Button Text="Navigate to Second Page" Clicked="Onbtn_Clicked" BackgroundColor="Blue" /> </StackLayout>
- </ContentPage>
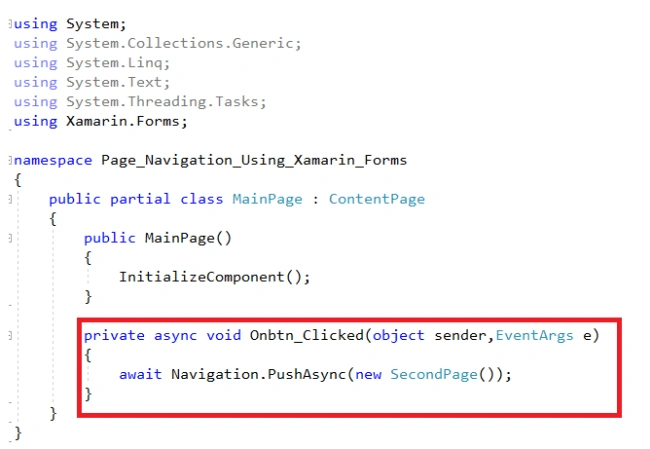
Now open the MainPage.xaml.cs file and write the C# code in that,
C# Code
- using System;
- using System.Collections.Generic;
- using System.Linq;
- using System.Text;
- using System.Threading.Tasks;
- using Xamarin.Forms;
- namespace Page_Navigation_Using_Xamarin_Forms {
- public partial class MainPage: ContentPage {
- public MainPage() {
- InitializeComponent();
- }
- private async void Onbtn_Clicked(object sender, EventArgs e) {
- await Navigation.PushAsync(new SecondPage());
- }
- }
- }
Step 8
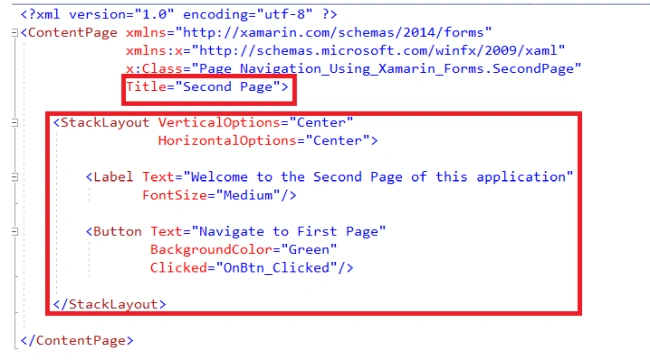
Now open the SecondPage.xaml file and write the following XAML code in it and set the Title of that page.
XAML Code
- <?xml version="1.0" encoding="utf-8" ?>
- <ContentPage xmlns="http://xamarin.com/schemas/2014/forms" xmlns:x="http://schemas.microsoft.com/winfx/2009/xaml" x:Class="Page_Navigation_Using_Xamarin_Forms.SecondPage" Title="Second Page">
- <StackLayout VerticalOptions="Center" HorizontalOptions="Center">
- <Label Text="Welcome to the Second Page of this application" FontSize="Medium" />
- <Button Text="Navigate to First Page" BackgroundColor="Green" Clicked="OnBtn_Clicked" /> </StackLayout>
- </ContentPage>
Step 9
Now open the SecondPage.xaml.cs file and write the C# code in it.
- using System;
- using System.Collections.Generic;
- using System.Linq;
- using System.Text;
- using System.Threading.Tasks;
- using Xamarin.Forms;
- using Xamarin.Forms.Xaml;
- namespace Page_Navigation_Using_Xamarin_Forms {
- [XamlCompilation(XamlCompilationOptions.Compile)]
- public partial class SecondPage: ContentPage {
- public SecondPage() {
- InitializeComponent();
- }
- private async void OnBtn_Clicked(object sender, EventArgs e) {
- await Navigation.PushAsync(new Page_Navigation_Using_Xamarin_Forms.MainPage());
- }
- }
- }
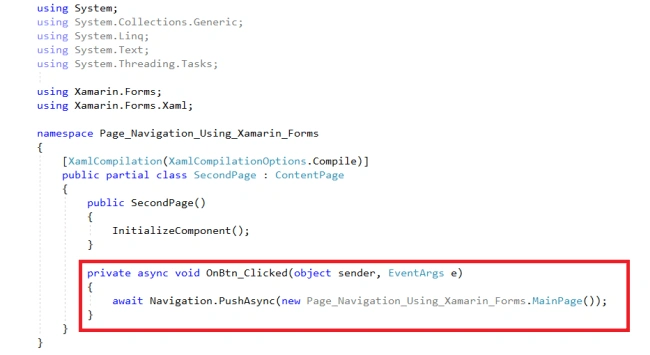
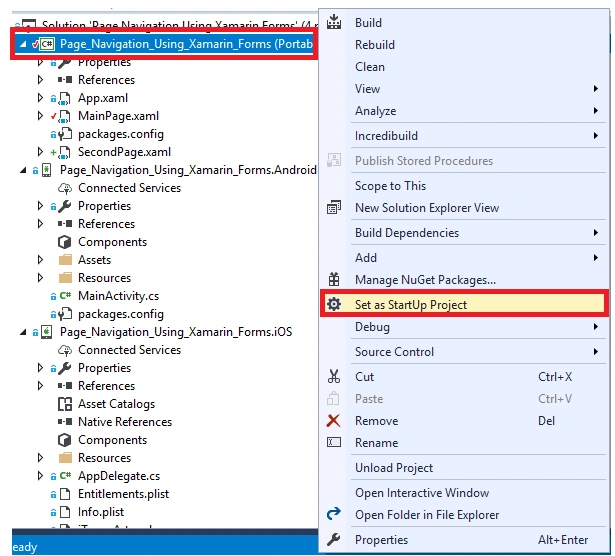
Now open Solution Explorer and set the Portable file as the startup project.
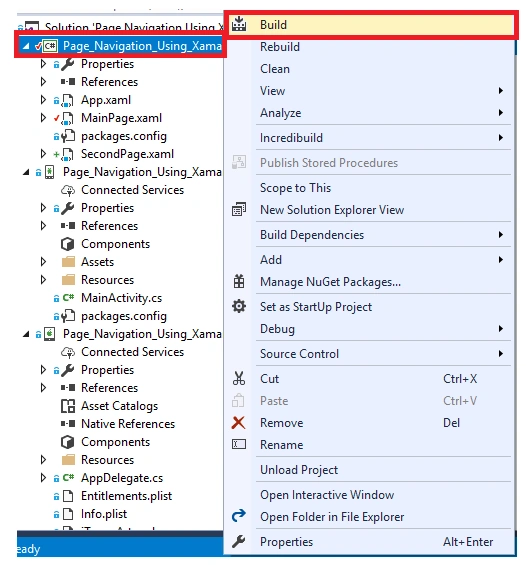
Step 11
Now, build the Portable file fom the Solution Explorer.
Step 12
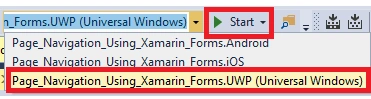
After the successful build of the Portable class now select the type of application you want to run and then click on the Start button.
Step 13
After clicking on the Start button your application will execute.
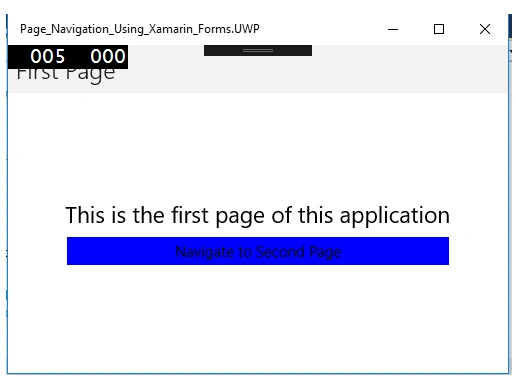
Now, click on the Navigate to Second Page button and you will be taken to the second page of the application.
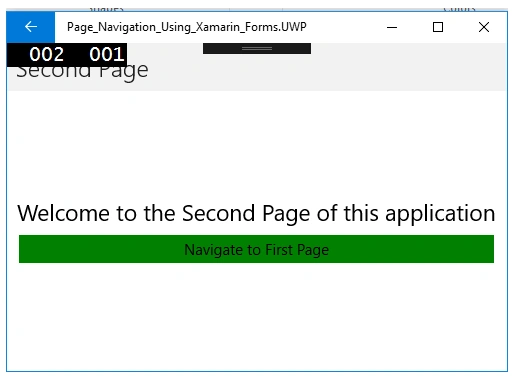
Again Click on the Navigate to First Page button and you will be taken to the first page of the application i.e., MainPage of this application.
Conclusion
Now, we have successfully created an Xamarin Forms Application for navigating between two pages.
Vijayaragavan SPosted Jun 7, 2018, 10:35 PM
Nice Article.... Keep writing.....