

Notification Hubs
Notification Hub is a component which is used for sending push notifications to any platform from any back-end application. The following points show the importance of Notification Hubs.
- Reach all major platforms—iOS, Android, Windows, Kindle, Baidu.
- Use any back-end, in the cloud or on-premises.
- Fast broadcast push to millions of mobile devices with single API call.
- Tailor push notifications by user, language, and location.
- Dynamically define and notify user segments.
- Scale instantly to millions of mobile devices.
The following are the steps followed to create and configure notification hubs, using Universal Windows Application.
- Visual Studio Community 2015 or later
- Windows 10 Universal Windows Development
- Microsoft Azure Account
- Windows Developer Account
Let’s get started to complete these articles.
Register your App in Windows Store
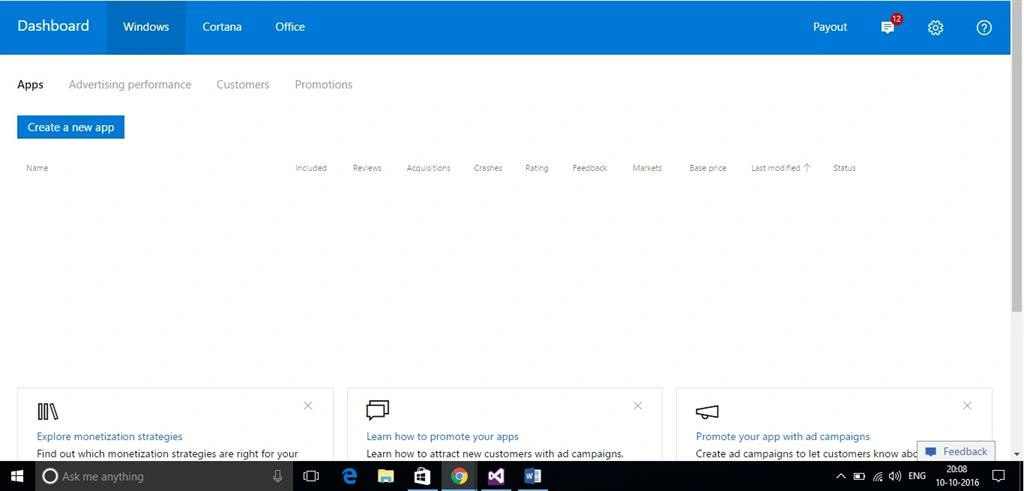
Navigate to Windows Dev Center by clicking the Link. In that, sign in with your Microsoft Account and then click “Create a New App”.
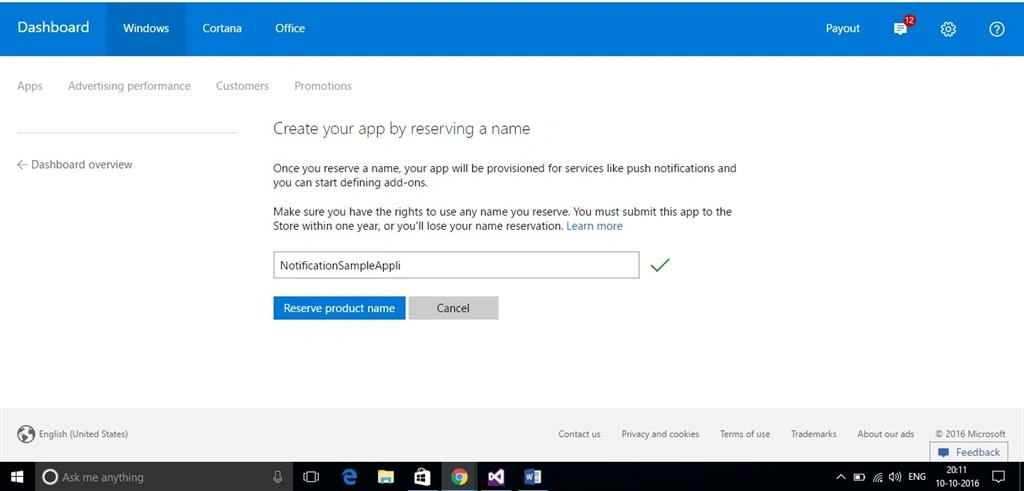
Type the name of your application and then click “Reserve App Name” or “Reserve Product Name”.
Steps Followed in Visual Studio
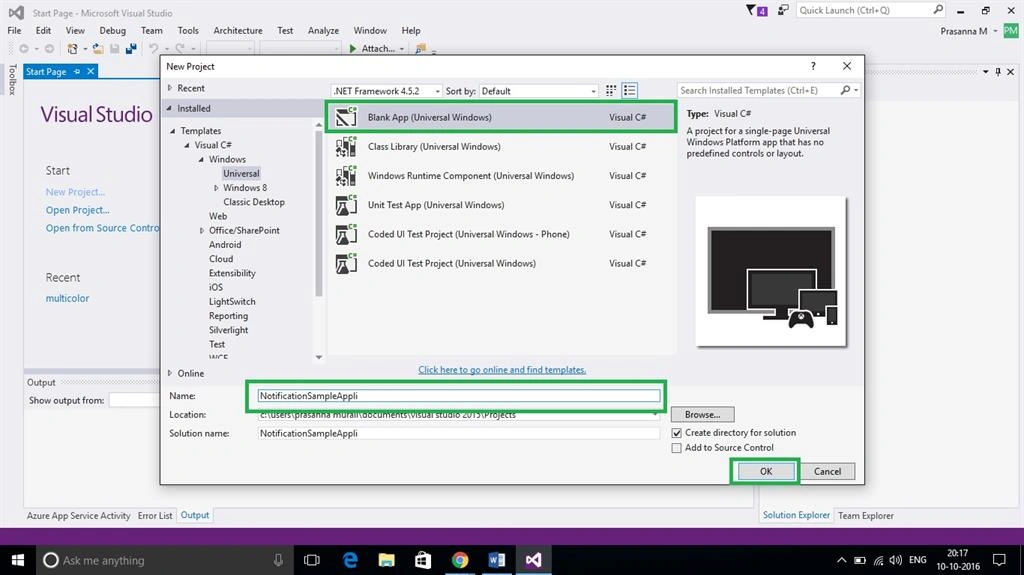
In Visual Studio IDE, create a new Visual C# application by using the "Blank App" template and click OK.
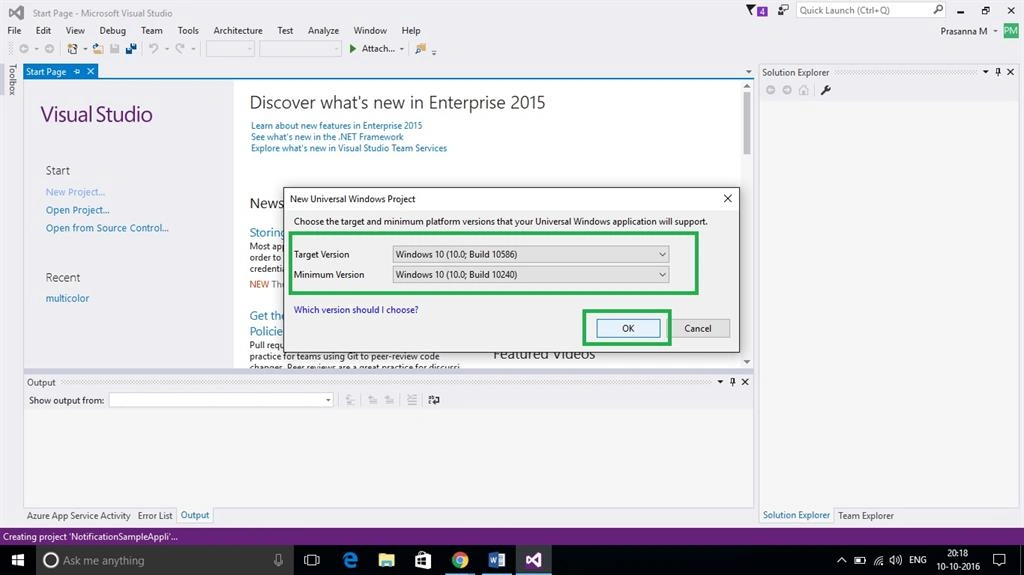
Select minimum version and the targeted version. Then, click OK.
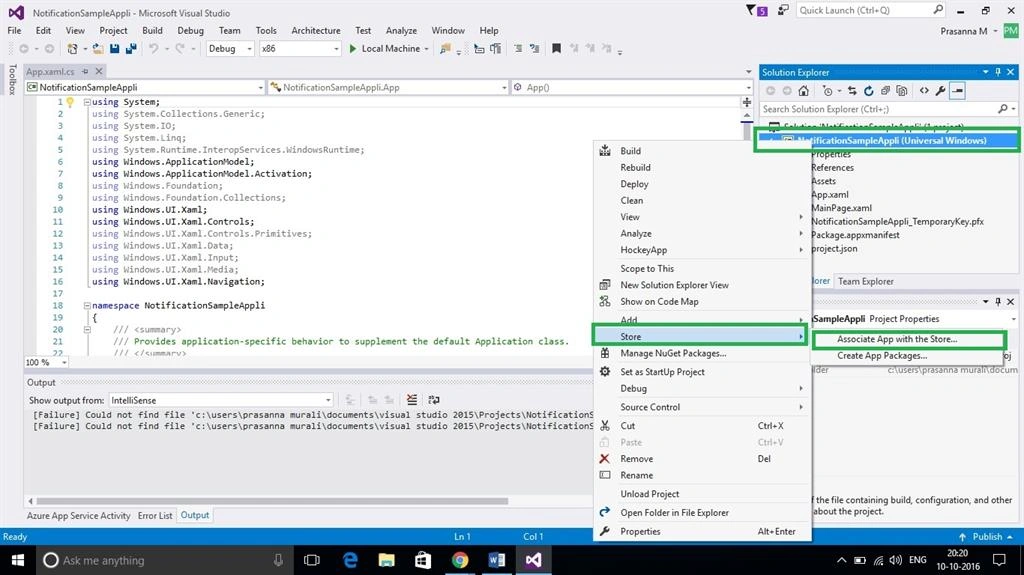
In the Solution Explorer, right click your application and the find store option from the dropdown and click "Associate App with the store".
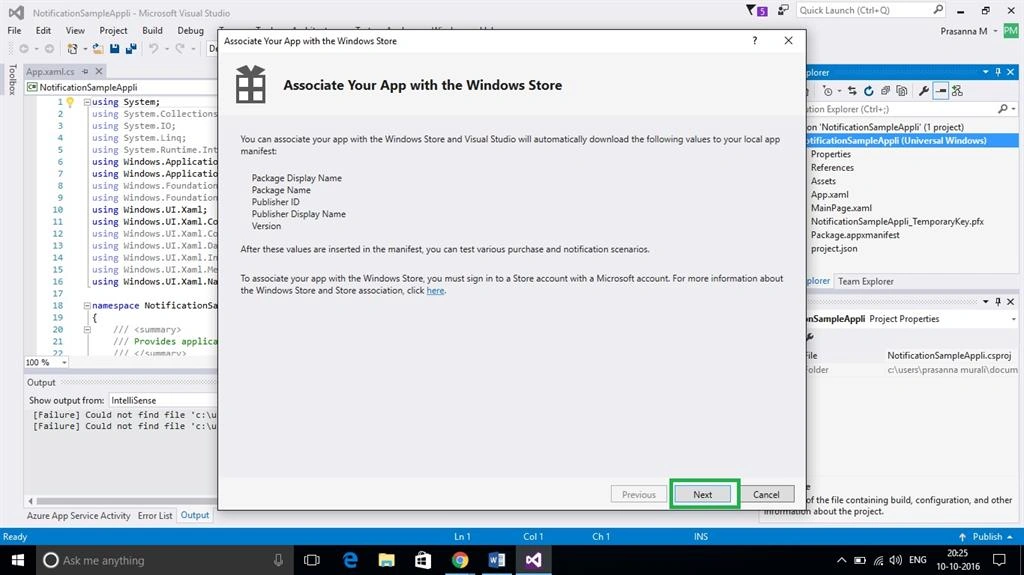
In the Associate app with store wizard, click Next.
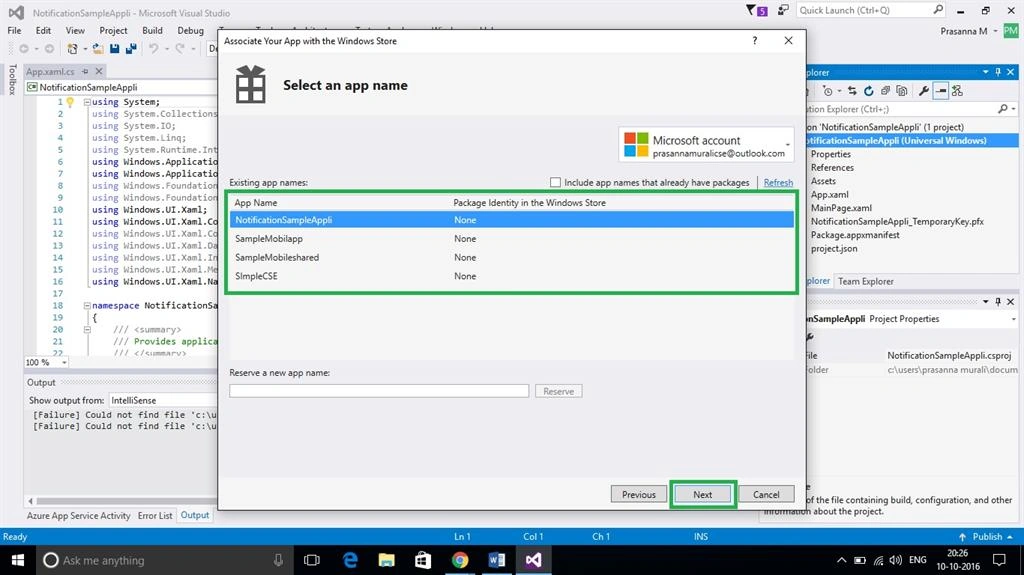
Now, in the "Select an app name" wizard, select the app name that is already registered in the Windows Store development portal and then click Associate.
Now, in Developer Center, click service >> Push Notification >> Live Services site under Windows Push Notification Services (WNS) and Microsoft Azure Mobile apps.
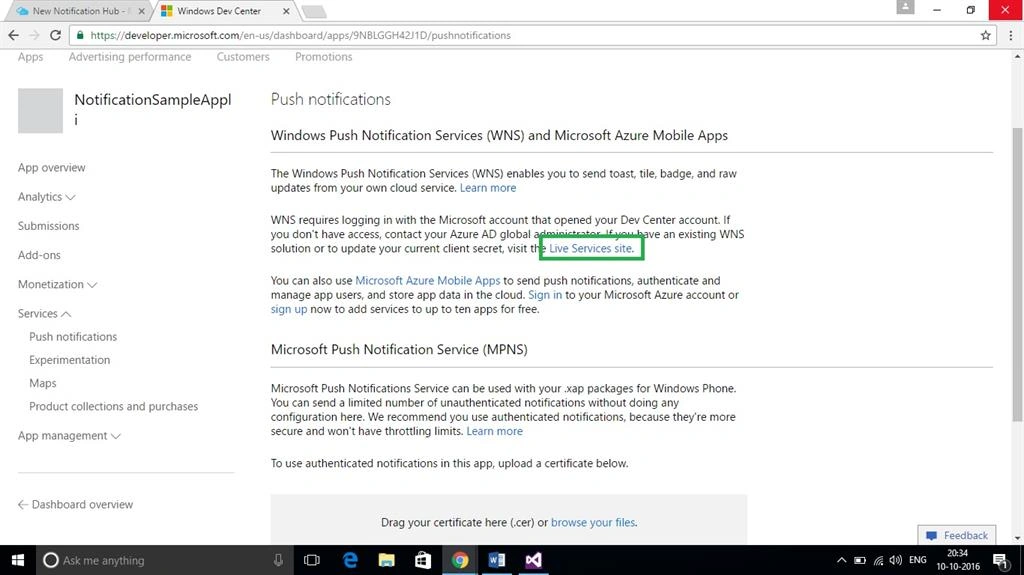
On the registration page for your app, make a note of the Application Secret password and the Package Security Identifier (SID), located in the Windows Store platform settings.
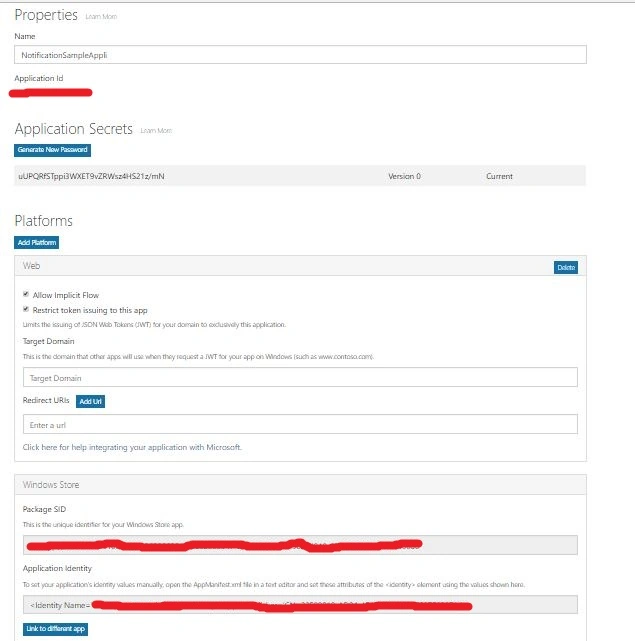
Note
Don’t share Package ID and Application ID with any one.
Configuring Notification Hub in Azure
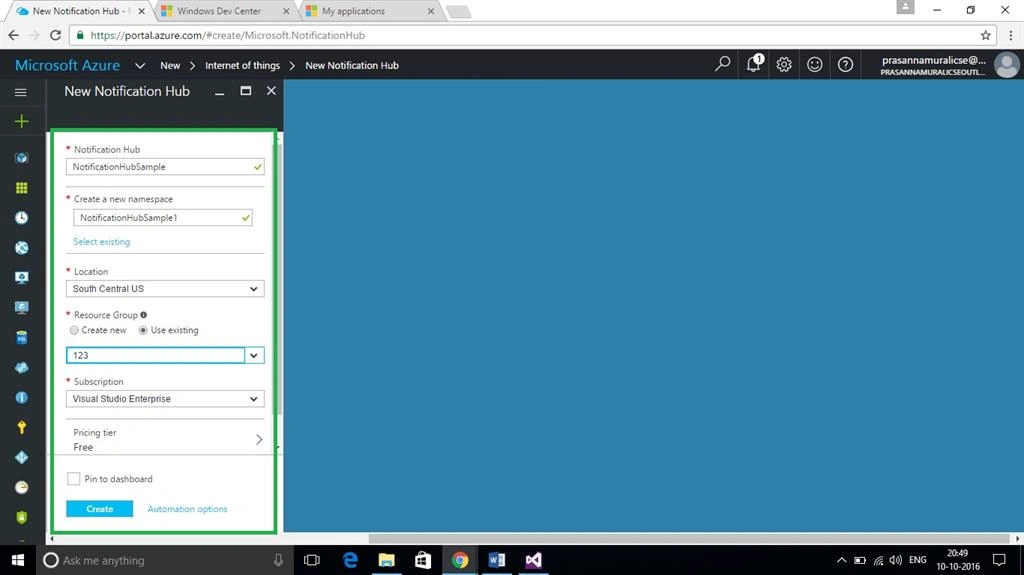
Sign into Azure Management portal, and then click New >> Web + Mobile >> Notification Hub.
In the Notification Hub creation wizard, fill all the fields, such as Notification Hub Name, create a namespace, region, and resource group and then click create.
Click on Settings and then Access Policies - take note of the two connection strings that are made available to you, as you will need them to handle push notifications later.
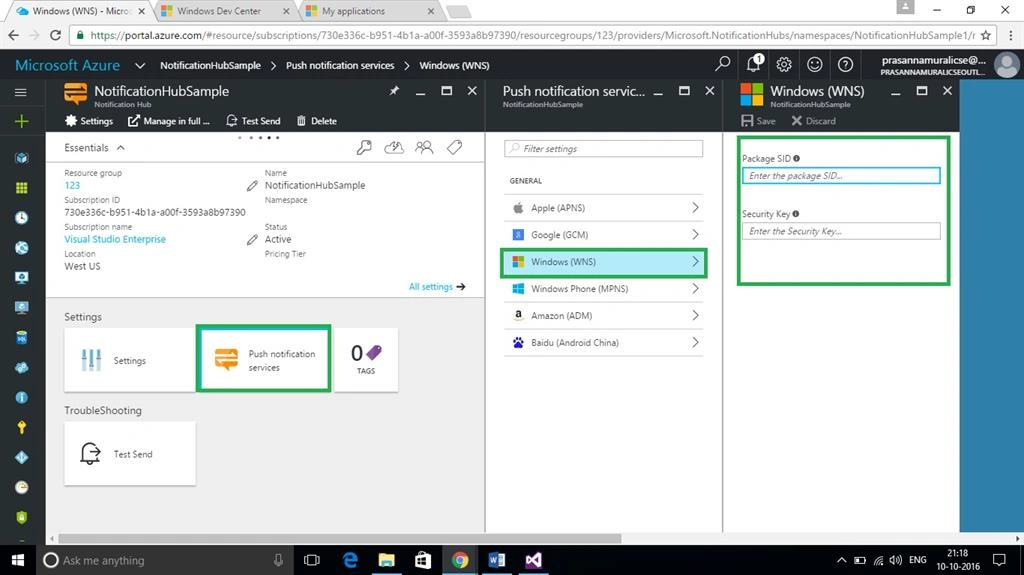
Select the Push Notification Services option and the Windows (WNS)
option. Then enter the Application secret password in the Security Key field.
Enter your Package SID value that you obtained from WNS in the windows store
portal, and then click Save.
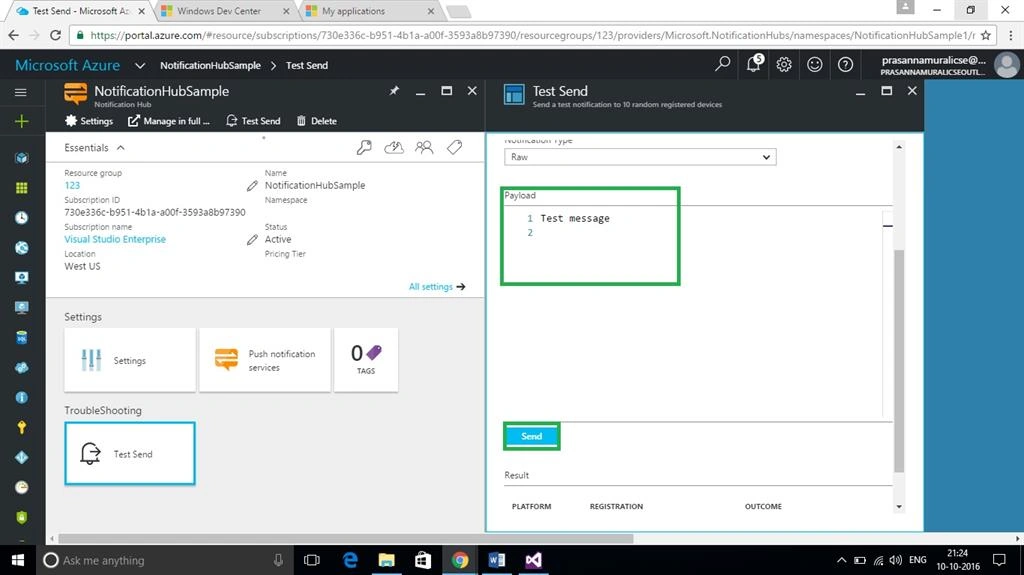
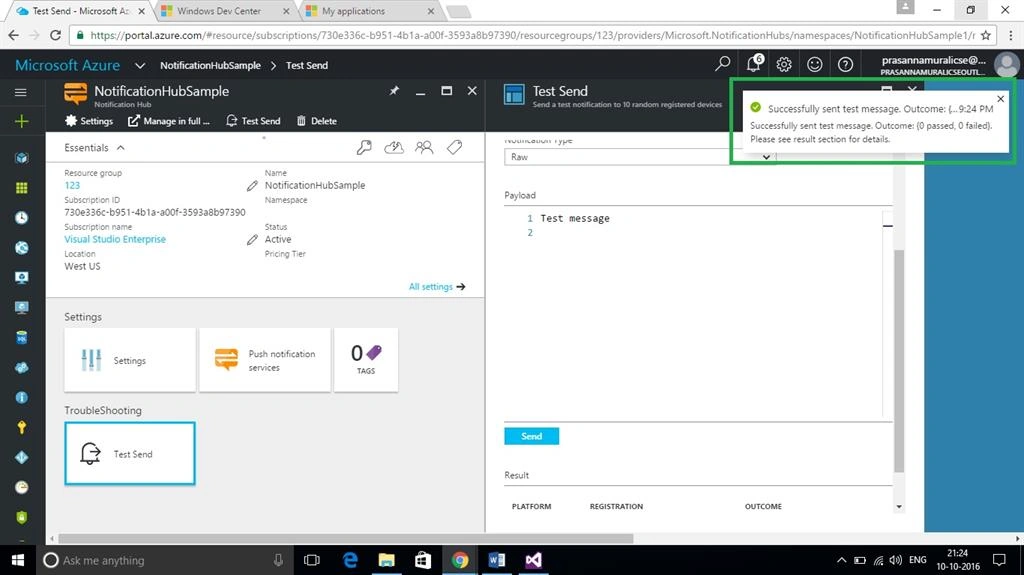
Now, click the Test Send option to check whether your notification is working or not.
Summary
In this article, we have seen about creating and configuring Notifcation Hub in Windows Azure.
Deepa RajasabesonPosted Mar 19, 2020, 1:22 AM
Hi Prasanna, Everything works fine as you explained till end. I get success result in azure portal when I test send a message, but in my windows app running in Visual studio in my local desktop not receiving the "Test message" sent by Push Notification from Notification Hub in Azure Portal. Please help.
Deepa RajasabesonPosted Mar 19, 2020, 1:21 AM
Hi Prasanna,
sahu19902 sahu19902Posted Jun 23, 2019, 7:10 PM
Please help me for android and IOs
BhuvanshwariPosted Jul 31, 2017, 3:10 AM
Hi Prasanna. Test send is getting failed as I am receving Bad request 400 error in azure portal. Please help
SubashPosted Oct 22, 2016, 7:14 AM
Nice