

Today, I will be covering the day 3 topics of MS Flow series. If you have not checked my previous post about Microsoft Flow, I would recommend you to have a look at it. Links to the previous posts are given below.
What I am going to cover
I am planning to write a series on MS Flow on which I will cover most of the areas in it. This will be a 10 days series
- Day 1: Flow Templates, Connectors, Triggers, Actions, Conditions
- Day 2: The famous Twitter flow, My Flows, Team Flows, Share a Flow
- Day 3: Flow in Mobiles, Debug a flow, export, and import a flow
- Day 4: Approval Flow (sequential and parallel)
- Day 5: Flow with SharePoint on-prem (Gateways)
- Day 6: Flow vs logic apps
- Day 7: Flow with custom applications web services
- Day 8: Flow with Graph API
- Day 9: Flow with Cognitive services
- Day 10: Flow Administration and DLP, Pricing etc.
Few points before moving to the topic
Microsoft Flow is an online service that helps in connect various apps and services. And those include Microsoft products like SharePoint, Dynamics, Excel, Power BI etc... and non-Microsoft services like Twitter, Facebook, MailChimp, etc...
Flow in Mobiles
Microsoft Flow has also been added as a part of our day to life by making it as an app and handing over to us. Now let’s see how efficiently they have integrated this with the mobile app.
I am checking on an Android phone. It is also available for iPhone users. From the Store, this can be downloaded and installed on your device.
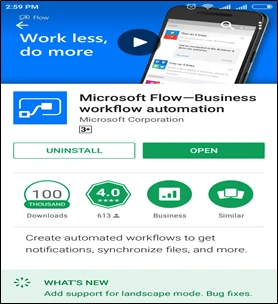
Once installed, it asks for the O365 account to get logged into. Once you enter the credentials, you see this “terms and conditions” page.
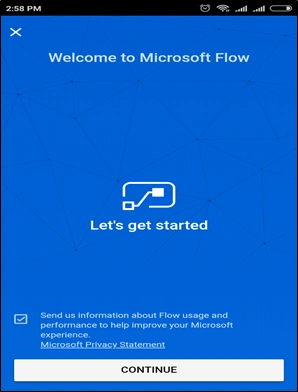
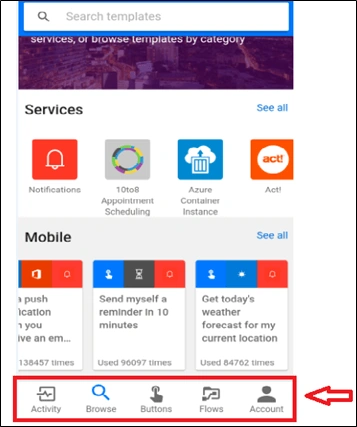
We have these 5 buttons at the bottom.
- Activity – This shows the history of flows that have run along with its status whether it has been a success or not
- Browse – This helps us in finding the template to build a flow.
- Buttons – This is sort of a trigger and will be explained below.
- Flows – This holds all of the flows owned by the user.
- Account – This helps to show the information about the user who has logged in and a provision to sign out.
Note
Your web and mobile accounts are synchronized and the flows that you have created in your web will appear here also.
Now I am going to explain how the flow creation is done in mobile. This is very similar to what we have done in the web.
I have selected a similar flow template what we have done in the first day of this course. Please find the details here.
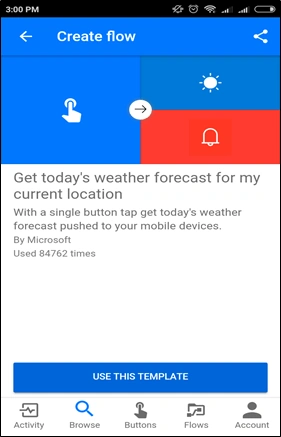
I have selected the above template and clicked on “USE THIS TEMPLATE”.
As usual, it gives the already built flow in your hands.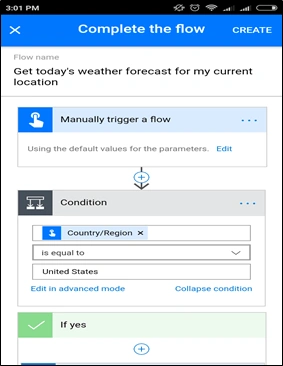
You have to switch on your location access for your device, as it is going to take the Longitude and Latitude from your device.
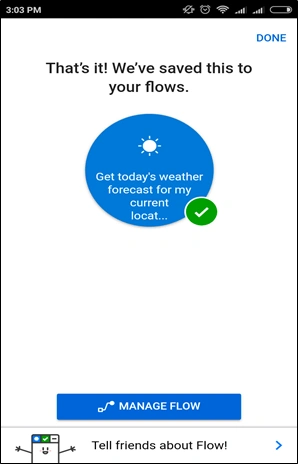
Now click on Create at the top right of your screen. You will get this success message on the screen.
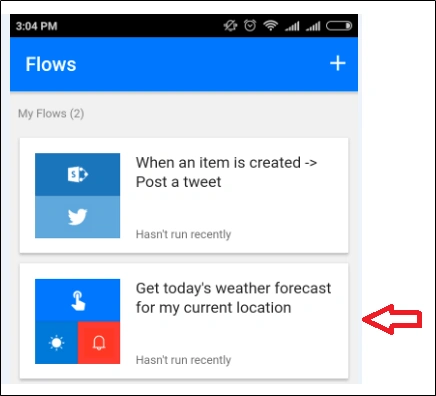
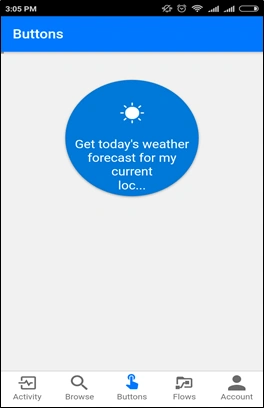
This is going to be the trigger for your flow. Click that and you will see the notification at the top showing the weather forecast.
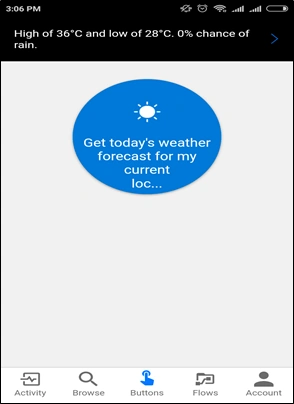
Thus flow mobile app is used to create and monitor the flow.
Debug a flow
As a developer (or a power user), we should be happy that MS flow has made our life easy by helping us in finding the error in our flow very easily. Though there are some limitations in debugging, there are some posts on the UserVoice section regarding those. I will cover this in below section.
To get an error in our flow, I am deliberately going to mess up something. Click on the gear icon in the ribbon and select Connections.
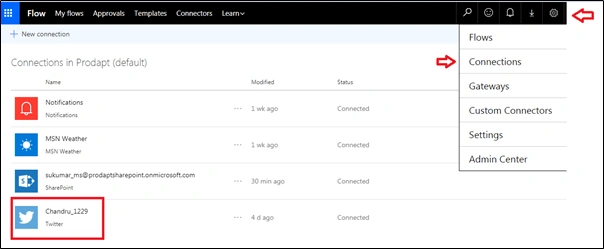
Here I am going to delete the Twitter connection. Click on the 3 dots and click on delete.
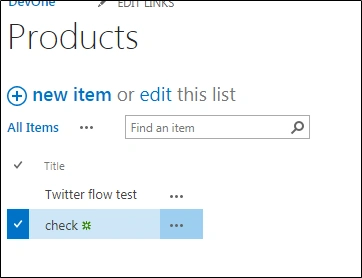
Now to check the flow, create an item in SharePoint.
Click on your flow and check the Run History in the next page.

There is a red mark with the status as Failed. Click on it to view the detailed error description.
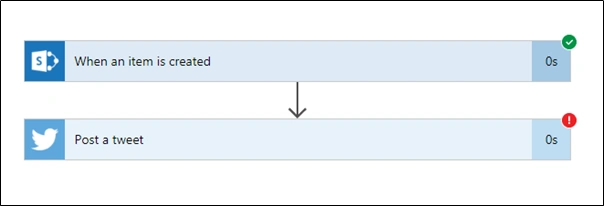
Here I can see the red mark at the Twitter action error denoting it. We will analyze both the steps now.
On clicking the first step, it opens a pane which contains lots and lots of details about the item that has triggered this flow.
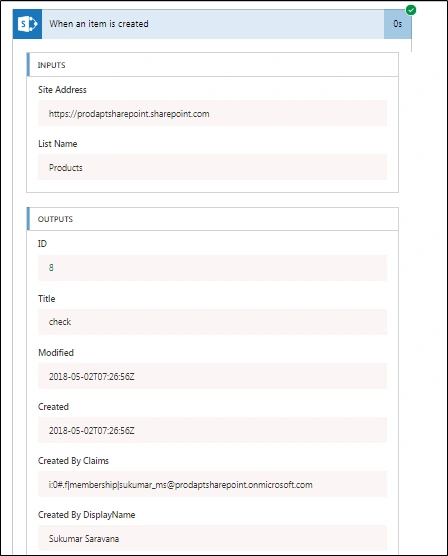
And the details go on and on….
Now on clicking the failed action (Twitter), it opens a similar pane with the error details.
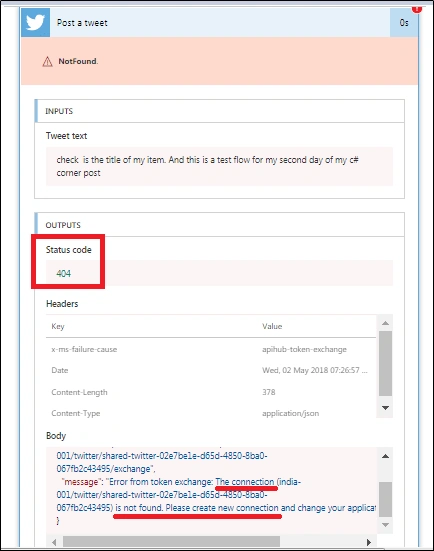
Status code is 404. And in the Body section’s error message we could see it clearly states, there is some problem with the connection and new connection must be made.
Thus, we have seen, we could narrow down the error easily here. But in some cases, there lies a problem and Microsoft is working on it to fix it.
Ex
Please check here = https://powerusers.microsoft.com/t5/Flow-Ideas/We-should-be-able-to-debug-apply-to-each-while-it-runs/idi-p/72865
Note
https://docs.microsoft.com/en-us/flow/fix-flow-failures
This helps a lot in finding the common issues in the flow.
Export a Flow
Microsoft never disappoints us while designing any technology. I have personally experienced this in lots of time in my career with SharePoint. The same applies here also. We here have the option to export as well as to import a flow. First, we will see how a flow is exported. This exported flow can be moved to other tenants or from test to production platforms.
Click on My Flow to go to the dashboard page where all your flows are listed.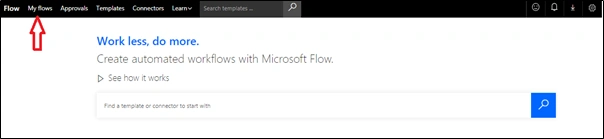
If you had followed my previous articles, you would have observed that I have created a Team Flow on my second part of this series. If not, please check this link here.
Now I am going to export that flow. Click on the 3 dots icon on the rightmost corner of the flow item to get the option for exporting.
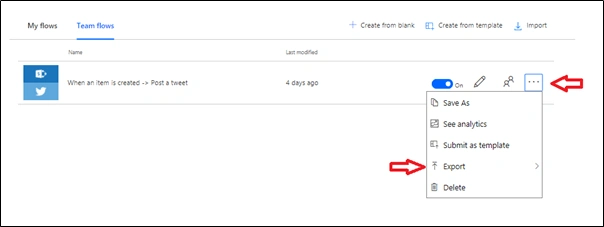
There we will be shown 2 options. 1) to export as .zip file 2) .json file template for Logic apps.
I will be explaining the first option. For Logic app JSON format, I will explain that in my 6th part of this series.
So on clicking the “to export as .zip” option, it opens this page.
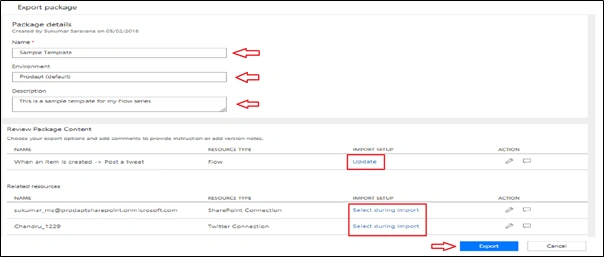
We have to supply the Name, Environment, and Description for the flow template. Here Environment concept – we will see in a later article.
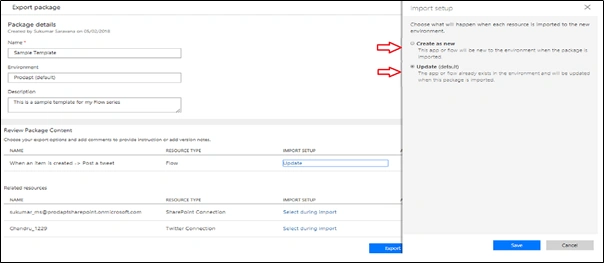
And there is a section for Review Package Content. Here we have the option “import setup”. And there are 2 options for this a) new b) update.
- New is to be selected when the flow is not present in the new environment/tent where we are going to restore/import it.
- Update is to be selected when the flow is already present and it has to be updated with the new template that we have.
And at the last section, we have Related Resources. This exports the connectors along with the flow.
We have got the zip file now. Thus the Flow can be exported. Now we will see how to import it to an environment.
Import a flow
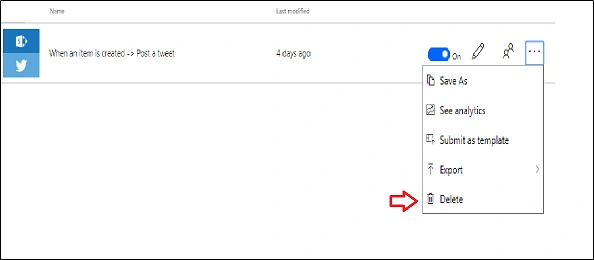

Click on the upload option and select our already exported package. It takes a few seconds.

After a moment later, we get the following screen.
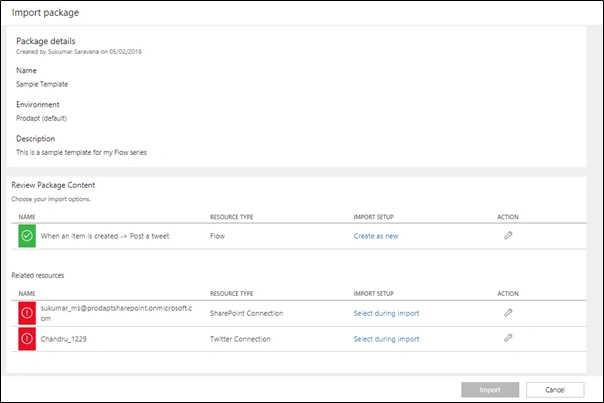
It has all the details which were present in the old flow. Now we can see the “Import” button is not highlighted. The reason for this is due to the configuration of connection in the new flow. We have to confirm the connections once again in the “Related resources” section, so that the Red icon on each will be changed to Ash color icon
This will be done by clicking on “Select during import”. It opens a pane on the right side. Click the connection resource, so that it draws a “tick” next to it. This highlights the Save button at the bottom. Click on it.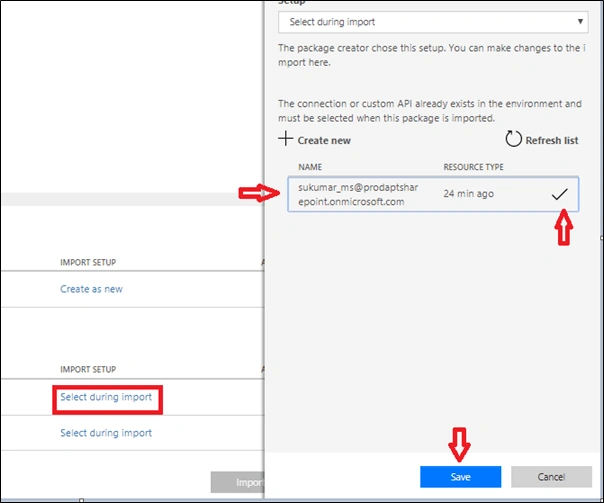
Do this for both the connections. Now, the red icon on the the conencttions are gone and the Import button will be highlighted.
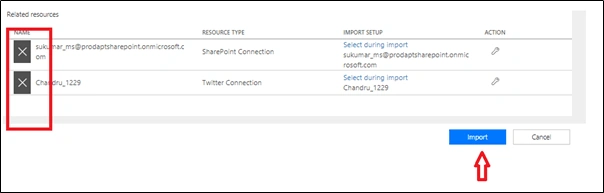
Hurrah!!!! we have succeeded!
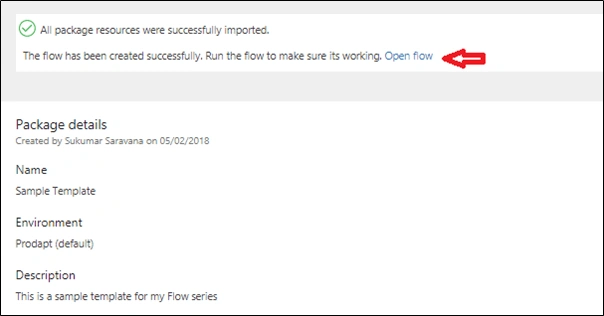
Now click on “Open flow” to verify it.
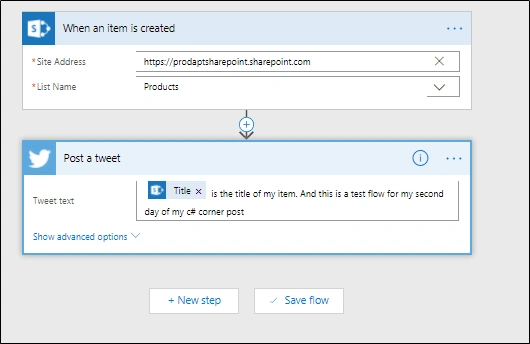
Perfect….. It worked like a charm…
That’s it for Day 3.. See you on the next part of the series.
Dhayanand KalimidiPosted May 11, 2018, 8:11 AM
Its a very good article written by you & very use full to many members in the group. Hope you continue to give your best patterns / practices. All the best for future endeavors.
Narasimhan RamaniPosted May 7, 2018, 3:19 AM
Good presentation chandru
Chandru DPosted May 7, 2018, 2:39 AM
Thanks Jeeva for your valuable comments
jeeva srPosted May 7, 2018, 2:14 AM
Hi Chandru. Really brilliant article with clear steps. Helped a lots. Thanks.