

Introduction
In today’s ever-evolving landscape of remote work, secure access to on-premises applications is more crucial than ever. That’s where Microsoft Entra ID Application Proxy comes in, offering a reliable solution to ensure seamless access to internal applications from anywhere outside the corporate network.
In this detailed guide, we will delve into the intricacies of Microsoft Entra ID Application Proxy, providing a comprehensive understanding of how it works and how to implement it effectively. We will take you through each step with clear instructions and helpful screenshots, making the process as easy as possible for you to follow. Stay tuned for valuable insights and practical tips to enhance your remote work experience.
I will be deployed in the following environment based on the diagram below.

One of the key benefits of implementing Microsoft Entra ID Application Proxy. Here are some specific advantages.
- Microsoft Entra ID Application Proxy facilitates secure internal application access by enforcing authentication and authorization policies.
- Users benefit from a seamless and familiar sign-on experience when accessing on-premises applications outside the corporate network.
- Application publishing with Microsoft Entra ID Application Proxy is flexible and scalable. Administrators can publish many on-premises applications, including web applications, APIs, and internal websites, without complex network configurations or VPNs.
- Microsoft Entra ID Application Proxy is a cost-effective solution for enabling remote access to on-premises applications. They eliminate the need for complex infrastructure and VPNs, reducing operational costs associated with maintaining traditional remote access solutions.
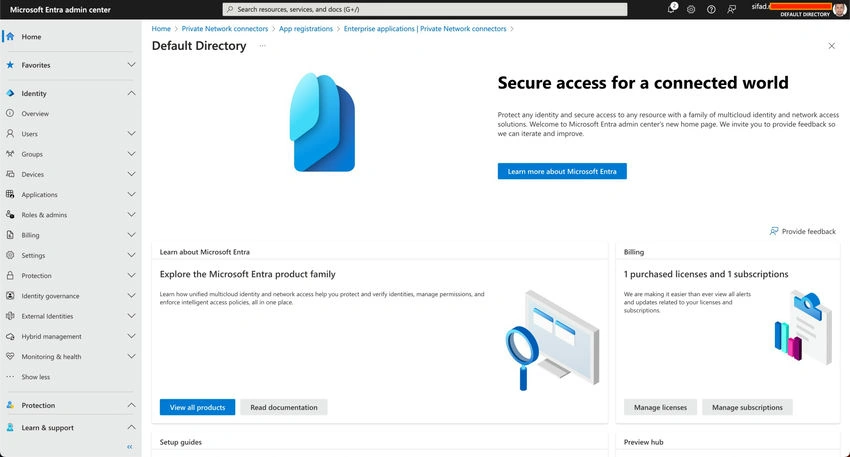
Step 1. Go to the Microsoft Entra ID portal (https://entra.microsoft.com/).
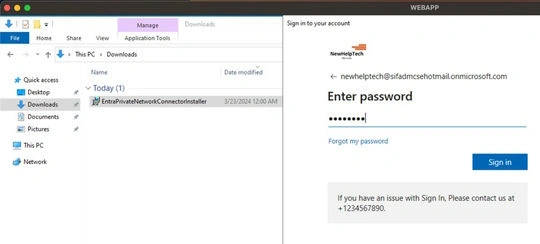
Step 2. Download and install the Private Network connectors on a Windows Server within my on-premises environment. Here’s a screenshot of the download and installation wizard.
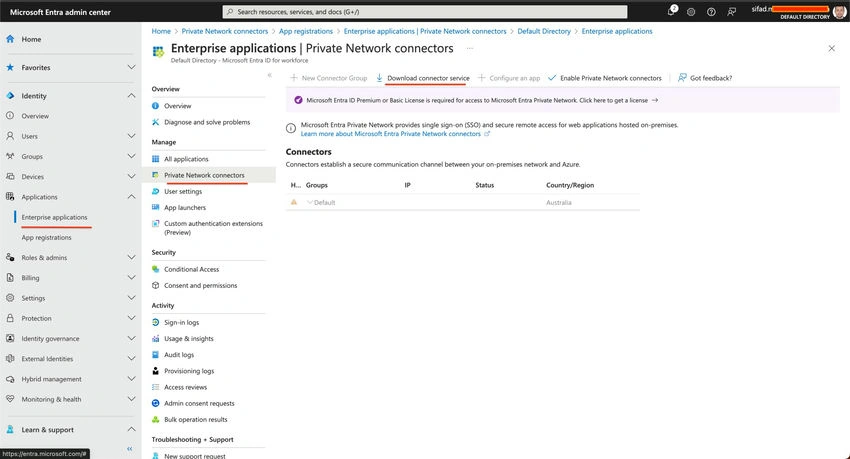
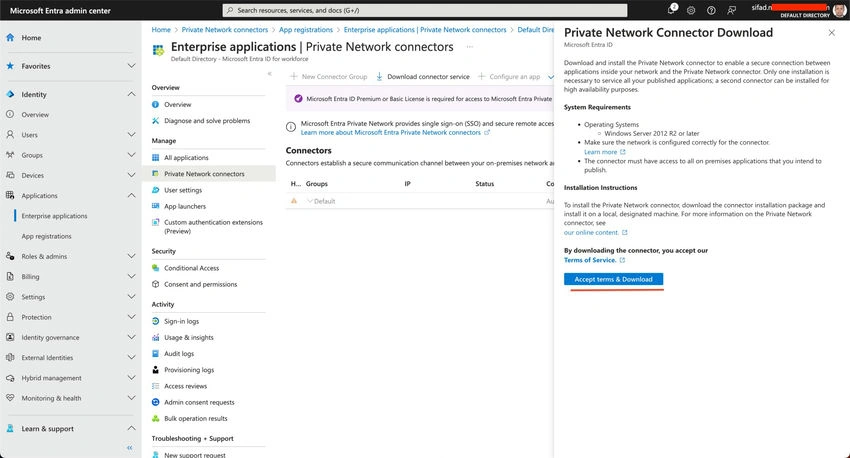
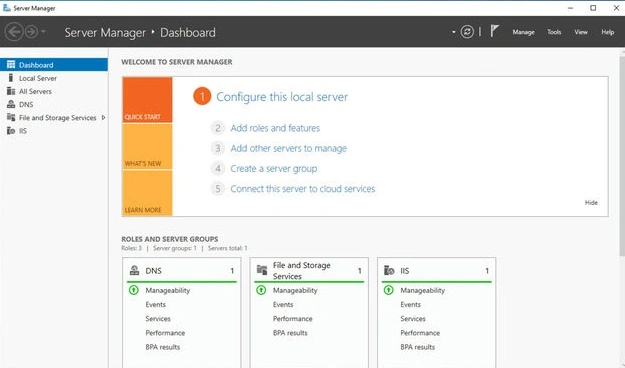
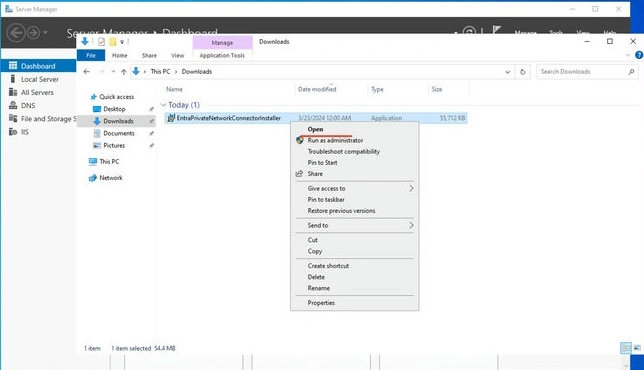
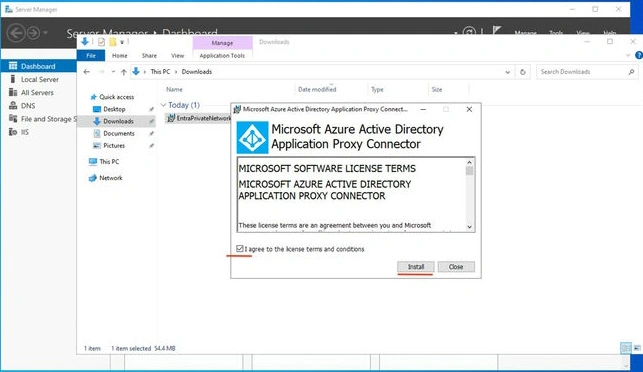
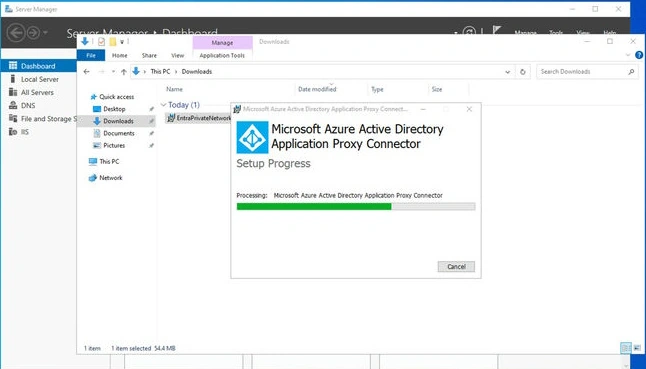
Rest assured, to register the Application Proxy with Microsoft Entra ID, you must have either the global administrator or the application administrator role. These credentials are utilized exclusively for the registration process and are not utilized as service account credentials, ensuring the integrity of your security measures.
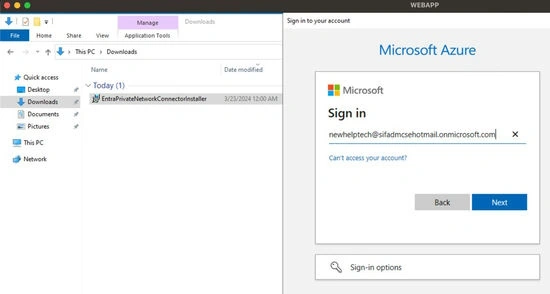
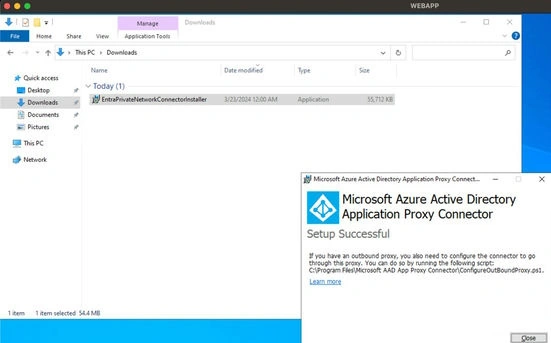
The Microsoft Entra ID Private Network connector installation process has been executed seamlessly.
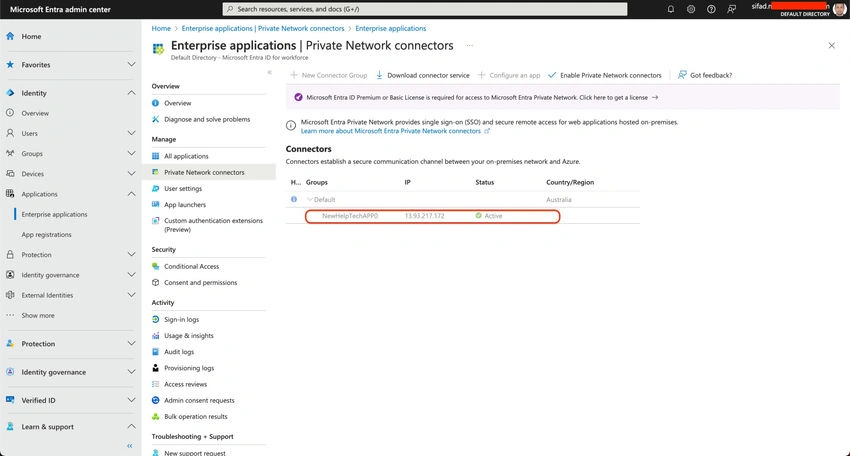
Step 3. The Private Network connectors page should show a list of the status of the connectors. Look for the connector associated with the server we configured.
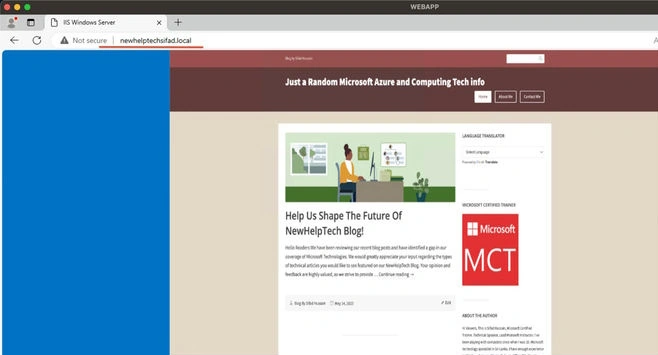
Step 4. Verify the on-premises web app access to the internal network via (http://newhelptechsifad.local/).
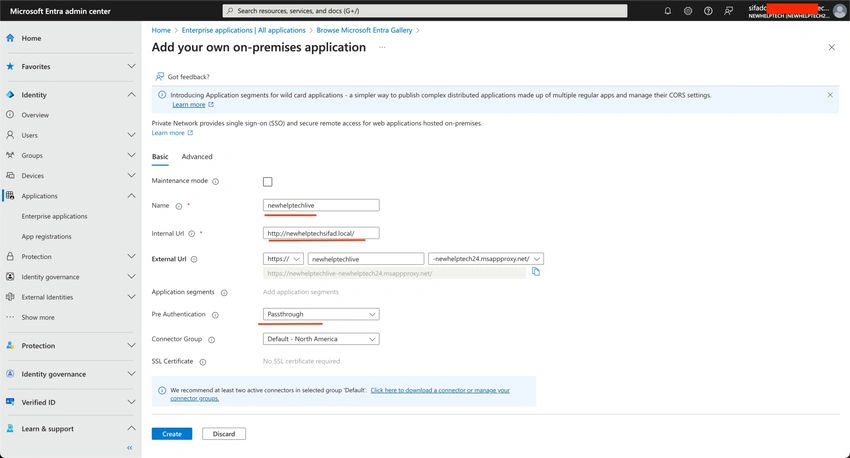
Step 5. In the Microsoft Entra ID portal, navigate to Identity –> Enterprise Applications –> New Application –> On-premises application. Add our on-premises application and configure settings, then click on Save Configuration. Here’s a screenshot of the application publishing interface.
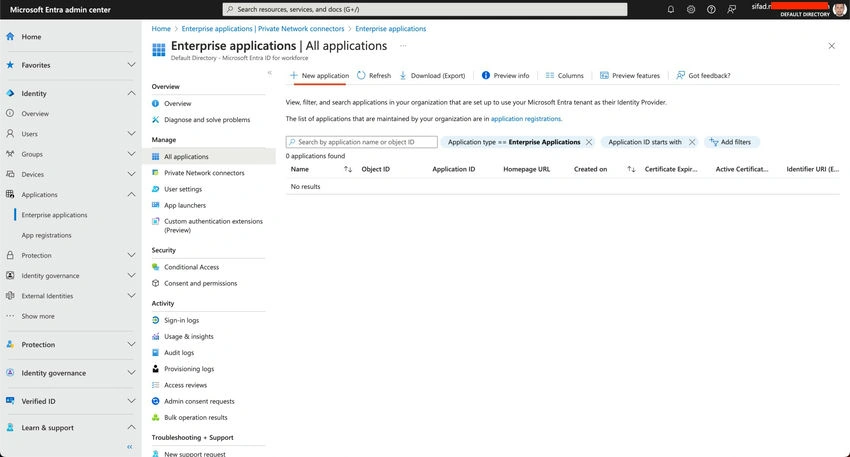
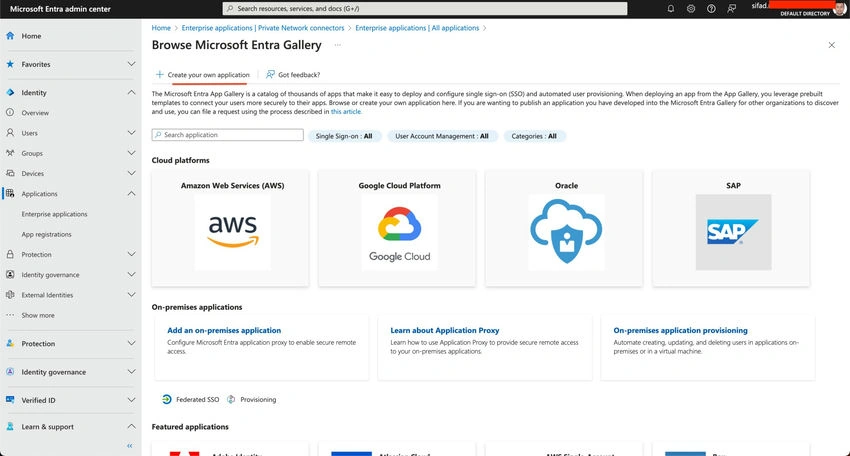
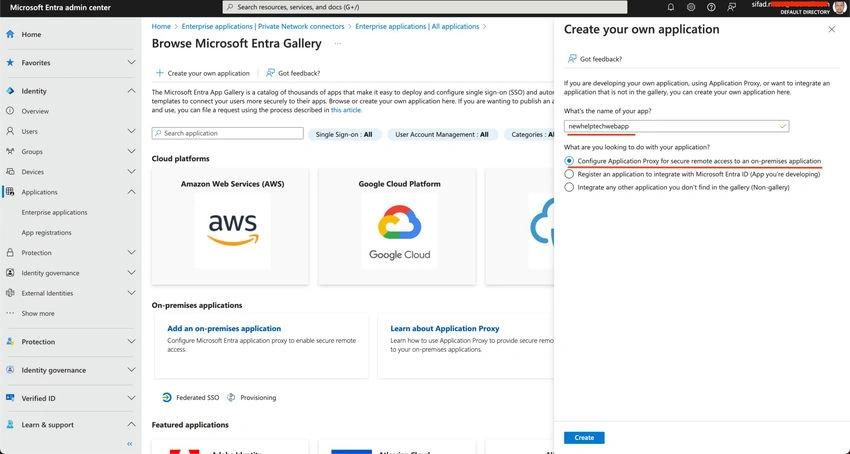
Fill in the Application Details
- Name: Enter the name of your application, which will be visible to users (Newhelptechlive).
- Internal URL: Provide the internal URL used to access your application within the network (http://newhelptechsifad.local/).
- External URL: This is the URL users will use to access the application externally (https://newhelptechlive-newhelptech24.msappproxy.net/). Make sure to note down this URL.
- Select Pre-Authentication: Choose the authentication method. For example, you can select “Microsoft Entra ID” for authentication with Passthrough.
- Choose Connector Group: Select the connector group you previously created or to which your Connector is assigned.
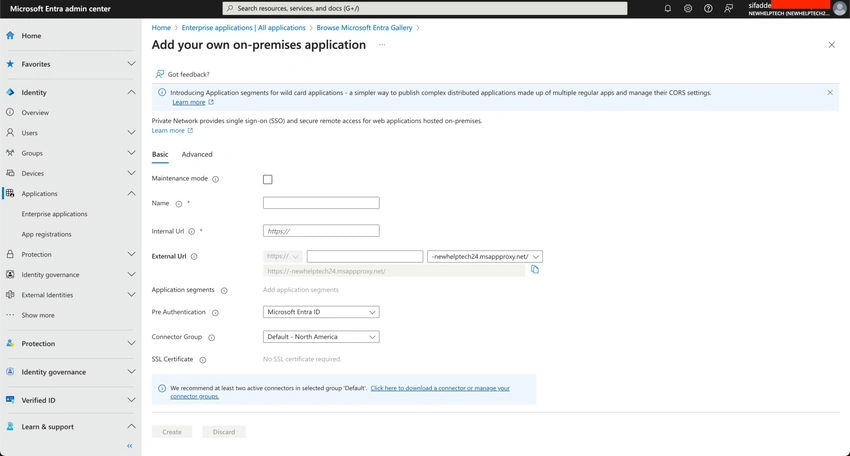
Click on Create.
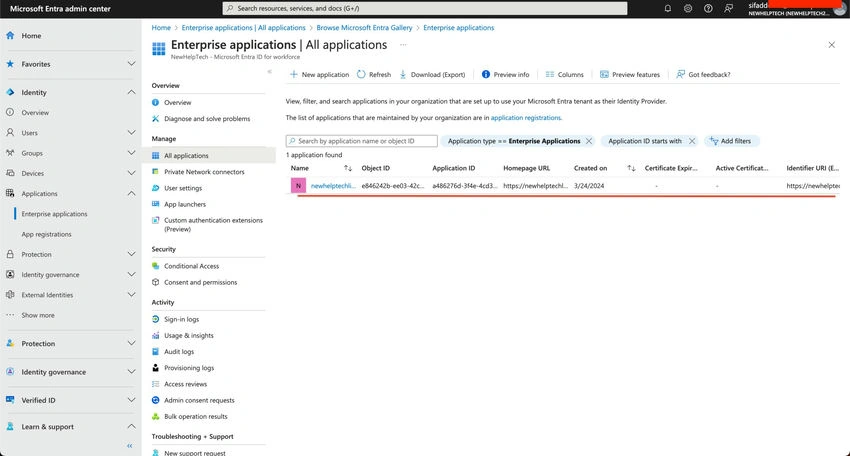
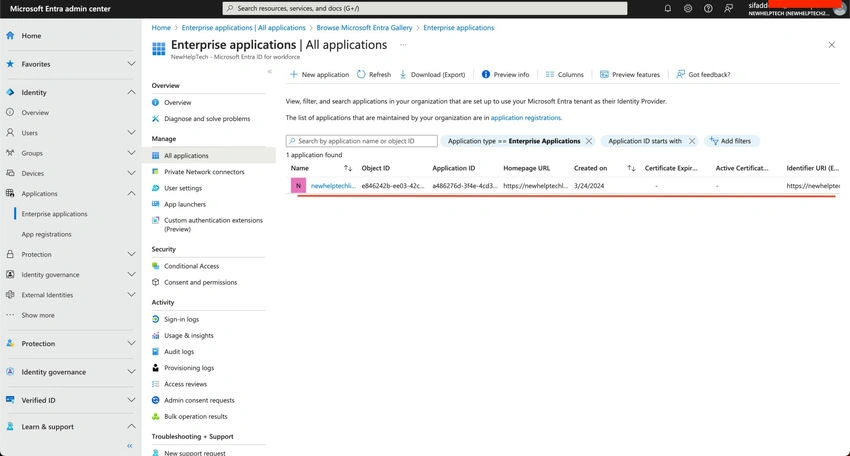
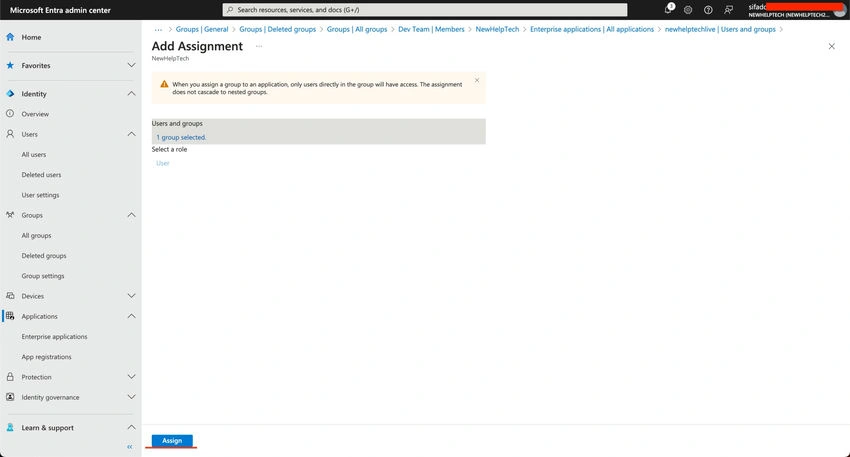
Step 6. Head to the Entra admin center and access “Enterprise applications” –> Select the previously added application, then click on it to initiate the configuration page –> On the Overview page, opt for “Assign users and groups” to specify the individuals or groups who will have access to the application, then click on Save Configuration.
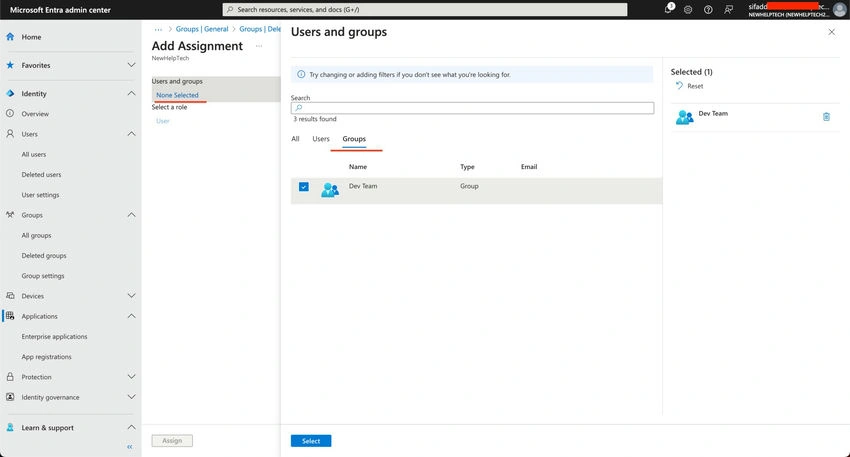
Click on Assign.
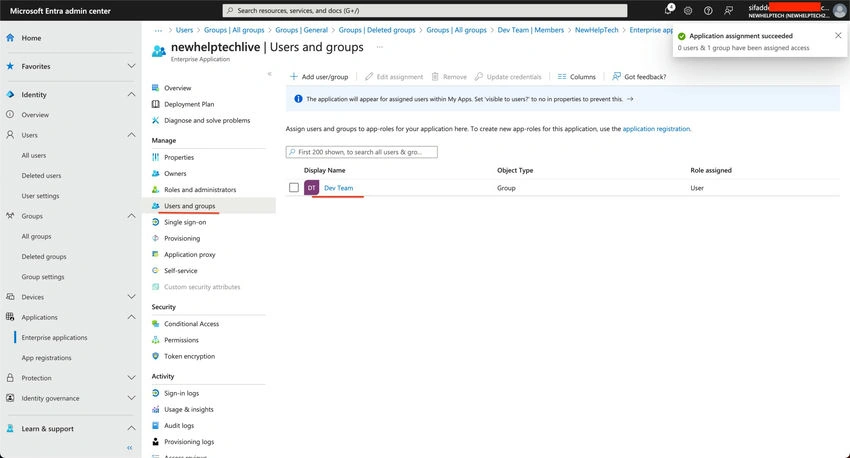
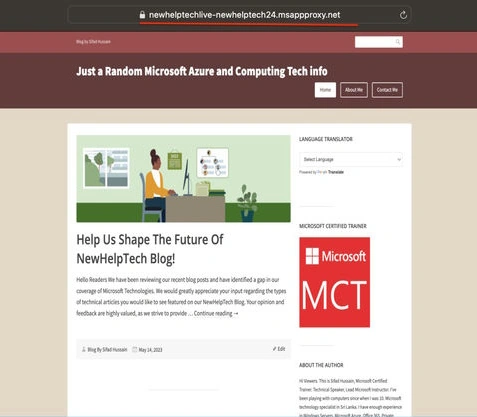
Step 7. Verify external access to the application. Here’s a screenshot of successful access from an external device.
- Open Browser: Launch Microsoft Edge or any other preferred browser.
- Enter External URL: Paste the External URL (https://newhelptechlive-newhelptech24.msappproxy.net/) into the address bar.
- Access Application: We should now be able to access our on-premises web application from anywhere in the world.
Conclusion
Mastering the Microsoft Entra ID Application Proxy setup ensures more robust access control and heightened security for your on-premises applications. With this guide’s straightforward steps and clear visuals, you’ll confidently navigate the process, empowering your organization with seamless remote access capabilities.
Join the conversation! Your thoughts help the community grow.