

In my previous article, I explained how to fetch access token to consume Graph API. In this article, we will discuss how to send an email from SharePoint using Microsoft Graph API. You can read the previous part here.
HTTP Request
- POST https://graph.microsoft.com/v1.0/{userid | userprincipalname}/sendMail
- POST https://graph.microsoft.com/v1.0/me/sendMail
The above HTTP requests help in sending the email.
Let's open Microsoft Graph Explorer and send a test message to my personal email.
Navigate to:
https://developer.microsoft.com/en-us/graph/graph-explorer
https://developer.microsoft.com/en-us/graph/graph-explorer
Log in to your Office 365 work or school account.
In Graph Explorer, navigate to Outlook Mail section where there are plenty of HTTP requests with different activities.
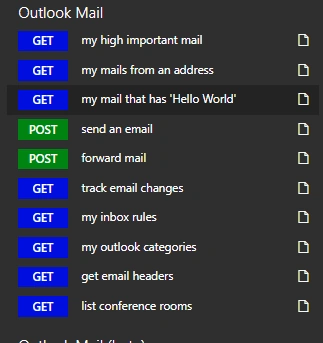
Now, I am using POST request for sending an email to my personal Gmail account with the help of Graph API.
Click on "Send an email".
Request Header - Content-Type - application/json
Request Body in JSON format -
- {
- "message": {
- "subject": "Test Message from Microsoft Graph Explorer",
- "body": {
- "contentType": "Text",
- "content": "This is the test email body message from microsoft graph api"
- },
- "toRecipients": [{
- "emailAddress": {
- "address": "[email protected]"
- }
- }]
- }
- }
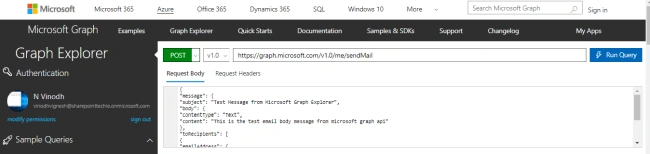
Click "Run Query".
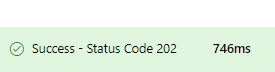
The request is successful. You are able to see the below message from the Graph Explorer.
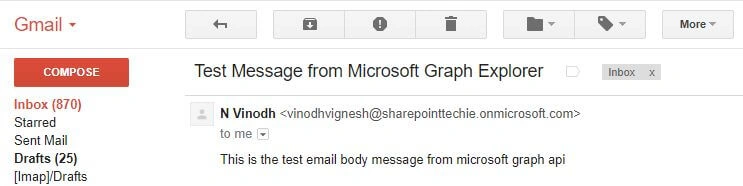
So now, I am going to open my email inbox to check if the mail has been sent from Microsoft Graph API Explorer.
So, in the next step, I am going to send the HTTP Request from jquery AJAX. Open SharePoint and create an HTML form for sending an email.
HTML Code
- <link rel="stylesheet" href="https://maxcdn.bootstrapcdn.com/bootstrap/3.3.7/css/bootstrap.min.css">
- <script src="https://ajax.googleapis.com/ajax/libs/jquery/3.3.1/jquery.min.js"></script>
- <script src="https://maxcdn.bootstrapcdn.com/bootstrap/3.3.7/js/bootstrap.min.js"></script>
- <body>
- <div class="container">
- <div class="form-group">
- <label for="email">To:</label>
- <input type="email" class="form-control" id="email" required>
- </div>
- <div class="form-group">
- <label for="txtsubject">Subject:</label>
- <input type="text" class="form-control" id="txtsubject" required>
- </div>
- <div class="form-group">
- <label for="txtmessage">Message:</label>
- <textarea class="form-control" id="txtmessage" rows="7" required></textarea>
- </div>
- <button type="submit" onclick="sendEmail();" class="btn btn-default">Send</button>
- </div>
- </body>
Now, the design looks like the below screen.
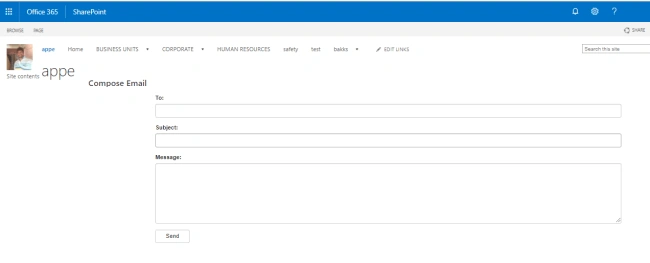
Now, create a function requesttoken() to fetch the access token using OAuth.
Code
- function requestToken() {
- $.ajax({
- "async": true,
- "crossDomain": true,
- "url": "https://cors-anywhere.herokuapp.com/https://login.microsoftonline.com/sharepointtechie.onmicrosoft.com/oauth2/v2.0/token", // Pass your tenant name instead of sharepointtechie
- "method": "POST",
- "headers": {
- "content-type": "application/x-www-form-urlencoded"
- },
- "data": {
- "grant_type": "client_credentials",
- "client_id ": "8baf0301-27df-44b1-b4fe-7911b9a918de", //Provide your app id
- "client_secret": "DxSF1K+JKl7LWJK8+3Ibg4il5JM4qUvdwOtShsYNvEA=", //Provide your secret
- "scope ": "https://graph.microsoft.com/.default"
- },
- success: function(response) {
- console.log(response);
- token = response.access_token;
- },
- error: function(error) {
- console.log(JSON.stringify(error));
- }
- })
- }
- var token; // Globally created variable holds the access token
- $(document).ready(function() {
- requestToken();
- });
Just go to the console and see the reponse of AJAX request.

Let's create a function sendEmail() to send email to the user.
Pass "message" property in the request body.
- function sendEmail() {
- //Variable to get values from input elements
- var to = $('#email').val();
- var sub = $('#txtsubject').val();
- var msg = $('#txtmessage').val();
- $.ajax({
- "async": true,
- "crossDomain": true,
- "url": "https://graph.microsoft.com/v1.0/users/[email protected]/sendMail",
- "method": "POST",
- "headers": {
- "authorization": "Bearer" + token, //Pass the token to authorize the API request
- "content-type": "application/json"
- },
- "processData": false,
- "data": JSON.stringify({ // Pass JSON data with message property
- "message": {
- "subject": sub,
- "body": {
- "contentType": "Text", // Body Content Type will be text or HTML
- "content": msg
- },
- "toRecipients": [{
- "emailAddress": {
- "address": to
- }
- }]
- }
- }),
- success: function(response) {
- alert("email sent successfully to " + to + "");
- },
- error: function(error) {
- console.log(JSON.stringify(error));
- }
- })
- }
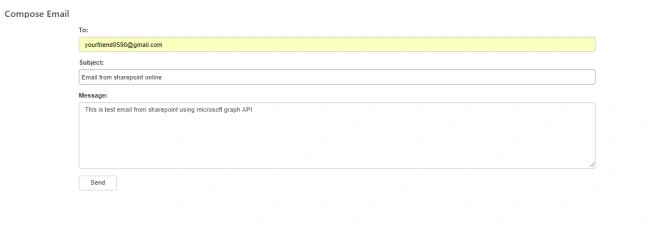
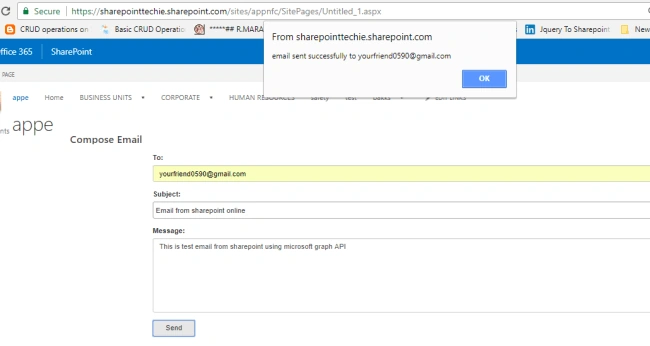
Click Send and you are able to see the alert email has been sent successfully.
Now, am going to open my mailbox to check if the mail I have sent is received or not.
Hurray!
The email has been received.


In my upcoming article, we will discuss more things using Microsoft Graph API.
Happy SharePointing!
Bhanuprakash BysaniPosted Oct 23, 2018, 7:53 AM
I am getting an error in send email function as Access is denied. Check credentials and try again.
Love ThakkerPosted Sep 5, 2018, 7:19 AM
Make sure you are passing space after Bearer in header in send mail. "headers": { "authorization": "Bearer " + token, //Pass the token to authorize the API request "content-type": "application/json" }
Chintan SanghaviPosted Sep 4, 2018, 9:27 AM
Well explained Vinod....Solved one of my query.
Satyaprakash SamantarayPosted May 16, 2018, 11:19 AM
Nice one .... very clear description