

Introduction
In this article, we will learn the step-by-step process of allowing users to log in to an application with Facebook using ReactJS. Logging in with Facebook makes it safe and easy for users to use applications. When a user clicks on the Login with Facebook button, the user is navigated Facebook to give the app permission. In response, the user receives a token key and other personal details.
Prerequisites
- Basic knowledge of ReactJS and Web API
- Visual Studio and Visual Studio code
- SQL Server Management Studio
Topics Covered in this Article,
- Create a ReactJS Project
- Install rreact-facebook-login React plugin
- Install Axios and Bootstrap
- Add React Router
- Install Bootstrap and React strap
- Create a Google App and get client Id
- Create a database and table
- Create a Web API Project
Create a ReactJS project by using the following command
- npx create-react-app sociallogin
Open the newly-created project in Visual Studio code and install react-google-login React plugin using the following command
- npm install react-facebook-login --save
Now install Bootstrap in this project by using the following command.
- npm install --save bootstrap
Now, open the index.js file and add import Bootstrap.
- import 'bootstrap/dist/css/bootstrap.min.css';
Now install the Axios library by using the following command. Learn more about Axios
- npm install --save axios
Create a Facebook App and Get App Id
Go to Facebook developer page and create a new App,
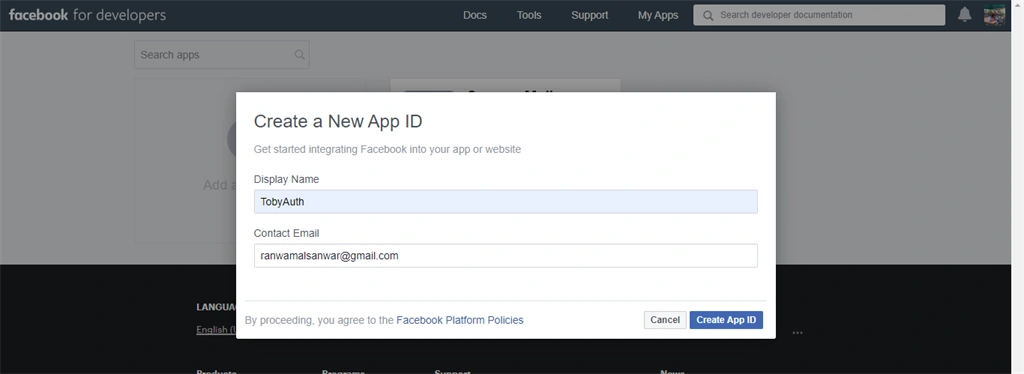
Click on create App ID
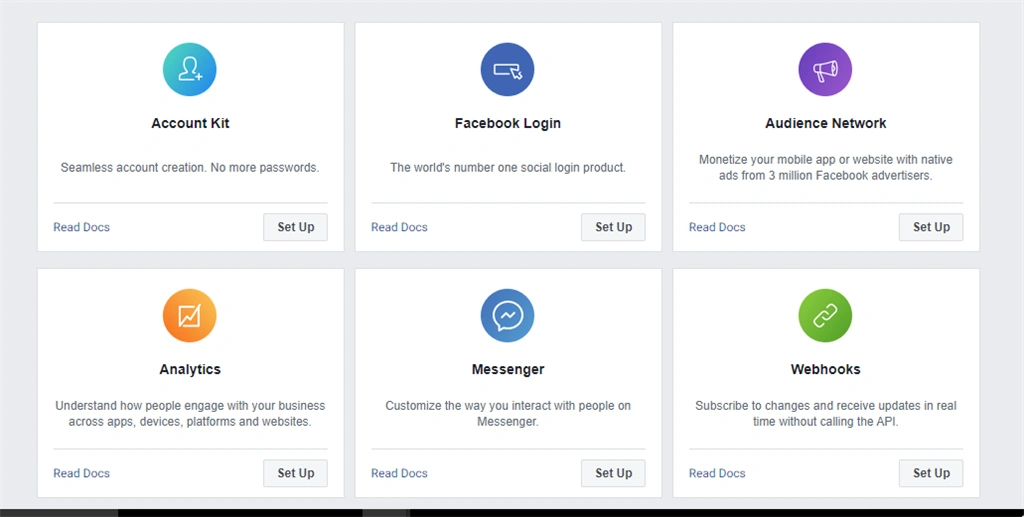
Click on Facebook login setup
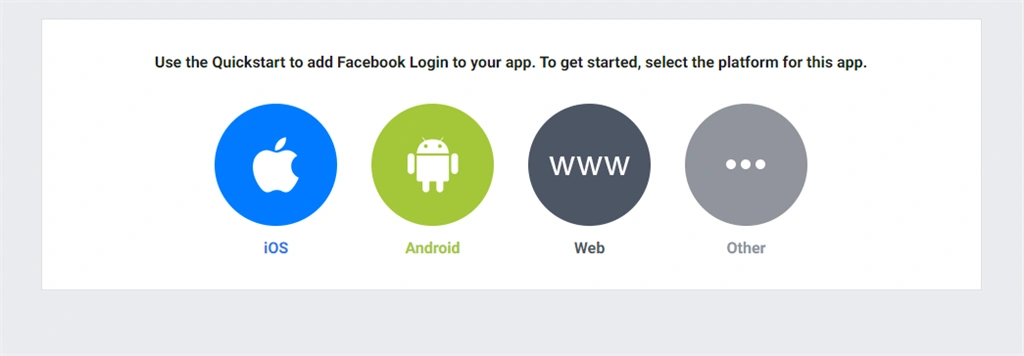
Click on Web
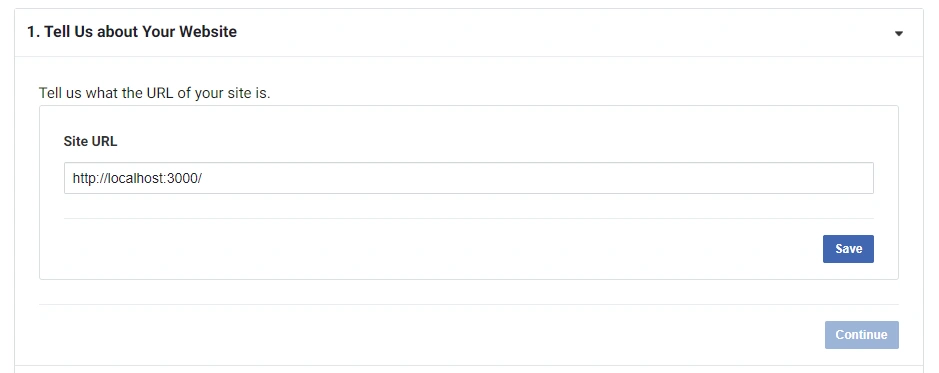
Enter Site url and click on save, now go to setting, and copy app id
Now, in Visual Studio code, go to src folder and create a new folder and inside this folder add 2 new components
- Loginbyfacebook.js
- Dashboard.js
Add Routing in ReactJS
Install react-router-dom package by using the following command
- npm install react-router-dom --save
Open app.js file and imports of Router and Route (react-router-dom) and 2 components.
- import Logintbygoogle from './Logintbygoogle'
- import Dashboard from "./Dashboard";
- import { BrowserRouter as Router, Switch, Route, Link } from 'react-router-dom';
Add the following code in app.js file,
- import React from 'react';
- import logo from './logo.svg';
- import './App.css';
- import Logintbyfacebook from './Logintbyfacebook'
- import Dashboard from "./Dashboard";
- import { BrowserRouter as Router, Switch, Route, Link } from 'react-router-dom';
- function App() {
- return (
- <>
- <div className="App">
- <Router>
- <div className="container">
- <Switch>
- <Route exact path='/' component={Logintbyfacebook} />
- <Route path='/Dashboard' component={Dashboard} />
- </Switch>
- </div>
- </Router>
- </div>
- </>
- );
- }
- export default App;
Now, open the Loginbyfacebook.js file and add the following code.
- import React, { Component } from 'react'
- import FacebookLogin from 'react-facebook-login';
- import axios from 'axios'
- export class Logintbyfacebook extends Component {
- constructor(props) {
- super(props);
- this.state = {
- };
- }
- signup(res) {
- const responseFacebook = {
- Name: res.name,
- email: res.email,
- token: res.accessToken,
- Image: res.picture.data.url,
- ProviderId: 'Facebook'
- }
- debugger;
- axios.post('http://localhost:60200/Api/Login/SocialmediaData', responseFacebook)
- .then((result) => {
- let responseJson = result;
- console.log(result.data.name);
- alert("data");
- sessionStorage.setItem("userData", JSON.stringify(result));
- this.props.history.push('/Dashboard')
- });
- };
- render() {
- const responseFacebook = (response) => {
- console.log(response);
- var res = response.profileObj;
- console.log(res);
- debugger;
- this.signup(response);
- }
- return (
- <div className="App">
- <div className="row">
- <div className="col-sm-12 btn btn-info">
- Login With Facebook Using ReactJS
- </div>
- </div>
- <div className="row">
- <div style={{ 'paddingTop': "20px" }} className="col-sm-12">
- <div className="col-sm-4"></div>
- <div className="col-sm-4">
- <FacebookLogin buttonStyle={{padding:"6px"}}
- appId="682908192243627"
- autoLoad={false}
- fields="name,email,picture"
- callback={responseFacebook}/>
- </div>
- <div className="col-sm-4"></div>
- </div>
- </div>
- </div>
- )
- }
- }
- export default Logintbyfacebook
Now, open the Dashboard .js file and add the following code.
- import React, { Component } from 'react'
- export class Dashboard extends Component {
- constructor(props){
- super(props);
- this.state = {
- name:'',
- };
- }
- componentDidMount() {
- const data = JSON.parse(sessionStorage.getItem('userData'));
- let data1=data;
- console.log(data1.data.Name);
- console.log(data1.Name);
- this.setState({name: data1.data.Name})
- }
- render() {
- return (
- <div className="container">
- <div className="row">
- <div className="col-sm-12 btn btn-info">
- Welcome to Dashboard
- </div>
- </div>
- <div className="row">
- <div className="col-sm-3"> Welcome :{this.state.name} </div>
- <div className="col-sm-9"></div>
- {/* <div className="col-sm-4"></div> */}
- </div>
- </div>
- )
- }
- }
- export default Dashboard
Create a table in the Database
Open SQL Server Management Studio, create a database named "Demotest," and in this database, create a table. Give that table a name like "sociallogin".
- CREATE TABLE [dbo].[Socaillogin](
- [Id] [int] IDENTITY(1,1) NOT NULL,
- [Name] [varchar](50) NULL,
- [Email] [varchar](50) NULL,
- [ProviderName] [varchar](50) NULL,
- [Image] [varchar](650) NULL,
- [Token] [nvarchar](650) NULL,
- CONSTRAINT [PK_Socaillogin] PRIMARY KEY CLUSTERED
- (
- [Id] ASC
- )WITH (PAD_INDEX = OFF, STATISTICS_NORECOMPUTE = OFF, IGNORE_DUP_KEY = OFF, ALLOW_ROW_LOCKS = ON, ALLOW_PAGE_LOCKS = ON) ON [PRIMARY]
- ) ON [PRIMARY]
- GO
Create a Web API Project
Open Visual Studio and create a new project.
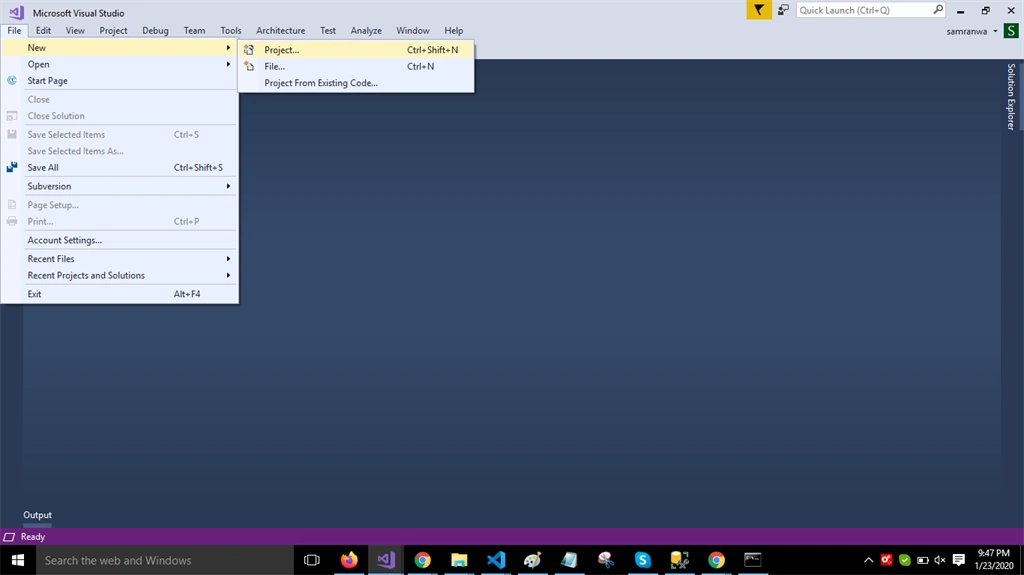
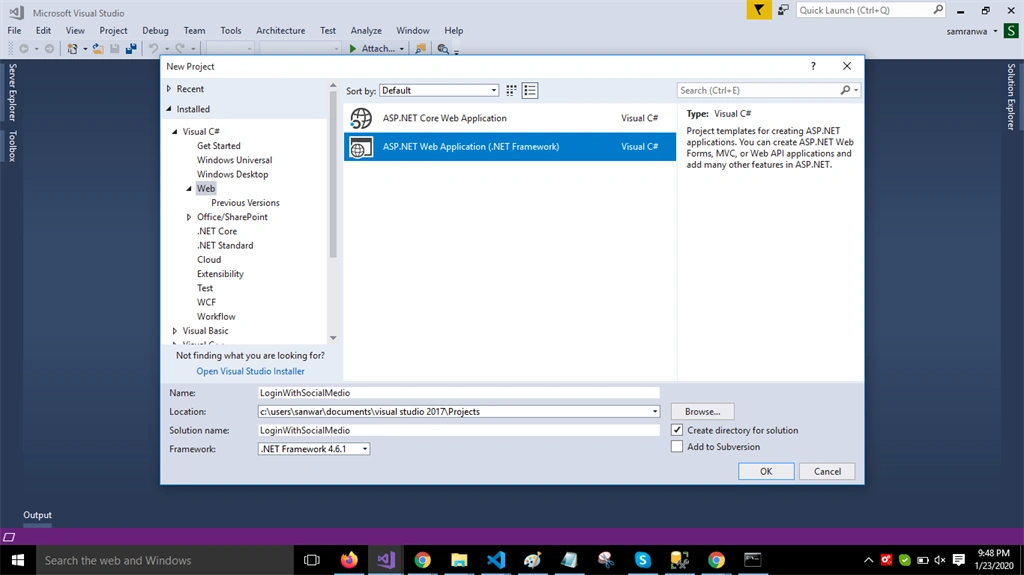
Change the name
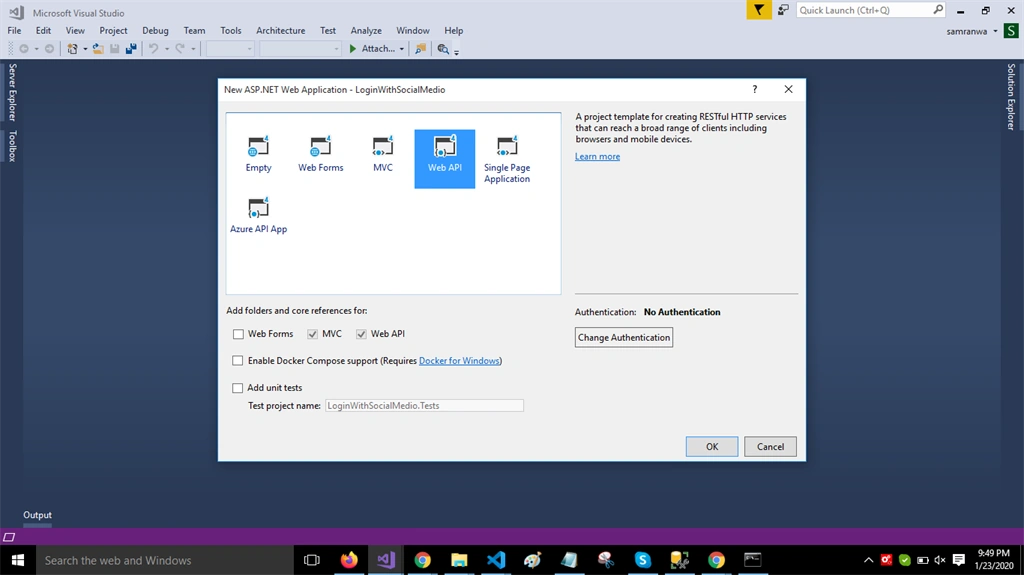
Select Web API as its template.
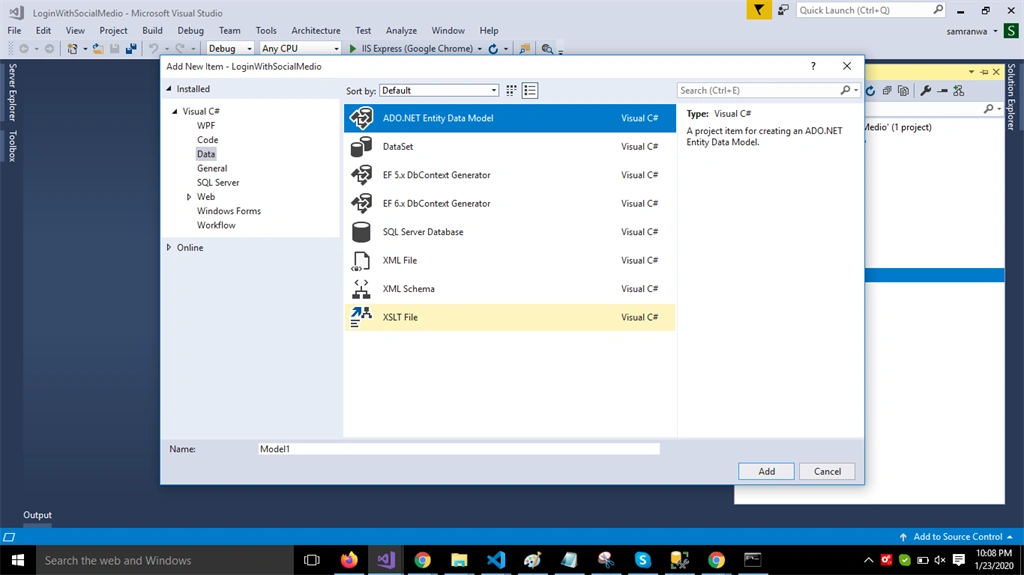
Right-click the Models folder from Solution Explorer and go to Add >> New Item >> data.
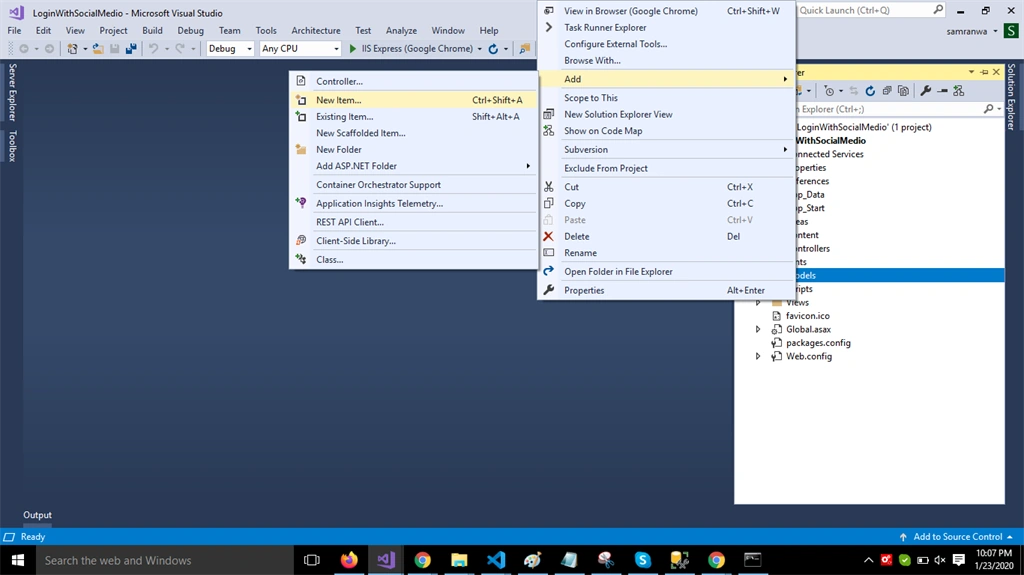
Click on the "ADO.NET Entity Data Model" option and click "Add".
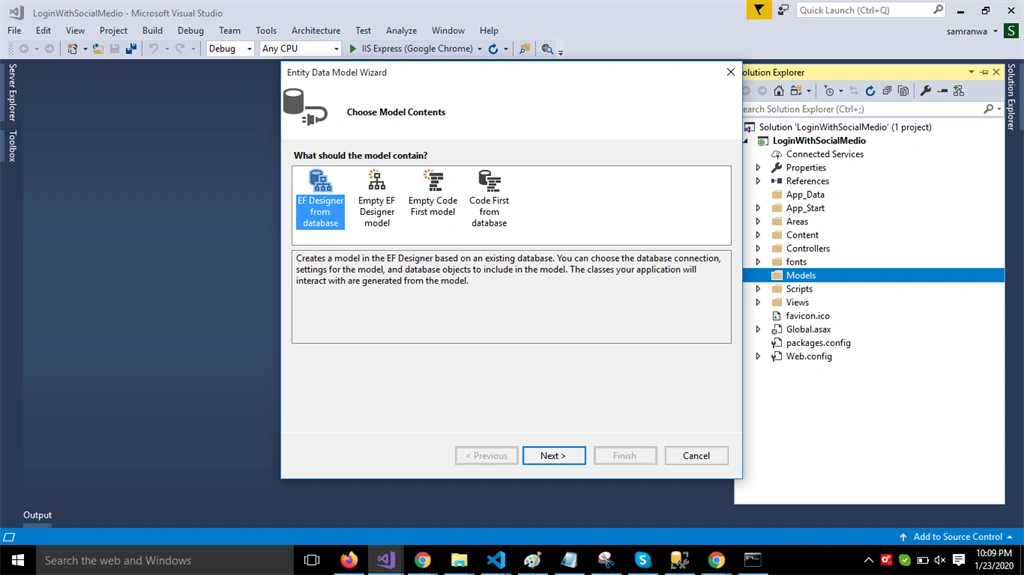
Select the EF Designer from the database and click the "Next" button.
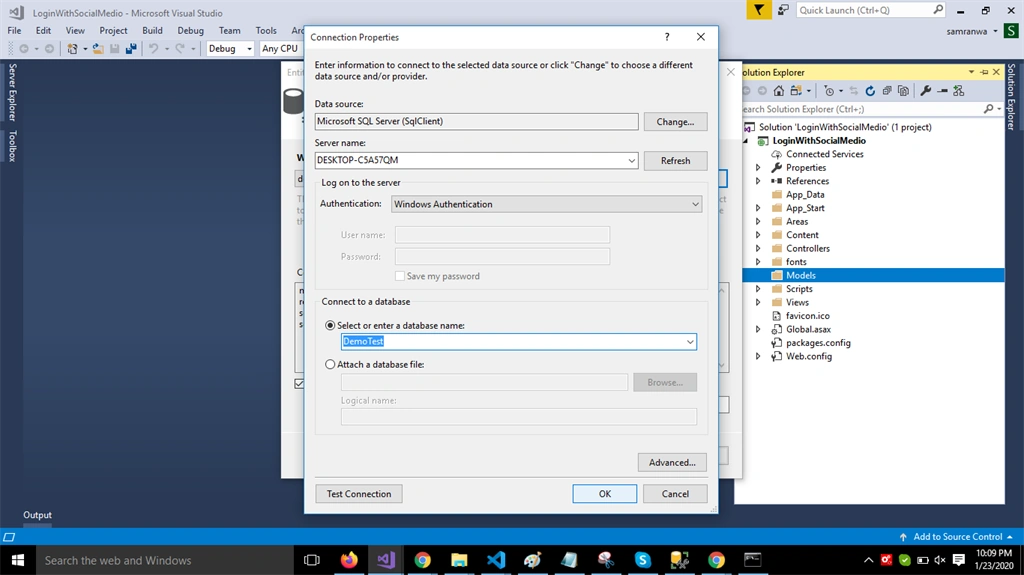
Add the connection properties and select database name on the next page and click OK.
Check the Table checkbox. The internal options will be selected by default. Now, click the "Finish" button.
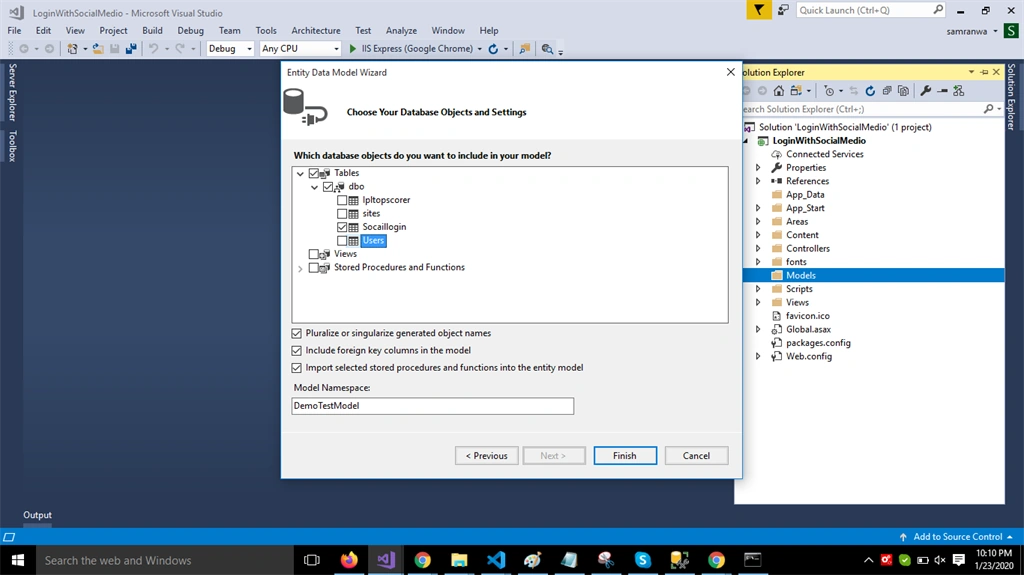
Our data model is created successfully now.
Now, Right-click on the model folder and add two classes - Userdetails and Response. Now, paste the following code in these classes.
Userdetails class
- public class Userdetails
- {
- public int Id { get; set; }
- public string Name { get; set; }
- public string Email { get; set; }
- public string ProviderName { get; set; }
- public string Image { get; set; }
- public string Token { get; set; }
- }
Response Class
- public class Response
- {
- public string Status { set; get; }
- public string Message { set; get; }
- }
Right-click on the Controllers folder and add a new controller. Name it as "Login controller" and add the following namespace.
- using LoginWithSocialMedio.Models;
Create a method in this controller to save data. Add the following code in this controller.
- using System;
- using System.Collections.Generic;
- using System.Linq;
- using System.Net;
- using System.Net.Http;
- using System.Web.Http;
- using LoginWithSocialMedio.Models;
- namespace LoginWithSocialMedio.Controllers
- {
- [RoutePrefix("Api/Login")]
- public class LoginController : ApiController
- {
- [Route("SocialmediaData")]
- [HttpPost]
- public object SocialmediaData(Userdetails user)
- {
- try
- {
- DemoTestEntities DB = new DemoTestEntities();
- Socaillogin Social = new Socaillogin();
- if (Social.Id == 0)
- {
- Social.Name = user.Name;
- Social.Email = user.Email;
- Social.ProviderName = user.ProviderName;
- Social.Image = user.Image;
- Social.Token = user.Token;
- var res = DB.Socaillogins.Add(Social);
- DB.SaveChanges();
- return res;
- }
- }
- catch (Exception)
- {
- throw;
- }
- return new Response
- { Status = "Error", Message = "Data." };
- }
- }
- }
Now, let's enable Cors. Go to Tools, open NuGet Package Manager, search for Cors and install the Microsoft.Asp.Net.WebApi.Cors package. Open Webapiconfig.cs, and add the following lines.
- EnableCorsAttribute cors = new EnableCorsAttribute("*", "*", "*");
- config.EnableCors(cors);
Now to go Visual Studio code and run the project
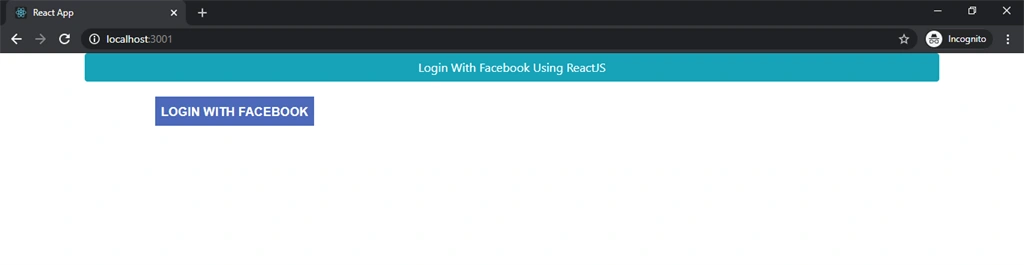
Click on 'login with Facebook' button,
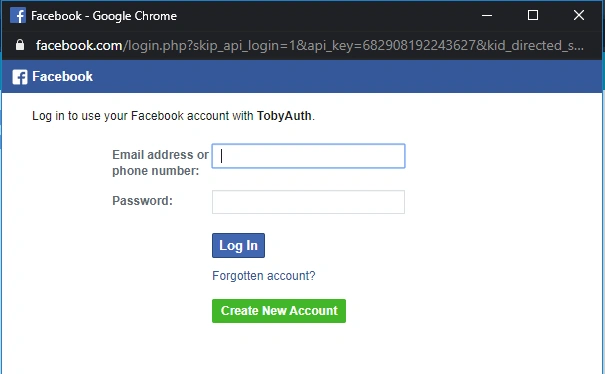
Enter e-mail and password.
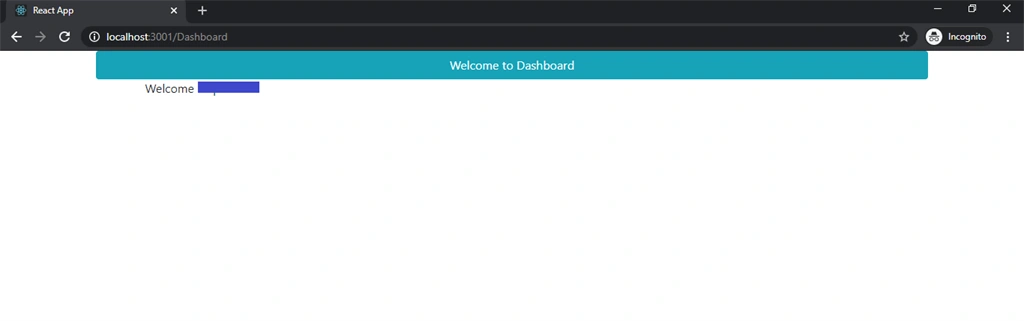
Now if login is successful, then it redirects to the dashboard page.
Summary
In this article, we discussed the process of logging in with Facebook using React and Web API.
Join the conversation! Your thoughts help the community grow.