

Nowadays MongoDB is one of the most popular NoSQL databases. NoSQL means 'not only SQL' , and as the the name suggests, we are not managing data using traditional RDBMS. Before jumping into MongoDB, let’s find out different NoSQL databases and their types.
Types of NoSQL databases
There are 4 basic types of NoSQL databases:
- Key-Value-Based Database -- Big Hash Table of keys & values
Example: Dynamo (Amazon S3)
- Document-based Database -- Stores documents with elements.
Example: CouchDB, MongoDB
- Column-based Database -- Stores data in one big table like Excel.
Example: Cassandra and HBase
- Graph-based Database -- Graph database is a technology for data management designed to handle very large sets of structured, semi-structured or unstructured data.
Example: Neo4J
Out of these many options we are going to concentrate only on MongoDB.
So, let’s figure out how we need to manage the data using MongoDB.
So now we can start to understand the basics of MongoDB and also will have some insights into practical work as well.
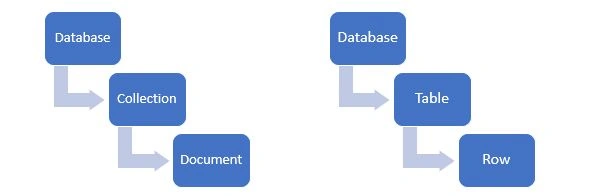
MongoDB has the following hierarchy. Below is a comparison with RDBMS hierarchy.
Environment Setup
We have two options available
- Local Setup
For this purpose, we need to download and install MongoDB installer and then we need to run Mongodb command line tools to start/stop the server.
In this article we will focus on cloud setup.
- Cloud Setup
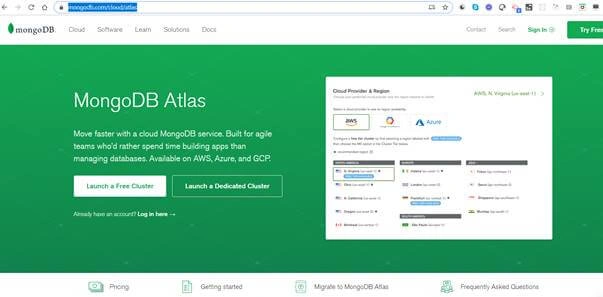
MongoDB cloud setup is known as MongoDB Atlas. Let’s start practically with MongoDB Atlas. As Atlas is the cloud version of MongoDB there is no need to download or install anything on your local box so please open the browser and add this url.
Then you will see the below page where you can easily find out the button “Launch a Free Cluster”. Just click that button.
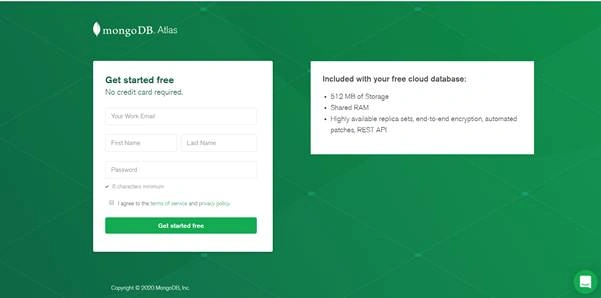
After selecting “Launch a Free Cluster” you will see the registration page. If you are already registered then go back there and you will be able to see “Log in here”
After the registration is complete:
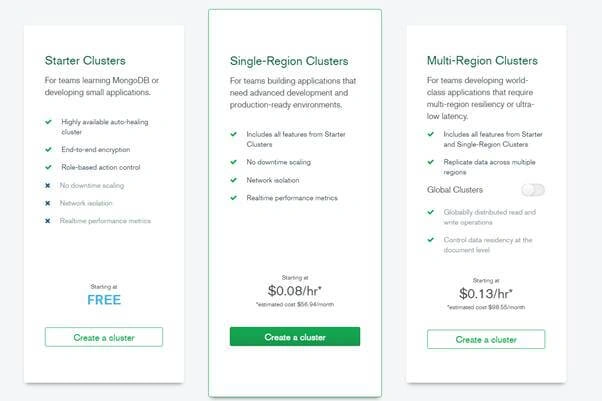
Here we will get three options and we will go with free option and select “Create a cluster”
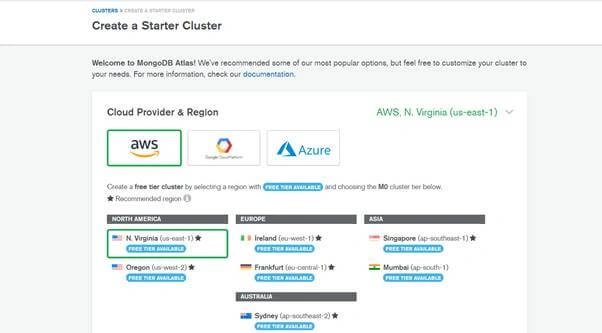
Atlas gives us three cloud options AWS, Google Cloud and AWS options.
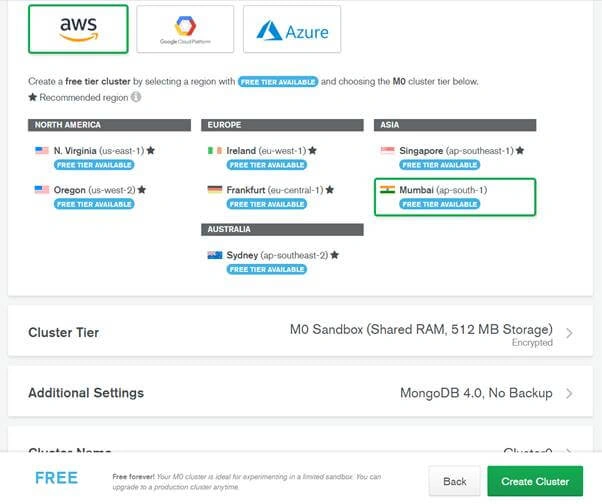
I have selected AWS and Mumbai option and clicked “Create Cluster” button.
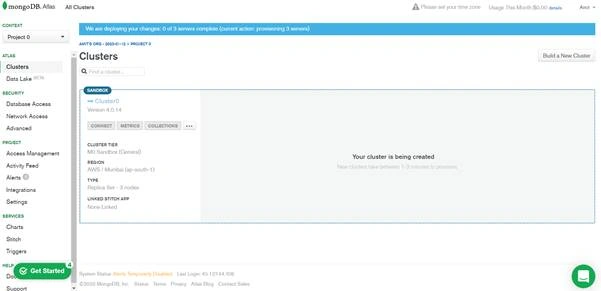
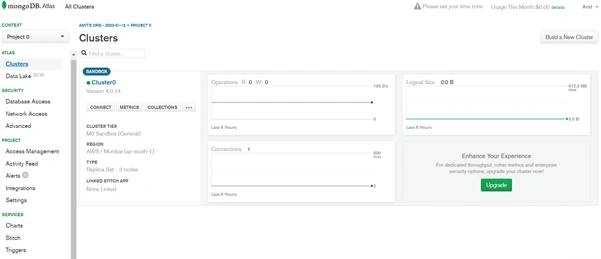
To create cluster, it will take couple of minutes.
Get “Database Access” – Select Database Access
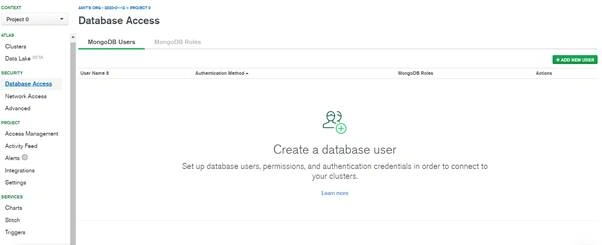
Add New User:
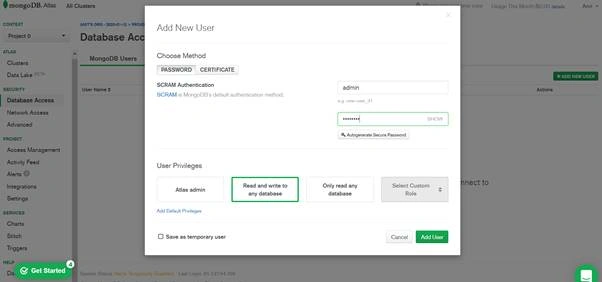
While creating user we can set privileges as well. I am selecting default privileges for admin user.
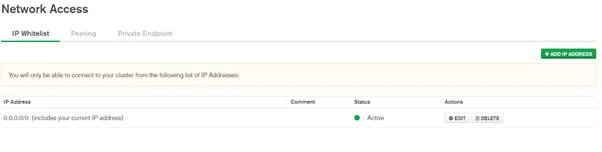
Get “Network Access” – Select Network Access
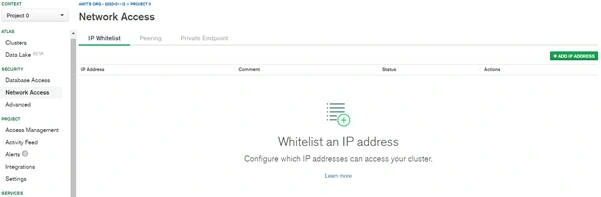
Select button. Add IP Address then you will get a popup:
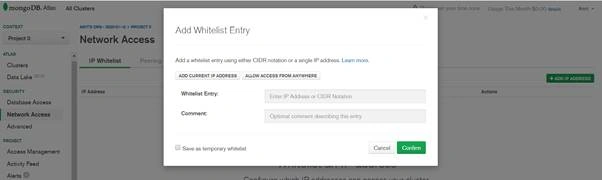
Select ALLOW FROM ANYWHERE OPTION and click Confirm
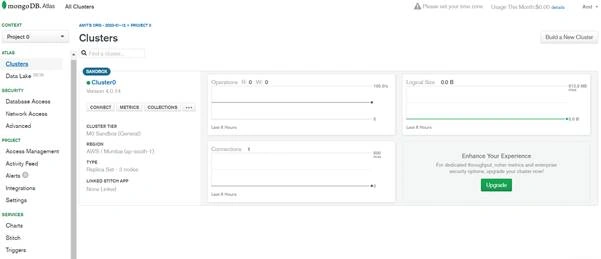
After configuring the security part, select cluster from left panel.
Now select Collection Button
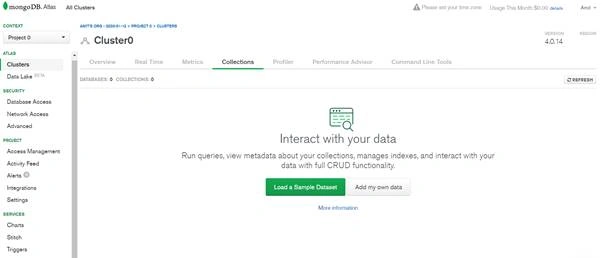
Here we will get two options - readymade dataset or user can create his/her collection and add data. If you select Load a Sample Dataset it will add 350 mb dataset so I am selecting add my own data:
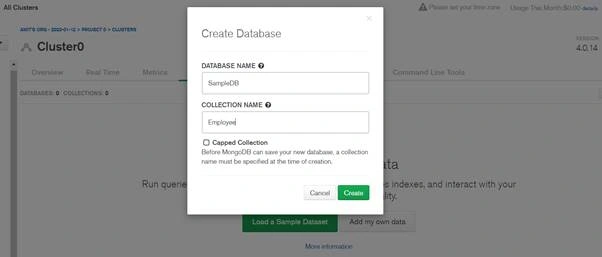
You can give whatever database name you wish, collection name ,and click Create Button.
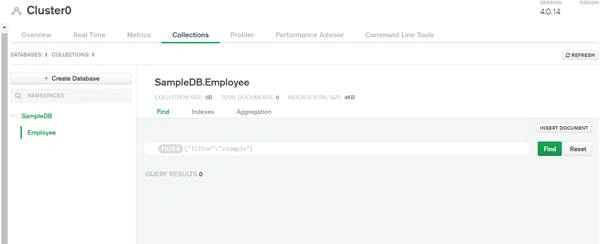
After creating database and collection then the next step is to add document using INSERT DOCUMENT.
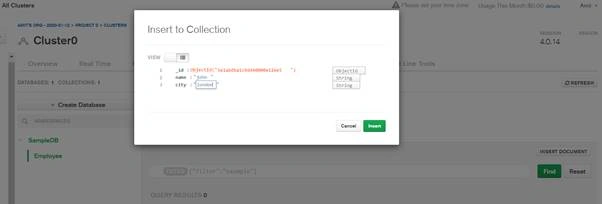
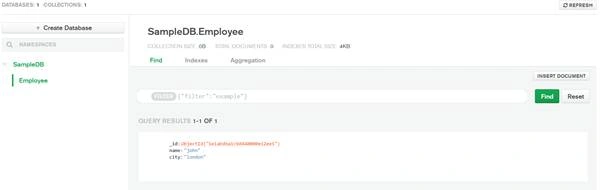
So far we have finsihed the basic setup of MongoDB atlas and how to create the database -- now we will move forward to understand more about MongoDB.
MongoDB is storing data in the form of json. This json is known as BSON. BSON stands for binary JSON. See the below comparison between JSON and BSON.
|
Json
|
Bson
|
|
Json is file format
|
Binary json
|
|
Slower
|
Faster than json
|
|
Encoding and decoding techniques are not available
|
Encoding and decoding techniques are not available
|
Primary key is required while inserting a new document. In MongoDB this primary is key known as _id field. The _id field contains a unique ObjectID value. When we are inserting new document _id gets automatically gets generated. We can also override this unique objectID by passing manually _id as field while inserting new document.
Access MongoDB Atlas externally
Select cluster from left panel and then click CONNECT button
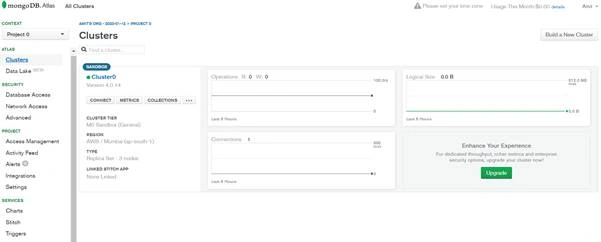
You will see popup with three options. We will explore each option
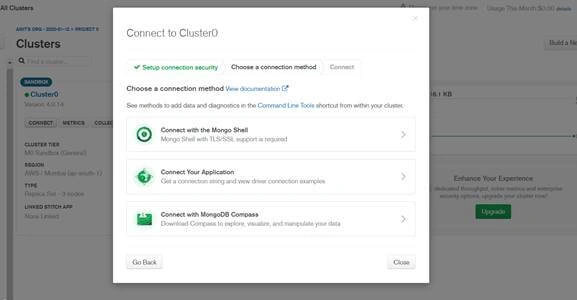
So, first select “Connect with Mongo Shell” – This option provides us with the facility to connect MongoDB with one local console environment.
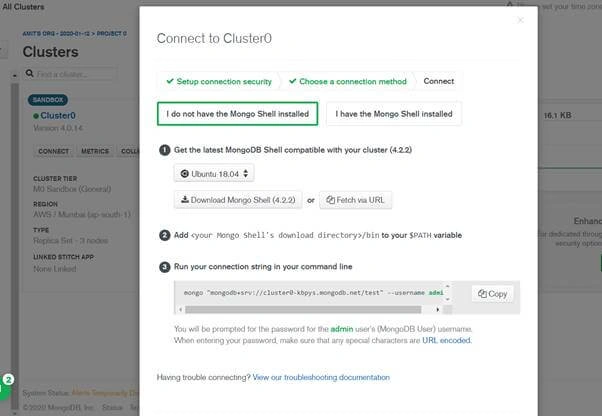
Here you need to follow these 3 steps. In my case I am selecting Windows and copying the command as I have already installed Mongo Shell locally. So I am opening my mongo shell locally and running the following mongo command:
mongo "mongodb+srv://cluster0-kbpys.mongodb.net/test" --username admin
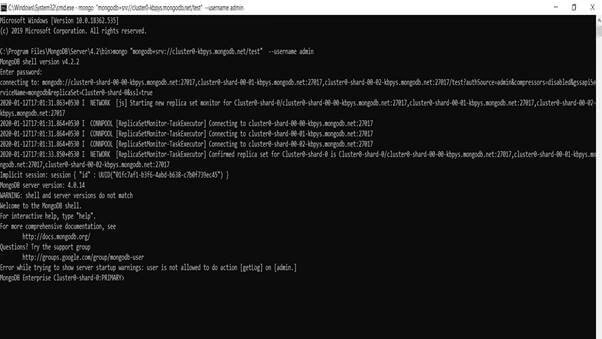
After running this command, we need to provide the password:

Here we can add commands to retrieve database, collections and documents from MongoDB atlas and also, we create new database, collections and also insert new database.
Now we try explorer commands,
- show dbs - List all databases
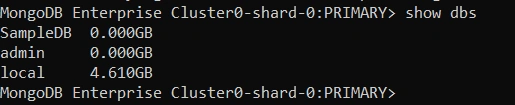
- use <database_name> – Change to database and if that database does not exist then create a new database with that name.
- db – Show current database.

In my case ‘test’ is my current database.
Now I am creating new database: OrganizationDB

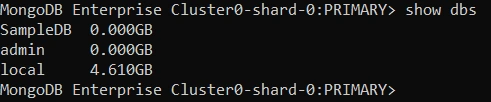
In this list we are not getting OrganizationDB. It is because until we are adding any collections it is not showing in list.
Let's find some more commands
- Show collections
- // List down collections of the current database
- MongoDB Enterprise Cluster0-shard-0:PRIMARY> show collections;
- MongoDB Enterprise Cluster0-shard-0:PRIMARY> db.getCollectionNames();
- Create new collection
- db.createCollection("collection-name");
- Insert new document in collection.
- // Insert single document
- MongoDB Enterprise Cluster0-shard-0:PRIMARY> db.<collection_name>.insert({field1: "value", field2: "value"})
- // Insert multiple documents
- MongoDB Enterprise Cluster0-shard-0:PRIMARY> db.<collection_name>.insert([{field1: "value1"}, {field1: "value2"}])
- MongoDB Enterprise Cluster0-shard-0:PRIMARY> db.<collection_name>.insertMany([{field1: "value1"}, {field1: "value2"}])
- (Note: If you insert the record with collection_name and if that collection is not available then automatically collection will get created.)
- Find data from collection
- // Find all records
- MongoDB Enterprise Cluster0-shard-0:PRIMARY> db.< collection_name>.find();
- // Retrieve limited number of records
- db.< collection_name>.find().limit(10);
- // Retrieve records on condition
- db.< collection_name>.find({"_id": ObjectId("someid")});
- // Sample queries
- MongoDB Enterprise Cluster0-shard-0:PRIMARY> show dbs
- SampleDB 0.000GB
- admin 0.000GB
- local 4.610GB
- MongoDB Enterprise Cluster0-shard-0:PRIMARY> db.City.insertMany([{name: "mumbai",state:"MH"}, {name: "pune", state:"MH"}])
- {
- "acknowledged" : true,
- "insertedIds" : [
- ObjectId("5e1b0ea24fd72f15bdc222c9"),
- ObjectId("5e1b0ea24fd72f15bdc222ca")
- ]
- }
- MongoDB Enterprise Cluster0-shard-0:PRIMARY> db.City.find({})
- { "_id" : ObjectId("5e1b0ea24fd72f15bdc222c9"), "name" : "mumbai", "state" : "MH" }
- { "_id" : ObjectId("5e1b0ea24fd72f15bdc222ca"), "name" : "pune", "state" : "MH" }
- MongoDB Enterprise Cluster0-shard-0:PRIMARY> db.City.find({"name":"mumbai"})
- { "_id" : ObjectId("5e1b0ea24fd72f15bdc222c9"), "name" : "mumbai", "state" : "MH" }
- MongoDB Enterprise Cluster0-shard-0:PRIMARY> db.City.find({}).limit(1)
- { "_id" : ObjectId("5e1b0ea24fd72f15bdc222c9"), "name" : "mumbai", "state" : "MH" }
- MongoDB Enterprise Cluster0-shard-0:PRIMARY> db.City.findOne({})
- {
- "_id" : ObjectId("5e1b0ea24fd72f15bdc222c9"),
- "name" : "mumbai",
- "state" : "MH"
- }
We can also delete or remove the databases, collections and also documents. Also we can update the documents.
- db.collection.remove()
- db.users.remove({})
Conditional remove:
- db.users.remove( { status : "P" } )
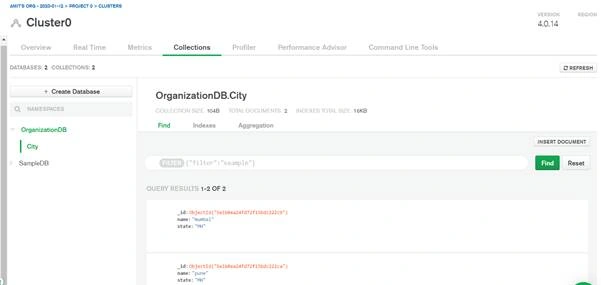
Open Mongo Atlas and select Cluster and then click Collection. You will get all new databases, collections and documents.
Advantages of MongoDB Atlas
- No download and installation required
- Automatic updation available
- Monitoring tools available with alerts
- Inbuilt security and scalability available
- Good performance
Here we are concluding MongoDB Atlas. So, we started with understanding about MongoDB and setup, and also started with basic querying. In the next article we will try to access MongoDB with other programming languages like C#, Javascript, or Python and perform CRUD operations.
Saber ShaikhPosted Jan 23, 2020, 5:02 PM
Nice bro this is use full