

Description
Identity is Users Authentication and Authorization. In this article we will see how users are able to log in with their social identities so that they can have a rich experience on their website.
ASP.NET membership makes it easy to enable membership requirements on our web application which involves Forms Authentication, authorization and a SQL Server database which persist information for user names, passwords, and profile data. Now a days most developers want to enable their sites to use social identity providers for authentication and authorization functionality.
Simple Membership
Simple membership is used to add an additional functionality on my web page application in ASP.NET which contain the hard coded SQL statement to create table in SQL database that persist the user profile information in table. It makes easier to customize user data.
Universal Providers
Universal provider is used to persist the membership information in SQL Server. Universal providers are the default for ASP.NET MVC 3. It does not have any view or stored procedures in SQL.
- Login Username/Password
- External Login-Social Provider
- Roles
- Profile
- Claims
- User Management-Create,Delete,Edit User
- Role Management-Create,Delete,Edit
- Identity Storage Extensibility
- Stronger Password
- Two-Factor Authentication
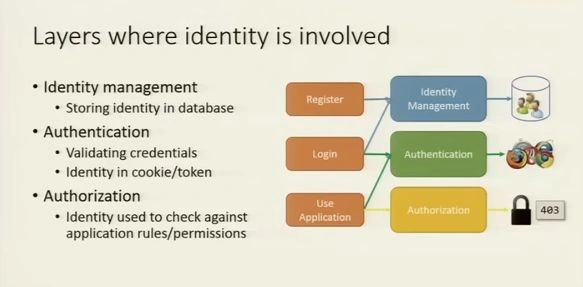
How to implement ASP.NET Identity with new ASP.NET website
It is pretty simple to implement ASP.NET Identity feature by using Visual Studio 2013.
Step 1:
Open Visual Studio and press Ctrl + Shift + N on keyboard to open new project window (or alternatively click File, New, then Project... on top menu). Select ASP.NET Web Application as in the following screenshot,
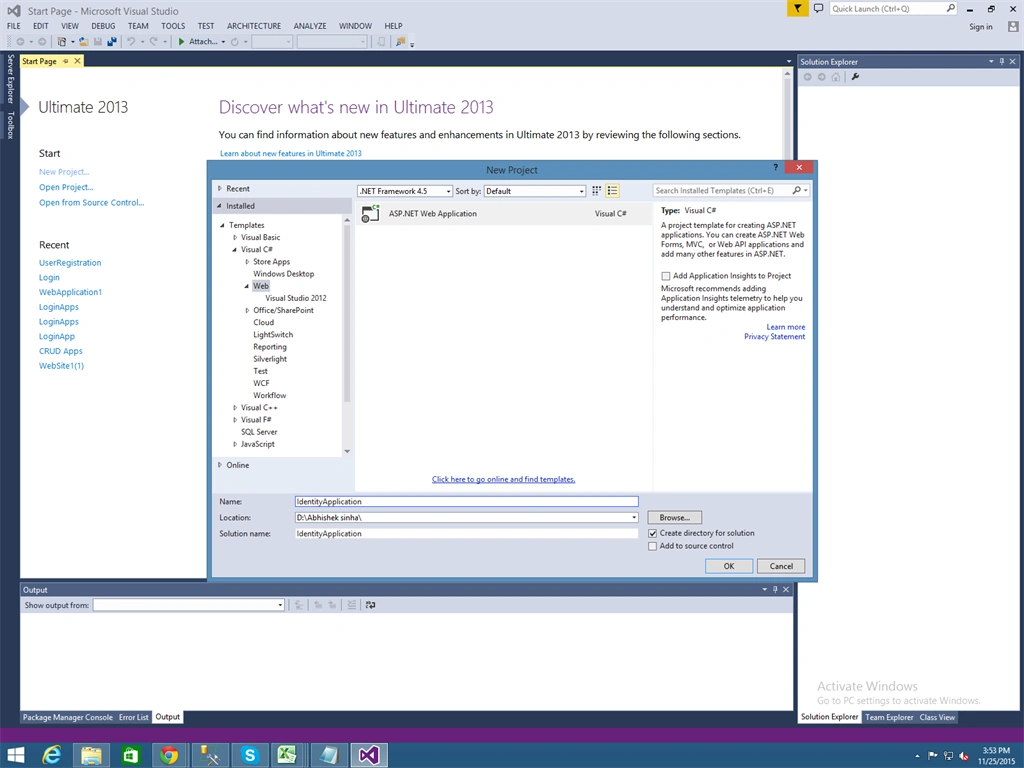
Step 2:
Choose project name and project location, and press OK button. On the next screen, window is divided in two parts. On left side, select type of ASP.NET application, like Web Forms, MVC, and Single Page, etc. On right side you can select authentication method,

Step 3:
After clicking OK button on the pop page the next page will open in my Visual studio 2013 like the following screenshot,

Step 4:
After that we run my application by clicking Ctrl+F5, then my application run for awhile and this page open in Google Chrome browser like given below,

Social Networks Authentication with ASP. NET Identity
We can easily implement a new web application and we can customize it according to our needs. Now a days we want to build a solution in our web pages that enable users to login via their social account like Facebook, Google, LinkedIn and Twitter. By using ASP.NET Identity we can easily use this feature in our application.
Enable login to ASP. NET website using Facebook accounts
Step 1:
Firstly, we have to create an account on Facebook developer site developers.facebook.com

Step 2:
After creating new App Id on Facebook developer account. We have to assign URL of my application in site URL Text Field while creating App Id and then we complete the process of creating App Id on Facebook.
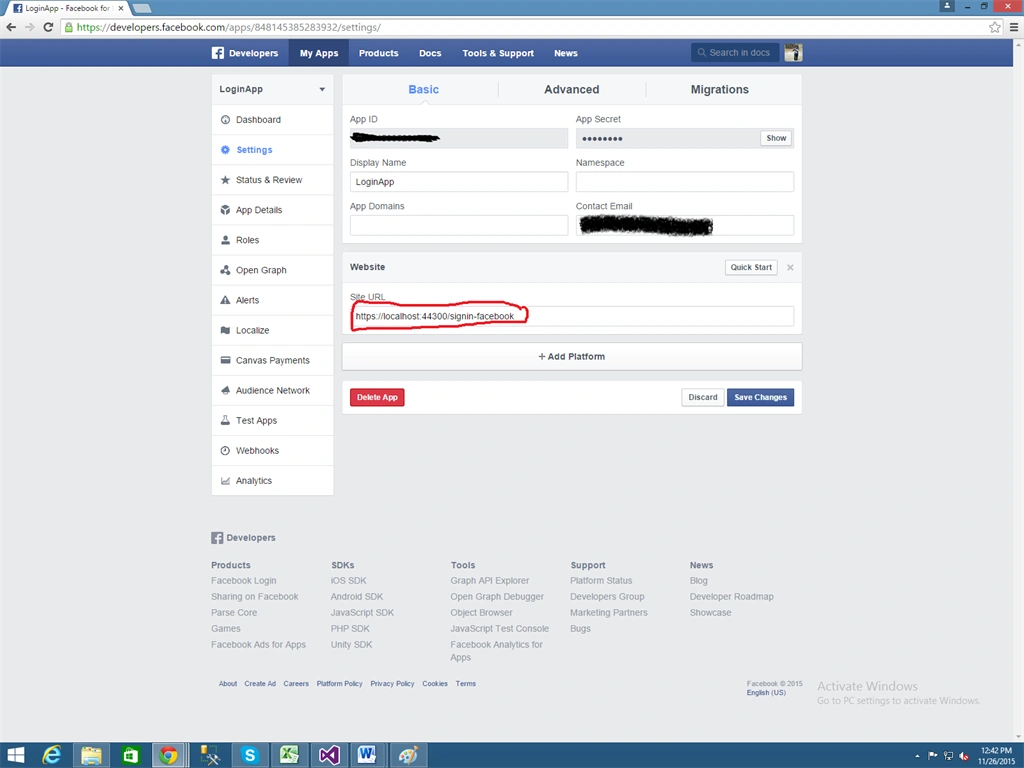
Step 3:
After creating Facebook developer account we go to the Dashboard menu, where we see our App ID and App Secret. We will use this App ID and App Secret in my code.
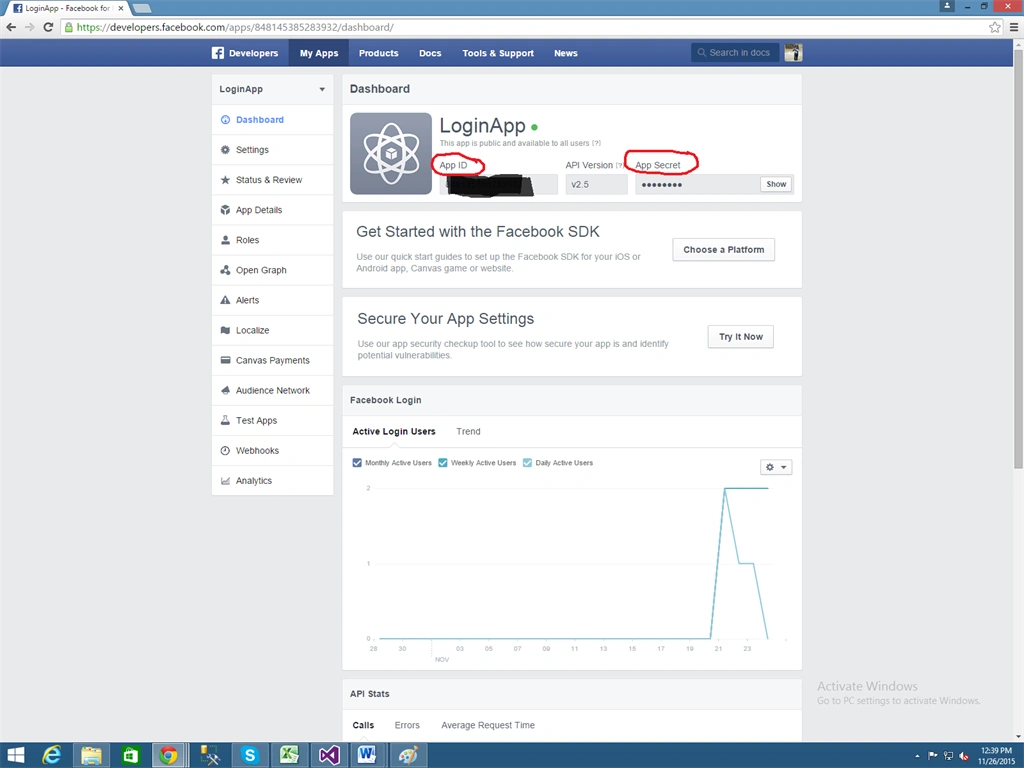
Now, go back to Visual Studio and open App_Start\Startup.Auth.cs file. Uncomment Facebook code snippet, marked in the following image and then we add our Facebook App ID and App Secret here.
- namespace MyIdentityApplication {
- public partial class Startup {
- // For more information on configuring authentication, please visit http://go.microsoft.com/fwlink/?LinkId=301864
- public void ConfigureAuth(IAppBuilder app) {
- // Configure the db context, user manager and signin manager to use a single instance per request
- app.CreatePerOwinContext(ApplicationDbContext.Create);
- app.CreatePerOwinContext < ApplicationUserManager > (ApplicationUserManager.Create);
- app.CreatePerOwinContext < ApplicationSignInManager > (ApplicationSignInManager.Create);
- // Enable the application to use a cookie to store information for the signed in user
- // and to use a cookie to temporarily store information about a user logging in with a third party login provider
- // Configure the sign in cookie
- app.UseCookieAuthentication(new CookieAuthenticationOptions {
- AuthenticationType = DefaultAuthenticationTypes.ApplicationCookie,
- LoginPath = new PathString("/Account/Login"),
- Provider = new CookieAuthenticationProvider {
- // Enables the application to validate the security stamp when the user logs in.
- // This is a security feature which is used when you change a password or add an external login to your account.
- OnValidateIdentity = SecurityStampValidator.OnValidateIdentity < ApplicationUserManager, ApplicationUser > (
- validateInterval: TimeSpan.FromMinutes(30),
- regenerateIdentity: (manager, user) => user.GenerateUserIdentityAsync(manager))
- }
- });
- app.UseExternalSignInCookie(DefaultAuthenticationTypes.ExternalCookie);
- // Enables the application to temporarily store user information when they are verifying the second factor in the two-factor authentication process.
- app.UseTwoFactorSignInCookie(DefaultAuthenticationTypes.TwoFactorCookie, TimeSpan.FromMinutes(5));
- // Enables the application to remember the second login verification factor such as phone or email.
- // Once you check this option, your second step of verification during the login process will be remembered on the device where you logged in from.
- // This is similar to the RememberMe option when you log in.
- app.UseTwoFactorRememberBrowserCookie(DefaultAuthenticationTypes.TwoFactorRememberBrowserCookie);
- // Uncomment the following lines to enable logging in with third party login providers
- //app.UseMicrosoftAccountAuthentication(
- // clientId: "",
- // clientSecret: "");
- //app.UseTwitterAuthentication(
- // consumerKey: "",
- // consumerSecret: "");
- app.UseFacebookAuthentication(
- appId: "675652236",
- appSecret: "av5rfd35a6a9v8");
- //app.UseGoogleAuthentication(new GoogleOAuth2AuthenticationOptions()
- //{
- // ClientId = "",
- // ClientSecret = ""
- //});
- }
- }
- }
Add values for App Id an App Secret, like on Facebook application control panel.
Step 4:
When you start web application, click Login link and you will see new Facebook button on right side. Click that Facebook button.
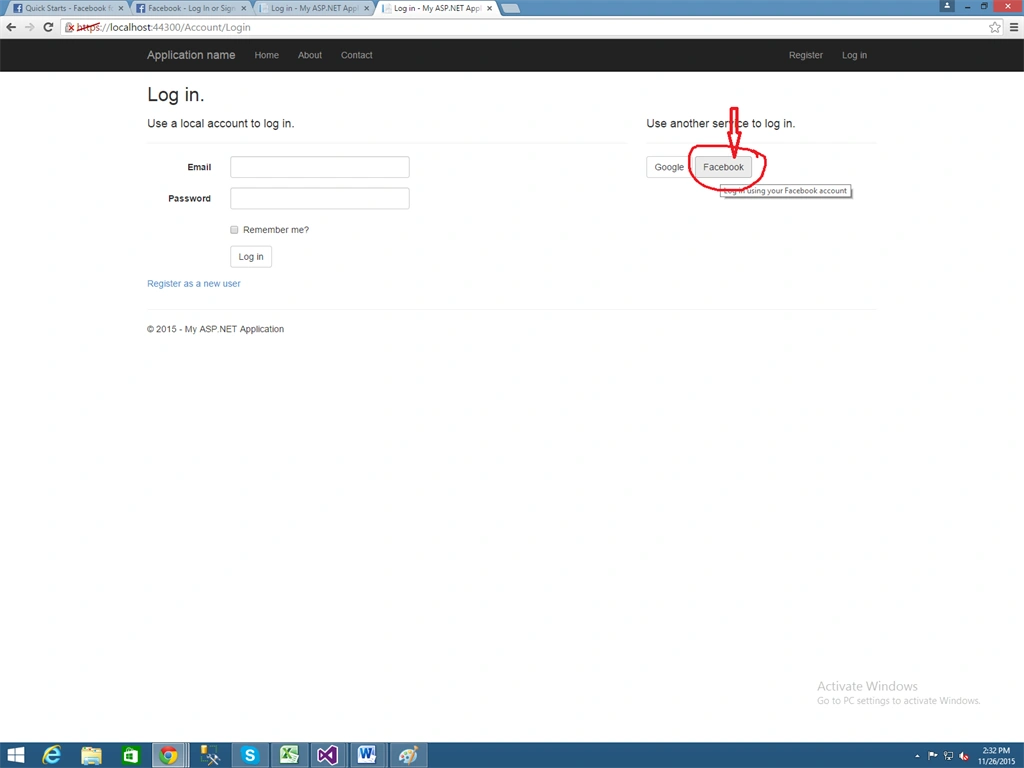
Step 5:
After clicking the Facebook button my next page will appear like given below. Here we enter the Facebook account login email id and password and then we click login button. Then Facebook page will ask permission to share your Facebook account data to your application.
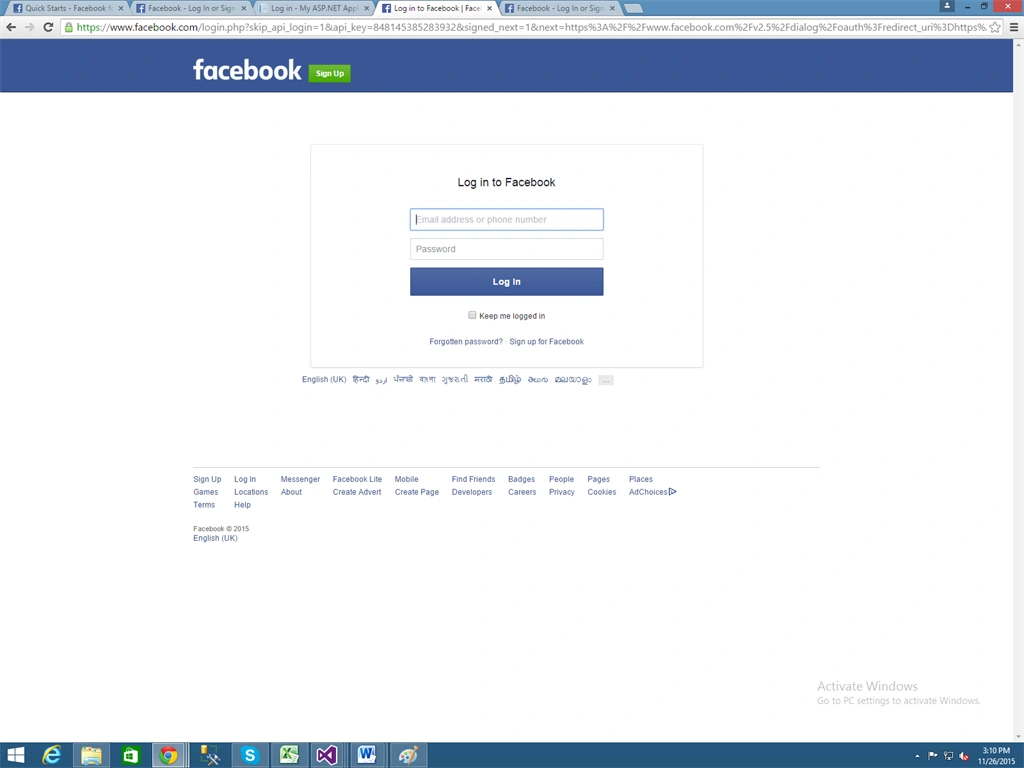
Step 6:
Then my page will appear like this. Here my application page successfully login via my Facebook account. And my profile data is automatically copied in my SQL Server database. 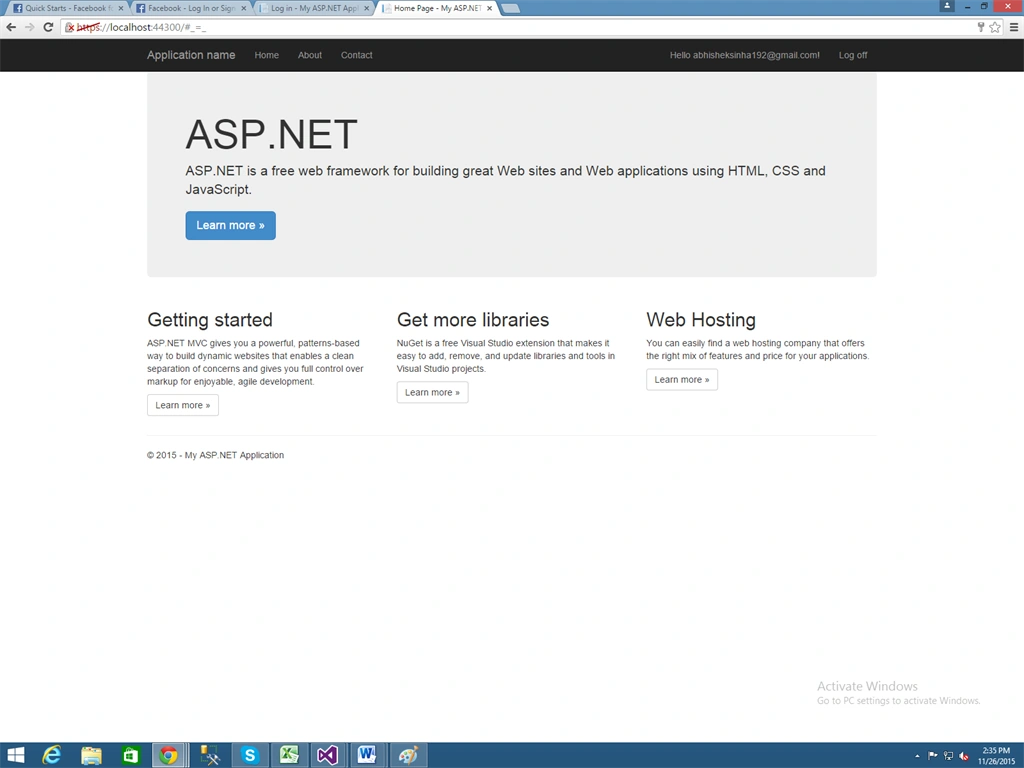
Step 7:
And now we examine the membership data in database so we expand the DefaultConnection(MvcAuth). Expand Tables, right clickAspNetUser and click Show Table.

Conclusion
Humayun Kabir MamunPosted Dec 8, 2015, 12:18 AM
Nice...
Saillesh PawarPosted Dec 7, 2015, 12:57 PM
Nice 1
Raja TPosted Dec 7, 2015, 7:13 AM
Nice one, Welcome to csharpcorner
Mukesh KumarPosted Dec 7, 2015, 7:08 AM
Good one..
Santhakumar MunuswamyPosted Dec 7, 2015, 6:49 AM
Welcome
Santhakumar MunuswamyPosted Dec 7, 2015, 6:49 AM
Good Start