

Introduction
In this article, we will learn how we can create searchable and multi select dropdown in React.js using react-select library.
Prerequisites
- We should have basic knowledge of React.js and Web API.
- Visual Studio and Visual Studio Code IDE should be installed on your system.
- SQL Server Management Studio
- Basic knowledge of Bootstrap
- Axios Installed
Create ReactJS project
Now, let's first create a React application with the following command.
- npx create-react-app matform
- npm install react-select --save
- npm install --save bootstrap
- import 'bootstrap/dist/css/bootstrap.min.css';
Now install the Axios library by using the following command. Learn more about Axios
- npm install --save axios
Now go to the src folder and add a new component, named 'Reactsel.js'. and import react-select package.
- import Select from 'react-select';
- import React, { Component } from 'react'
- import Select from 'react-select';
- import axios from 'axios';
- export class Reactsel extends Component {
- constructor(props) {
- super(props)
- this.state = {
- country: []
- }
- }
- componentWillMount() {
- axios.get('http://localhost:51983/Api/autoComplete/Countrylist').then(response => {
- console.log(response);
- this.setState({
- country: response.data
- })
- })
- }
- Country() {
- return (this.state.country.map(data => ({ label: data.Name, value: data.Id })))
- }
- render() {
- return (
- <>
- <div style={{ margin: "10px" }} class="row" className="hdr">
- <div class="col-sm-12 btn btn-warning">
- React Select
- </div>
- </div>
- <div className="container">
- <div className="row">
- <div className="col-md-3"></div>
- <div className="col-md-6">
- <Select options={this.Country()} />
- </div>
- <div className="col-md-4"></div>
- </div>
- </div>
- </>
- )
- }
- }
- export default Reactsel
Now add another component,named 'Multiselect.js' and add the following code
- import React, { Component } from 'react';
- import Select from 'react-select';
- import makeAnimated from 'react-select/animated';
- import axios from 'axios';
- const animatedComponents = makeAnimated();
- export class Multiselect extends Component {
- constructor(props) {
- super(props)
- this.state = {
- country: [],
- }
- }
- componentWillMount() {
- axios.get('http://localhost:51983/Api/autoComplete/Countrylist').then(response => {
- console.log(response);
- this.setState({
- country: response.data
- })
- })
- }
- Country() {
- return (this.state.country.map(data => ({ label: data.Name, value: data.Id })))
- }
- render() {
- return (
- <>
- <div style={{ margin: "10px" }} class="row" className="hdr">
- <div class="col-sm-12 btn btn-warning">
- React Select
- </div>
- </div>
- <div className="container">
- <div className="row">
- <div className="col-md-3"></div>
- <div className="col-md-6">
- <Select options={this.Country()} components={animatedComponents}
- isMulti />
- </div>
- <div className="col-md-4"></div>
- </div>
- </div>
- </>
- )
- }
- }
- export default Multiselect
- import React from 'react';
- import logo from './logo.svg';
- import './App.css';
- import Multiselect from './Multiselect'
- import Reactsel from "./Reactsel";
- function App() {
- return (
- <div className="App">
- <Multiselect />
- </div>
- );
- }
- export default App;
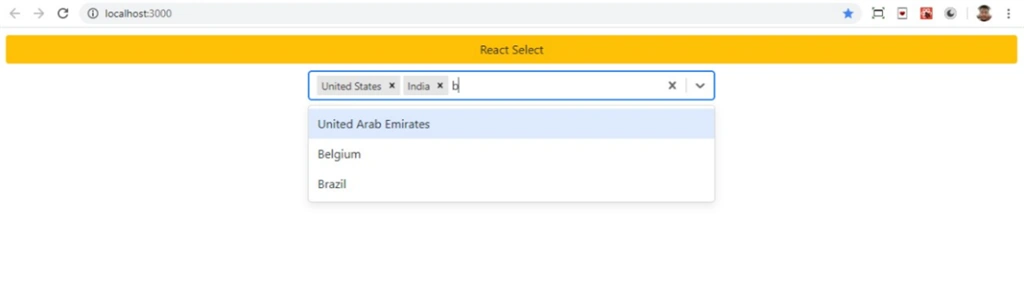
Run the project and check result.
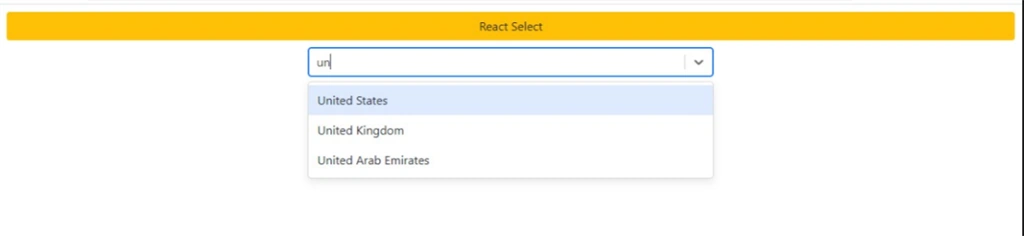
Create a table in the database
Open SQL Server Management Studio, create a table:
- CREATE TABLE [dbo].[TblCountry](
- [Id] [int] IDENTITY(1,1) NOT NULL,
- [Name] [nvarchar](50) NULL,
- CONSTRAINT [PK_TblCountry] PRIMARY KEY CLUSTERED
- (
- [Id] ASC
- )WITH (PAD_INDEX = OFF, STATISTICS_NORECOMPUTE = OFF, IGNORE_DUP_KEY = OFF, ALLOW_ROW_LOCKS = ON, ALLOW_PAGE_LOCKS = ON) ON [PRIMARY]
- ) ON [PRIMARY]
- GO
Create a new Web API project
Open Visual Studio and create a new project:
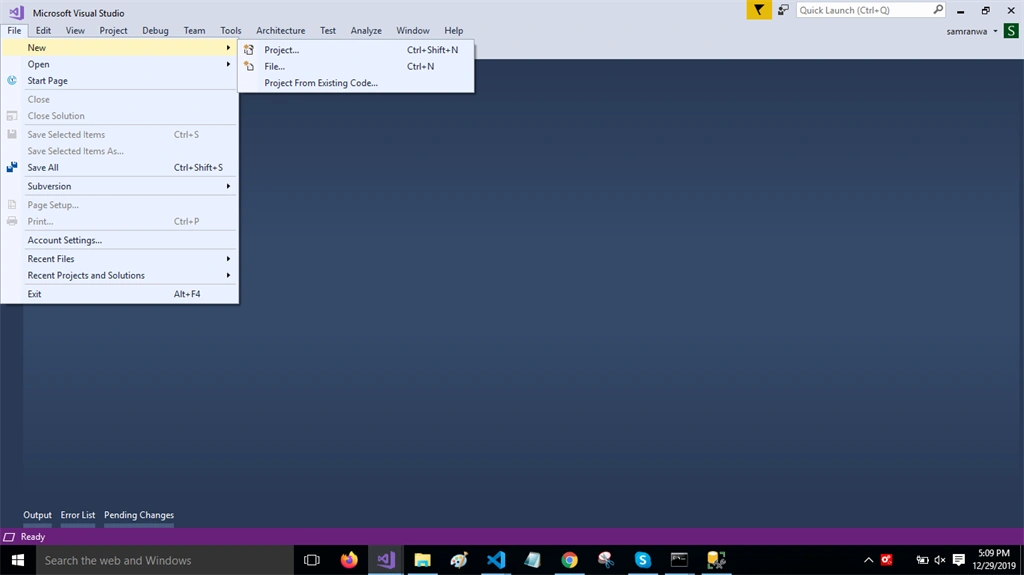
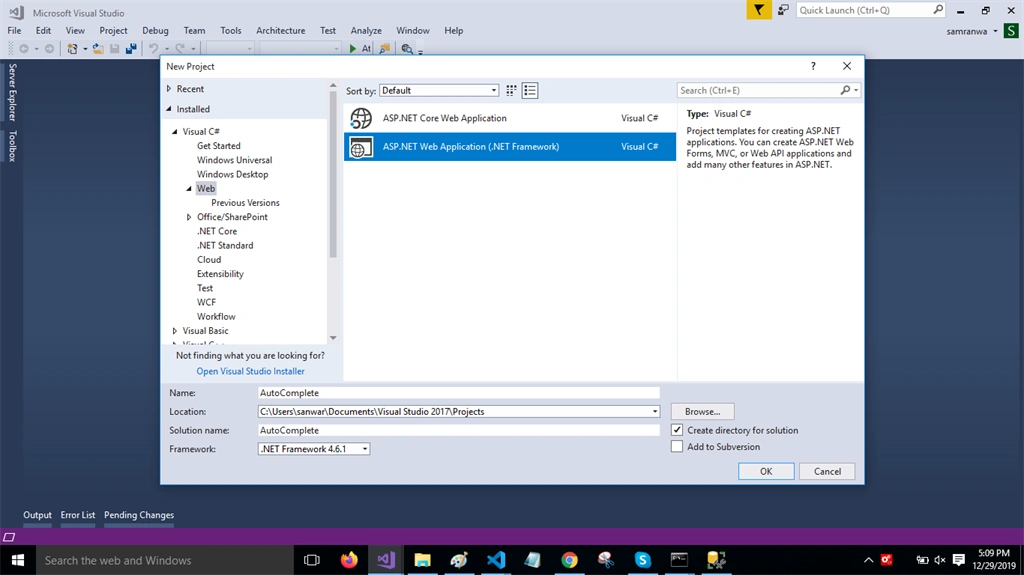
Change the name to autocomplete.
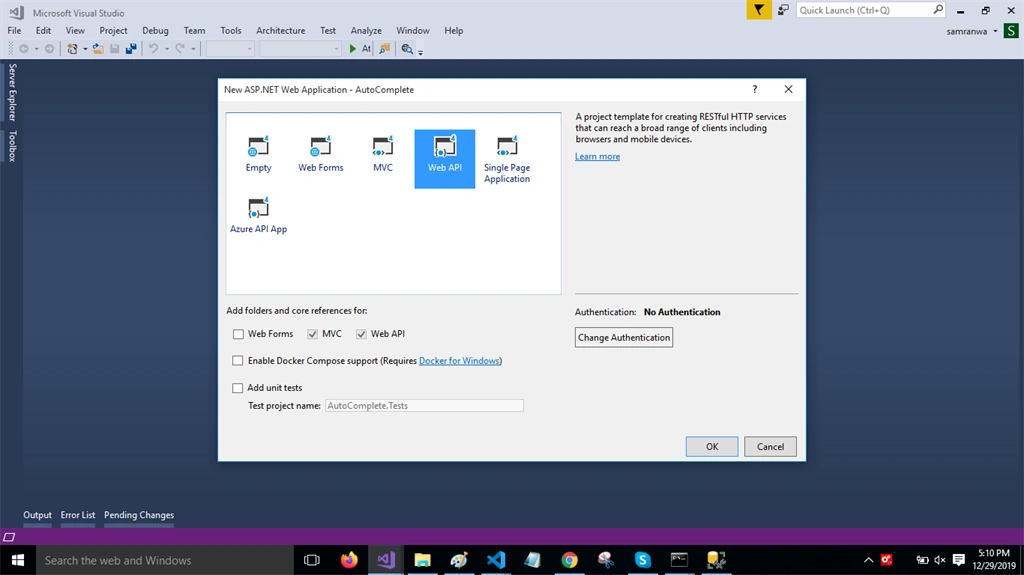
Choose the template as Web API.
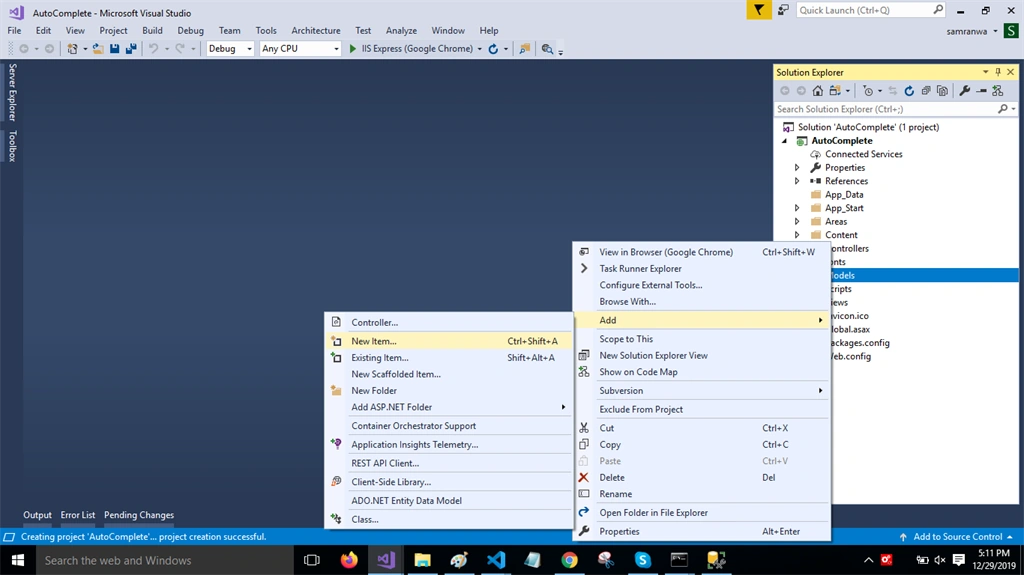
Right-click the Models folder from Solution Explorer and go to Add >> New Item >> data.
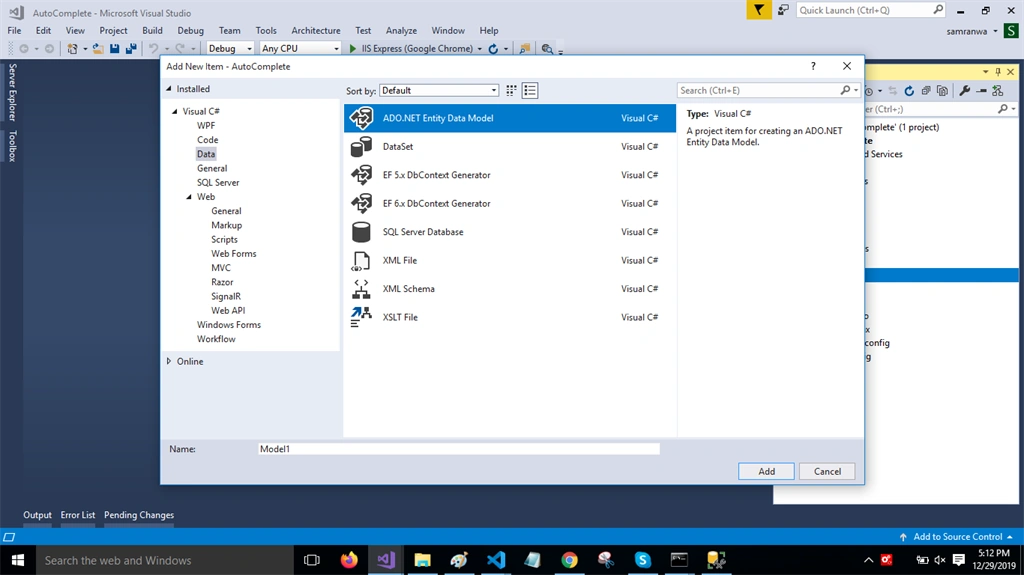
Click on the "ADO.NET Entity Data Model" option and click "Add".
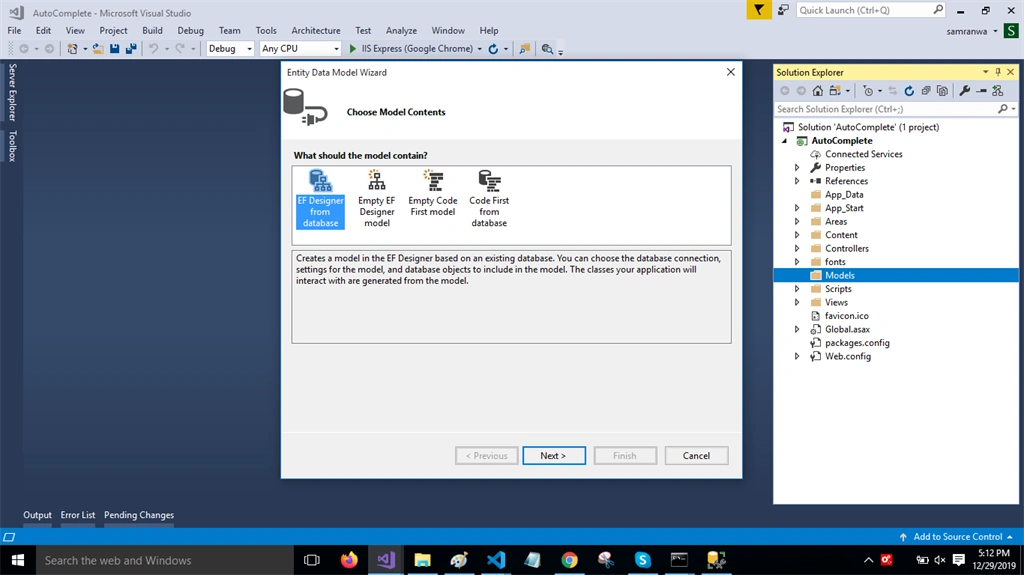
Select EF Designer from the database and click the "Next" button.
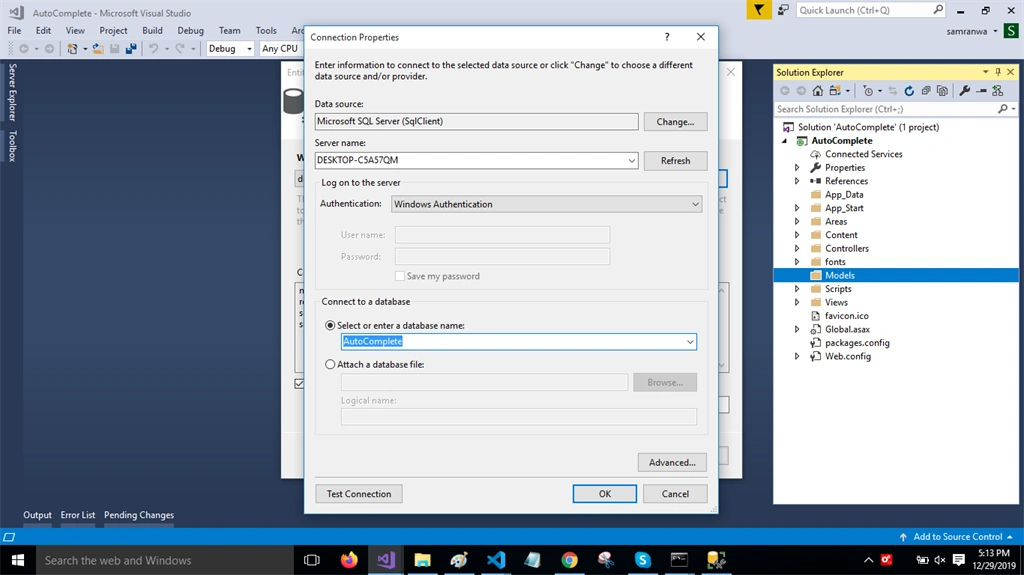
Add the connection properties and select database name on the next page and click OK.
Check the "Table" checkbox. The internal options will be selected by default. Now, click OK
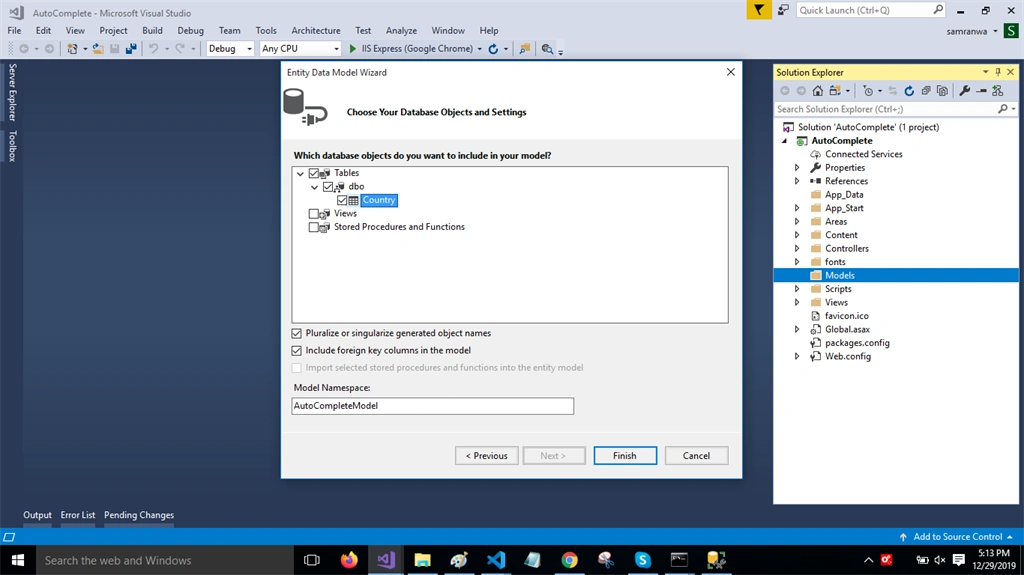
Now, our data model is successfully created.
Right-click on the Controllers folder and add a new controller. Name it as "Autocomplete controller" and add the following namespace in the Autocomplete controller.
- using AutoComplete.Models;
- public object Getrecord()
- {
- var data= DB.TblCountries.ToList();
- return data;
- }
Complete Autocomplete controller code
- using System;
- using System.Collections.Generic;
- using System.Linq;
- using System.Net;
- using System.Net.Http;
- using System.Web.Http;
- using AutoComplete.Models;
- namespace AutoComplete.Controllers
- {
- [RoutePrefix("Api/autoComplete")]
- public class AutoCompleteController : ApiController
- {
- AutoCompleteEntities2 DB = new AutoCompleteEntities2();
- [HttpGet]
- [Route("Countrylist")]
- public object Getrecord()
- {
- var data= DB.TblCountries.ToList();
- return data;
- }
- }
- }
Now, let's enable CORS. Go to Tools, open NuGet Package Manager, search for CORS, and install the "Microsoft.Asp.Net.WebApi.Cors" package. Open Webapiconfig.cs and add the following lines.
- EnableCorsAttribute cors = new EnableCorsAttribute("*", "*", "*");
- config.EnableCors(cors);
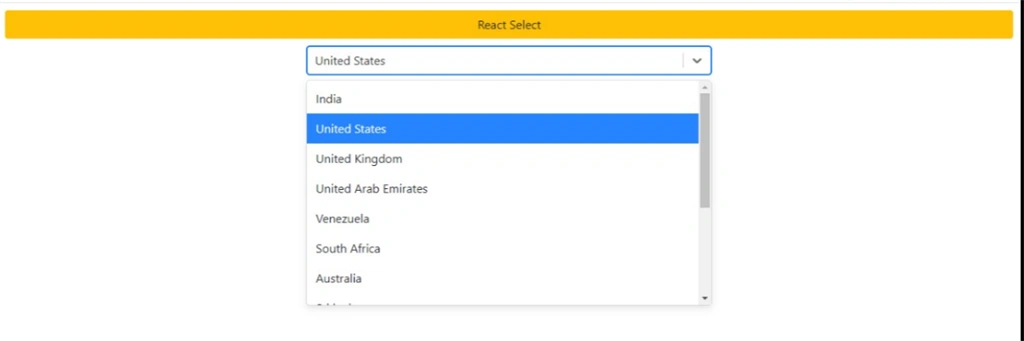
Now go to Visual Studio code and run the project by using 'npm start' command and check.
Summary
In this article, we learned how we can create searchable and multi select dropdown in React.js using react-select library.
Ashan SeneviratnePosted May 24, 2021, 4:01 PM
Hi, "AutoCompleteEntities2 DB = new AutoCompleteEntities2();" this line gives me an error. The error is "The type or namespace name could not be found (are you missing a using directive or an assembly reference?)"