

Introduction
Continuous Integration means automating the process of building and testing the code whenever a developer commits and pushes the code to source control. This commit will trigger an automated build process in Azure DevOps which will take the latest code from version control, will build it, and also runs tests on it (if configured).
The build pipeline in Azure DevOps includes the below steps (testing steps are not included in this article):
- Create a build definition
- Install NodeJS
- Restore npm packages
- Build the solution
- Package the solution
- Prepare the Artifacts
- Publish the Artifacts
Let’s discuss the above steps in detail:
Create a Build Definition
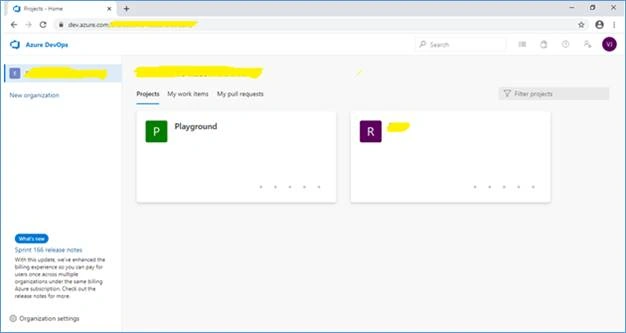
Log in to the Azure DevOps portal and select the project to set up a build definition. The below image shows the first screen when you log in to Azure DevOps.
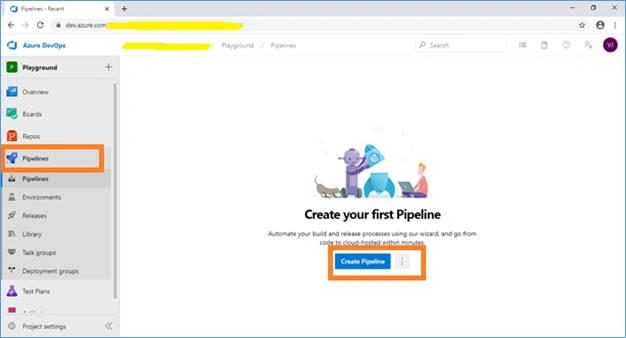
As shown in the below image, from the left navigation, select “Pipelines” and click on “Create Pipeline”.
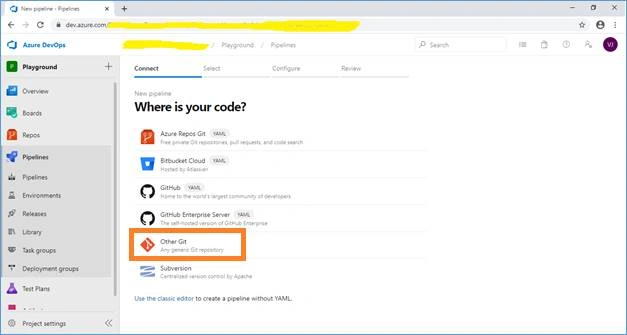
Selection the location where your code resides, as shown in the below image:
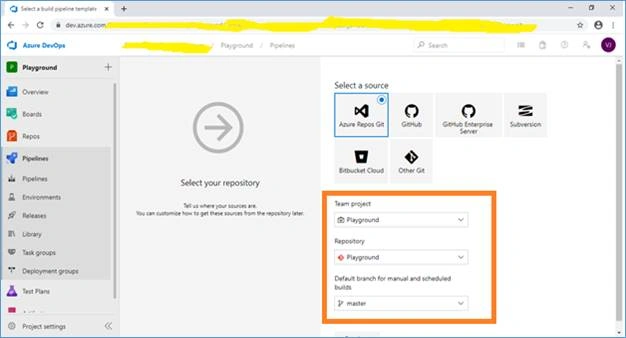
Select the source to connect to your source or code repository. Select your “Team Project”, “Repository” and “Branch” to build. Click on "Continue" for the next steps.
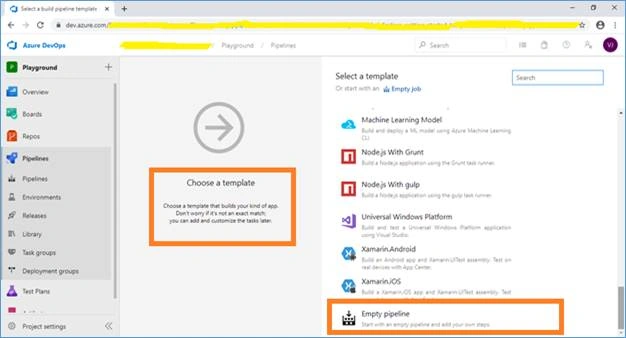
The next screen will be to select a template, select “Empty Pipeline” as shown in the below image:
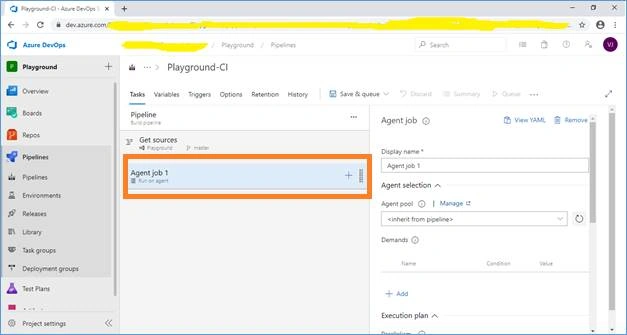
Every build definition has a default agent in which you can add multiple tasks:
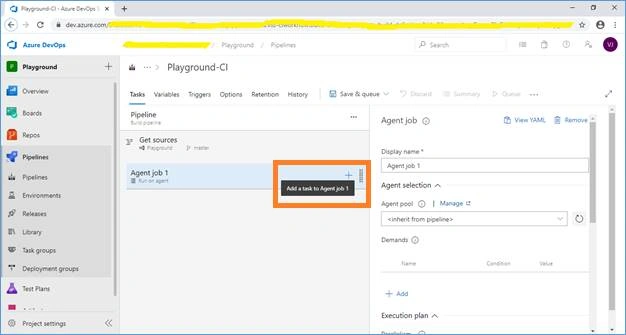
You can click on “+” to add multiple tasks in an agent, as shown in the below image:
Install Node JS
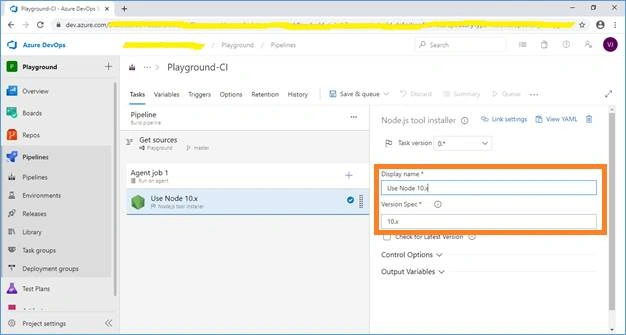
Add the Node.js Tool installer.
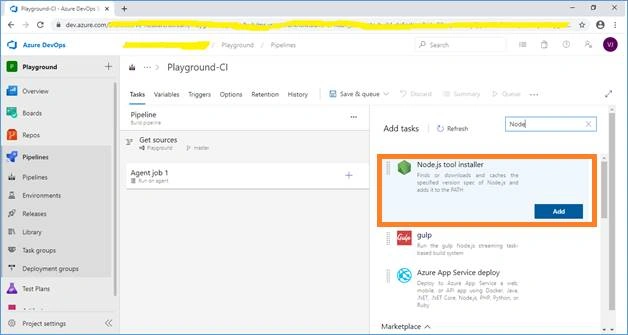
You can specify Node version as 10.x, or 8.x based on your project requirements, as shown in the below image:
Restore NPM Packages
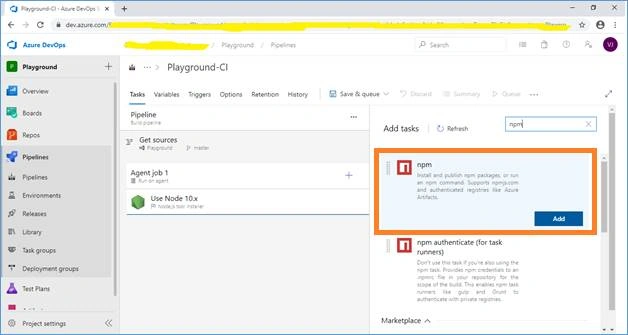
Add an npm task, as shown in the below image:
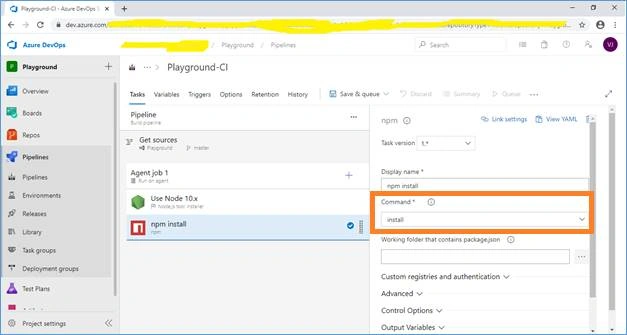
Make sure that the command is set to install, as shown in the below image:
Build the Solution
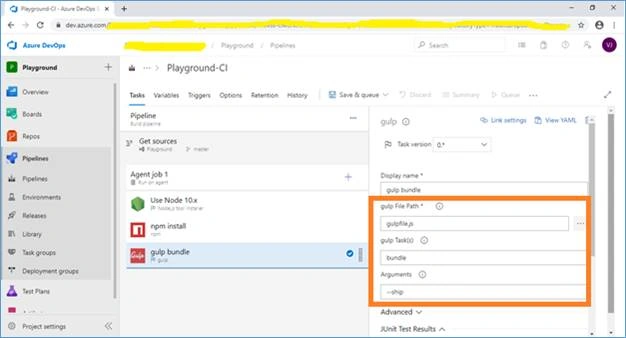
Build the SPFx solution using gulp tasks (add gulp task), as shown in the below image:
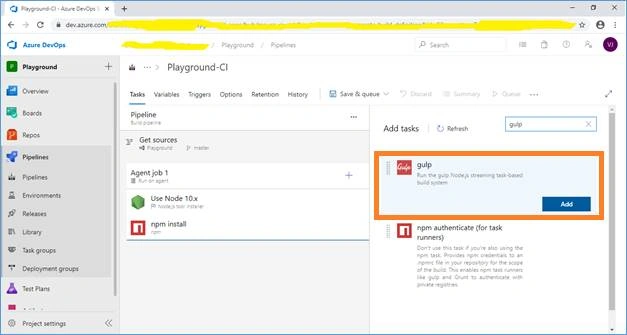
Set the Gulp file path to gulpfile.js. Set the Gulp task as a bundle. Set Gulp arguments to --ship.
Package the Solution
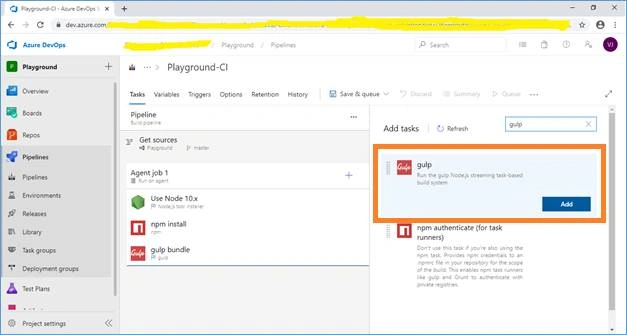
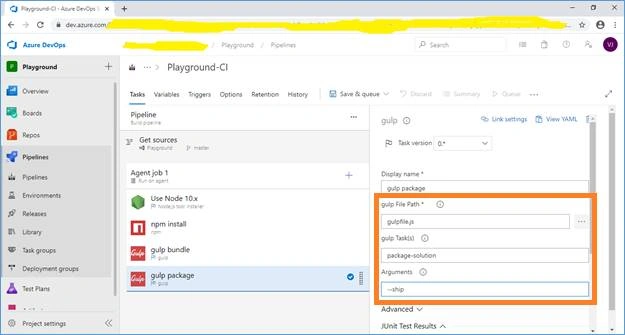
Add a gulp task to package your SPFx solution.
Set the Gulp file path to gulpfile.js. Set the Gulp task as package-solution. Set Gulp arguments to --ship.
Prepare the Artifacts
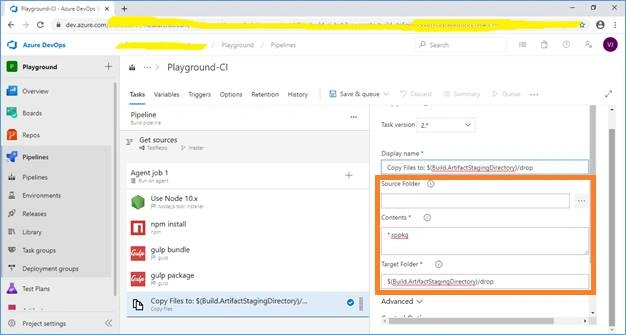
The .sppkg file created from the above steps needs to be copied to a staging directory to be given to release pipeline. For this, add Copy Files task, as shown in the below image:
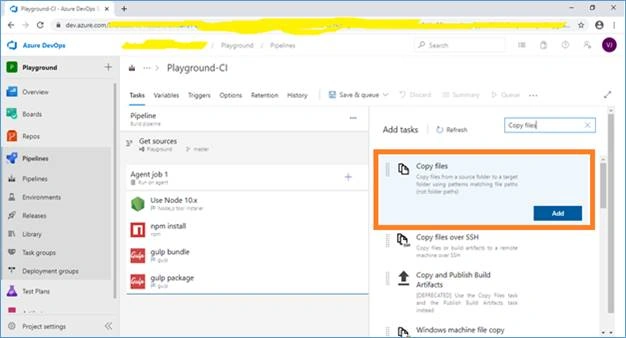
The Source Folder is optional, so you can keep it blank. Set “Contents” to *.sppkg. Set the target folder to $(Build.ArtifactStagingDirectory)/drop.
Publish the Artifacts
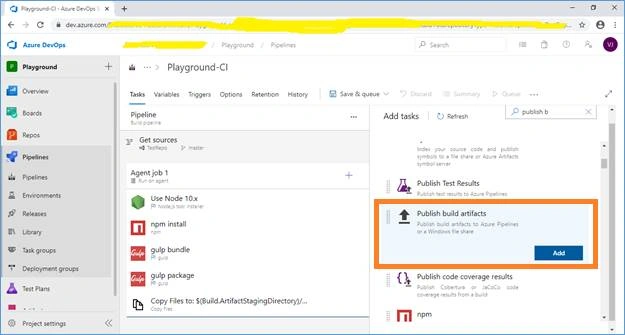
Azure DevOps will keep the files after build execution. Add the “Publish build artifacts” task, as shown in the below image:
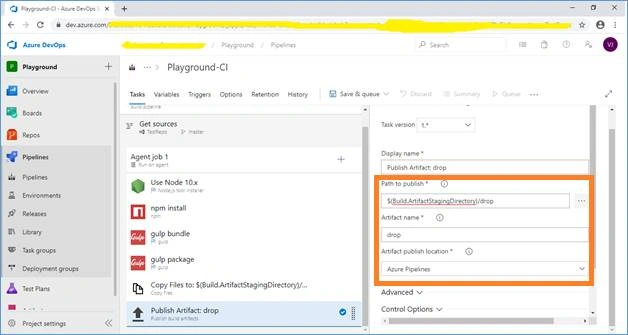
Set “Path to publish” to $(Build.ArtifactStagingDirectory)/drop. Set “Artifact name” to drop.
Save the build configuration, as shown in the below image:
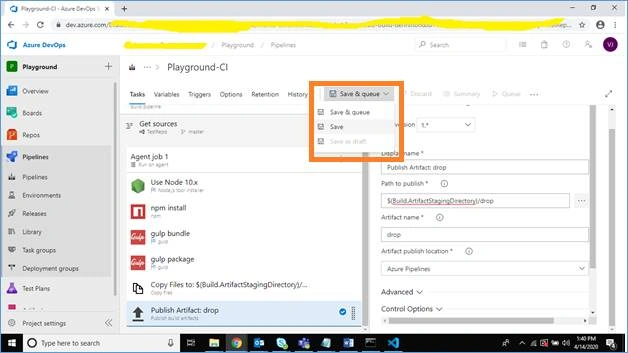
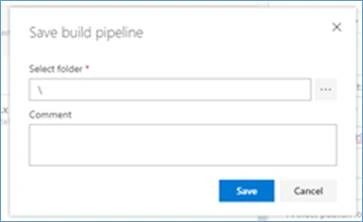
Once you will click on “Save”, a pop up will open (as shown in below image) which will ask the folder path where build pipeline should be saved:
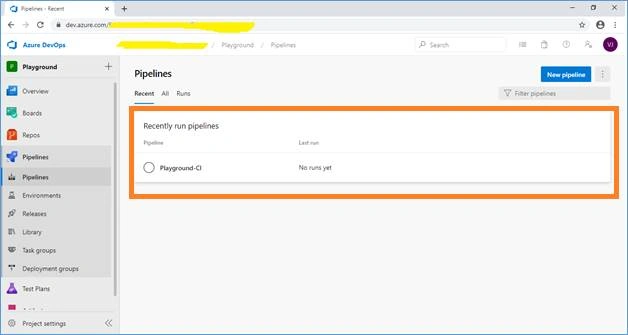
Once the pipeline will be saved, it will be visible in the recently added pipelines, as shown below:
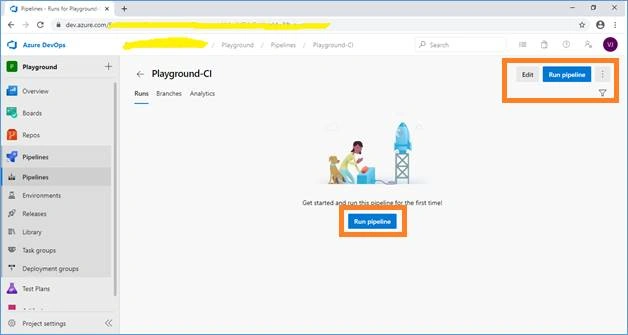
Once you will select the pipeline, you will get an option to run the pipeline, as shown in the below image:
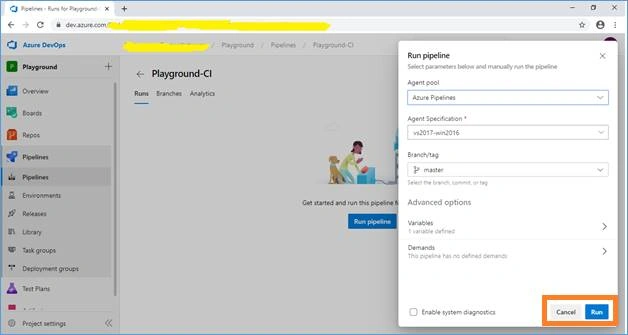
Once you click on “Run Pipeline” button, then the below details will be required to fill the form and run it:
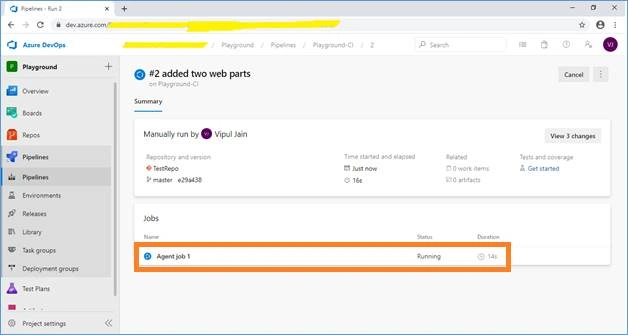
The below image shows that the pipeline is running in Azure DevOps:
Summary
In this article, we discussed how you can implement the continuous integration of code using Azure DevOps, which helps to automate SPFx solution builds.
Join the conversation! Your thoughts help the community grow.