

Amazon Simple Queue Service (SQS) is a fully managed message queuing service that helps applications communicate asynchronously. It allows you to send, store, and receive messages between software components without losing messages.
In this article, we’ll walk through how to use Amazon SQS step by step.
Step 1. Sign in to AWS and Open SQS.
- Go to the AWS Management Console.
- Search for SQS in the search bar.
- Click on Simple Queue Service to open the SQS Dashboard.
Step 2. Create an SQS Queue.
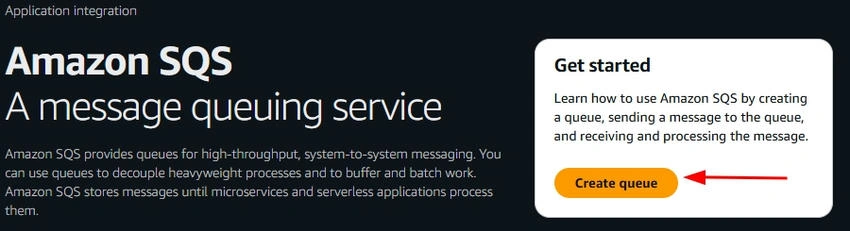
- Click on Create Queue.
- Choose the queue type based on your needs.
- Standard Queue (default, allows unlimited throughput)
- FIFO Queue (ensures messages are processed in order)
- Give your queue a Name.
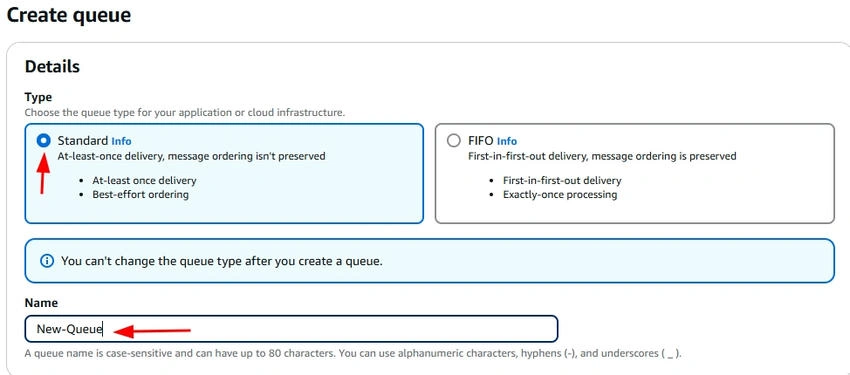
- Keep the other settings as default unless needed.
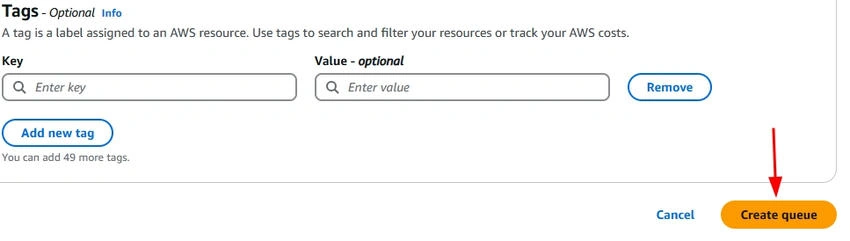
- Click Create Queue.
Step 3. Send a Message to the Queue.
- Select your newly created queue.
- Click on Send and receive messages.

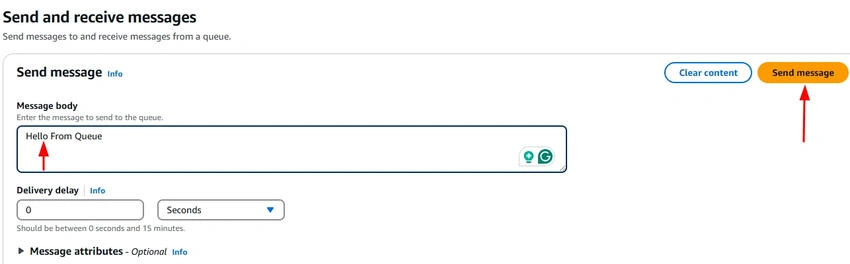
- In the Message body field, type a sample message.
- Click Send Message.
Step 4. Receive and Process Messages.
- In your queue, click Poll for messages.
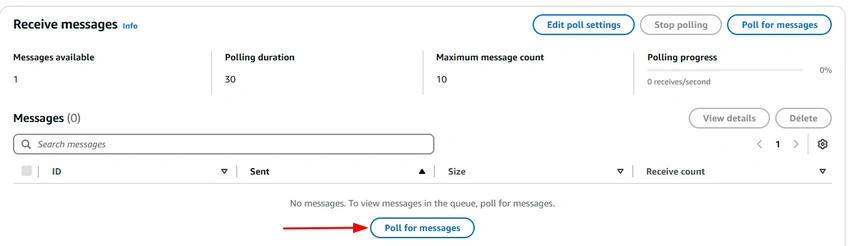
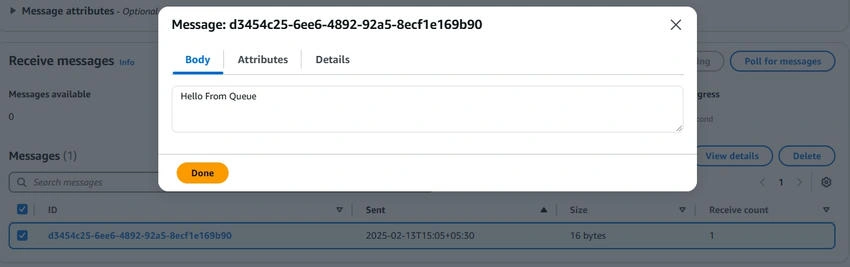
- If there are messages in the queue, they will appear in the list.
- Click on a message to view its details.
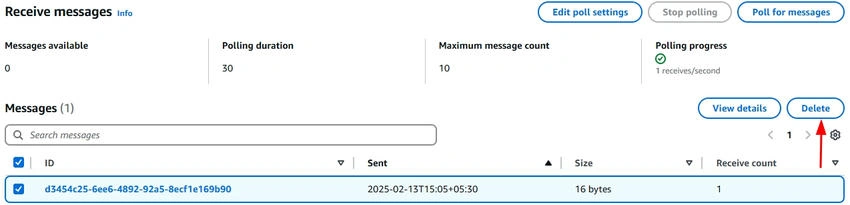
- You can delete the message by clicking Delete Message after processing.
Conclusion
Amazon SQS makes it easy to send, store, and receive messages between application components. By following these simple steps, you can set up a queue, send messages, and process them efficiently, helping improve your application's performance and reliability.
Join the conversation! Your thoughts help the community grow.