

Introduction
Requirements
- Android Studio version 2.3.3
- Little bit XML and JAVA knowledge.
- Android Emulator (or) Android mobile
- Download link (Android Studio)
Steps to be followed
Follow these steps to create an application that starts the camera in Android. I have included the source code below.
Step 1
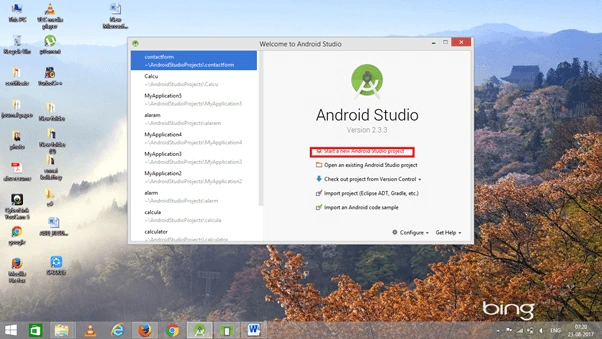
Open Android Studio and start a new Android Studio Project.
Step 2
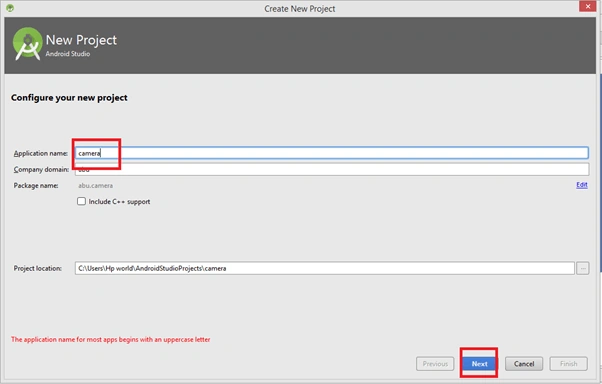
You can choose your application name and choose where your project is stored on the location. If you wish to use C++ for coding the project, mark the "Include C++ support", and click the "Next" button.
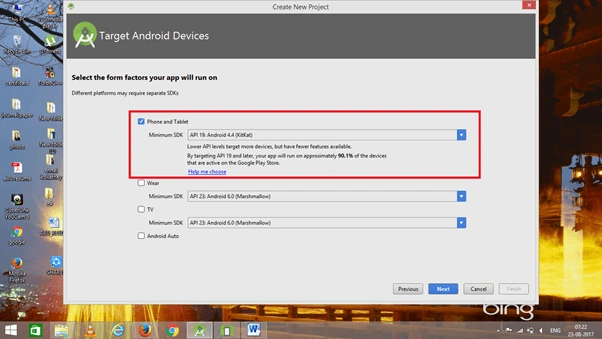
 Now, select the version of Android and select the target Android devices.
Step 3
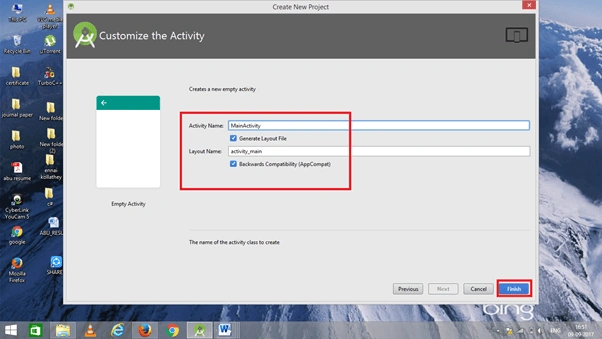
Now, add the activity and click the "Next" button.
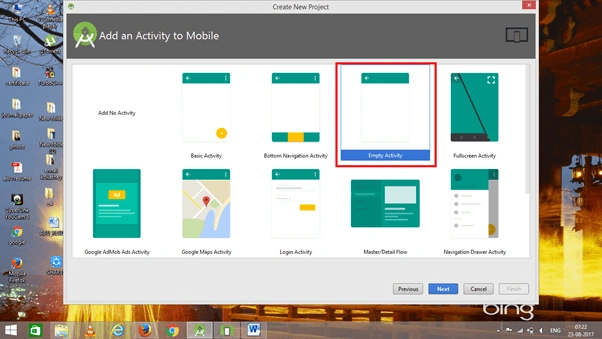 Add activity name and click "Finish".
Step 4
Go to activity_main.xml, This XML file contains the designing code for your Android app.
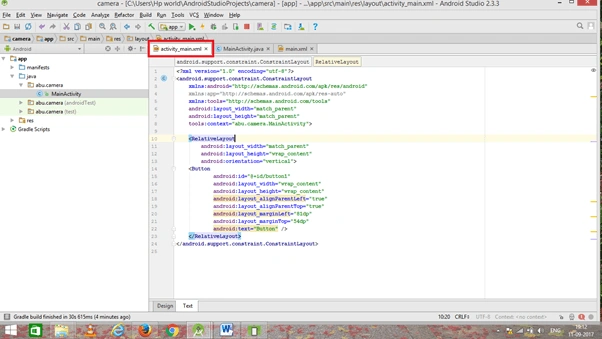 The XML code is given below.
- <?xml version="1.0" encoding="utf-8"?>
- <android.support.constraint.ConstraintLayout
- xmlns:android="http://schemas.android.com/apk/res/android"
- xmlns:app="http://schemas.android.com/apk/res-auto"
- xmlns:tools="http://schemas.android.com/tools"
- android:layout_width="match_parent"
- android:layout_height="match_parent"
- tools:context="abu.camera.MainActivity">
- <RelativeLayout
- android:layout_width="match_parent"
- android:layout_height="wrap_content"
- android:orientation="vertical">
- <Button
- android:id="@+id/button1"
- android:layout_width="wrap_content"
- android:layout_height="wrap_content"
- android:layout_alignParentLeft="true"
- android:layout_alignParentTop="true"
- android:layout_marginLeft="81dp"
- android:layout_marginTop="54dp"
- android:text="Button" />
- </RelativeLayout>
- </android.support.constraint.ConstraintLayout>
Step 5
Go to Main Activity.java. This Java program is the backend language for the Android app.
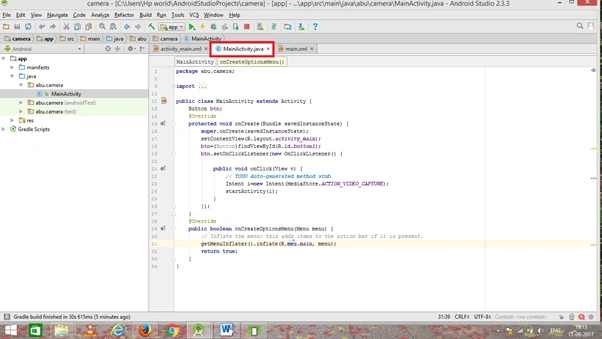 The Java code is given below.
- package abu.camera;
- import android.app.Activity;
- import android.content.Intent;
- import android.os.Bundle;
- import android.provider.MediaStore;
- import android.view.Menu;
- import android.view.View;
- import android.view.View.OnClickListener;
- import android.widget.Button;
- public class MainActivity extends Activity {
- Button btn;
- @Override
- protected void onCreate(Bundle savedInstanceState) {
- super.onCreate(savedInstanceState);
- setContentView(R.layout.activity_main);
- btn=(Button)findViewById(R.id.button1);
- btn.setOnClickListener(new OnClickListener() {
- public void onClick(View v) {
- // TODO Auto-generated method stub
- Intent i=new Intent(MediaStore.ACTION_VIDEO_CAPTURE);
- startActivity(i);
- }
- });
- }
- @Override
- public boolean onCreateOptionsMenu(Menu menu) {
- // Inflate the menu; this adds items to the action bar if it is present.
- getMenuInflater().inflate(R.menu.main, menu);
- return true;
- }
- }
Step 6
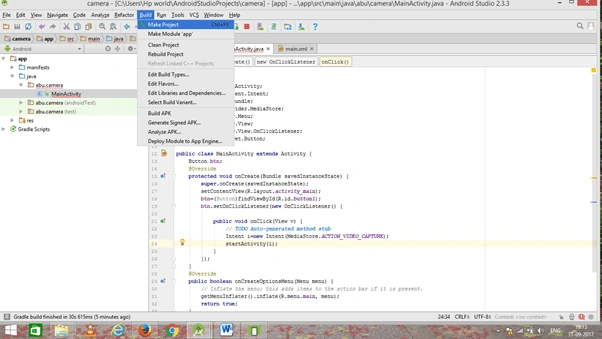
Now, go to the menu bar and click "Make Project" or press ctrl+f9 to debug the errors.
Step 7
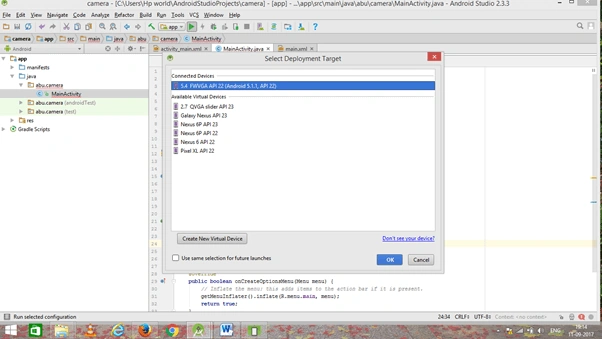
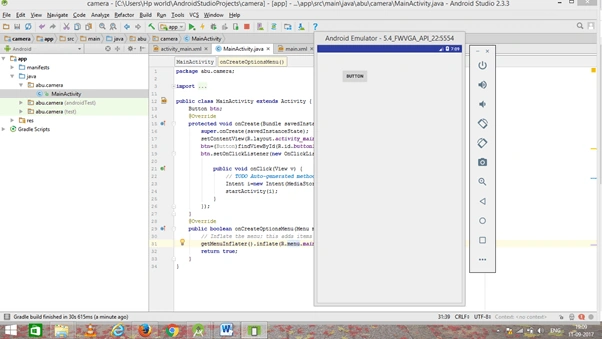
Then, click the "Run" button or press shift+f10 to run the project. Choose the "virtual machine" option and click OK.
Conclusion
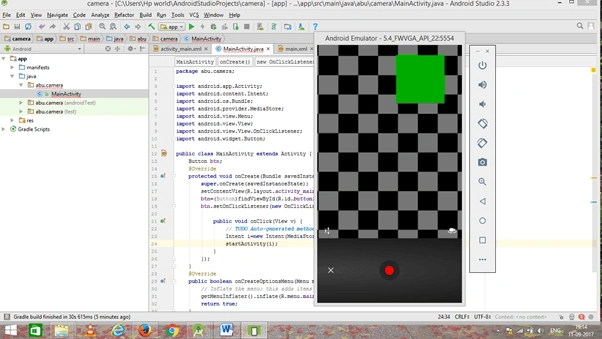
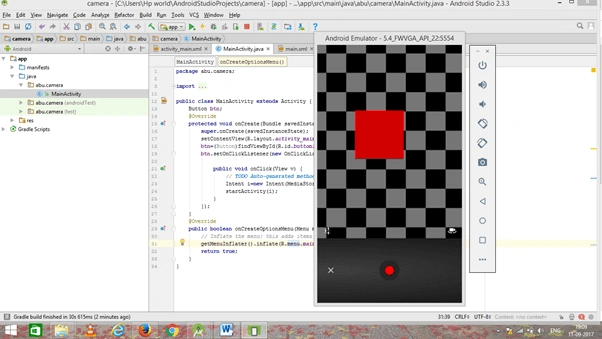
We have successfully created an app that starts the camera in Android.
Shans SecondPosted Jan 29, 2021, 12:09 AM
How do I add a custom flash function that flashes any color I want?
SANTHOSH KPosted Aug 6, 2019, 12:36 AM
Bro., how to set boundary box in camera app using android studio..
malik ghayoorPosted Oct 24, 2018, 9:31 AM
Please guide how to sotre this capture image and display on next screen
Mona aPosted Oct 8, 2018, 12:04 AM
May you please send me the code, this is my email [email protected]
khansa artPosted Oct 5, 2018, 2:39 PM
I m khansa I need the camera app code..
Abubackkar ShithikPosted Feb 8, 2018, 8:44 PM
Mail me on [email protected]
Aravind RajagopalanPosted Feb 8, 2018, 9:13 AM
Hi my name is Aravind Rajagopalan i need image capture code in android
Abubackkar ShithikPosted Oct 16, 2017, 2:47 PM
Send me u r mail I'd
Manish PatilPosted Oct 16, 2017, 1:17 AM
Hi, I have an application which streams the audio and video from the android mobile. I want to add an login page from a webpage from my website (on shared linux hosting) before the app starts such that the user will have to login and then he can use the app so that only my authorised people can use the app. Please sms or whatsapp your email to me at 7020404018 so that I can give you any other required details and contact you. Regards