

Introduction
In this article, we will explore Xcode, a software development tool where we will be doing our code to develop an iOS application. Xcode has a lot of features that we are not going to use. Here we will discuss some of the features we will use whenever we create an iOS app. In this article, we are going to download and install Xcode first. If you don't have Xcode, then we will set up our first iOS project. Here we will also discuss some tips, so let's get started.
Installation of Xcode
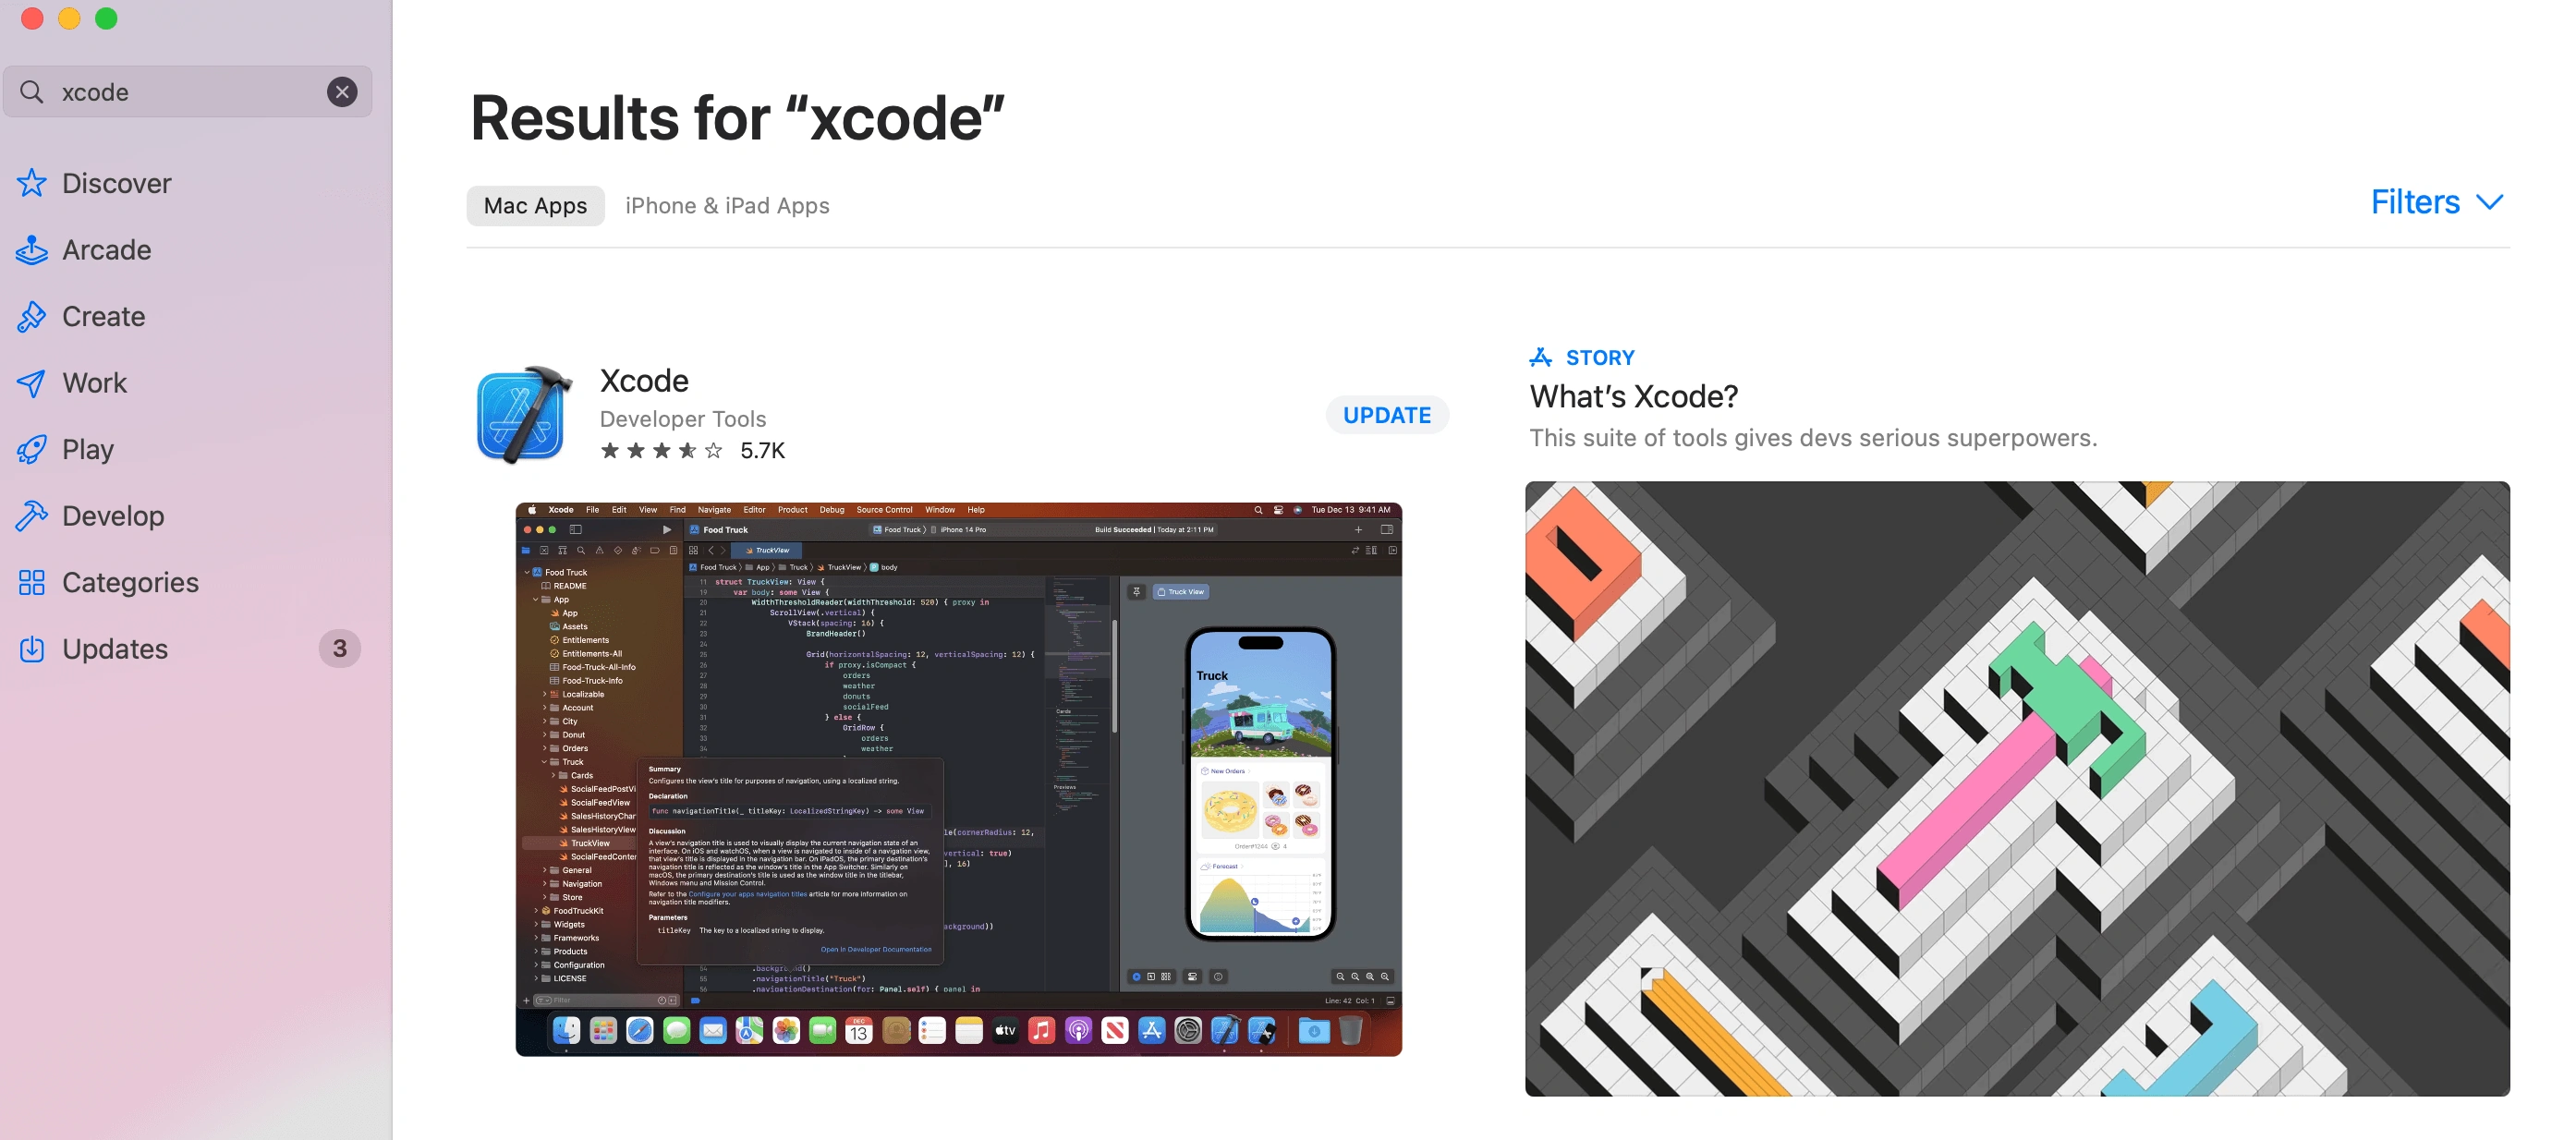
Here we are going to download our Xcode application. Open your AppStore on your mac and search for Xcode. It will come first in your search results because it is the most used tool to develop iOS applications developed by Apple. Here I have already downloaded the Xcode app, which is why it shows me to update. If you haven't downloaded it will show you get, so click on get and download the App. It will take a few minutes because this is a pretty big file.
Setting up Xcode for a new SwiftUI project
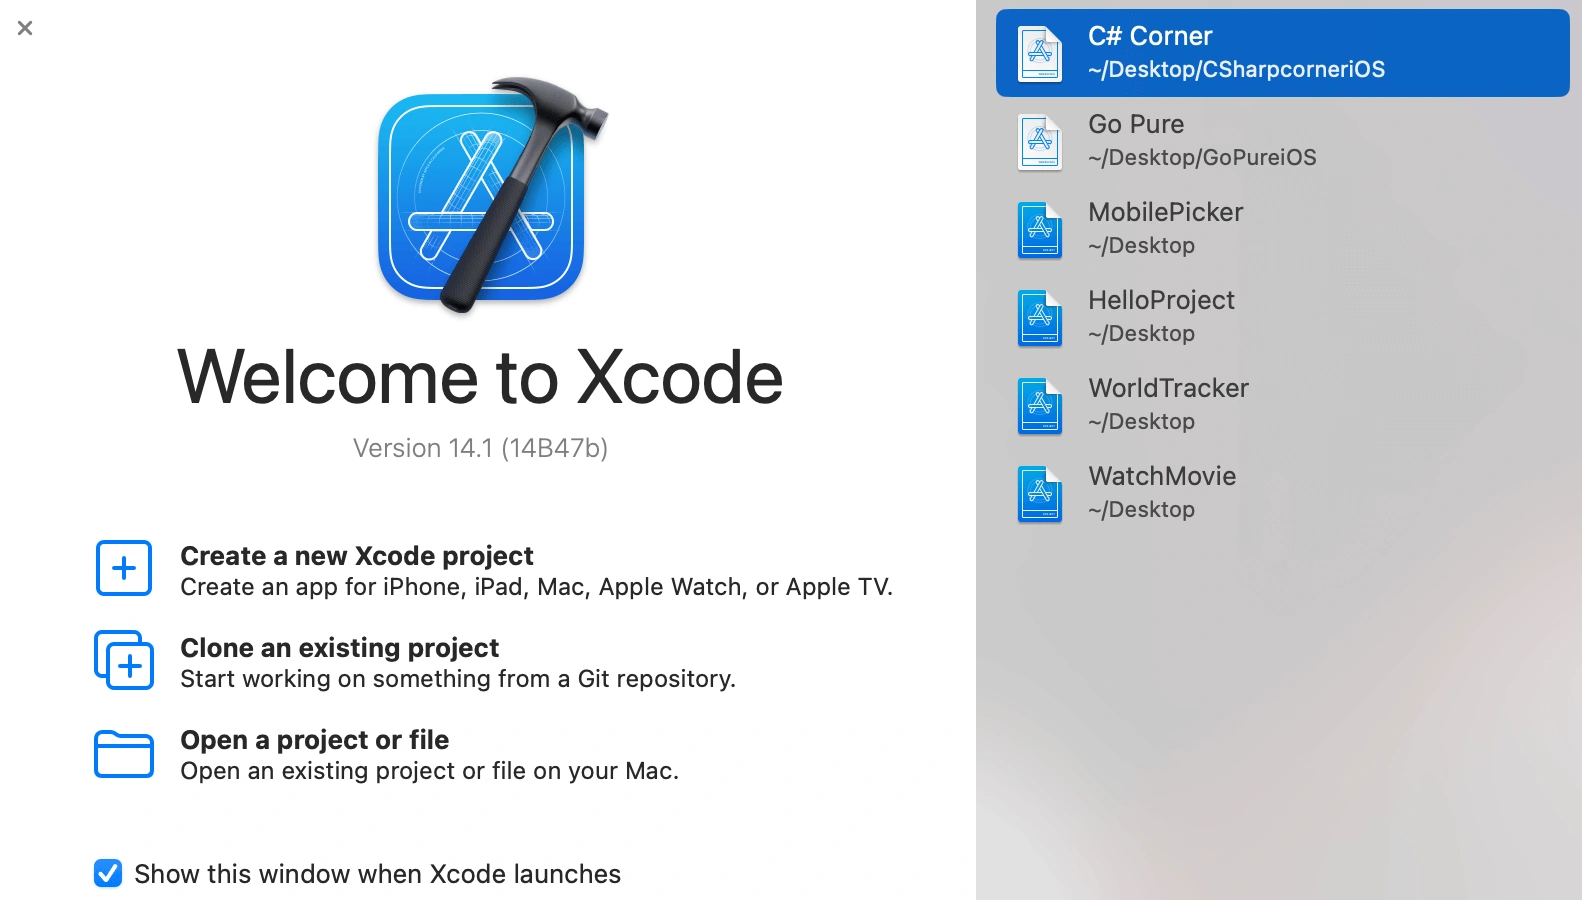
Once you have downloaded Xcode, open it and create a new project.
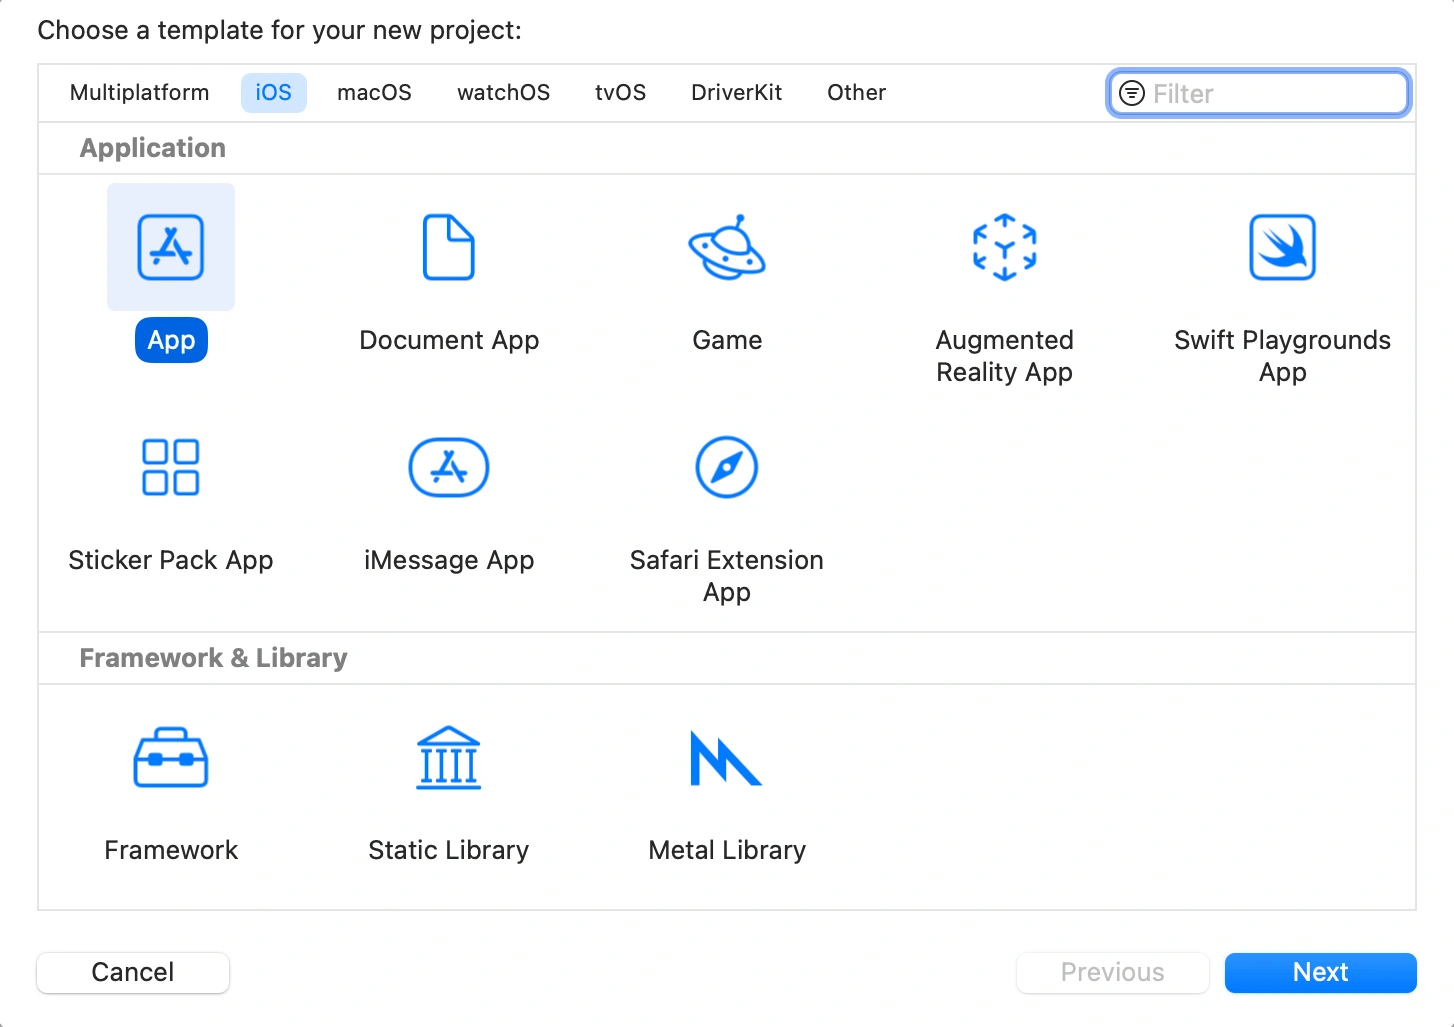
When you arrive at the screen asking what kind of project you want to create, you will see options for regular, augmented reality (AR), gaming, iMessage apps, and more. Clicking on any one of these will create a starter template. At the top, you will see options for iOS, macOS, watchOS, tvOS, and others, indicating which platform you want to create your application for. We will create a regular iOS app for this article, so select "iOS" from the top navigator.
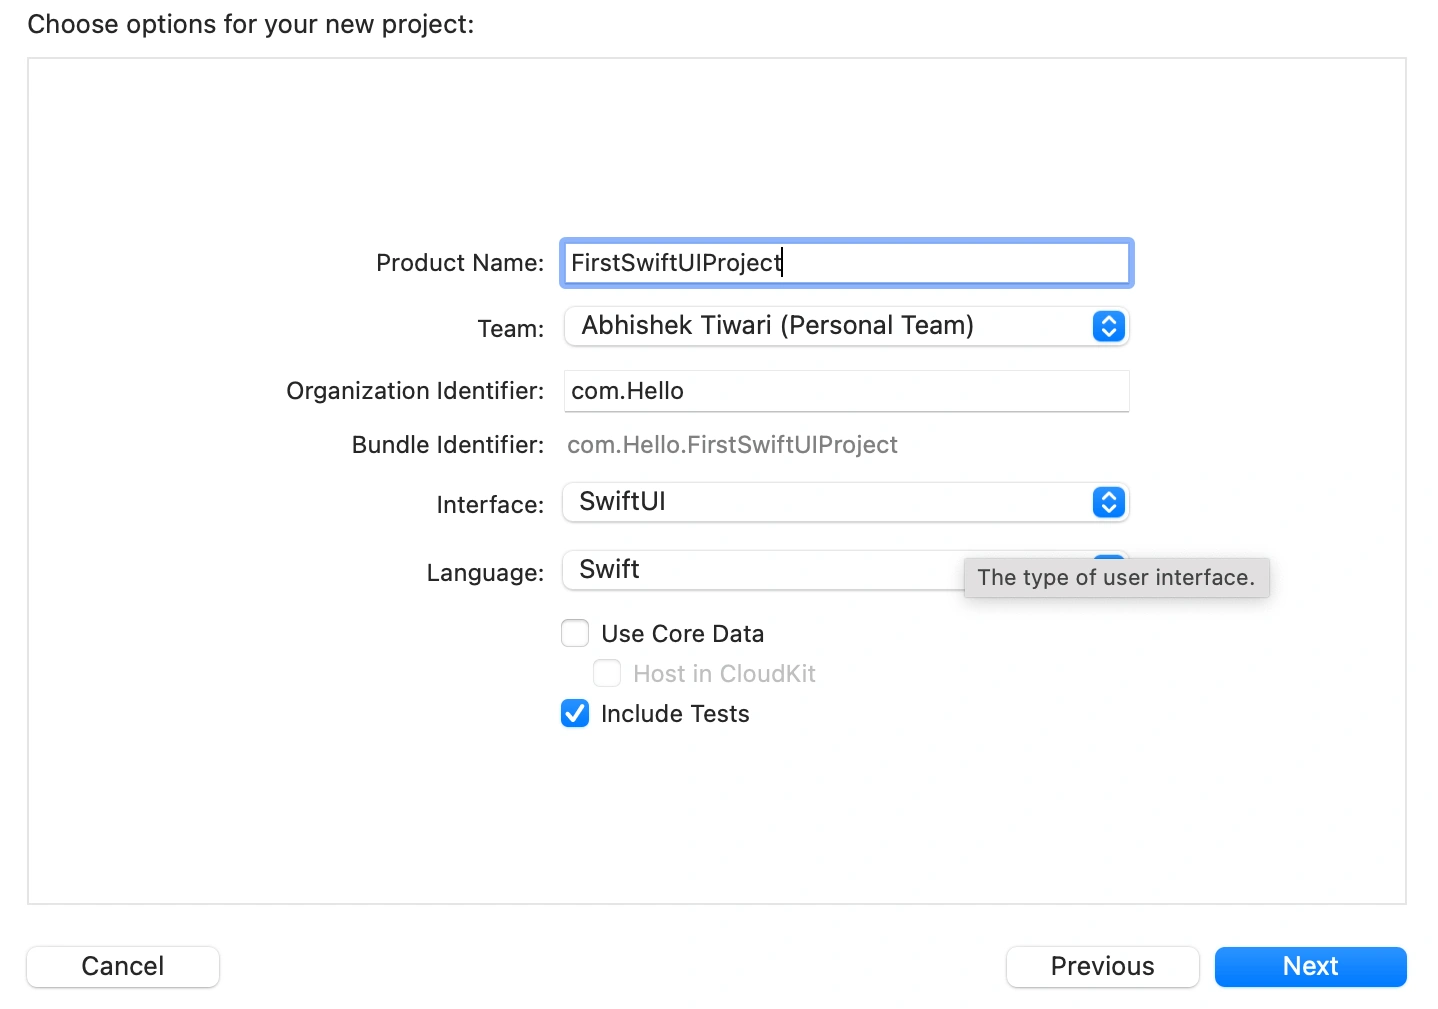
When you click "Next," you will see a screen asking for the project name. I have named my project "FirstSwiftUIProject," but you can give your project any name you like. If you want to push your iOS app to the App Store, you will need to select a Development Team. However, since we are creating a simple SwiftUI app, we can select "None" for now. You will also see two options for the interface: SwiftUI and Storyboard. The Storyboard option is for creating a UIKit app, but since we are creating a SwiftUI project, we will select SwiftUI as the interface.
Creating First iOS App In SwiftUI
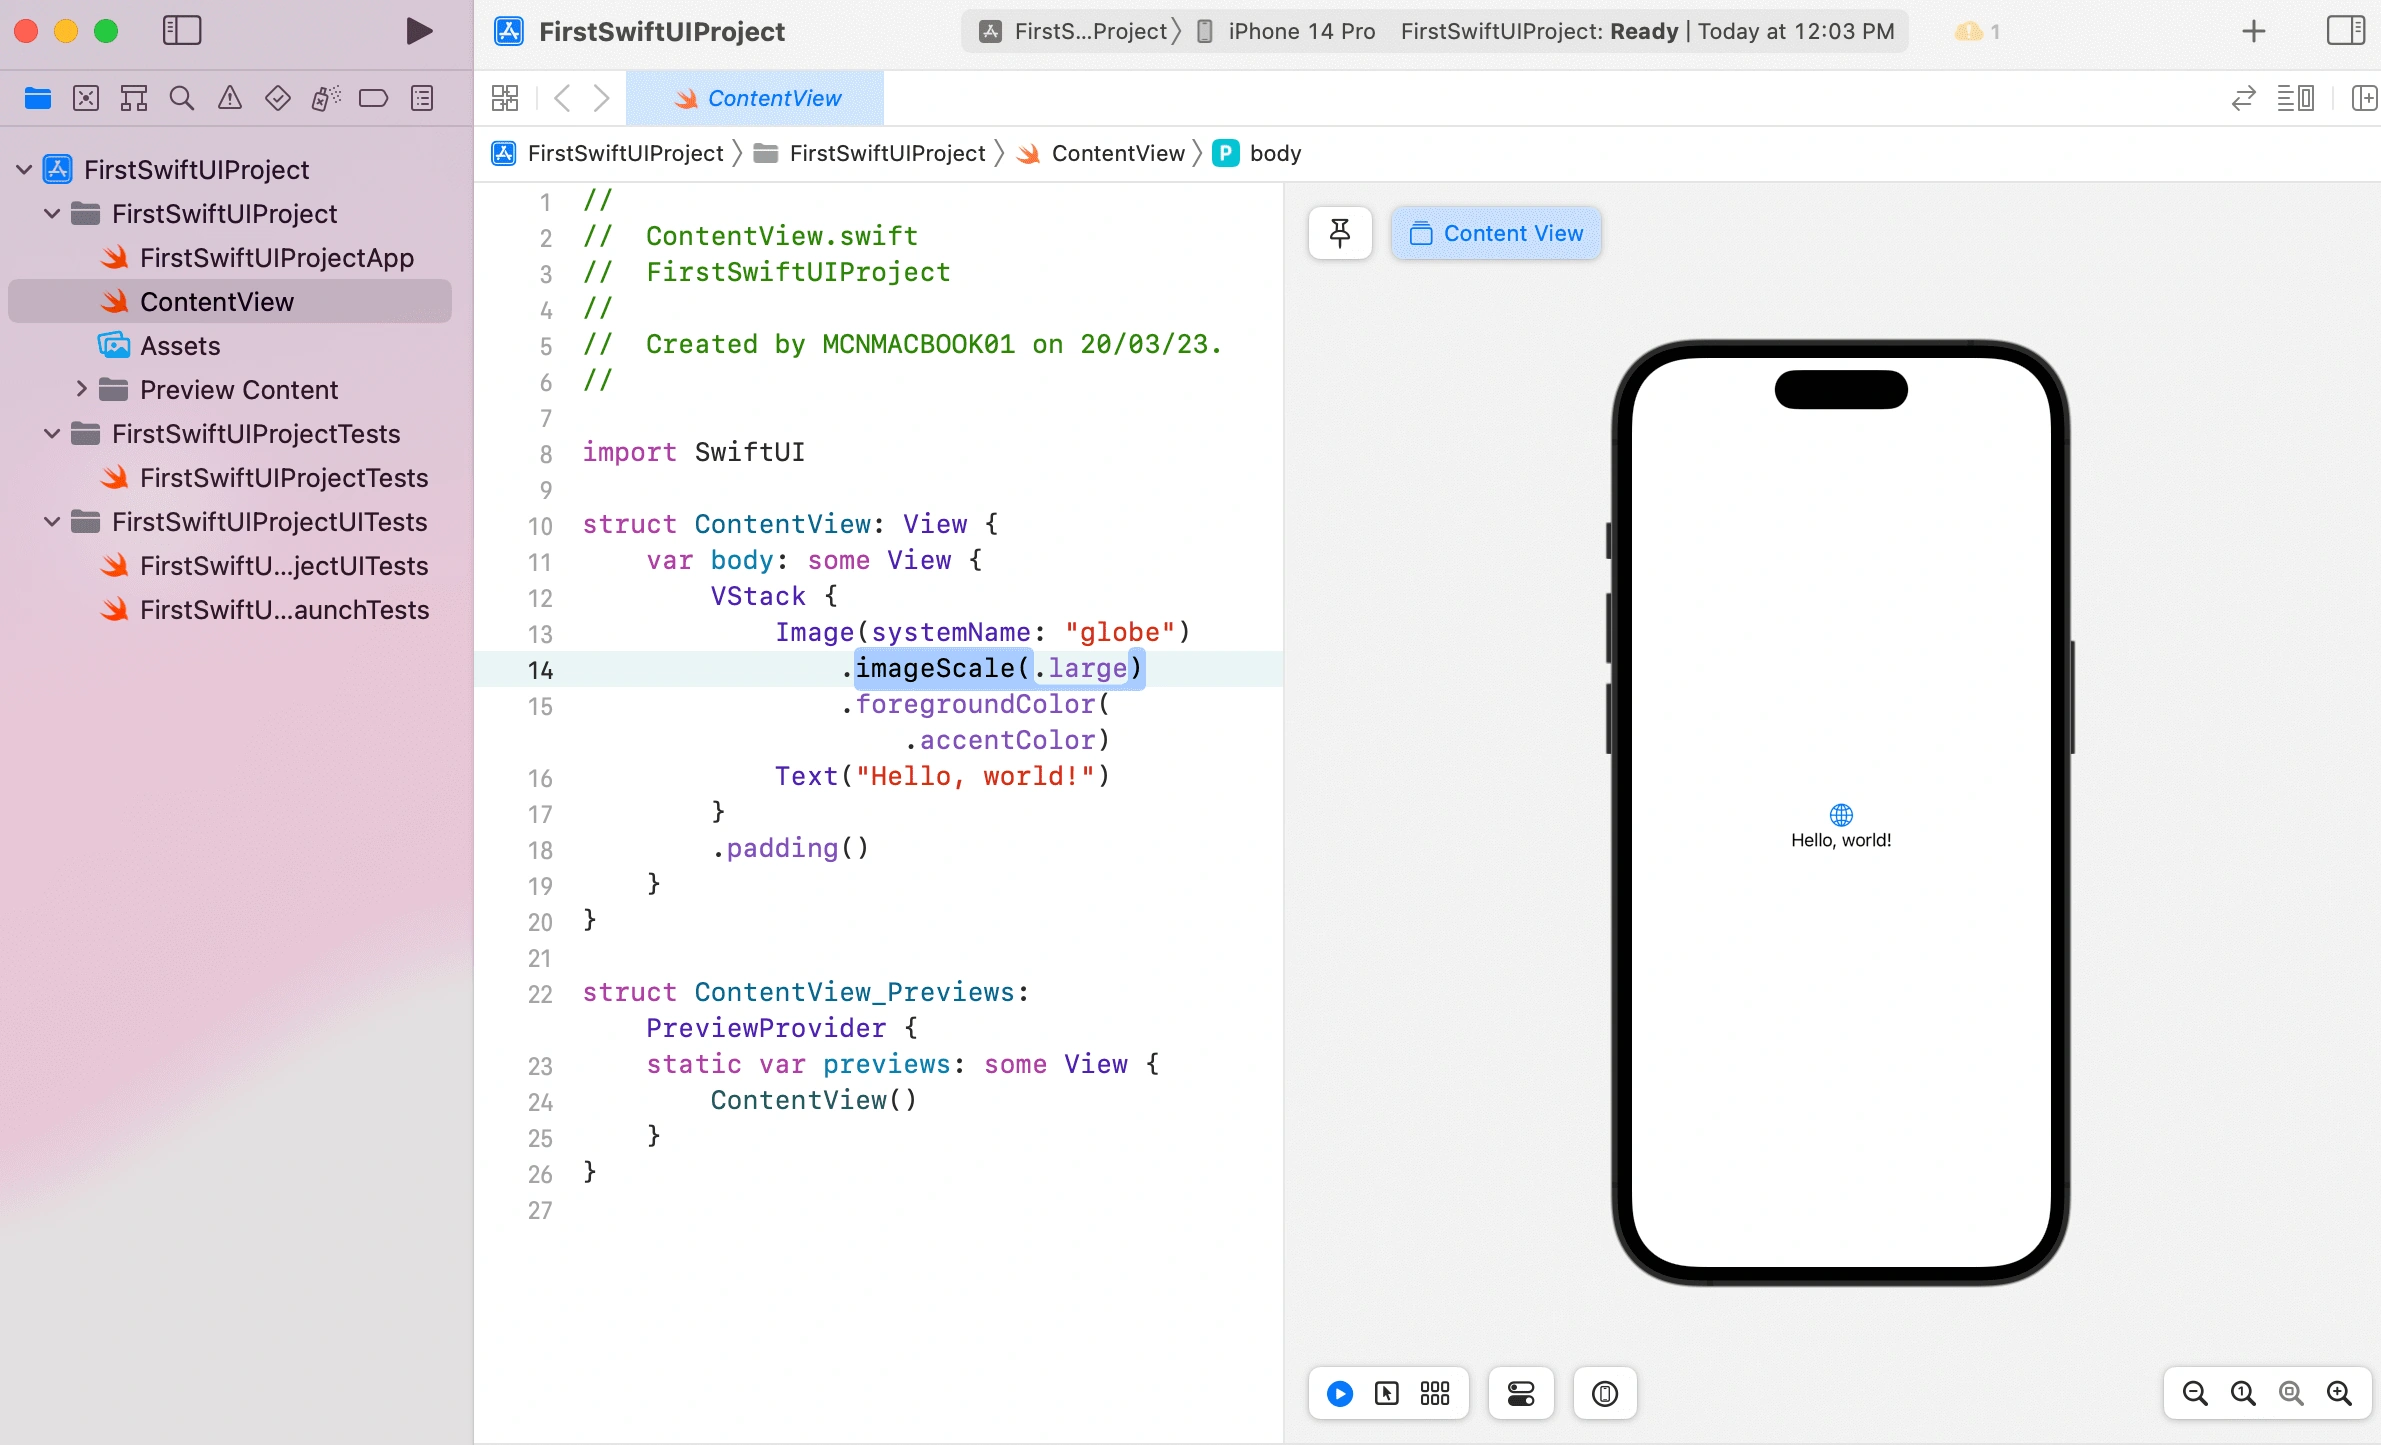
- After setting up our project, we will see a screen previewing our iOS app running on an iPhone 14 Pro Max on the right side. You can change your simulator by selecting a different iPhone or iPad model from the top middle.
- On the left side, you will see the ContentView file in the file navigator. You can also hide this by clicking the top left button. In the center, you will see the ContentView file code. We can see the PreviewProvider, which controls the preview screen on the right side. If we remove this code, the preview screen will disappear.
- On the left side, we have an assets file where we can place all our images, colors, and other resources that we will use throughout the project. In the middle, we have the ContentView structure, which inherits View. To inherit this view, we have to declare a protocol. Otherwise, we will receive an error.
- Here we have a body where we will create our UI. We have a VStack, a container that arranges its components vertically. We will cover stacking views in a future article. We also have an Image where we are using a system image, "globe." We also have some view modifiers on the Image, which we will explain in a future article. Finally, we have a Text component, which displays the text "Hello World." These two components are placed vertically because we have placed them inside a VStack.
- Here we have a body where we will create our UI. We have a VStack, which is a container that arranges its components in vertical order. We then have an Image where we use a system image, "globe". We will know about the stacking view in our following articles.
- We also have some view modifiers on the Image. We will understand what is View modifiers in the next articles. We also have a Text showing the text "Hello World". Both components are placed vertically because we have taken VStack.
- If we change the text, the preview on the right will automatically update. We can see the changes in real-time without running our app. This is one of the benefits of using SwiftUI, as it allows us to develop apps more quickly.
- We can run our app using (Command + r) or click on the triangle button to give us a simulator. It is a virtual iPhone device we can verify that our Views are showing correctly. So this is how we can create our first app.
Conclusion
Here we have learned how to install and create our SwiftUI project. We have also explored some of Xcode's features to create an iOS app. So this was all about understanding the Xcode tool. We will learn all components of SwiftUI to create a beautiful iOS app. So that's all for this article hope you enjoyed it a lot. Please follow for the next coming articles.
Thank you!
Join the conversation! Your thoughts help the community grow.