

One of the most common scenarios for Power BI users is connecting to a SQL Server database. Power BI makes it easy to pull in tables or write custom queries, and with Import Mode, you can benefit from lightning-fast performance using Power BI’s in-memory engine.
In this article, we’ll walk through the end-to-end process of ingesting data from SQL Server into Power BI using Import Mode.
Why Use Import Mode with SQL Server?
Before diving into the steps, let’s quickly highlight why Import Mode is a good fit for SQL Server:
High performance thanks to Power BI’s VertiPaq engine.
Offline access—data is stored in the Power BI file.
Rich modeling features—supports advanced DAX, time intelligence, and complex relationships.
Great for dashboards that don’t need second-by-second real-time updates.
If your data can be refreshed on a scheduled basis (daily, hourly, or a few times a day), Import Mode is usually the best choice.
Prerequisites
Before we begin, make sure you have:
Power BI Desktop installed (free download from the Microsoft Power BI site).
Access to a SQL Server database (local or remote).
Server name and database name (plus login credentials if needed).
Step 1. Launch Power BI Desktop
Open Power BI Desktop. On the Home ribbon, click Get Data.
Step 2. Choose SQL Server as the Data Source
In the Get Data window, select SQL Server database.
Click Connect.
Step 3. Enter Connection Details
A dialog box appears where you’ll enter the SQL Server connection details:
Server: Enter your SQL Server instance name (e.g.,
ABIOLADAVID,MyServer\SQL2019, or a remote server address).Database: Enter the database name (optional—you can leave it blank to see all databases).
For Data Connectivity Mode, make sure to select:
👉 Import
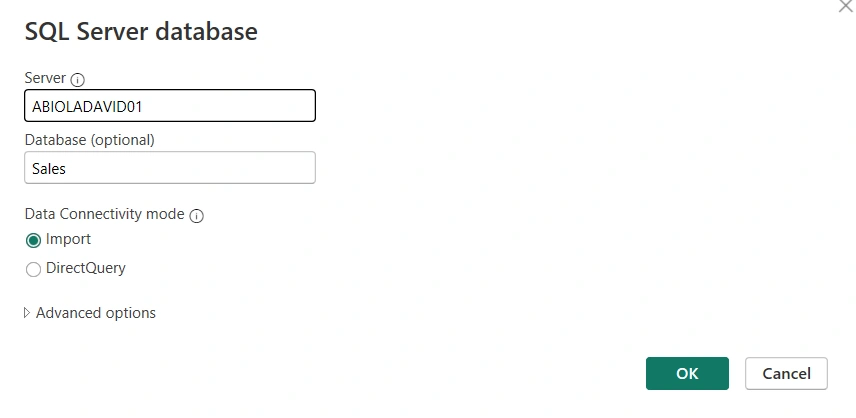
(This ensures Power BI copies the data into its in-memory model instead of querying the database directly.)
Click OK.
Step 4. Authenticate
Choose the authentication method:
Windows Authentication – if your SQL Server uses your Windows login.
Database Authentication – enter a SQL username and password.
Microsoft Account / Other – depending on your setup.
Click Connect.
Step 5. Select Tables or Write a Query
Power BI will now show the Navigator window:
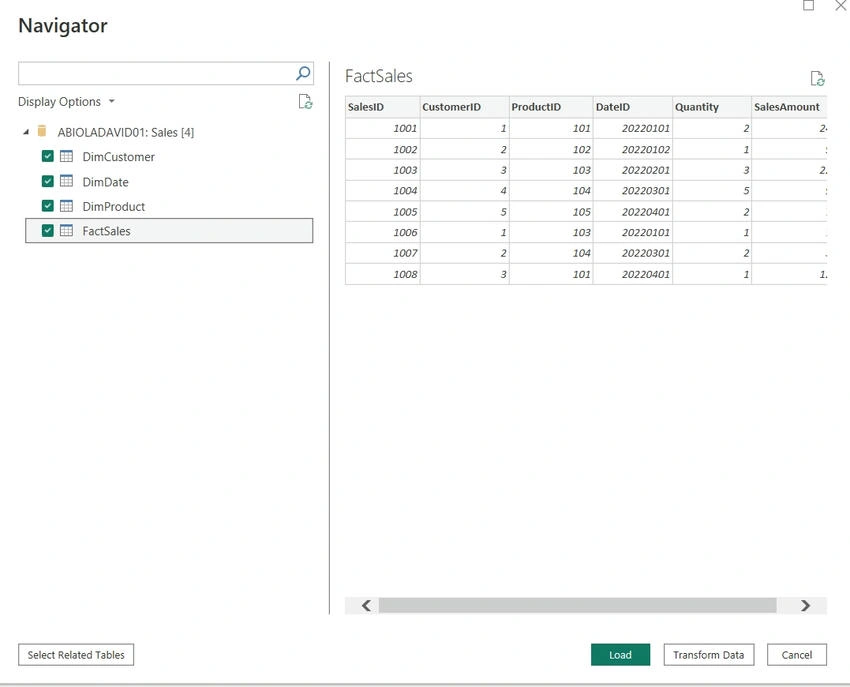
Browse through the list of tables and views available in your database.
You can select multiple tables at once.
Alternatively, click Advanced Options and paste a custom SQL query if you want more control.
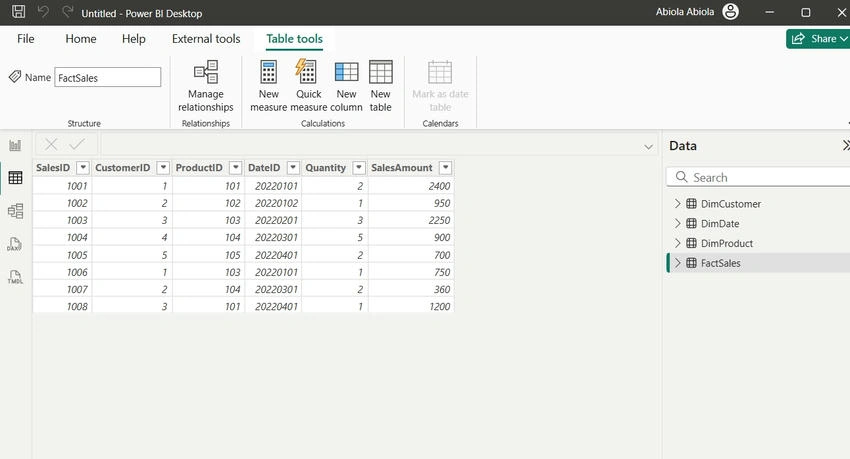
Click Load to import the data.
Join the conversation! Your thoughts help the community grow.